Gilgamesh is back, and he's not alone this time. His ever-faithful partner Enkidu (or at least a Primal that resembles her) is makes her first actual appearance in Final Fantasy 14 after a long while, and the duo is ready to cause some havoc and give the Warrior of Light some more problems.

The rematch with the honorable warrior happens in the Battle in the Big Keep Trial, a direct follow-up to the previous encounter with him. Gilgamesh is not holding anything back this time, so don't pull any punches this time either, as his extra arms can be a bit much to handle.
How To Unlock Battle In The Big Keep

The second fight with Gilgamesh is unlocked at the climax of the Hildibrand Adventures quests, during the Her Last Vow quest. This happens halfway through the quest, and the duty will automatically be added to your Duty Finder once you reach the correct step.
Battle in the Big Keep is a Level 50 Trial, with a minimum Item Level of 90.
While it normally requires a whole traditional party of eight people, you can also use the Unrestricted Party option to enter with less people, but with no level restrictions. This might be the optimal way these days, as it will usually take a very long time to find a party for this using the Duty Finder.
Battle In The Big Keep Guide

If you thought that the first Gilgamesh fight was messy, get ready to see the real deal here. He's bringing a lot of new tricks to the battlefield this time, and is also partnered with Enkidu for a certain portion of the fight. You'll have to fight both of them at once during the first phase, and Gilgamesh will unleash his full might upon you once he's cornered.
We can separate this fight into two separate phases, with Gilgamesh and Enkidu both sharing the spotlight during the first. Below you'll find all of their moves. Gilgamesh particularly uses a lot of the same tricks he used in the first battle.
|
Attack |
Type |
Description |
|---|---|---|
| Aero II | Targeted AoE | Enkidu launches a wind blast at a random target, also hitting all players around them. Avoid stacking so you won't take double damage from this. |
| Web | Single-target | Applies Slow and Heavy to random players, which can be removed with Esuna or similar effects. |
| Eerie Soundwave | Cone AoE | Targets a random player with a conal AoE, with some time for them to dodge. |
| White Wind | Heal | Restores HP to Gilgamesh. |
| Missile | Target AoE | Marks a player, then launches a missile that damages them for half of their current health. |
| Pradamante | Circle AoE | Attacks all players around him with his spear. Untelegraphed, but doesn't deal much damage. |
| Whirlwind Slash | Circle AoE | Similar to Pradamante (his untelegraphed AoE), but with a cast bar. |
| Bitter End | Cleaving Tankbuster | Gilgamesh sweeps the area in front of his main target. Must be mitigated. Avoid being in front of him if you're not a tank. |
| Minimum | Special | Just like in the first fight, Gilgamesh reduces two players' size with Mini and links them with a tether. Walk up to your partner to return to normal. |
| Chicken | Special | Gilgamesh turns players into chickens. Various players can become chickens at once, including healers, so be careful. Chickens return to normal after a few seconds, but they should touch the tornados around the room. |
| Woken Wind | Special | Tornados appear around the room, knocking up and damaging players severely if they touch them. If chickens touch the tornados, they won't take damage and the tornado disappears. They're still knocked up, though. |
| Turbulence | AoE | Gilgamesh explodes any remaining tornadoes, causing huge damage to the whole party. Can lead to a few deaths if people are at low health. |
Focus your attacks on Enkidu, while one of the tanks keeps Gilgamesh busy. This phase ends as soon as Enkidu is defeated, causing Gilgamesh to flee once again.
But this time, when you meet him again, he'll come at you with his full power, transforming into his definitive form for this battle.

During the second phase, Gilgamesh uses some of the same attacks from before, with notable additions.
|
Attack |
Type |
Description |
|---|---|---|
| Icewind | Special | Gilgamesh creates ice lines on the floor, leaving only small squares as safe spots. Dodge to the safe squares as needed. |
| Enchain | Special | Gilgamesh targets a healer and, after a few seconds, locks them down in chains. The healer must go as far as possible from Gilgamesh, and players must break the chain to release them. Staying near Gilgamesh makes the chain more resistant to damage. Kills the target with Hell's Gate if they're not freed. |
| Swords Dance | Cleaving Tankbuster | Multi-hit attack on the main target. Don't stand in front of Gilgamesh if you're not a tank. |
| Moonlight | Room AoE | Hits the whole arena, with safe spots being the lower parts of the arena without the faint glow. |
| Dragon's Head | Special | Summons four Dragon Heads around the arena. Each of them uses Dragonfire (Line AoE), and will explode with Dragonstrike if they're not killed in time. |
| Bloomshower | Arena AoE | Various purple AoEs appear throughout the arena. Find the safe spot between them. |
| Lightning Orbs | Orb AoE | Summons various orbs either around him or at the arena borders, leaving the opposite zone as a safe area. He always does it twice in a row, hitting the opposite zone at the second time. |
| Giga Jump | Special | Gilgamesh jumps into a random player, causing AoE damage around the target. Immediately after, he dashes back to the main tank with Masamune. |
While it's a lot more to digest, this phase is quite easy to understand, with the only real issue being the Dragon Heads. Players must focus them down as soon as they appear to avoid massive damage. Don't worry if you can't bring them all down, but try to take out at least two or three before they explode.
The chains can also be a problem if the healer stands too close to Gilgamesh. Fortunately, there's a lot of time for everyone to break them out, so don't stand waiting and help your teammate. It won't be long until Gilgamesh is, once again, defeated. This time for good.
Battle In The Big Keep Rewards

Similar to Battle at the Big Bridge, the second Gilgamesh fight does have some unique drops. While the main prize is still being able to continue the amazing Hildibrand Adventures quests, the following items can be obtained after the fight:
- Enkidu Minion
- Faded Copy of Battle on the Big Bridge
- Bartz Klauser Card
The Orchestrion Roll and the Triple Trial card are automatically added to your inventory, but are not a guaranteed drop. Enkidu always appears in the final chest, and it's untradeable, so you can only get it from here.
Another notable side rewards are Eerie Soundwave, Missile, and White Wind skill for Blue Mages. These abilities are used by Enkidu during the first phase, and the last two are some of the most powerful spells for the Limited Job.
To learn them, you need to enter as Blue Mage and then proceed to learn them normally, which can be done as soon as you clear the trial once.

The above is the detailed content of Final Fantasy 14: Battle In The Big Keep Trial Guide. For more information, please follow other related articles on the PHP Chinese website!
 Revenge Of The Savage Planet: All Xephyr Orange Goo LocationsMay 08, 2025 pm 10:35 PM
Guide to Orange Slime Collection in Revenge of the Furious Planet The game "Raging Planet Revenge" is quite straightforward to name certain things. When you are thrown on an unknown planet and fired, you have to name everything. Not everyone has this talent, so most of the things in these worlds are... simple to name. For example, you come across an orange slime that seems to rejuvenate you and give you new powers in this alien world. What should this be called? Of course it is what it is, orange slime! This mucus is found on every planet in the galaxy, especially in the arid areas of Sevre. Here are the places where all the orange slime is found in Seffer. The purpose of orange slime In "Raging Planet"
 Revenge Of The Savage Planet: All Xephyr Selfie LocationsMay 08, 2025 pm 10:27 PM
The game "Revenge of the Wild Planet" criticizes the phenomenon of a single enterprise monopolizing space travel, and also shows some behavioral patterns in contemporary society in a relaxed and humorous way, such as the impulse to take pictures of anything. But if you are laid off and have the right to explore the entire planet freely, what better pastime than creating memories? The planet Xephyr seems to have only sand dunes and cactus, but as long as you choose the right angle, even the driest desert can become a refreshing oasis. All places where you can take selfies are listed below. What is the so-called "selfie" in the game? The word "selfie" may make you mistakenly think that "Revenge of the Wild Planet" has a photo mode that requires you to take photos at a specific location. Although the latter is correct, the former is not the case
 Clair Obscur: Expedition 33 - White Nevrons, ExplainedMay 08, 2025 pm 10:13 PM
In Clair Obscur: Expedition 33, you'll encounter White Nevrons, easily distinguished by their white hue compared to their Grey counterparts. Initially neutral, these creatures present a choice: attack or spare. This decision significantly impacts ac
 Revenge Of The Savage Planet: All Stellaris Prime ScannablesMay 08, 2025 pm 10:10 PM
Explore the diverse world of Stellaris Prime in Revenge of the Savage Planet! This guide details every scannable item found on this initial planet, categorized for easy reference. Get ready to fill your Kindex! Stellaris Prime offers a wealth of sc
 Oblivion Remastered: Clavicus Vile Quest WalkthroughMay 08, 2025 pm 10:08 PM
In The Elder Scrolls IV: Oblivion Remastered, Daedric artifacts offer top-tier equipment early on, bypassing the need for leveling. This guide focuses on acquiring the Masque of Clavicus Vile, a powerful artifact obtained through a challenging and e
 NYT Connections Answers And Hints - May 9, 2025 Solution #698May 08, 2025 pm 08:09 PM
Solve today's New York Times Connections puzzle with these helpful hints! Preserve your winning streak with clues ranging from subtle suggestions to straightforward answers. We've ordered the hints from easiest (Yellow) to hardest (Purple), just lik
 Revenge Of The Savage Planet: Crash Test Dummy Quest GuideMay 08, 2025 pm 08:08 PM
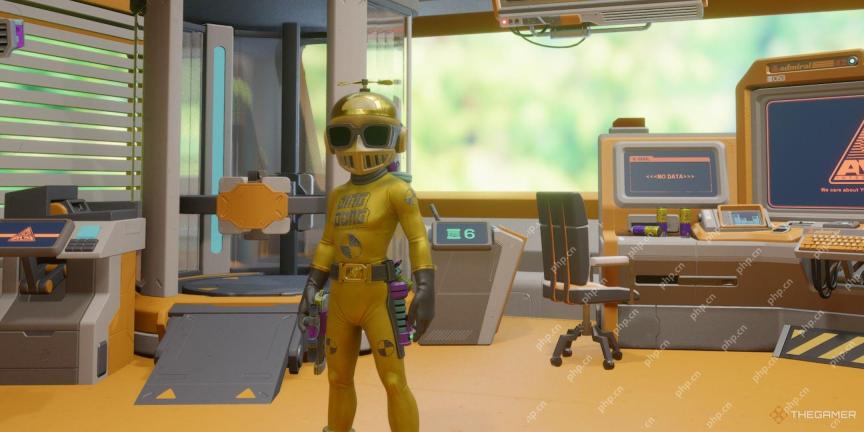
"Crash Test Dummies" Mission Guide in "Revenge of Wild Planet" "Revenge of Wild Planet" has both spicy irony and relaxed fun. The premise of the game is that a company abandons you after making a grand promise, while the actual game process is simple and fun, allowing you to explore multiple worlds. And, you won't actually die. The ability of infinite resurrection brings new ways to play. At Shamarama's request, you wear his special golden test suit to see how much pressure your body and the outfit can withstand. It turns out that this outfit can't do anything well except being destroyed. How to unlock the "Crash Test Dummy" task The "Crash Test Dummy" task is part of the D.I.A.P.E.R. scheduled DLC task, so only installation
 Revenge Of The Savage Planet: All Zenithian Rift Selfie LocationsMay 08, 2025 pm 08:05 PM
Experience the extreme temperature swings of Zenithian Rift in Revenge of the Savage Planet! This fiery-icy planet offers a unique challenge, transitioning from scorching lava to freezing ice in minutes – perfect for some thrilling selfies. Find all


Hot AI Tools

Undresser.AI Undress
AI-powered app for creating realistic nude photos

AI Clothes Remover
Online AI tool for removing clothes from photos.

Undress AI Tool
Undress images for free

Clothoff.io
AI clothes remover

Video Face Swap
Swap faces in any video effortlessly with our completely free AI face swap tool!

Hot Article

Hot Tools

DVWA
Damn Vulnerable Web App (DVWA) is a PHP/MySQL web application that is very vulnerable. Its main goals are to be an aid for security professionals to test their skills and tools in a legal environment, to help web developers better understand the process of securing web applications, and to help teachers/students teach/learn in a classroom environment Web application security. The goal of DVWA is to practice some of the most common web vulnerabilities through a simple and straightforward interface, with varying degrees of difficulty. Please note that this software

mPDF
mPDF is a PHP library that can generate PDF files from UTF-8 encoded HTML. The original author, Ian Back, wrote mPDF to output PDF files "on the fly" from his website and handle different languages. It is slower than original scripts like HTML2FPDF and produces larger files when using Unicode fonts, but supports CSS styles etc. and has a lot of enhancements. Supports almost all languages, including RTL (Arabic and Hebrew) and CJK (Chinese, Japanese and Korean). Supports nested block-level elements (such as P, DIV),

WebStorm Mac version
Useful JavaScript development tools

VSCode Windows 64-bit Download
A free and powerful IDE editor launched by Microsoft

SublimeText3 Chinese version
Chinese version, very easy to use


