Introduced during the 4.2 patch of Final Fantasy 14, The Jade Stoa (Extreme) is the harder version of the confrontation between the Warrior of Light and Byakko, one of the Four Lords encountered during one of Stormblood's various Side Quest, bringing a much harder challenge for those willing to face it.

Unable to contain his unending, primal rage, the auspicious is forced to face the player in a last attempt to calm his emotions - or be consumed by them. In this enhanced fight, Byakko has some new tricks under his paws. Don't blink, or the storm will take you.
How To Unlock The Jade Stoa (Extreme)

The Extreme version of the Trial can be unlocked by speaking with the Wandering Minstrel in Kugane (X:11.6, Y:12.6). You need to complete the story version of the Trial first, unlocked through the An Auspicious Encounter quest in The Ruby Sea (X:5.7, Y:15.7), with Soroban.
The Trial is meant for Level 70 characters and has a minimum Item Level of 340. Players can also enter with the Unrestricted Party option enabled in Duty Finder, allowing them to Unsync the battle and enter at higher levels.
If trying to enter the Unreal version of the Trial, you must instead unlock it through the Fantastic Mr. Faux quest in Idyllshire (X:7.0, Y:5.9), available after completing the Shadowbringers MSQ. The fight is identical but synced up to the current Level cap.
The Jade Stoa (Extreme) Guide

This fight is on the easier side of the Stormblood-era Trials, but can still pose some problems if you're not careful. Set up Light Parties (two groups of four players) once you enter. Also, place three Markers at different corners of the map in a Triangle shape, in a way they won't touch each other.
Being hit by unavoidable attacks will give you a Vulnerability Up debuff that lasts two minutes. These increase the damage you take from each attack, so be careful.
Byakko has two phases with a special intermission in between, and here's a list of his moves during each of them.
1st Phase
|
Attack |
Type |
Description |
|---|---|---|
| Storm Pulse | AoE | Raidwide damage that hits two times. Repeated throughout the encounter. |
| Heavenly Strike | Single-target Tankbuster | Big hit on the main target. Must be mitigated. |
| State of Shock/Highest Stakes | Single Target/Stack AoE | Grabs the main target and throws it at a stack AoE circle it creates somewhere in the arena. Players must join the stack to save the grabbed person. Repeats the attack twice. Tanks must keep their stances on so they'll be the targets, and their Light Parties can soak the damage for them. A player cannot stack twice or they'll instantly die. Tanks can use their invulnerability here to avoid stacks. |
| Unrelenting Anguish | Special | Byakko jumps to the arena's center and starts shooting various rotating energy orbs around him. Players must rotate alongside him avoiding these orbs. At the same time, Byakko marks three players with an orb (Ominous Wind) around them. They'll be knocked up into the sky if they are near each other once the debuff timer ends. |
| Fire & Lightning | Line AoE | While still casting Unrelenting Anguish, Byakko attacks a corner of the arena. Dodge away from the line. |
| Summon Hakutei | Special | After the orbs are gone, Byakko summons the tiger Hakutei to battle. The main Tank keeps Byakko north while the other Tank grabs Hakutei and keeps it south. Hakutei hits hard and cleaves the area in front of him, so don't stand in front of him if you're not a Tank. |
| Aramata | Baits | Byakko marks a healer and a DPS to drop three puddles beneath them after a few seconds. Targets head east and west to drop their puddles, preferably away from each other and away from the two bosses. |
| Flare | Proximity AoE | Once the puddles are over, Hakutei jumps away and hits his main target with a proximity AoE. The Tank must be as far as possible from the rest of the party until it explodes. |
| Distant Clap | Arena-wide AoE | Byakko hits the whole arena with lightning, with a small safe space below him. Run to him once the attack starts. Follows up with another Fire & Lightning immediately. |
| Roar of Thunder | AoE/Special | After the previous attacks are done, Byakko vanishes and Hakutei returns to charge Roar of Thunder. Hakutei must be at 50% health or below for you to survive the attack, but mitigations and shields are desired. Additionally, there are various orbs trying to reach Hakutei. If they reach it, they'll increase Roar of Thunder's damage. Healers and Casters must grab these orbs as they apply a Physical Damage Down debuff, which does nothing to magic users. |
If you survive Roar of Thunder, the party is sent into a free fall for a while, serving as the fight's transition.
Intermission

This is a short phase where your cooldowns will slowly return for the fight's final phase. You cannot be healed during this phase, so be careful.
|
Attack |
Type |
Description |
|---|---|---|
| Orbs | Special | Orbs float around the air, so dodge them accordingly. |
| Byakko - Circle | Arena-wide AoE | Same as Distant Clap. Head center next to Byakko to dodge it. |
| Hakutei - Line | Line AoE | Same as Fire & Lightning. Dodge the line and you're good. |
These attacks will repeat for a while. After roughly a minute and a half, you'll be back on the ground and can heal/resurrect your party as needed. Use your mitigations for another Raidwide and prepare for the final phase, complete with new music.
Final Phase

Byakko repeats most of his Phase 1 moves, but they're a bit faster now or have some extra gimmick. If you had no issues with them before, it shouldn't be much harder.
|
Attack |
Type |
Description |
|---|---|---|
| Heavenly Strike | Single-target Tankbuster | Big hit on the main target. Must be mitigated. |
| Hundredfold Havoc | Continuous-firing AoE | Byakko screams "Lightning, sear!" and summons four arrow AoEs from the arena center, with four more appearing to cover the other directions. Stand on the second set, then wait for the first set to fire twice. Immediately dodge to where the first set was and you should be safe. |
| State of Shock/Highest Stakes | Single Target/Stack AoE | Same as before. However, it now happens alongside Hundredfold Havoc. |
| Sweep the Leg | Arena-wide AoE | Byakko hits the whole arena in front of him. Dodge immediately behind him to be safe. |
| Unrelenting Anguish | Special | Similar to before, but now a healer, a tank, and a DPS are targeted by a circle AoE around them that drops a puddle when it explodes. These puddles expand and cannot touch each other. You also cannot touch the area left by them or you'll take damage. Drop these on the markers you set at the beginning. A suggestion is DPS A, Healer B, and Tank C. Just remember your color and drop the puddle on it. If you're a DPS, be around A when it starts, and so on. |
| Fire & Lightning | Line AoE | Same thing as before. Always repeat it twice from now on. |
| Summon Hakutei | Special | Same thing as before, including the Aramata puddles that follow. Byakko now remains in the arena while Hakutei is charging Roar of Thunder. |
| Distant Clap/Fire & Lightning | Arena/Line AoEs | Both moves are used in sequence two times, so dodge one and immediately prepare for the other. |
| Roar of Thunder | AoE/Special | The same move from before the intermission. Instead of damaging Hakutei here, most people prefer just mitigating harder and using Tank Limit Break 3 so you can hit Byakko more. If it isn't available for any reason, just hit Hakutei as usual. Remember to grab the orbs to avoid tragedies. Players will be stunned after the roar, assuming they survive. He immediately follows up with another Fire & Lightning, so be quick to react. |
| Storm Pulse | AoE | Raidwide damage that hits two times. Repeated throughout the encounter. |
| Hundredfold Havoc | Continuous-firing AoE | Same as before, but now happens alongside the same baits from Unrelenting Anguish. |
| State of Shock/Highest Stakes | Single Target/Stack AoE | Happens immediately after Hundredfold Havoc, complete with another Sweep The Leg afterward. |
From this point on, Byakko will only repeat the same attacks he's been using during the last phase. It shouldn't be hard to avoid them this time, as you've already seen them enough.
His hard enrage is around 12 minutes into the fight, and he starts spamming Storm Pulse endlessly. The final Storm Pulse has a longer cast and it's accompanied by a voiceline, wiping the party if he isn't killed by then.
The Jade Stoa (Extreme) Rewards

Defeating Byakko rewards all players with a Byakko Totem, which can be exchanged for some rewards in Rhalgr's Reach (X:13.8 Y:11.8) with Eschina. The full reward list is the following:
|
Always Drops? | ||||||||||||
|---|---|---|---|---|---|---|---|---|---|---|---|---|---|
| Byakko Weapon Coffer | Yes | ||||||||||||
| Random Byakko Weapon | Yes | ||||||||||||
| Byakko's Mane | No | ||||||||||||
| Auspicious Kamuy Fife | No | ||||||||||||
| Faded Copy of the Jade Stoa | No |
The random weapon dropped can be any of the available weapons. Opening the coffer grants you the weapon for the job you're currently using. Byakko's Mane is used to craft various Byakko-themed items, including glowing versions of the weapons obtained here.
If you're fighting the Unreal version of the Trial, the rewards are vastly different. The items above are only available for the regular Extreme Trial.

The above is the detailed content of Final Fantasy 14: The Jade Stoa (Extreme) Trial Guide. For more information, please follow other related articles on the PHP Chinese website!
 Roblox: Hunters - Weapons Tier ListApr 14, 2025 pm 12:04 PM
Picking the right weapon will determine your effectiveness in the dungeons of Roblox's Hunters. Even though the game doesn't feature a wide variety of weapon types, players have a few options to choose from. And if you want to learn w
 The First Berserker: Khazan - Transcendental Sword WalkthroughApr 14, 2025 pm 12:02 PM
The Transcendental Sword is one of the key side missions in The First Berserker: Khazan. If you are hoping to clear the game with the best ending, you'll need to work your way through it. While it isn't the largest mission in the game, it is loaded w
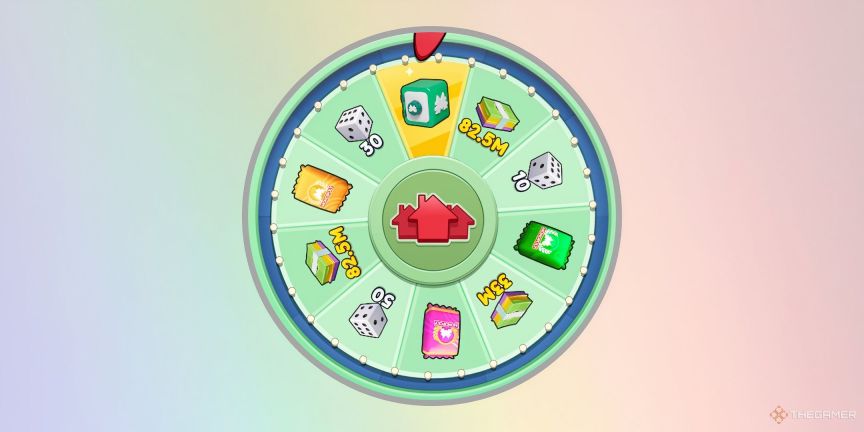 Monopoly Go: Peg-E Deluxe Drop Rewards Guide (April 13-15)Apr 14, 2025 am 11:17 AM
If you're ready to spruce things up for spring now that we're finished with the partner event in Monopoly Go for the weekend, then you'd do well to play along with the Peg-E Deluxe Drop that runs between 4PM EST on April 13 and 1PM EST on April 15.
 Blue Prince: Hall Pass GuideApr 14, 2025 am 09:44 AM
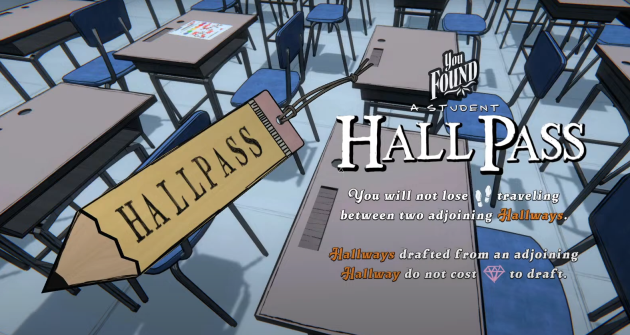
In the Blue Prince game, although the pass is inconspicuous, it is a powerful prop that can significantly improve the efficiency of exploring large, complex and branched manors. It won't unlock anything or break anything, but it saves you steps and eliminates gem costs when drawing corridors from other corridors. More readings: All items in "Blue Prince" Functions of the pass When moving between two connected corridors, there is no loss of steps. No gems are required when drawing a corridor from a room that is already a corridor. This effect is passive and will automatically take effect when the item is in your inventory. You can find it in the classroom…of course. Why the pass is great Ideal for long layouts with many branches or loop paths. If you use the corridor


Hot AI Tools

Undresser.AI Undress
AI-powered app for creating realistic nude photos

AI Clothes Remover
Online AI tool for removing clothes from photos.

Undress AI Tool
Undress images for free

Clothoff.io
AI clothes remover

AI Hentai Generator
Generate AI Hentai for free.

Hot Article

Hot Tools

VSCode Windows 64-bit Download
A free and powerful IDE editor launched by Microsoft

Dreamweaver CS6
Visual web development tools

WebStorm Mac version
Useful JavaScript development tools

Safe Exam Browser
Safe Exam Browser is a secure browser environment for taking online exams securely. This software turns any computer into a secure workstation. It controls access to any utility and prevents students from using unauthorized resources.

Zend Studio 13.0.1
Powerful PHP integrated development environment


