


HTML and CSS are the most fundamental building blocks of a webpage, and they are also your first step towards becoming a web developer. HTML provides the layout and content of the webpage, and CSS defines its style and appearance. In this tutorial, we are going to cover the basics of HTML and CSS, and by the end, you will be able to design responsive webpages that work seamlessly on devices of all sizes.
What is HTML?
HTML is the standard markup language used to create webpages. It defines the structure and content of webpages using HTML elements such as headings, paragraphs, images, links, forms, and more.
To start writing HTML code, you can use the CodePen demo below:
Code Demo ?
On the left side, you will find the HTML source code, which is essentially the blueprint for what will be displayed. The browser will then transform this blueprint into the webpage you see on the right side.
You can modify the source code directly to see how it affects the displayed webpage.
Prepare your computer for web development
Of course, in practice, you cannot rely on tools such as CodePen to create a working and fully featured web application. You need something more powerful, so, let's set up your computer for web development.
To get started, make sure you have a browser installed. Any popular web browser such as Google Chrome, Microsoft Edge, Safari, or Firefox, should be sufficient for this course. You may download and install the browser from the linked websites.
In addition, you'll need a code editor to write and edit your code. Visual Studio Code is a great option for beginners (and professionals, for that matter). It is the most commonly used code editor in the world. Simply download the appropriate installer for your operating system from their official website.

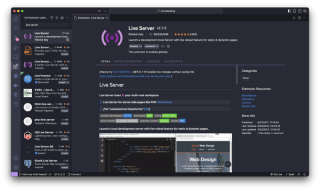
After you've installed VSCode, make sure to install the Live Server extension as well. Navigate to the Extensions tab on the left sidebar, and type in Live Server in the search box. From there, you'll be able to download and install the extension.
Live Server will create a local development server with the auto-reload feature. For example, create a new work directory and open it using VSCode.

Create a new file named index.html under this directory. The .html extension indicates that this is an HTML document. Type in ! in VSCode, and you will see suggestions like this:

This is a shortcut for creating HTML documents quickly. You can navigate with the ↑ or ↓ keys. Select the first option, and the following code should be generated.
    <meta charset="UTF-8">
    <meta name="viewport" content="width=device-width, initial-scale=1.0">
    <title>Document</title>
Notice that at the bottom right corner of the VSCode window, there is a Go Live button.

Clicking this button will activate the Live Server extension. A local development server will be started, hosting the index.html file you just created.

Of course, the file is still empty right now, so you can't see anything. Add something between the
and tags.
    <meta charset="UTF-8">
    <meta name="viewport" content="width=device-width, initial-scale=1.0">
    <title>Document</title>


    Hello, world!
Save the changes, and the webpage will be automatically refreshed with the new content.

The structure of an HTML document
A typical HTML document always has the following structure:
    . . .


    . . .
The tag defines the document type. When the web browser encounters , it understands that the page should be parsed and displayed according to the specifications of HTML5, the latest version of HTML standard. This ensures that modern browsers interpret the webpage's content and layout correctly.
Everything else in the file should be enclosed inside an element, defined by an opening tag () and a closing tag ().
lang is called an attribute, and it has the value "en". This tells the browser as well as the search engine that English is the primary language used for this webpage.
Inside the element, there are two child elements,
and . contains metadata and other information about the HTML document. This information will not be displayed in the browser but is often used by search engines for SEO (Search Engine Optimization) purposes. , on the other hand, contains the main content of the webpage that is visible to the users, and for that reason, it is also the part of the HTML file we are going to focus on in this course.Elements and attributes
Let's take a closer look at the previous example and notice that the HTML document comprises different elements in a nested structure. In HTML, most elements have both an opening tag and a closing tag:
    <meta charset="UTF-8">
    <meta name="viewport" content="width=device-width, initial-scale=1.0">
    <title>Document</title>
In this case,
    <meta charset="UTF-8">
    <meta name="viewport" content="width=device-width, initial-scale=1.0">
    <title>Document</title>


    Hello, world!
The element can also wrap around other elements, forming a nested structure.
    . . .


    . . .
Inside the opening tag, you can define attributes, which are used to specify additional information about the element, such as its class, id, and so on.
<tag>. . .</tag>
The attribute is usually in a key/value pair, and the value must always be enclosed inside matching quotes (double or single).
There are some exceptions to these general formats. For example, the
element, which creates a line break, does not need a closing tag. Some attributes, such as multiple, do not require a value. We will discuss these exceptions later in this course as we encounter them.
However, you should remember that if an element does require a closing tag, then it should never be left out. In most cases, the webpage could still render correctly, but as the structure of your HTML document grows more complex, unexpected errors may occur. Take a look at our best practice guidelines for writing HTML and CSS if you are interested.
Further readings
- Introducing the Cascading Style Sheet (CSS)
- Introduction to JavaScript
- What is Responsive Design
- How to Build Interactive Forms Using HTML and CSS
The above is the detailed content of Fundamentals of HTML and CSS. For more information, please follow other related articles on the PHP Chinese website!

 Using Pages CMS for Static Site Content ManagementMay 13, 2025 am 09:24 AM
I know, I know: there are a ton of content management system options available, and while I've tested several, none have really been the one, y'know? Weird pricing models, difficult customization, some even end up becoming a whole &
 The Ultimate Guide to Linking CSS Files in HTMLMay 13, 2025 am 12:02 AM
Linking CSS files to HTML can be achieved by using elements in part of HTML. 1) Use tags to link local CSS files. 2) Multiple CSS files can be implemented by adding multiple tags. 3) External CSS files use absolute URL links, such as. 4) Ensure the correct use of file paths and CSS file loading order, and optimize performance can use CSS preprocessor to merge files.
 CSS Flexbox vs Grid: a comprehensive reviewMay 12, 2025 am 12:01 AM
Choosing Flexbox or Grid depends on the layout requirements: 1) Flexbox is suitable for one-dimensional layouts, such as navigation bar; 2) Grid is suitable for two-dimensional layouts, such as magazine layouts. The two can be used in the project to improve the layout effect.
 How to Include CSS Files: Methods and Best PracticesMay 11, 2025 am 12:02 AM
The best way to include CSS files is to use tags to introduce external CSS files in the HTML part. 1. Use tags to introduce external CSS files, such as. 2. For small adjustments, inline CSS can be used, but should be used with caution. 3. Large projects can use CSS preprocessors such as Sass or Less to import other CSS files through @import. 4. For performance, CSS files should be merged and CDN should be used, and compressed using tools such as CSSNano.
 Flexbox vs Grid: should I learn them both?May 10, 2025 am 12:01 AM
Yes,youshouldlearnbothFlexboxandGrid.1)Flexboxisidealforone-dimensional,flexiblelayoutslikenavigationmenus.2)Gridexcelsintwo-dimensional,complexdesignssuchasmagazinelayouts.3)Combiningbothenhanceslayoutflexibilityandresponsiveness,allowingforstructur
 Orbital Mechanics (or How I Optimized a CSS Keyframes Animation)May 09, 2025 am 09:57 AM
What does it look like to refactor your own code? John Rhea picks apart an old CSS animation he wrote and walks through the thought process of optimizing it.
 CSS Animations: Is it hard to create them?May 09, 2025 am 12:03 AM
CSSanimationsarenotinherentlyhardbutrequirepracticeandunderstandingofCSSpropertiesandtimingfunctions.1)Startwithsimpleanimationslikescalingabuttononhoverusingkeyframes.2)Useeasingfunctionslikecubic-bezierfornaturaleffects,suchasabounceanimation.3)For
 @keyframes CSS: The most used tricksMay 08, 2025 am 12:13 AM
@keyframesispopularduetoitsversatilityandpowerincreatingsmoothCSSanimations.Keytricksinclude:1)Definingsmoothtransitionsbetweenstates,2)Animatingmultiplepropertiessimultaneously,3)Usingvendorprefixesforbrowsercompatibility,4)CombiningwithJavaScriptfo


Hot AI Tools

Undresser.AI Undress
AI-powered app for creating realistic nude photos

AI Clothes Remover
Online AI tool for removing clothes from photos.

Undress AI Tool
Undress images for free

Clothoff.io
AI clothes remover

Video Face Swap
Swap faces in any video effortlessly with our completely free AI face swap tool!

Hot Article
Hot Tools

SublimeText3 English version
Recommended: Win version, supports code prompts!

VSCode Windows 64-bit Download
A free and powerful IDE editor launched by Microsoft

SublimeText3 Linux new version
SublimeText3 Linux latest version

Dreamweaver CS6
Visual web development tools

Zend Studio 13.0.1
Powerful PHP integrated development environment

