 Mobile Game Tutorial
 Mobile Game Guide
 Dragon Age: The Veilguard - Through The Shadows Walkthrough
Through the Shadows is Bellara’s final companion quest in Dragon Age: The Veilguard. You follow Bellara through the Arlathan Forest in an attempt to stop Anaris’ ritual that endangers the entire region. The quest also concludes the storyline of Bellara’s brother, Cyrian. You must have completed Blood of Arlathan and spoken to Bellara during Hummingbird’s Lament to unlock this quest.

This guide will walk you through everything you need to know about completing Through the Shadows, finding all the collectibles along the way and banishing Anaris from this world once and for all.
Find The Ritual Site

Begin by heading to the northwest section of the Arlathan Forest. There is a Fast Travel beacon nearby, which you can unlock during the Magic of the Ancients quest. Speak with Bellara to learn that the ritual has already started. Your dialogue choice has no implication here, so choose whatever suits Rook’s personality the most. Continue along the only path you can take, cross the bridge, and up a small hill.
Before heading up the stairs toward the objective marker, search the area on the left (with a large crystal in the middle) to collect a Memento, a Codex Entry, and a Grenade Belt.
Activate The Bridge

Go up the stairs to come across a puzzle involving crystal beams that must be redirected toward the main door. To solve the puzzle, redirect the beam directly above the northern door. This allows you to reach the second beam. Point it at the main door before jumping down. Now redirect the first beam toward the main door to build a bridge leading to the next area.
Delay The Ritual

Cross the bridge to reach a new area with a large crystal in the center. Speak with Bellara to learn that the crystal is amplifying the magic and must be destroyed to delay the ritual. To do this, activate the mechanism on the farthest platform, destroy three amplifiers in the area, and fend off Anaris’ minions. You will need to do this a total of three times to open the path. Here is a complete list of enemies you will face in this area, alongside their weaknesses:
|
Enemy |
Vulnerable |
Resistant |
|---|---|---|
| Energy-Loaded Sentinels |
Lightning |
Frost |
| Rapid Fadestalker | ||
| Energy-Loaded Spellwight | ||
| Superior Shade |
Frost |
Necrotic |
| Greater Voltaic Shade | ||
| Orbiting Envy Demon | Lightning | Necrotic |
The area can get pretty overwhelming in a short span of time. This is why we recommend using Bellara's Time-Slow skill to reposition yourself when in a pinch.

While facing the crystal from the entrance, head to your right (after crossing the walkway in the middle) to interact with the Spiteful Aura. This will create a temporary path with a Codex Entry at the end of it.
When you are ready, jump into the hole to find a chest with a shortbow for Harding. Continue to follow the path while defeating the Voltaic Shades hurling magic bolts at you from a distance. Once you are at the end, enter the portal to reach the barrier puzzle.
How To Solve The Barrier Puzzle

To remove the barrier, you will need to redirect five crystal beams towards different anchors. It may appear a bit complicated, but it is a fairly simple puzzle to solve. Here is how you can do it:
- Go up the stairs on the left, collect the Power Crystal near the chest, and climb the ladder. Find the Beam Generator and aim it at one of the energy nodes.
- Head back down to redirect the second Beam Generator (directly below the first one) at another node.
- Place the Power Crystal on the left Beam Generator (near the barrier where all the nodes are located) to activate it. Once done, point it at the node directly above the area’s entrance — behind all the statues. This will create a bridge at the top. Head up the ladder, across the bridge, and aim the beam at one of the nodes.
- Follow the path downstairs to find the fourth Beam Generator. Again, point it at one of the nodes.
- For the final one, return to the main room, take out the Power Crystal from the left Beam Generator, and place it on the right one. Aim the beam at the last node to remove the barrier.
Past the barrier, you will find a chest containing Medium Armor for Bellara.
How To Defeat Anaris

Continue to follow the path to reach Anaris. The first thing that you will notice is that he is protected by a barrier. To destroy the barrier, you will need to break three crystals (behind the pillars) using any ranged attack. While you are working on these crystals, Greater Shades and Voltaic Shades will continue to spawn in the area. We recommend dealing with them as a priority to give yourself some breathing room. Once you have cleared the room, break the last crystal to start the DPS phase.

Anaris is weak against Lightning and strong against Fire. Whenever you see red circles on the ground, move away from the area to avoid falling meteors. He can also channel a frost beam that deals a good amount of damage. You should try to use the pillars in the area as cover. Continue to dish out damage until he is immune.

Repeat the same thing for the second phase: kill the Shades in the area, break all three crystals to remove the barrier, and damage Anaris. During this phase, the boss will leave explosions whenever he teleports. At around 33 percent HP, he will become immune for the last time.

During the third phase, frost beams will begin to spin around Anaris, making it difficult to break the crystals. Again, deal with the Shades before working on the crystals. In this phase, he will also cast frost waves in your direction. They have a lot of travel-time, so it should not be hard to avoid them. Try to rely on your crowd-control as much as possible. Freeze, time-slow, etc. are incredibly powerful against him.
Rewards And What To Do With The Archive Spirit

Defeat him to complete Through the Shadows, and get 2,500 XP, 400 Gold, 100 Veil Jumpers Strength, as well as a Keepsake for Bellara.
Also, do not forget to return to Bellara at The Lighthouse to decide the fate of the Archive Spirit. Here is everything you need to know:
Free The Spirit
She acquires the Chain Lightning skill, which boosts Shocked effects as well as her weapon damage. Aside from this, she also gets Reborn Leathers armor that increases Detonation damage.
Keep It
She gets the Lingering Strike skill, which allows her to easily spread Weakened and Shocked ailments. She also acquires the Archivist’s Mail armor that further boosts Sundered Detonations and vulnerability caused by Electric damage.

The above is the detailed content of Dragon Age: The Veilguard - Through The Shadows Walkthrough. For more information, please follow other related articles on the PHP Chinese website!
 R.E.P.O. Energy Crystals Explained and What They Do (Yellow Crystal)Mar 18, 2025 am 12:07 AM
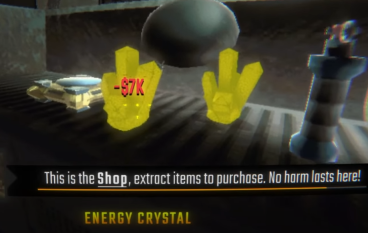
I bought expensive weapons or drones in R.E.P.O. but found that the energy was exhausted and became useless? Don't worry, you don't have to spend $50,000 on replacements, just charge your gear! That strange machine at the back of your truck is not a decoration. Here are how to get energy crystals and use them to keep your gear running continuously to avoid bankruptcy. More Reads: All R.E.P.O. Items How to get energy crystal You can buy energy crystals from the service store between levels. They usually cost between $7,000 and $9,000 — while expensive, they are far cheaper than repurchasing gear. In the first few levels, no purchase is required. You don't need them for the time being, so
 How Long Does It Take To Beat Split Fiction?Mar 07, 2025 am 04:16 AM
Detailed explanation of the game duration of "Split Fiction": main line, branch line and 100% completion Like Hazelight Studio's previous works, Split Fiction is a relatively linear game, but it also contains some extra interesting content. There are some side stories, optional dialogues and easter eggs in the game, but there are not many elements to collect. Although the level is long and includes multiple mechanisms and boss battles, it still takes a considerable time to complete "Split Fiction", especially to achieve 100% completion. The following is a detailed analysis of the game duration: The main plot duration In the case of two-player game (the player level is comparable), it takes about 12 hours to pass the main plot. But this game is more suitable
 R.E.P.O. Best Graphic SettingsMar 18, 2025 am 01:33 AM
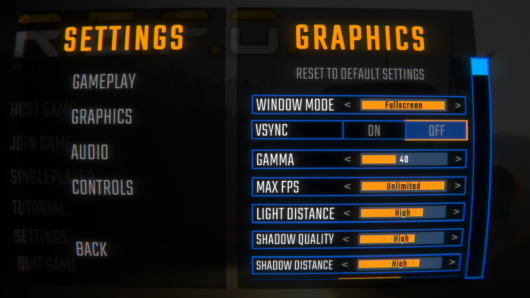
R.E.P.O. Game Screen Setting Guide: How to improve frame rate while ensuring picture quality? This article will guide you to optimize game settings and find the best balance point. Step 1: Full Screen Mode and Frame Rate Adjustment Before adjusting other settings, make sure the game is running in the best mode: Display Mode: Full Screen - Always use Full Screen Mode for optimal performance. Window mode will reduce the frame rate. Vertical Sync (V-Sync): Off - Unless a screen tear occurs, turn off vertical synchronization for a smoother gaming experience. Maximum FPS: Unlimited - If your computer is configured strongly, you can set it to Unlimited. Otherwise, it is recommended to limit it to 60 frames or match your monitor refresh rate. second
 Assassin's Creed Shadows: Seashell Riddle SolutionMar 28, 2025 am 01:58 AM
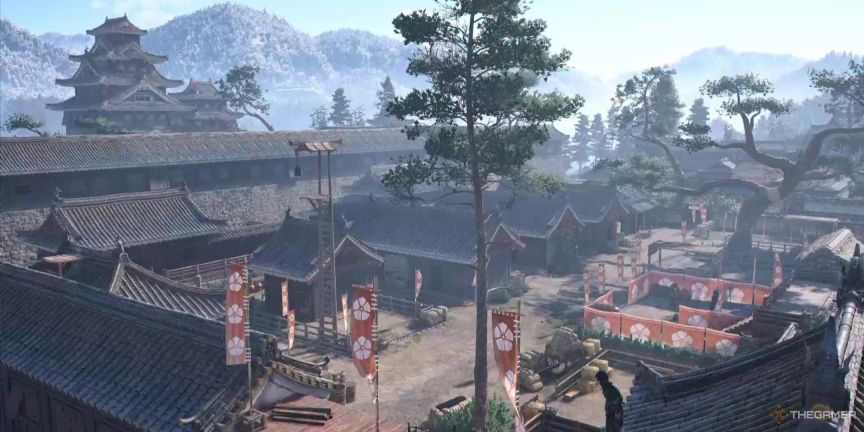
Assassin's Creed: Shadows boasts a vast world brimming with activities beyond the main storyline. Side missions and various encounters significantly enrich the immersive experience of in-game Japan. One particularly memorable encounter is the Seashe
 R.E.P.O. How to Fix Audio if You Can't Hear AnyoneMar 17, 2025 pm 06:10 PM
Can't hear other players' voices in the R.E.P.O. game? Even if your microphone is working properly, it can be a problem caused by audio settings or device conflicts. Here are some effective solutions to help you restore your voice chat functionality. 1. Check the output device Open the audio settings of R.E.P.O. and check the output device settings. If set to "Default", manually select your headset or speaker. Restart the game and test voice chat again. 2. Adjust Windows sound settings If R.E.P.O. does not output the sound to the correct device, check the Windows Sound Settings: Right-click the speaker icon in the taskbar and select Sound Settings. Under "Output",
 WWE 2K25: How To Unlock Everything In MyRiseMar 15, 2025 pm 12:03 PM
WWE 2K25's MyRise mode is one of the best career modes in WWE games in recent years, telling an exciting story: a group of disgruntled NXT superstars take over WWE. However, enjoying the plot is not the only reason to play this mode. By playing MyRise, you can also unlock many content such as new superstars, new arenas, extra costumes, special weapons, and more. However, you can't get everything in a round of games, so you may want to prioritize certain items. Before you do this, you need to know what unlockable content is and how to get them. All this information is included here. Unlocked content through plot promotion By advancing the main plot and completing the chapters, you can solve
 Where to find the Crane Control Keycard in AtomfallMar 28, 2025 am 02:17 AM
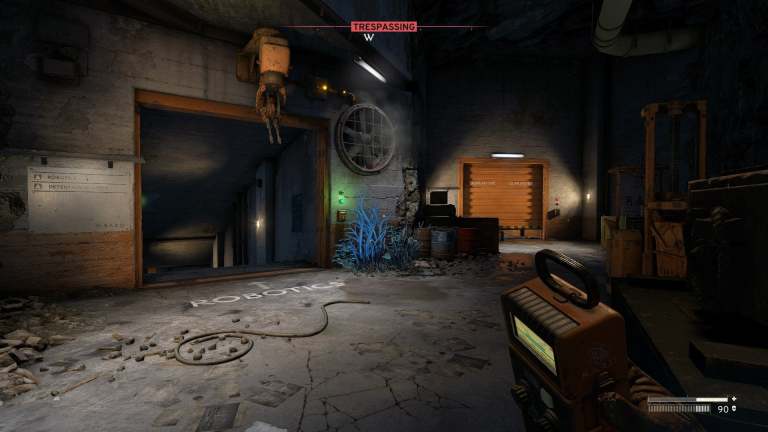
In Atomfall, discover hidden keys and passages, including multiple ways to access key locations. This guide focuses on using the Crane Control Keycard for easy, unguarded Entry to Skethermoor Prison, bypassing the need to cooperate with Captain Sims
 Assassin's Creed Shadows - How To Find The Blacksmith And Unlock Weapon And Armour CustomisationMar 22, 2025 am 01:06 AM
In Assassin's Creed Mirage, early game progression is limited until you recruit allies and unlock key features. Weapon customization, for instance, requires finding the blacksmith, Heiji. This unlocks through a side quest, impacting gameplay signif


Hot AI Tools

Undresser.AI Undress
AI-powered app for creating realistic nude photos

AI Clothes Remover
Online AI tool for removing clothes from photos.

Undress AI Tool
Undress images for free

Clothoff.io
AI clothes remover

AI Hentai Generator
Generate AI Hentai for free.

Hot Article

Hot Tools

ZendStudio 13.5.1 Mac
Powerful PHP integrated development environment

WebStorm Mac version
Useful JavaScript development tools

Notepad++7.3.1
Easy-to-use and free code editor

mPDF
mPDF is a PHP library that can generate PDF files from UTF-8 encoded HTML. The original author, Ian Back, wrote mPDF to output PDF files "on the fly" from his website and handle different languages. It is slower than original scripts like HTML2FPDF and produces larger files when using Unicode fonts, but supports CSS styles etc. and has a lot of enhancements. Supports almost all languages, including RTL (Arabic and Hebrew) and CJK (Chinese, Japanese and Korean). Supports nested block-level elements (such as P, DIV),

MinGW - Minimalist GNU for Windows
This project is in the process of being migrated to osdn.net/projects/mingw, you can continue to follow us there. MinGW: A native Windows port of the GNU Compiler Collection (GCC), freely distributable import libraries and header files for building native Windows applications; includes extensions to the MSVC runtime to support C99 functionality. All MinGW software can run on 64-bit Windows platforms.


