


Did you accidentally delete your important emails from Exchange Server or want to recover old emails? Don’t worry, this post on MiniTool will walk you through several feasible and effective methods to recover emails from Exchange Server safely.
The Exchange Server features a recycle bin that enables users to recover their data within a designated timeframe. By default, it keeps mailbox information for 14 days. However, some administrators may extend this duration to 30 days based on the specific versions and settings in use. But what steps can you take if this timeframe has already elapsed? Let’s explore how to recover emails from Exchange Server.
Microsoft Exchange Server has a global user base due to its robust features. Occasionally, the need to recover emails from Exchange Server arises when you unintentionally delete them. We understand that this situation can be frustrating, especially if the deleted items are important to you. Don’t worry, we will walk you through several methods to recover deleted emails from Exchange Server. Just follow.
Part 1. Best Solution to Recover Emails from Exchange Server
As we know, the emails from Exchange Server use the EDB file type. Therefore, if you don’t need to recover a large number of emails and want to recover the EDB files quickly and safely, an EDB file recovery software is what you need most.
MiniTool Power Data Recovery is a free data recovery tool that is designed for Windows 11/10/8.1/8 to recover all types of files securely, including photos, documents, audio files, videos, etc. It is fully compatible with all file storage devices for data recovery, including internal or external HDDs/SSDs data recovery, USB flash drives data recovery, SD cards data recovery, and more.
Use this powerful data recovery tool to get back your emails. Download and install it by clicking the green button below.
Steps to Recover EDB Files Using MiniTool Power Data Recovery
Step 1: Launch MiniTool Power Data Recovery to enter its home page. By default, you will start in the Logical Drives section. Select the partition where the emails are deleted and click Scan. Allow the scan to finish automatically for the best results.

Step 2: After the scanning process is complete, the discovered files will be organized in the Path tab under categories such as Deleted Files, Lost Files, and Existing Files. You can expand each category to find specific items. Make use of the Filter, Type, Search, and Preview functions to locate the EDB files.
Step 3: Select the desired files and click Save to recover them. To avoid overwriting current data, ensure that the recovered files are saved to a different location. Then, click OK to save the files.

The free version allows for a recovery maximum of 1GB of files. If you want to recover more files using this powerful data recovery tool, you can choose to upgrade to advanced edition.
Part 2. Manually Recover Emails from Exchange Server
Option 1. Recover Emails via the Deleted Items Folder
Once emails are deleted, they will be placed in the deleted items folder, which users can easily access using several methods. Follow the instructions below to recover emails from Exchange through Outlook.
Step 1: Launch Microsoft Outlook on your computer.
Step 2: Next, navigate to the Deleted Items folder.

Step 3: Locate the email within the folder that you wish to restore.
Step 4: After finding the email, right-click on it. Choose the Move option to return the email to your preferred location.
Option 2. Recover Emails Using the Exchange Admin Center (EAC)
>> Obtain Permissions for Exchange Admin Center
Before recovering deleted emails from the Exchange Server for users, we must first obtain the necessary permissions. The permissions required are import/export permissions for the mailboxes, which are not assigned by default to anyone in Exchange.
- Access the Exchange Admin Center and go to Permissions > Admin Roles.
- Select the New button to open the dialog for creating a new role group.
- Click the Add button under the role section.
- Select the Mailbox Import Export option by double-clicking it, then click OK.
- Under Members, click the Add button.
- Double-click on each administrator to assign them this role, then click OK.
- Click on the Save button.
>> Recover Emails from Exchange Server
In this section, we will elucidate the procedure for recovering emails from an Exchange Server utilizing the Exchange Admin Center. Users may follow the subsequent steps applicable to Exchange versions 2013 and later:
Step 1: Access the Exchange Admin Center and navigate to the Recipients section.
Step 2: Select Mailboxes.
Step 3: In the Mailboxes view, pick the user for whom you wish to restore the email, and then click on the Recover deleted items button.

Step 4: You can enhance this perspective further by choosing various filters located at the top of the page. For instance, we can opt for a Custom Date Range, Search for a Particular Topic, Select a Type of Item or Folder, or Search for a Specific Object ID.
Step 5: The item will be Returned to the User’s Mailbox, specifically in the folder where it was Hard Deleted.
This procedure enables users to recover deleted items from the Exchange Admin Center, provided they fall within the retention period.
Option 3. Recover emails via the Outlook Web App
Next, we will explore an alternative method for retrieving emails from the Exchange Server via the Outlook Web Application.
Step 1. Access the Outlook Web App online and log in using your Exchange Server account.
Step 2. Find the Deleted Items section, right-click on it, and choose Recover deleted items.
Step 3. Highlight the items that were found, right-click on them, and select Recover.
Step 4. Press OK to validate the action.
After completing this, you can return to the Deleted Items to verify the restored items there.
Option 4: Recover Emails Using Powershell Command
Users have the option to use the PowerShell command for recovering deleted emails from Exchange Server, though this approach carries some risks for their data and may potentially corrupt the Exchange database file. This method is intended for experienced Exchange Server administrators who possess knowledge of PowerShell commands.
Step 1: Launch PowerShell on the computer running Exchange Server.
Step 2: Input the following script parameters and press Enter for each entry:
- RecoverDeletedItems [-Mailbox]
- [-RestoreStart]
- [-RestoreEnd]
- [-RestoreFromFolder]
- [-Credentials]
- [-Impersonate]
- [-EwsUrl]
- [-EWSManagedApiPath]
- [-IgnoreSSLCertificate]
- [-AllowInsecureRedirection]
Step 3: Once the process is complete, verify the recovered emails.
Keep in mind that the recovered emails will be placed in standard folders based on their item types. For instance, emails will be sent back to the Inbox, while appointments will return to the Calendar, etc.
Final Words
Now, you have a robust data recovery tool and 4 options to recover emails from Exchange Server. The methods mentioned above are both for free and you can choose one according to your actual situation. Hope the information is helpful for you.
The above is the detailed content of Effective Ways to Recover Emails from Exchange Server: Guide. For more information, please follow other related articles on the PHP Chinese website!

 Clipchamp Video Loss on Windows? 2 Ways to Recover Files!May 09, 2025 pm 08:12 PM
Recover Lost Clipchamp Videos: A Step-by-Step Guide Losing a video you've edited in Clipchamp can be frustrating. This guide provides effective methods to recover your lost Clipchamp video files. Finding Your Clipchamp Videos Before attempting recov
 7 Useful Fixes for Action Center Keeps Popping upMay 09, 2025 pm 08:07 PM
Action Center allows you to access quick settings and notifications. However, some users say that they encounter the “Action Center keeps popping up” issue on Windows 11/10. If you are one of them, refer to this post from MiniTool to get solutions.Qu
 Instant Ways to Restore Missing Google Chrome Icon on WindowsMay 09, 2025 pm 08:06 PM
Troubleshoot Missing Google Chrome Icon on Windows Can't find your Google Chrome icon on Windows? This guide offers several solutions to restore it. Why is my Chrome icon missing? Several factors can cause the Chrome icon to vanish from your desktop:
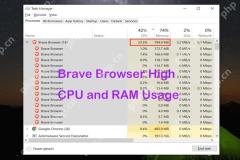 Brave Browser High CPU and RAM Usage: Best 5 Tips to ReduceMay 09, 2025 pm 08:05 PM
Brave browser CPU and memory usage too high? Under Windows 10/11 system, Brave browser's high CPU and memory usage problems have troubled many users. This tutorial will provide a variety of solutions to help you easily resolve this issue. Quick navigation: Brave browser high CPU and memory footprint Solution 1: Clear cookies and cache data Solution 2: Disable hardware acceleration Solution 3: Close the tab and update the Brave browser Solution 4: Disable the plugin Solution 5: Create a new user profile Optional: Run MiniTool System Booster System Optimization Tool Summarize Brave browser high CP
 Targeted Fixes for Xbox Error 0x87e0000f When Installing GamesMay 09, 2025 pm 08:04 PM
Troubleshooting Xbox Error Code 0x87e0000f: A Comprehensive Guide Encountering the Xbox error code 0x87e0000f while downloading games from Xbox Game Pass can be frustrating. This guide provides several solutions to help you resolve this issue and get
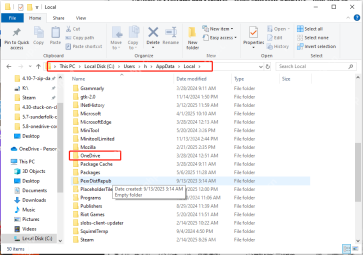 OneDrive Couldn't Start Files on Demand?Top 4 MethodsMay 09, 2025 pm 08:02 PM
OneDrive Files On-Demand troubleshooting: resolving the "OneDrive couldn't start Files On-Demand" error. This MiniTool guide provides solutions for the persistent "Microsoft OneDrive Couldn’t start files on Demand" error (codes 0x
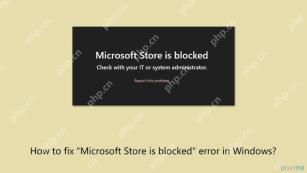 How to fix 'Microsoft Store is blocked' error in Windows?May 09, 2025 pm 06:00 PM
Microsoft Store is blocked error occurs when Windows prevents access to the Microsoft Store app, displaying the message Microsoft Store is blocked. Check with y
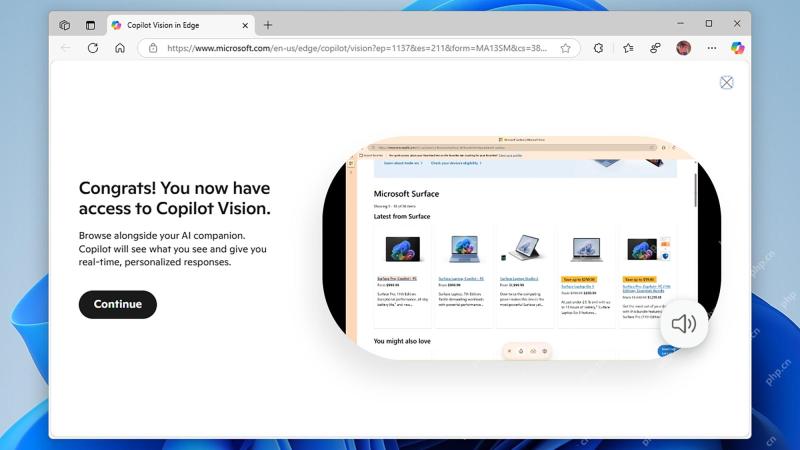 How to use Copilot Vision for free in Microsoft EdgeMay 09, 2025 am 10:32 AM
Staying current with all the new AI tools is a challenge. Many might even overlook readily available AI features. For instance, Copilot Vision is now free for all Microsoft Edge users – a fact easily missed if you don't regularly use Edge or haven't


Hot AI Tools

Undresser.AI Undress
AI-powered app for creating realistic nude photos

AI Clothes Remover
Online AI tool for removing clothes from photos.

Undress AI Tool
Undress images for free

Clothoff.io
AI clothes remover

Video Face Swap
Swap faces in any video effortlessly with our completely free AI face swap tool!

Hot Article
Hot Tools

WebStorm Mac version
Useful JavaScript development tools

SublimeText3 Linux new version
SublimeText3 Linux latest version

SecLists
SecLists is the ultimate security tester's companion. It is a collection of various types of lists that are frequently used during security assessments, all in one place. SecLists helps make security testing more efficient and productive by conveniently providing all the lists a security tester might need. List types include usernames, passwords, URLs, fuzzing payloads, sensitive data patterns, web shells, and more. The tester can simply pull this repository onto a new test machine and he will have access to every type of list he needs.

SublimeText3 Chinese version
Chinese version, very easy to use

Safe Exam Browser
Safe Exam Browser is a secure browser environment for taking online exams securely. This software turns any computer into a secure workstation. It controls access to any utility and prevents students from using unauthorized resources.

