The Harrowing is the very first side quest for anyone who chooses the Mage class in Dragon Age: Origins. During this quest, you must enter the Fade and face the unthinkable. The Harrowing is a mental puzzle where mages must remain stoic and prove to the Templar's that they can control their magic.

Mages must make sure they don't get possessed or preyed upon by demons of the Fade. This quest will show players just how easy it is to get killed by a demon in the unruly Fade if you do not keep your wits about you.
Find Some Spirits

When you first enter the Fade, you can find an interactable vase in the starting area that contains some Shimmering Orbs of Light, a magical item that replenishes health and can only be used within the Fade, disappearing once you leave. Further ahead, you will bump into a character called Mouse, a lost spirit who claims to be a forgotten mage who did not pass his Harrowing test and wants to help you pass yours.
Interact with the statue near the vase to unlock a Codex entry.
As you walk through the area, you will find minor enemies called Wisp Wraiths; these are balls of light that inflict ranged magic damage, but one single use of any beginner spell should kill them in one or two attacks. There's an arena to the right, with a Lyrium deposit that will replenish your Mana.
Continuing through the linear path, you will start to see some hills and statues ahead, and Mouse will comment that there is a spirit ahead. Before you visit this spirit, make sure to turn right and walk up a small hill. Here you will find another vase with more Shimmering Orbs of Light, as well as another statue that unlocks a Codex.
How To Convince Spirit of Valor To Help You

The next spirit you will meet is the Spirit of Valor. The goal here is to convince him to help you defeat the demon that will allow you to complete your Harrowing test, and there are two ways to convince this spirit to help you. You can either defeat him in an honorable duel or use your wits to convince him to give you aid without a fight.
|
|||||||||
|---|---|---|---|---|---|---|---|---|---|
| Fight Valor | If you fight him, Mouse will attack with you. Let Mouse take the forefront while you stand back. | ||||||||
| Convince Valor | With high Willpower, you can use persuasion to convince him to help you. | ||||||||
| Reward | No matter which option you choose, the reward will be the Valor's Staff. | ||||||||
|
Valor's Staff Overview |
|
|---|---|
| Material | Iron (Tier 1) |
| Damage | 4.00 |
| Armor Penetration | 20.00 |
| Range | 50 |
| Spell Power | 1 |
After defeating the demon and completing The Harrowing, this staff will disappear from your inventory.
After acquiring the Valor's Staff, Spirit Wolves will spawn behind you and attack; keep in mind that your basic beginner spells should kill Spirit Wolves with two hits, and to divert their attention you should be able to take them out one by one if you let Mouse take aggro. More Spirit Wolves will spawn further along the path.

How To Convince Sloth Demon To Help You

The next spirit you will meet is called Sloth. He is supposed to be the most dangerous thing in the area, but he is too tired to care, instead teaching Mouse how to transform into a bear. This will allow Mouse to inflict more damage when he helps you defeat the demon.
There are two ways to get Sloth to help you; either defeat him or answer his riddles correctly. If you choose to fight Sloth, he will take three separate forms each time he is defeated.
|
Sloth Demon's Riddle Answers |
|
|---|---|
| "I have seas with no water, coasts with no sand, towns without people, mountains without land. What am I?" | A map. |
| "I'm rarely touched, but often held. If you have wit, you'll use me well. What am I?" | My tongue. |
| "Often will I spin a tale, never will I charge a fee. I'll amuse you an entire eve, but, alas, you won't remember me. What am I?" | A dream. |
If you answer one of the riddles incorrectly, you will be forced to fight the Sloth Demon.
Upon answering all the questions correctly, Mouse will turn into a bear. More Spirit Wolves and Wisp Wraiths will be waiting along the path, allowing you to gain XP, and you will have to turn around and revisit the area where Mouse said the final demon will spawn, at the end of the map.
How To Defeat The Rage Demon

When you reach the arena, a Rage Demon will spawn. During the fight, three Wisp Wraiths will surround you and Mouse; make sure to get a lot of distance and take out the Wisps first, so that they do not make fighting the demon more challenging. Mouse can distract the demon while you take on the Wisps quickly.
It is best to stand near the Lyrium Vein so that you have quick access to more Mana. Any ice or frost damage will inflict the most damage because the demon is made of fire, so Fire-based magic will not do as much damage.
Mouse becomes a party companion after he turns into a bear. You can have him consume Shimmering Orbs of Light to heal him in combat.
Upon the defeat of the Rage Demon, Mouse will reveal he was who you should have been wary of all along. He will give you the life lesson that you are always being tested and should always be on your guard, and your character will wake up back in The Circle Tower after that.

The above is the detailed content of Dragon Age: Origins - The Harrowing Quest Walkthrough. For more information, please follow other related articles on the PHP Chinese website!
 R.E.P.O. Energy Crystals Explained and What They Do (Yellow Crystal)Mar 18, 2025 am 12:07 AM
I bought expensive weapons or drones in R.E.P.O. but found that the energy was exhausted and became useless? Don't worry, you don't have to spend $50,000 on replacements, just charge your gear! That strange machine at the back of your truck is not a decoration. Here are how to get energy crystals and use them to keep your gear running continuously to avoid bankruptcy. More Reads: All R.E.P.O. Items How to get energy crystal You can buy energy crystals from the service store between levels. They usually cost between $7,000 and $9,000 — while expensive, they are far cheaper than repurchasing gear. In the first few levels, no purchase is required. You don't need them for the time being, so
 How Long Does It Take To Beat Split Fiction?Mar 07, 2025 am 04:16 AM
Detailed explanation of the game duration of "Split Fiction": main line, branch line and 100% completion Like Hazelight Studio's previous works, Split Fiction is a relatively linear game, but it also contains some extra interesting content. There are some side stories, optional dialogues and easter eggs in the game, but there are not many elements to collect. Although the level is long and includes multiple mechanisms and boss battles, it still takes a considerable time to complete "Split Fiction", especially to achieve 100% completion. The following is a detailed analysis of the game duration: The main plot duration In the case of two-player game (the player level is comparable), it takes about 12 hours to pass the main plot. But this game is more suitable
 R.E.P.O. Best Graphic SettingsMar 18, 2025 am 01:33 AM
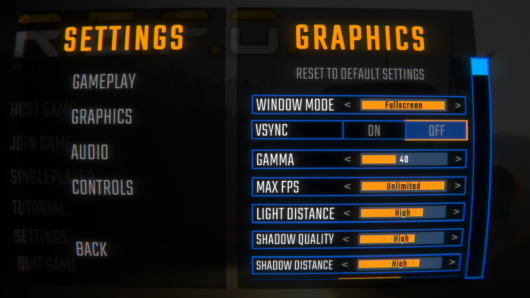
R.E.P.O. Game Screen Setting Guide: How to improve frame rate while ensuring picture quality? This article will guide you to optimize game settings and find the best balance point. Step 1: Full Screen Mode and Frame Rate Adjustment Before adjusting other settings, make sure the game is running in the best mode: Display Mode: Full Screen - Always use Full Screen Mode for optimal performance. Window mode will reduce the frame rate. Vertical Sync (V-Sync): Off - Unless a screen tear occurs, turn off vertical synchronization for a smoother gaming experience. Maximum FPS: Unlimited - If your computer is configured strongly, you can set it to Unlimited. Otherwise, it is recommended to limit it to 60 frames or match your monitor refresh rate. second
 Assassin's Creed Shadows: Seashell Riddle SolutionMar 28, 2025 am 01:58 AM
Assassin's Creed: Shadows boasts a vast world brimming with activities beyond the main storyline. Side missions and various encounters significantly enrich the immersive experience of in-game Japan. One particularly memorable encounter is the Seashe
 R.E.P.O. How to Fix Audio if You Can't Hear AnyoneMar 17, 2025 pm 06:10 PM
Can't hear other players' voices in the R.E.P.O. game? Even if your microphone is working properly, it can be a problem caused by audio settings or device conflicts. Here are some effective solutions to help you restore your voice chat functionality. 1. Check the output device Open the audio settings of R.E.P.O. and check the output device settings. If set to "Default", manually select your headset or speaker. Restart the game and test voice chat again. 2. Adjust Windows sound settings If R.E.P.O. does not output the sound to the correct device, check the Windows Sound Settings: Right-click the speaker icon in the taskbar and select Sound Settings. Under "Output",
 Suikoden 1 HD Remaster: How To Win The Duel With General TeoMar 06, 2025 pm 06:03 PM
In "Awakening 1&2 HD Remake", some seemingly invincible boss battles can actually be won, and the duel between General Theo and Paine is the best example. In difficult and difficult terms, this battle is very tricky, and you might think that Paine will definitely die. But that's not the case. This guide will explain in detail the key duel: the timing of the duel, the best equipment of Paine, the conditions to be met before the battle, and General Theo's action prediction to help you defeat him. Paine recommended levels and equipment First, go to the Emperor Garden to sharpen Paine's claws to level 12 (the highest level in this stage of the game). Then, equip ninja suits, headdresses and two bodyguard rings (available at Antai’s Armory). Finally, Paine's level should be higher than level 30, at least level 30, the closer it is to 35
 WWE 2K25: How To Unlock Everything In MyRiseMar 15, 2025 pm 12:03 PM
WWE 2K25's MyRise mode is one of the best career modes in WWE games in recent years, telling an exciting story: a group of disgruntled NXT superstars take over WWE. However, enjoying the plot is not the only reason to play this mode. By playing MyRise, you can also unlock many content such as new superstars, new arenas, extra costumes, special weapons, and more. However, you can't get everything in a round of games, so you may want to prioritize certain items. Before you do this, you need to know what unlockable content is and how to get them. All this information is included here. Unlocked content through plot promotion By advancing the main plot and completing the chapters, you can solve
 Where to find the Crane Control Keycard in AtomfallMar 28, 2025 am 02:17 AM
In Atomfall, discover hidden keys and passages, including multiple ways to access key locations. This guide focuses on using the Crane Control Keycard for easy, unguarded Entry to Skethermoor Prison, bypassing the need to cooperate with Captain Sims


Hot AI Tools

Undresser.AI Undress
AI-powered app for creating realistic nude photos

AI Clothes Remover
Online AI tool for removing clothes from photos.

Undress AI Tool
Undress images for free

Clothoff.io
AI clothes remover

AI Hentai Generator
Generate AI Hentai for free.

Hot Article

Hot Tools

SAP NetWeaver Server Adapter for Eclipse
Integrate Eclipse with SAP NetWeaver application server.

PhpStorm Mac version
The latest (2018.2.1) professional PHP integrated development tool

DVWA
Damn Vulnerable Web App (DVWA) is a PHP/MySQL web application that is very vulnerable. Its main goals are to be an aid for security professionals to test their skills and tools in a legal environment, to help web developers better understand the process of securing web applications, and to help teachers/students teach/learn in a classroom environment Web application security. The goal of DVWA is to practice some of the most common web vulnerabilities through a simple and straightforward interface, with varying degrees of difficulty. Please note that this software

SublimeText3 English version
Recommended: Win version, supports code prompts!

ZendStudio 13.5.1 Mac
Powerful PHP integrated development environment


