Give a warm welcome to Tarma, the coolest character in the series making an appearance in Metal Slug Tactics. Being the badass he is, you’ll be riding on a motorbike and spawning tanks out of nowhere to deal serious damage to your enemies in the coolest way possible.

Tarma has a good mix of close-range and long-range tools, with knives, laser guns, and grenade launchers that can reach far away tiles from the unit. As usual, how you want to play with him is a matter of what you want, but here we will explain the basics you need to know about Tarma in Metal Slug Tactics.
Tarma’s Core Abilities - Wild Ride, Final Crash, And Giant Knuckle

Tarma likes using his motorcycle, and you should like it, too. Wild Ride, maybe his best Core Ability, deals four damage, ignores cover, and goes in a straight line over enemies. If that’s not enough, he gains one Dodge for each unit he hits, which is perfect for a move that can leave you a bit exposed for counter-attacks if you don’t have much space.
To unlock Tarma, you need to unlock all the regions in the game, which means that you must complete Argun and Herkanet Tombs.
Final Crash turns Tarma into a type of tank character, since it moves him and deals three damage in a wide area, applying Provoked to any enemy that receives the hit. Any unit with Provoked will attack the character that gave them that status, so it is a taunt.
It’s a great move when you can build Dodge and get some good Cover, but beware of being too greedy with this as provoking at the same time many units can mean death in the next turn. We will recommend some good abilities to go with this later in the guide.
The last core ability is Giant Knuckle, which moves a unit to an adjacent tile, dealing three damage. Plus, you’ll get a Bonus Action if you kill a unit with this ability, which means that you can use Giant Knuckle again if you have enough Adrenaline or can use any of your weapons.
Yes, three damage is low if you don’t attack an already wounded unit, but it can get upgrades with increasing damage. If you can’t upgrade this Special Action, then try to use it to finish enemies.
Tarma’s Special Actions

Some of the best Special Actions in the game belong to Tarma. He’s a high-risk and high-reward type of character, but you can learn how to reduce the risk with some practice.
|
Name |
Cost |
Range |
Effect(s) |
|---|---|---|---|
| Wild Ride | 6 | 1-5 | Goes straight in a line, going over units on the way. |
| Slug Kick | 3 | 1-1 | Deals 5 damage. |
| Final Crash | 6 | 2-4 | Moves to a selected square. |
| Killer Pose | 5 | Self | Deal 4 damage. |
| Mimic | 4 | Self | Gives Retaliation, which activates when attacked. |
| High Five | 4 | 5 | Gives one Dodge. |
| Giant Knuckle | 5 | 3-6 | Moves an adjacent unit to a tile within range. |
| Spotlight | 4 | Self | Gives Spotlights to allies in range, which redirects any attack the allies receive to Tarma. |

Tarma Classic Loadout

Tarma likes close combat, so his first primary weapon is a Knife, which has the great perk of ignoring cover. Add a good old Shotgun to the mix and you’re ready for some great damage.
Plus, this loadout comes with Wild Ride as its starting Special Action, which is fantastic. With these weapons and this ability alone you won’t be able to attack twice in a turn, but below you’ll find some solutions for this downside.
In any case, Wild Ride will give you some extra Dodge and make you close to enemies (while also dealing damage to them, of course). With enough Dodge and a good position, you might not get hurt and will be ready to close the deal with your other weapons in the next turn.
Recommended Passives
- Brick Wall is the best Passive for this loadout. It gives Tarma a Bonus Action if he gets at least two Dodge in one action, which can be easily achieved if you strike two enemies with Wild Ride.
- If you’re upgrading your Wild Ride and feeling greedy, Oversized does the same thing as Brick Wall, with the difference that you need to hit at least three enemies. Difficult, but not impossible.
- Following the trend of attacking multiple enemies with one move, Stylish is a good Passive since it will give you two Adrenaline each time you hit two targets or more. A great way of building up this attribute.
Tarma Dopamine Rush Loadout

Another knife, but this one, theTatsumaki, has a weird range. It's like a square but it doesn’t hit right behind you. However, one good detail is that it ignores Cover, so it’s a great one to have when dealing with covered enemies.
Your secondary weapon will be a flamethrower called Inferno, which has a more proper range and it’s a good mix with the knife. It also ignores Cover and adds Flame when getting a frag.
Add Giant Knuckle as the starting Special Action, which lets you move units around, and you’ll be able to position them where you need them for your ranges.
You need to complete one run with Tarma to unlock this loadout.
Recommended Passives
- Let’s start with a simple one. Marathon gives you one Dodge at the start of your run, and it can be upgraded. More Dodge is never a bad thing.
- Guerrilla will give you a Bonus Move when you contribute to a frag on an adjacent enemy, so it’s a good pick for your Giant Knuckle ability.
- For last, let’s go with Thick Skin, which will give you one extra Dodge (with the chance of more if upgraded) for each Bonus Action or Move you earn.
Tarma Extravagance Loadout

If you want to try being a little more “Kamikaze”, the grenade Charisma has this keyword. Basically, Tarma attacks himself without hurting him, but dealing damage to the enemies in range.
The loadout’s secondary weapon is a laser gun called Flatline, which is pretty good. It attacks all the enemies in a straight line within range. Plus, if you perform a complete Synchronization with it, Tarma will gain Motivation, which basically gives you a Special Action for free in your next turn.
Flatline also hurts allies that stand in the same line of attack!
Extravange’s Core Ability is Final Crash, which can be either a great mix or a recipe for disaster with Charisma. Basically, you move to a tile damaging the enemies in range, and applying Provoke to them (they become taunted for a turn). If you have Passives that help you gain Dodge, this is not a bad move, but taunting multiple enemies that are close to you can be pretty dangerous.
Recommended Passives
- Considering how exposed you will be with this loadout, Regeneration is a must. You’ll be healed with half of the Adrenaline points required for each Special Action you use.
- Marathon is a good addition since every extra Dodge will help you receive less damage.
- Let’s close with Guerilla, which will give you a Bonus Move for each frag you contribute to, which will be useful to take cover after attacking with your close-range attacks.
Tarma Big Guns Loadout

The last loadout has a Berta, which is a fantastic handgun. It comes with Impressive, a keyword that gives you one extra Adrenaline if you contribute to a frag, and this will be easy with the four damage the Berta deals.
Your Glass Launcher has long-range, Burst (consumes Dodge to deal more damage) and ignores elevation differences, which makes it a powerful weapon from the very beginning.
While these two weapons are great for being far away from enemies, your Core Ability Slug Kick can only be used when close to someone. It gives you Escape (your Dodge does not reset in your next turn), and deals five damage, ignoring Cover. A pretty powerful ability.
You can’t activate Escape two times in a row with the same unit.
Recommended Passives
- Since you might not be as Close to your enemies as with other loadouts, let’s go with Glass Tank. It will add Burst to all your Special Actions.
- Team Player will give you two extra Adrenaline for each Synchronization you perform with Tarma, perfect for building this attribute and having Slug Kick always available.
- As you will have Burst with more than one attack, Marathon will help you with that extra Dodge at the start of every turn.

The above is the detailed content of METAL SLUG Tactics: Tarma Character Guide. For more information, please follow other related articles on the PHP Chinese website!
 How to Unlock All Characters in Shadow of the DepthApr 11, 2025 am 09:32 AM
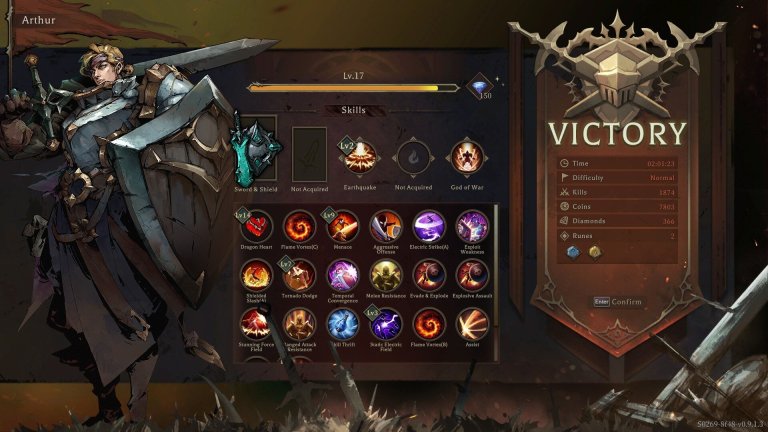
Only one character can be used in the early stage of the game "Deep Shadow", and the rest of the characters need to be upgraded to join the team. The good news is that unlocking most characters doesn't take long game time, here's a brief description of each character's unlocking level: Learn more: "Deep Shadow" Best Career Recommendations Arthur – Unlocked at the start of the game You start the game with Arthur by default. He is a character who uses shields and swords, and is a good all-around choice for beginners. Phyllis – Level 5 Unlock Phyllis can be unlocked by reaching level 5. She is a ranged archer and has a pet, and if you like standing behind and letting your pet complete the battle, she will be the perfect choice for you. Alia – Level 8 Unlock After reaching level 8, Alia will join your team
 All Weapons in Into the Dead: Our Darkest DaysApr 11, 2025 am 09:24 AM
Into the Dead: Our Darkest Days isn’t the kind of game where you load up with an assault rifle and mow things down. No, this is the kind of game where you crouch in the dark with a broken pair of scissors and hope today isn’t the day your luck runs o
 Is Into the Dead: Our Darkest Days Co-op or Multiplayer?Apr 11, 2025 am 09:21 AM
Into the Dead: Our Darkest Days has no cooperative mode or multiplayer mode. There are currently no multiplayer functions in the game, and it does not exist in online mode, local cooperation mode, or real-time cooperation with friends to fight against zombie groups. More Readings: All Characters in "Into the Dead: Our Darkest Days" The developer responded to players’ requests for cooperating mode in a recent Steam discussion, saying that this would revolutionize the game. If similar features are finally implemented, it will be an independent project—a derivative work with different gameplay but set in the same worldview. In other words, don't hold too much hope. The development team seems to be focused on
 How to Eat in Into the Dead: Our Darkest DaysApr 11, 2025 am 09:14 AM
The game's cooking system is surprisingly simple, but the eating mechanism is not the case. If you find yourself having food but don't know how to eat it, don't worry, you're not alone; many players miss this. Further reading: Into the Dead: Our Darkest Days Full Role Introduction How to eat You need to manually open your inventory when eating. This means pressing the Tab key on the keyboard (or pressing the correct button on the controller). Once you enter the inventory, you can click on the food and choose to eat. It's that simple. There is no need for cooking mini-games, nor will it automatically eat when the character is hungry. Just click and eat. This mechanism is a bit clumsy, especially in games that support controllers, but it does do it
 Best Characters to Pick in Into the Dead: Our Darkest DaysApr 11, 2025 am 09:08 AM
Into the Dead: Our Darkest Days Guide to the Best Survivor Combo Although in theory any survivor combination can pass "Into the Dead: Our Darkest Days", there are no completely useless characters, and the game will not get stuck because of your choice. But if you want a more relaxed gaming experience, especially in the early stages of the game, some combinations are significantly better than others. If you want to worry less, here are some of the best combinations. Read more: All Survivors of "Into the Dead: Our Darkest Days" Daphne and Penny Daphne is in charge of the shelter and Penny is in charge of the assassination. For beginner players
 Blood Moon Event 2025 Guide for Dead by DaylightApr 11, 2025 am 09:04 AM
Dead by Daylight The Blood Moon Feast is coming, and a large number of blood points are waiting for you to obtain! From April 7th to 29th, participate in the Blood Moon event, win generous rewards, improve character levels, and quickly complete the picture book task. During the event, new goals, unique accessories and daily login rewards are waiting for you to receive! How to earn blood points During the Blood Moon event, there are many ways to obtain blood points, and you can get rewards even if you just log in to the game: Complete the Blood Moon Generator Four of the seven generators on the map will become special Blood Moon generators. You need to collect blood from the blood pump on the map and then bring the blood tank to the Blood Moon generator to fill it. Carrying a full tank of blood will consume resources faster, and it is recommended to adopt a hidden strategy to transport blood. Survivors obtain by collecting blood, filling and completing blood moon generators
 How to Save in Into the Dead: Our Darkest DaysApr 11, 2025 am 09:03 AM
"Night of the Living Dead: Our Darkest Days" does not have a manual save button. The game handles the save itself—and it was designed with survival elements in mind. Based on player feedback (and game mechanics), the game will be automatically saved at the end of each day and night cycle. More Reads: All Characters of "Night of the Living Dead: Our Darkest Days" This save system is designed around the permanent death of the game and the lack of resources. If you can save as you like, it will destroy the core of the game – every decision should make sense. If a character dies at a stage, the game saves the result. You cannot return unless you exit the game before the end of the phase. Again, it cannot be saved manually, and there is no automatic save within the stage. If you are searching for supplies
 The Sims 4: Businesses & Hobbies - Mastery Perks GuideApr 11, 2025 am 08:05 AM
The Sims 4: Businesses & Hobbies expansion introduces Mastery Perks, enhancing skill development. Earning these perks unlocks advantages in various skill areas. With only four perk slots per Sim, strategic selection is key. There are 18 Master


Hot AI Tools

Undresser.AI Undress
AI-powered app for creating realistic nude photos

AI Clothes Remover
Online AI tool for removing clothes from photos.

Undress AI Tool
Undress images for free

Clothoff.io
AI clothes remover

AI Hentai Generator
Generate AI Hentai for free.

Hot Article

Hot Tools

SublimeText3 Linux new version
SublimeText3 Linux latest version

Zend Studio 13.0.1
Powerful PHP integrated development environment

SublimeText3 Chinese version
Chinese version, very easy to use

VSCode Windows 64-bit Download
A free and powerful IDE editor launched by Microsoft

mPDF
mPDF is a PHP library that can generate PDF files from UTF-8 encoded HTML. The original author, Ian Back, wrote mPDF to output PDF files "on the fly" from his website and handle different languages. It is slower than original scripts like HTML2FPDF and produces larger files when using Unicode fonts, but supports CSS styles etc. and has a lot of enhancements. Supports almost all languages, including RTL (Arabic and Hebrew) and CJK (Chinese, Japanese and Korean). Supports nested block-level elements (such as P, DIV),


