Buu, the chaotic and powerful antagonist from Dragon Ball Z, brings his unpredictable nature and immense strength to Dragon Ball: Sparking Zero. With his various forms—Majin Buu, Super Buu, and Kid Buu among them—players can adapt their strategy based on the situation.

Each form offers unique abilities, from Majin Buu’s resilience and regeneration to Super Buu’s devastating transformations and Kid Buu’s unmatched speed and ferocity. Mastering Buu’s variants and movesets will allow you to dominate opponents with a blend of power and unpredictability. In this guide, we’ll explore all of Buu’s forms, abilities, and strategies for victory.
Majin Buu

|
Move Name |
Input |
Cost |
Effect |
|---|---|---|---|
| Paralyze Beam | R2/RT Up on the D-Pad | 2 Skill Count | Paralyze your opponent. |
| Sleep | R2/RT Left on the D-Pad | 4 Skill Count | Recover over a bar of health and all Ki. |
| Buu Buu Gum | R2/RT Square/X | 3 Ki Bars | Fires a Beam Super that does a bar of damage. |
| Super Kamehameha | R2/RT Triangle/Y | 3 Ki Bars | Fires a Beam Super that does over a bar of damage when fully charged up. |
| Angry Explosion | R2/RT Circle/B (when in Sparking Mode) | Full Ki Bar | Huge and unblockable area-of-effect explosive wave that deals nearly two bars of damage. |
Majin Buu In Versus And Online Matches

Majin Buu is a very resilient character meant to outpace your opponent with its regenerative abilities. The longer the fight goes on, the better for you, since you need only the slightest of openings to use your Sleep skill and recover a lot of health in an instant.
His Ultimate attack is a fantastic way to finish a match, since it covers a wide range around you, and it can’t be blocked. A good way to enter Sparking Mode without too much hassle is through Sleep, since it also fully charges your Ki bars.
Evil Buu

|
Move Name |
Input |
Cost |
Effect |
|---|---|---|---|
| Paralyze Beam | R2/RT Up on the D-Pad | 2 Skill Count | Paralyze your opponent. |
| Mystic Breath | R2/RT Left on the D-Pad | 1 Skill Count | Fire an unblockable short range attack. |
| Super Kamehameha | R2/RT Square/X | 3 Ki Bars | Fires a Beam Super that does over a bar of damage when fully charged up. |
| Flame Shower Breath | R2/RT Triangle/Y | 3 Ki Bars | Fire an unblockable Medium range attack. |
| Guilty Flash | R2/RT Circle/B (when in Sparking Mode) | Full Ki Bar | Rush Ultimate that does nearly two bars of damage. |
Evil Buu In Versus And Online Matches

Evil Buu is, in many ways, the inferior version of all the Buus. His Breath abilities are hard to connect, and he only has a max of four Skill Count, so given the choice, you are better off using any of the other Buus of the family.
Super Buu

|
Move Name |
Input |
Cost |
Effect |
|---|---|---|---|
| Vice Shout | R2/RT Up on the D-Pad | 2 Skill Count | Paralyze your opponent. |
| Regeneration | R2/RT Left on the D-Pad | 4 Skill Count | Recover a bar and a half of health. |
| Assault Rain | R2/RT Square/X | 3 Ki Bars | Fires several projectiles that deal up to a bar of damage. |
| Majin Beam | R2/RT Triangle/Y | 4 Ki Bars | Fires an unblockable Medium range Beam Super that does a bar of damage. |
| Revenge Death Bomber | R2/RT Circle/B (when in Sparking Mode) | Full Ki Bar | Huge and unblockable area-of-effect explosive wave that deals two bars and a half of damage. |
Super Buu In Versus And Online Matches

Super Buu is extremely similar to Majin Buu, with ways to paralyze your enemies, regeneration and a wide range unblockable Ultimate. Said Ultimate does significantly more damage than most abilities, although it also leaves you at death’s door, so be sure to use Regeneration right after it connects.
Super Buu (Gotenks Absorbed)

|
Move Name |
Input |
Cost |
Effect |
|---|---|---|---|
| Explosive Wave | R2/RT Up on the D-Pad | 2 Skill Count | Sends out an explosive wave that knocks enemies back. |
| Regeneration | R2/RT Left on the D-Pad | 4 Skill Count | Recover over a bar and a half of health. |
| Galactic Donut Volley | R2/RT Square/X | 3 Ki Bars | Fires an unblockable Beam Super that does a bar of damage. |
| Special Beam Cannon | R2/RT Triangle/Y | 3 Ki Bars | Fires a Beam Super that does over a bar of damage when fully charged up. |
| Super Kamehameha | R2/RT Circle/B (when in Sparking Mode) | Full Ki Bar | Beam Ultimate that does two bars of damage. |
Super Buu (Gotenks Absorbed) In Versus And Online Matches

The version of Buu with a few of Gotenks’ moves is by far the best out of this line, at least regarding the trio that makes up Super Buu’s character. This is due to the new toys like Explosive Wave and Galactic Donut Volley, while still keeping the key skill Regeneration.
Explosive Wave is a great defensive tool in its own right, available to several characters as well, but Galactic Donut Volley requires more explanation to understand why it is good. It is an unblockable Super that only costs three Skill Count, meaning you can spam it constantly and have your opponent at your feet.
Super Buu (Gohan Absorbed)

|
Move Name |
Input |
Cost |
Effect |
|---|---|---|---|
| Afterimage | R2/RT Up on the D-Pad | 2 Skill Count | Dodge one attack. |
| High-Tension | R2/RT Left on the D-Pad | 2 Skill Count | Gain offensive buffs. |
| Super Kamehameha | R2/RT Square/X | 3 Ki Bars | Fires a Beam Super that does a bar and a half of damage when fully charged up. |
| Majin Beam | R2/RT Triangle/Y | 4 Ki Bars | Fires an unblockable Medium range Beam Super that does a bar of damage. |
| Super Ghost Buu Attack | R2/RT Circle/B (when in Sparking Mode) | Full Ki Bar | Fire several unblockable projectiles that trigger a scene, dealing two bars of damage. |
Super Buu (Gohan Absorbed) In Versus And Online Matches

While this version of Super Buu is the most powerful one from the series, it is a bit lackluster in Sparking Zero. Instead of useful skills, this Buu only has a few buffs, and while Majin Beam and Super Ghost Buu Attack are unblockable attacks, they aren’t as easy to use as Galactic Donut Volley from the previous version; you’re better off never transforming into this Buu.
Kid Buu

|
Move Name |
Input |
Cost |
Effect |
|---|---|---|---|
| Instant Transmission | R2/RT Up on the D-Pad | 2 Skill Count | Teleport behind your opponent. |
| Sleep | R2/RT Left on the D-Pad | 4 Skill Count | Recover over a bar of health and all Ki. |
| Super Kamehameha | R2/RT Square/X | 3 Ki Bars | Fires a Beam Super that does a bar and a half of damage when fully charged up. |
| Mystic Combination | R2/RT Triangle/Y | 3 Ki Bars | Triggers a Rush Super that does a bar of damage. |
| Planet Burst | R2/RT Circle/B (when in Sparking Mode) | Full Ki Bar | Beam Ultimate that does two bars of damage. |
Kid Buu In Versus And Online Matches

In terms of raw stats, this is the best Buu by far, and it has the best regenerative ability only present before on Majin Buu: Sleep. That, alongside Instant Transmission, makes Kid Buu one of the better characters in the game when it comes to skill distribution.
His other skills are fairly average, although they certainly pack a punch. Much like Majin Buu, an easy way to access your Ultimate is to use Sleep, then you will only need to charge the Sparking up, although this requires you to have five Skill Counts to spare.

The above is the detailed content of Dragon Ball: Sparking Zero - Buu Character Guide. For more information, please follow other related articles on the PHP Chinese website!
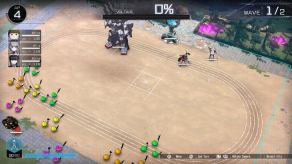 Spend Time Nozomi - The Hundred Line: Last Defense Academy WalkthroughMay 13, 2025 pm 04:51 PM
Continue to flee from the pursuer as several days pass. Do this again with Tsubasa when you control Nozomi. On Day 99, you have a battle with three characters: Kyoshika, Nozomi, and Shouma. Battle
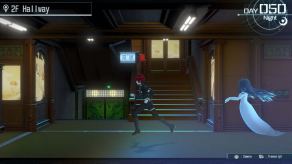 Pick Up The Box Walkthrough - The Hundred Line: Last Defense AcademyMay 13, 2025 pm 04:50 PM
You choose to take the box instead of assisting Sirei. Day 50 A ghostly pursuit ensues, requiring you to sprint left. Unlike previous chases, this ghost is reactive; it only moves when you do and vanishes if you attempt to confront it directly. Cont
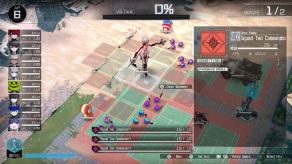 Day 08 Battle Pakron Guide - The Hundred Line: Last Defense AcademyMay 13, 2025 pm 04:49 PM
Conquering Pakron, the second Enemy Commander, is a two-stage battle requiring strategy and timing. While the fight itself isn't overly complex, the challenge lies in simultaneously managing other enemies. The initial phase involves three Squad Two C
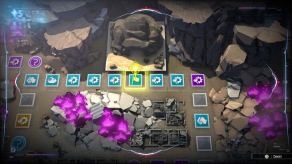 Don't Kiss Hiruko Walkthrough - The Hundred Line: Last Defense AcademyMay 13, 2025 pm 04:48 PM
1 Day 10 2 Day 11-15 3 Day 16-21 4 Day 22-23 5 Day 24-33 6 Day 34-40 7 Day 41-47 8 Day 48-50 You do not kiss Hiruko and she leaves.
 Stop - Categories Word Game Hiruko Walkthrough - The Hundred Line: Last Defense AcademyMay 13, 2025 pm 04:47 PM
You prevent Hiruko from destroying Nigou. Days 32-33 A clash with Addamaque occurs on Day 33. V'ehxness also appears, but you manage to reduce her health to only 50% before the encounter concludes. Days 34-47 A significant time jump transpires betwe
 Day 41-50 Walkthrough - The Hundred Line: Last Defense AcademyMay 13, 2025 pm 04:46 PM
Guide: Detailed explanation of the process of the Academy War Game 41-50 This guide will provide a detailed introduction to the plot process of the Academy War game’s 41-50th day, including combat strategies, key prop collection, and side missions. Days 41-42 Due to plot reasons, skip these two days. Day 43 Go to the gym (located in the center of the 1st floor, fast moving). Talk to Nonomiya and advance the plot. Day 44 Go to the war room to prepare for the battle. This battle will not have support from the final defense academy team. fighting When the third wave of enemies attacked, Shoma joined the team and the goal changed to defeating the enemy boss. Shojin can attract enemy fire and reflect damage. Remember not to use Xiangzhen skills on the final defense academy team, as the effect is ineffective. It is recommended to place Shoma in the center of the enemy.
 Preferred Item List Guide - The Hundred Line: Last Defense AcademyMay 13, 2025 pm 04:44 PM
This guide lists the Eight preferred gifts for each character in The Hundred Line - Last Defense Academy, maximizing affinity and grades in both the first and second playthroughs. Giving a preferred gift always grants the maximum 5 affinity points.
 Doom The Dark Ages All Mission Challenges GuideMay 13, 2025 pm 04:43 PM
Doom: The Dark Ages' 48 Mission Challenge Guide to easily unlock "Challenge Completion" trophys and achievements! This article will break down the task challenges of each chapter in detail, including combat skills, collection elements, etc., to help you complete all challenges efficiently. Some chapters have no challenges, some chapters contain 2-3 challenges. All challenges can be completed during the first round of the game without repeating the chapters. Battle-related challenges can be swiped through checkpoint restart. All challenges can be easily accomplished at the lowest difficulty, enabling accessibility and damage modifiers. Chapter selection interface, you can press R3/right stick to view chapter challenges. During the game, you can open the challenge menu and lock the challenge goals to facilitate tracking progress. Recommended in each


Hot AI Tools

Undresser.AI Undress
AI-powered app for creating realistic nude photos

AI Clothes Remover
Online AI tool for removing clothes from photos.

Undress AI Tool
Undress images for free

Clothoff.io
AI clothes remover

Video Face Swap
Swap faces in any video effortlessly with our completely free AI face swap tool!

Hot Article

Hot Tools

SublimeText3 English version
Recommended: Win version, supports code prompts!

VSCode Windows 64-bit Download
A free and powerful IDE editor launched by Microsoft

SublimeText3 Linux new version
SublimeText3 Linux latest version

Dreamweaver CS6
Visual web development tools

Zend Studio 13.0.1
Powerful PHP integrated development environment


