


I’ve always loved watching my unit tests run (and pass). They’re fast, and passing tests give me the assurance that my individual pieces behave like they’re supposed to. Conversely, I often struggled to prioritize end-to-end tests for the browser because writing and running them was gruelingly slow.
Fortunately, the tools for end-to-end in-browser testing have gotten much better and faster over the years. And with a headless browser setup, I can run my browser tests as part of my CI.
Recently, I came across this Heroku blog post talking about automating in-browser testing with headless Chrome within Heroku CI. Heroku has a buildpack that installs headless Chrome, which you can invoke for your tests in the CI pipeline.
The example setup from the blog post was a React app tested with Puppeteer and Jest. That’s a great start … but what if I use Playwright instead of Puppeteer? Is it possible?
I decided to investigate. As it turns out — yes, you can do this with Playwright too! So, I captured the steps you would need to get Playwright tests running on the headless Chrome browser used in Heroku CI. In this post, I’ll walk you through the steps to get set up.
A Quick Word on Browser Automation for End-to-End Testing
End-to-end testing captures how users actually interact with your app in a browser, validating complete workflows. Playwright makes this process pretty seamless with testing in Chrome, Firefox, and Safari. Of course, running a full slate of browser tests in CI is pretty heavy, which is why headless mode helps.
The Chrome for Testing buildpack from Heroku installs Chrome on a Heroku app, so you can run your Playwright tests in Heroku CI with a really lightweight setup.
Introduction to the Application for Testing
Since I was just trying this out, I forked the GitHub repo that was originally referenced in the Heroku blog post. The application was a simple React app with a link, a text input, and a submit button. There were three tests:
Verify that the link works and redirects to the right location.
Verify that the text input properly displays the user input.
Verify that submitting the form updates the text displayed on the page.
Pretty simple. Now, I just needed to change the code to use Playwright instead of Puppeteer and Jest. Oh, and I also wanted to use pnpm instead of npm. Here’s a link to my forked GitHub repo.
Modify the Code to Use Playwright
Let’s walk through the steps I took to modify the code. I started with my forked repo, identical to the heroku-examples repo.
Use pnpm
I wanted to use pnpm instead of npm. (Personal preference.) So, here’s what I did first:
~/project$ corepack enable pnpm


~/project$ corepack use pnpm@latest

Installing pnpm@9.12.3 in the project…
…
Progress: resolved 1444, reused 1441, downloaded 2, added 1444, done
…
Done in 14.4s

~/project$ rm package-lock.json


~/project$ pnpm install # just to show everything's good


Lockfile is up to date, resolution step is skipped
Already up to date
Done in 1.3s
Add Playwright to the project
Next, I removed Puppeteer and Jest, and I added Playwright.
~/project$ pnpm remove \
           babel-jest jest jest-puppeteer @testing-library/jest-dom

~/project$ $ pnpm create playwright
Getting started with writing end-to-end tests with Playwright:
Initializing project in '.'
✔ Do you want to use TypeScript or JavaScript? · JavaScript
✔ Where to put your end-to-end tests? · tests
✔ Add a GitHub Actions workflow? (y/N) · false
✔ Install Playwright browsers (can be done manually via 'pnpm exec playwright install')? (Y/n) · false
✔ Install Playwright operating system dependencies (requires sudo / root - can be done manually via 'sudo pnpm exec playwright install-deps')? (y/N) · false

Installing Playwright Test (pnpm add --save-dev @playwright/test)…
…
Installing Types (pnpm add --save-dev @types/node)…
…
Done in 2.7s
Writing playwright.config.js.
Writing tests/example.spec.js.
Writing tests-examples/demo-todo-app.spec.js.
Writing package.json.
I also removed the Jest configuration section from package.json.
Configure Playwright to use Chromium only
You can run your Playwright tests in Chrome, Firefox, and Safari. Since I was focused on Chrome, I removed the other browsers from the projects section of the generated playwright.config.js file:
  /* Configure projects for major browsers */
  projects: [
    {
      name: 'chromium',
      use: { ...devices['Desktop Chrome'] },
    },

//    {
//      name: 'firefox',
//      use: { ...devices['Desktop Firefox'] },
//    },
//
//    {
//      name: 'webkit',
//      use: { ...devices['Desktop Safari'] },
//    },


  ],
…
Exchange the Puppeteer test code for Playwright test code
The original code had a Puppeteer test file at src/tests/puppeteer.test.js. I moved that file to tests/playwright.spec.js. Then, I updated the test to use Playwright’s conventions, which mapped over quite cleanly. The new test file looked like this:
const ROOT_URL = 'http://localhost:8080';
const { test, expect } = require('@playwright/test');

const inputSelector = 'input[name="name"]';
const submitButtonSelector = 'button[type="submit"]';
const greetingSelector = 'h5#greeting';
const name = 'John Doe';

test.beforeEach(async ({ page }) => {
  await page.goto(ROOT_URL);
});

test.describe('Playwright link', () => {
  test('should navigate to Playwright documentation page', async ({ page }) => {
    await page.click('a[href="https://playwright.dev/"]');
    await expect(page.title()).resolves.toMatch('| Playwright');
  });
});

test.describe('Text input', () => {
  test('should display the entered text in the text input', async ({ page }) => {
    await page.fill(inputSelector, name);

    // Verify the input value
    const inputValue = await page.inputValue(inputSelector);
    expect(inputValue).toBe(name);
  });
});

test.describe('Form submission', () => {
  test('should display the "Hello, X" message after form submission', async ({ page }) => {
    const expectedGreeting = `Hello, ${name}.`;
    await page.fill(inputSelector, name);
    await page.click(submitButtonSelector);

    await page.waitForSelector(greetingSelector);
    const greetingText = await page.textContent(greetingSelector);
    expect(greetingText).toBe(expectedGreeting);
  });
});
Remove start-server-and-test, using Playwright’s webServer instead
To test my React app, I needed to spin it up (at http://localhost:8080) in a separate process first, and then I could run my tests. This would be the case whether I used Puppeteer or Playwright. With Puppeteer, the Heroku example used the start-server-and-test package. However, you can configure Playwright to spin up the app before running tests. This is pretty convenient!
I removed start-server-and-test from my project.
~/project$ pnpm remove start-server-and-test
In playwright.config.js, I uncommented the webServer section at the bottom, modifying it to look like this:
  /* Run your local dev server before starting the tests */
  webServer: {
     command: 'pnpm start',
     url: 'http://127.0.0.1:8080',
     reuseExistingServer: !process.env.CI,
  },
Then, I removed the test:ci script from the original package.json file. Instead, my test script looked like this:
  "scripts": {
    …
    "test": "playwright test --project=chromium --reporter list"
  },
Install Playwright browser on my local machine
Playwright installs the latest browser binaries to use for its tests. So, on my local machine, I needed Playwright to install its version of Chromium.
~/project$ pnpm playwright install chromium


Downloading Chromium 130.0.6723.31 (playwright build v1140)
from https://playwright.azureedge.net/builds/chromium/1140/chromium-linux.zip
164.5 MiB [====================] 100%
Note: The Chrome for Testing buildpack on Heroku installs the browser we’ll use for testing. We’ll set up our CI so that Playwright uses that browser instead of spending the time and resources installing its own.
Run tests locally
With that, I was all set. It was time to try out my tests locally.
~/project$ pnpm test

> playwright test --project=chromium --reporter list

Running 3 tests using 3 workers

  ✓  1 [chromium] > playwright.spec.js:21:3 > Text input > should display the entered text in the text input (911ms)
  ✘  2 [chromium] > playwright.spec.js:14:3 > Playwright link > should navigate to Playwright documentation page (5.2s)
  ✓  3 [chromium] > playwright.spec.js:31:3 > Form submission > should display the "Hello, X" message after form submission (959ms)

...
      - waiting for locator('a[href="https://playwright.dev/"]')


      13 | test.describe('Playwright link', () => {
      14 |   test('should navigate to Playwright documentation page', async ({ page }) => {
    > 15 |     await page.click('a[href="https://playwright.dev/"]');
         |                ^
      16 |     await expect(page.title()).resolves.toMatch('| Playwright');
      17 |   });
      18 | });
Oh! That’s right. I modified my test to expect the link in the app to take me to Playwright’s documentation instead of Puppeteer’s. I needed to update src/App.js at line 19:
<link href="https://playwright.dev/" rel="noopener">
  Playwright Documentation
Now, it was time to run the tests again…
~/project$ pnpm test

> playwright test --project=chromium --reporter list

Running 3 tests using 3 workers

  ✓  1 [chromium] > playwright.spec.js:21:3 > Text input > should display the entered text in the text input (1.1s)
  ✓  2 [chromium] > playwright.spec.js:14:3 > Playwright link > should navigate to Playwright documentation page (1.1s)
  ✓  3 [chromium] > playwright.spec.js:31:3 > Form submission > should display the "Hello, X" message after form submission (1.1s)

  3 passed (5.7s)
The tests passed! Next, it was time to get us onto Heroku CI.
Deploy to Heroku to Use CI Pipeline
I followed the instructions in the Heroku blog post to get my app set up in a Heroku CI pipeline.
Create a Heroku pipeline
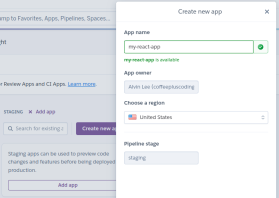
In Heroku, I created a new pipeline and connected it to my forked GitHub repo.

Next, I added my app to staging.
Then, I went to the Tests tab and clicked Enable Heroku CI.

Finally, I modified the app.json file to remove the test script which was set to call npm test:ci. I had already removed the test:ci script from my package.json file. The test script in package.json was now the one to use, and Heroku CI would look for that one by default.
My app.json file, which made sure to use the Chrome for Testing buildpack, looked like this:
~/project$ corepack enable pnpm


~/project$ corepack use pnpm@latest

Installing pnpm@9.12.3 in the project…
…
Progress: resolved 1444, reused 1441, downloaded 2, added 1444, done
…
Done in 14.4s

~/project$ rm package-lock.json


~/project$ pnpm install # just to show everything's good


Lockfile is up to date, resolution step is skipped
Already up to date
Done in 1.3s
Initial test run
I pushed my code to GitHub, and this triggered a test run in Heroku CI.

The test run failed, but I wasn’t worried. I knew there would be some Playwright configuration to do.
Digging around in the test log, I found this:
~/project$ pnpm remove \
           babel-jest jest jest-puppeteer @testing-library/jest-dom

~/project$ $ pnpm create playwright
Getting started with writing end-to-end tests with Playwright:
Initializing project in '.'
✔ Do you want to use TypeScript or JavaScript? · JavaScript
✔ Where to put your end-to-end tests? · tests
✔ Add a GitHub Actions workflow? (y/N) · false
✔ Install Playwright browsers (can be done manually via 'pnpm exec playwright install')? (Y/n) · false
✔ Install Playwright operating system dependencies (requires sudo / root - can be done manually via 'sudo pnpm exec playwright install-deps')? (y/N) · false

Installing Playwright Test (pnpm add --save-dev @playwright/test)…
…
Installing Types (pnpm add --save-dev @types/node)…
…
Done in 2.7s
Writing playwright.config.js.
Writing tests/example.spec.js.
Writing tests-examples/demo-todo-app.spec.js.
Writing package.json.
Playwright was looking for the Chrome browser instance. I could install it with the playwright install chromium command as part of my CI test setup. But that would defeat the whole purpose of having the Chrome for Testing buildpack. Chrome was already installed; I just needed to point to it properly.
Looking back in my test setup log for Heroku, I found these lines:
  /* Configure projects for major browsers */
  projects: [
    {
      name: 'chromium',
      use: { ...devices['Desktop Chrome'] },
    },

//    {
//      name: 'firefox',
//      use: { ...devices['Desktop Firefox'] },
//    },
//
//    {
//      name: 'webkit',
//      use: { ...devices['Desktop Safari'] },
//    },


  ],
…
So, the browser I wanted to use was at /app/.chrome-for-testing/chrome-linux64/chrome. I would just need Playwright to look there for it.
Helping Playwright find the installed Chrome browser
Note: If you’re not interested in the nitty-gritty details here, you can skip this section and simply copy the full app.json lower down. This should give you what you need to get up and running with Playwright on Heroku CI.
In Playwright’s documentation, I found that you can set an environment variable that tells Playwright if you used a custom location for all of its browser installs. That env variable is PLAYWRIGHT_BROWSERS_PATH. I decided to start there.
In app.json, I set an env variable like this:
const ROOT_URL = 'http://localhost:8080';
const { test, expect } = require('@playwright/test');

const inputSelector = 'input[name="name"]';
const submitButtonSelector = 'button[type="submit"]';
const greetingSelector = 'h5#greeting';
const name = 'John Doe';

test.beforeEach(async ({ page }) => {
  await page.goto(ROOT_URL);
});

test.describe('Playwright link', () => {
  test('should navigate to Playwright documentation page', async ({ page }) => {
    await page.click('a[href="https://playwright.dev/"]');
    await expect(page.title()).resolves.toMatch('| Playwright');
  });
});

test.describe('Text input', () => {
  test('should display the entered text in the text input', async ({ page }) => {
    await page.fill(inputSelector, name);

    // Verify the input value
    const inputValue = await page.inputValue(inputSelector);
    expect(inputValue).toBe(name);
  });
});

test.describe('Form submission', () => {
  test('should display the "Hello, X" message after form submission', async ({ page }) => {
    const expectedGreeting = `Hello, ${name}.`;
    await page.fill(inputSelector, name);
    await page.click(submitButtonSelector);

    await page.waitForSelector(greetingSelector);
    const greetingText = await page.textContent(greetingSelector);
    expect(greetingText).toBe(expectedGreeting);
  });
});
I pushed my code to GitHub to see what would happen with my tests in CI.
As expected, it failed again. However, the log error showed this:
~/project$ corepack enable pnpm


~/project$ corepack use pnpm@latest

Installing pnpm@9.12.3 in the project…
…
Progress: resolved 1444, reused 1441, downloaded 2, added 1444, done
…
Done in 14.4s

~/project$ rm package-lock.json


~/project$ pnpm install # just to show everything's good


Lockfile is up to date, resolution step is skipped
Already up to date
Done in 1.3s
That got me pretty close. I decided that I would do this:
- Create the folders needed for where Playwright expects the Chrome browser to be. That would be a command like:
~/project$ pnpm remove \
           babel-jest jest jest-puppeteer @testing-library/jest-dom

~/project$ $ pnpm create playwright
Getting started with writing end-to-end tests with Playwright:
Initializing project in '.'
✔ Do you want to use TypeScript or JavaScript? · JavaScript
✔ Where to put your end-to-end tests? · tests
✔ Add a GitHub Actions workflow? (y/N) · false
✔ Install Playwright browsers (can be done manually via 'pnpm exec playwright install')? (Y/n) · false
✔ Install Playwright operating system dependencies (requires sudo / root - can be done manually via 'sudo pnpm exec playwright install-deps')? (y/N) · false

Installing Playwright Test (pnpm add --save-dev @playwright/test)…
…
Installing Types (pnpm add --save-dev @types/node)…
…
Done in 2.7s
Writing playwright.config.js.
Writing tests/example.spec.js.
Writing tests-examples/demo-todo-app.spec.js.
Writing package.json.
- Create a symlink in this folder to point to the Chrome binary installed by the Heroku buildpack. That would look something like this:
  /* Configure projects for major browsers */
  projects: [
    {
      name: 'chromium',
      use: { ...devices['Desktop Chrome'] },
    },

//    {
//      name: 'firefox',
//      use: { ...devices['Desktop Firefox'] },
//    },
//
//    {
//      name: 'webkit',
//      use: { ...devices['Desktop Safari'] },
//    },


  ],
…
However, I was concerned about whether this would be future-proof. Eventually, Playwright would use a new version of Chromium, and it won’t look in a chromium-1140 folder anymore. How could I figure out where Playwright would look?
That’s when I discovered you can do a browser installation dry run.
const ROOT_URL = 'http://localhost:8080';
const { test, expect } = require('@playwright/test');

const inputSelector = 'input[name="name"]';
const submitButtonSelector = 'button[type="submit"]';
const greetingSelector = 'h5#greeting';
const name = 'John Doe';

test.beforeEach(async ({ page }) => {
  await page.goto(ROOT_URL);
});

test.describe('Playwright link', () => {
  test('should navigate to Playwright documentation page', async ({ page }) => {
    await page.click('a[href="https://playwright.dev/"]');
    await expect(page.title()).resolves.toMatch('| Playwright');
  });
});

test.describe('Text input', () => {
  test('should display the entered text in the text input', async ({ page }) => {
    await page.fill(inputSelector, name);

    // Verify the input value
    const inputValue = await page.inputValue(inputSelector);
    expect(inputValue).toBe(name);
  });
});

test.describe('Form submission', () => {
  test('should display the "Hello, X" message after form submission', async ({ page }) => {
    const expectedGreeting = `Hello, ${name}.`;
    await page.fill(inputSelector, name);
    await page.click(submitButtonSelector);

    await page.waitForSelector(greetingSelector);
    const greetingText = await page.textContent(greetingSelector);
    expect(greetingText).toBe(expectedGreeting);
  });
});
That “Install location” line was crucial. And, if we set PLAYWRIGHT_BROWSERS_PATH, here is what we would see:
~/project$ pnpm remove start-server-and-test
That’s what I want. With a little awk magic, I did this:
  /* Run your local dev server before starting the tests */
  webServer: {
     command: 'pnpm start',
     url: 'http://127.0.0.1:8080',
     reuseExistingServer: !process.env.CI,
  },
With all that figured out, I simply needed to add a test-setup script to app.json. Because PLAYWRIGHT_BROWSERS_PATH is already set in env, my script would be a little simpler. This was my final app.json file:
  "scripts": {
    …
    "test": "playwright test --project=chromium --reporter list"
  },
I’ll briefly walk through what test-setup does:
Accounting for PLAYWRIGHT_BROWSERS_PATH, uses playwright install -- dry-run with awk to determine the root folder where Playwright will look for the Chrome browser. Sets this as the value for the CHROMIUM_PATH variable.
Creates a new folder (and any necessary parent folders) to CHROMIUM_PATH/chrome-linux, which is the actual folder where Playwright will look for the chrome binary.
Creates a symlink in that folder, for chrome to point to the Heroku buildpack installation of Chrome (/app/.chrome-for-testing/chrome-linux64/chrome).
Run tests again
With my updated app.json file, Playwright should be able to use the Chrome installation from the buildpack. It was time to run the tests once again.

Success!
The test-setup script ran as expected.

Playwright was able to access the chrome binary and run the tests, which passed.

Conclusion
End-to-end testing for my web applications is becoming less cumbersome, so I’m prioritizing it more and more. In recent days, that has meant using Playwright more too. It’s flexible and fast. And now that I’ve done the work (for me and for you!) to get it up and running with the Chrome for Testing buildpack in Heroku CI, I can start building up my browser automation test suites once again.
The code for this walkthrough is available in my GitHub repository.
Happy coding!
The above is the detailed content of Playwright and Chrome Browser Testing in Heroku. For more information, please follow other related articles on the PHP Chinese website!

 Python vs. JavaScript: A Comparative Analysis for DevelopersMay 09, 2025 am 12:22 AM
The main difference between Python and JavaScript is the type system and application scenarios. 1. Python uses dynamic types, suitable for scientific computing and data analysis. 2. JavaScript adopts weak types and is widely used in front-end and full-stack development. The two have their own advantages in asynchronous programming and performance optimization, and should be decided according to project requirements when choosing.
 Python vs. JavaScript: Choosing the Right Tool for the JobMay 08, 2025 am 12:10 AM
Whether to choose Python or JavaScript depends on the project type: 1) Choose Python for data science and automation tasks; 2) Choose JavaScript for front-end and full-stack development. Python is favored for its powerful library in data processing and automation, while JavaScript is indispensable for its advantages in web interaction and full-stack development.
 Python and JavaScript: Understanding the Strengths of EachMay 06, 2025 am 12:15 AM
Python and JavaScript each have their own advantages, and the choice depends on project needs and personal preferences. 1. Python is easy to learn, with concise syntax, suitable for data science and back-end development, but has a slow execution speed. 2. JavaScript is everywhere in front-end development and has strong asynchronous programming capabilities. Node.js makes it suitable for full-stack development, but the syntax may be complex and error-prone.
 JavaScript's Core: Is It Built on C or C ?May 05, 2025 am 12:07 AM
JavaScriptisnotbuiltonCorC ;it'saninterpretedlanguagethatrunsonenginesoftenwritteninC .1)JavaScriptwasdesignedasalightweight,interpretedlanguageforwebbrowsers.2)EnginesevolvedfromsimpleinterpreterstoJITcompilers,typicallyinC ,improvingperformance.
 JavaScript Applications: From Front-End to Back-EndMay 04, 2025 am 12:12 AM
JavaScript can be used for front-end and back-end development. The front-end enhances the user experience through DOM operations, and the back-end handles server tasks through Node.js. 1. Front-end example: Change the content of the web page text. 2. Backend example: Create a Node.js server.
 Python vs. JavaScript: Which Language Should You Learn?May 03, 2025 am 12:10 AM
Choosing Python or JavaScript should be based on career development, learning curve and ecosystem: 1) Career development: Python is suitable for data science and back-end development, while JavaScript is suitable for front-end and full-stack development. 2) Learning curve: Python syntax is concise and suitable for beginners; JavaScript syntax is flexible. 3) Ecosystem: Python has rich scientific computing libraries, and JavaScript has a powerful front-end framework.
 JavaScript Frameworks: Powering Modern Web DevelopmentMay 02, 2025 am 12:04 AM
The power of the JavaScript framework lies in simplifying development, improving user experience and application performance. When choosing a framework, consider: 1. Project size and complexity, 2. Team experience, 3. Ecosystem and community support.
 The Relationship Between JavaScript, C , and BrowsersMay 01, 2025 am 12:06 AM
Introduction I know you may find it strange, what exactly does JavaScript, C and browser have to do? They seem to be unrelated, but in fact, they play a very important role in modern web development. Today we will discuss the close connection between these three. Through this article, you will learn how JavaScript runs in the browser, the role of C in the browser engine, and how they work together to drive rendering and interaction of web pages. We all know the relationship between JavaScript and browser. JavaScript is the core language of front-end development. It runs directly in the browser, making web pages vivid and interesting. Have you ever wondered why JavaScr


Hot AI Tools

Undresser.AI Undress
AI-powered app for creating realistic nude photos

AI Clothes Remover
Online AI tool for removing clothes from photos.

Undress AI Tool
Undress images for free

Clothoff.io
AI clothes remover

Video Face Swap
Swap faces in any video effortlessly with our completely free AI face swap tool!

Hot Article
Hot Tools

Dreamweaver Mac version
Visual web development tools

SAP NetWeaver Server Adapter for Eclipse
Integrate Eclipse with SAP NetWeaver application server.

SublimeText3 Chinese version
Chinese version, very easy to use

MantisBT
Mantis is an easy-to-deploy web-based defect tracking tool designed to aid in product defect tracking. It requires PHP, MySQL and a web server. Check out our demo and hosting services.

DVWA
Damn Vulnerable Web App (DVWA) is a PHP/MySQL web application that is very vulnerable. Its main goals are to be an aid for security professionals to test their skills and tools in a legal environment, to help web developers better understand the process of securing web applications, and to help teachers/students teach/learn in a classroom environment Web application security. The goal of DVWA is to practice some of the most common web vulnerabilities through a simple and straightforward interface, with varying degrees of difficulty. Please note that this software

