Dungeons make up some of the most challenging content in Dragon Quest 3 Remake, though with a little bit of grinding and some well-chosen companions, any dungeon can be completed effectively. Gaia's navel throws a spanner in the works in that carefully constructed formula.

In Gaia's Navel, only a single character can challenge the dungeon, throwing out any of your well-tuned teams in favour of just a single combatant. That can prove quite the challenge, but the reward is well worth the extra effort.
How To Access Gaia's Navel

Gaia's navel is located all the way down in Lanson, which itself is an isolated island to the south of Baharata, and directly west of Aliahan. It goes without saying that you need your own ship to reach here, but you'll need quite a bit more before you can access Gaia's Navel.
To access this dungeon, you will need the Ultimate Key. This, in turn, is gotten from the Sunken Shrine, which needs the Bottomless Pot to unveil. This is then found in Edina, though you need to be invisible to enter. Thankfully, Fading Jenny, which turns you invisible, can be bought in Lanson.
You can also use the Fade spell to enter Edina if you have a companion with the spell.
Once that rather lengthy series of events is complete and you have the Ultimate Key, use it to enter the shrine at the north end of Lanson. Inside, you will be quizzed by an man on how confident you are in your own strength. Yes will immediately bring you into Gaia's Navel by yourself.
However, you don't have to send your Hero. Instead, the character who challenges Gaia's Navel is whoever is first in your party's line-up. That means you can send anyone you want to challenge the dungeon. As such, send whoever you feel most comfortable would be able to survive by themselves.
Navigating Gaia's Navel

Thankfully, Gaia's Navel is relatively straightforward. There's not much in terms of exploration here, with the path mainly leading you exactly where you need to go, nor is the dungeon exceptionally long either. That means that the random encounters are the hardest challenge here.
In the very first area, there will be entrances to the left and right that lead to new areas. However, this actually just puts you on a looping path, so take the path in the south instead to floor B2.
This will put you in a room with four staircases. The bottom right will bring you back to floor B1, in a new C-shaped room. The top left stairs will also bring you back to floor B1, this time to a straight path. The downward stairs in the top right are the only ones that will bring you to floor B3. Take these ones down.
When you get to the final area of Gaia's Navel, the path splits in two. The south path is entirely a red herring with no optional items, bringing you to an empty floor B4.so take the path north instead. You will continually be stopped by the stone faces on the walls telling you to turn back. This might seem threatening, but ignore them. They're just trying to scare you.
Once you Weave all the way around, you'll approach the pedestal with the Blue orb. Ah, but of course it isn't that simple. The Chiromancer will now appear, and challenge you to a battle to the death for possession of the coveted orb. Defeat him to claim it for yourself.
Once you've picked up the Blue Orb and are satisfied with your exploration, simply use the Evac spell to quickly leave the dungeon rather than trudging through the whole dungeon again.
Every Optional Item In Gaia's Navel

While Gaia's Navel is quite linear, it does have a small number of optional areas, and they are filled with some very powerful and useful items if you can manage to find them. Here's where to find each of them.
|
Item |
Floor |
Directions |
|---|---|---|
| Knight (Monster) | B1 | In the looping hallway accessed in the first area. |
| Seed Of Life | B1 | In a chest in the upper right room. |
| Prayer Ring | B1 | In a chest in the upper left room. |
| Seed of Wisdom | B1 | In a chest in the lower right room. |
| Banishing Bell | B2 | On the ground by a collapsed pillar in the lower right of the room. |
| Earthenwear | B1 | In a chest at the end of the corridor of the C-shaped room. |
| 3,640 Gold Coins | B1 | In a chest at the end of the corridor of the straight room. |
| Mini Medal | B3 | In the left chest beside the Blue Orb. |
| Spirit Bracer | B3 | In the right chest beside the Blue Orb. |
| Blue Orb | B3 | On the pedestal, Acquired after beating the Chiromancer. |
The Knight monster will run away at the sight of anyone but a Monster Wrangler. That means you have to return later with a Monster Wrangler to recruit them if you didn't bring one the first time through.
Plenty of these items, like the Earthenwear and Spirit Bracer, can carry you very well through the next few hours of the game until you finally come to Baramos' Lair, so make sure you don't miss them.
Defeating The Chiromancer
When you approach the Blue Orb, the Chiromancer will appear to take it himself
. Obviously that's just not on, so show him just how confident you are in your own strength.The Chiromancer will not battle you by himself though, and will have a Mad Vlad alongside him
for support. Thankfully, he's not all that strong so he shouldn't prove too much of an issue.If you have a more powerful boomerang with you like the Gusterang
, you can potentially have the Mad Vlad defeated before they have the chance to do anything meaningful. They're most impactful attack is Sap, which reduces your defence. As such, take them down before the Chiromancer.The Chiromancer isn't the most proactive opponent, only using one move each turn. This is a great benefit to you, though they do have one advantage over you - every attack they perform restores a portion of their own health.
Their most common attacks are Frizzle and Swoosh
, a Fire and Wind elemental attack respectively. Equip accessories to reduce the damage you take from these if you have them, though if your defense is already high enough, you may be able to just tank the hits.As the battle draws on, the Chiromancer will begin to cast Oomph
on themselves to boost their attack power. magic attack in this stage can seriously damage your character. If you're using the Hero, you should have the Meditation ability, which fully restores your health. This is incredibly useful when battling solo.

The Chiromancer has plenty enough resistances, though is quite weak to Lightning. The Hero is the only character that natively gets Lightning attacks, so push the attack with both Zapple and Lightning Slash, whichever deals more damage for you.
Each time they launch an all-out attack, their defence also decreases. So press the assault as much as possible to take advantage of their lowered resistances.
With the Chiromancer defeated, the Blue Orb is yours to claim, and you have fully completed the Gaia's Navel dungeon. Congratulations, and good luck on the rest of your journey.

The above is the detailed content of Dragon Quest 3 Remake: Gaia\'s Navel Walkthrough. For more information, please follow other related articles on the PHP Chinese website!
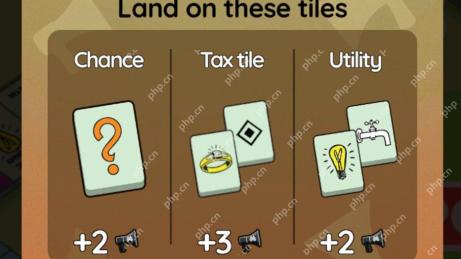 Monopoly Go Riches On Set rewardsApr 29, 2025 pm 08:02 PM
Lights, camera, action… and rewards! Monopoly Go's "Riches On Set" event, running alongside the Tycoon Awards tournament, brings a Hollywood theme to your game this week. Earn points (represented by a director's megaphone icon) by landing
 Roblox: Anime Last Stand - How To Get Spirit ShardsApr 29, 2025 pm 06:06 PM
In Roblox Anime Last Stand, character evolution is crucial for late-game success, but requires Spirit Shards at every stage. While plentiful early on, these shards become scarce as you aim for higher-rarity units. Early Game Spirit Shard Strategies
 Roblox: Anime Last Stand - How To Get PearlsApr 29, 2025 pm 06:05 PM
Anime Last Stand: Mastering the Art of Rerolling with Pearls In Anime Last Stand, like many Roblox games, character power significantly relies on RNG-based rerolling of stats, techniques, and enchantments. While stat and technique rerolls are relati
 Wordle Answer And Hints - April 30 2025 Solution #1,411Apr 29, 2025 pm 06:04 PM
Today's Wordle might present a bit of a challenge... while we solved it relatively quickly, finding the correct word still took all six attempts. Hopefully, you'll have better luck! To avoid spoilers, all letters and the full solution remain hidden
 Oblivion Remastered: Information At A Price Quest WalkthroughApr 29, 2025 pm 04:05 PM
Uncover the Secrets of Skingrad: A Guide to Oblivion's "Information at a Price" Quest The Arcane University's unusual connections in The Elder Scrolls IV: Oblivion Remastered have created a volatile power dynamic within the Empire, particul
 Oblivion Remastered: Blood Of The Daedra Quest WalkthroughApr 29, 2025 pm 04:04 PM
There are a variety of interesting quests in The Elder Scrolls IV: Annihilation Remake, including the main quests that can be completed in a variety of ways. "Dadra Blood" is such a task that requires you to find a Deadra artifact and hand it over to Martin Septim for use in the ceremony. But if you give him a Deedra artifact, you will lose it forever. Given that Deedra artifacts are powerful tools that are crucial later in the game, it is very important to make a decision wisely. How to start the "Dadra Blood" mission After completing the "Spy" mission, you can start the "Dadra's Blood" mission. You have to head to the Temple of Cloud Ruler to talk to Martin Septim and ask him how he is going about deciphering the Mysterious Zacks you recovered from the Mysterious Dawn Base. Martin will tell you
 Roblox: Anime Last Stand - How To Get EssenceApr 29, 2025 pm 04:03 PM
Roblox Anime Last Stand: Mastering Essence Farming In Roblox Anime Last Stand, managing resources is crucial, especially the various essences needed for character evolution. This guide details how to effectively farm essence throughout the game. Fi
 Roblox: Blox Fruits - Where To Find UzothApr 29, 2025 pm 04:02 PM
In Roblox: Blox Fruits, mastering the Dragon Talon fighting style, or upgrading its moves, requires finding Uzoth, the sole instructor for this fighting style. His location changed after Update 24, so here's how to find him. Uzoth is no longer at t


Hot AI Tools

Undresser.AI Undress
AI-powered app for creating realistic nude photos

AI Clothes Remover
Online AI tool for removing clothes from photos.

Undress AI Tool
Undress images for free

Clothoff.io
AI clothes remover

Video Face Swap
Swap faces in any video effortlessly with our completely free AI face swap tool!

Hot Article

Hot Tools

WebStorm Mac version
Useful JavaScript development tools

mPDF
mPDF is a PHP library that can generate PDF files from UTF-8 encoded HTML. The original author, Ian Back, wrote mPDF to output PDF files "on the fly" from his website and handle different languages. It is slower than original scripts like HTML2FPDF and produces larger files when using Unicode fonts, but supports CSS styles etc. and has a lot of enhancements. Supports almost all languages, including RTL (Arabic and Hebrew) and CJK (Chinese, Japanese and Korean). Supports nested block-level elements (such as P, DIV),

SublimeText3 English version
Recommended: Win version, supports code prompts!

SecLists
SecLists is the ultimate security tester's companion. It is a collection of various types of lists that are frequently used during security assessments, all in one place. SecLists helps make security testing more efficient and productive by conveniently providing all the lists a security tester might need. List types include usernames, passwords, URLs, fuzzing payloads, sensitive data patterns, web shells, and more. The tester can simply pull this repository onto a new test machine and he will have access to every type of list he needs.

Notepad++7.3.1
Easy-to-use and free code editor


