 Mobile Game Tutorial
 Mobile Game Guide
 Dragon Quest 3 Remake: Most Important Attributes For Each Vocation
Every time a character levels up in Dragon Quest 3 Remake, their attributes increase by a bit. But, this isn't a flat upgrade overall, and it isn't going to be exactly the same for every character, or even characters that are the same vocation. Especially once they've leveled a bit, and you've got some seeds.

Every vocation has a different focus, and they accomplish their strengths in different ways. The higher certain attributes are, the easier time each vocation is going to have at doing their job. But because of their different focuses, they're going to be interested in upgrading different attributes.
Every Attribute And Their Effects

There are ten different attributes in DQ3; we'll include them all in this section, but there are certain attributes that you cannot upgrade individually. Some attributes can only be increased when leveling up, and the amount that they increase is based partially on how high other related attributes are.
|
Attribute |
Description |
|---|---|
|
HP |
HP is exactly what it sounds like. If you have HP, you're alive. If you don't have HP, you're dead. HP is restored by resting at an Inn, with certain items, by certain spells, and when leveling up. |
|
MP |
MP is the resource you use when you cast spells, or use abilities. Certain vocations are going to use a heavier amount of MP than others, but all of them are going to use some amount of it. MP is restored by resting at an Inn, with certain items, by certain spells, and when leveling up. |
|
Attack |
Attack increases the amount of damage your physical attacks do. It does not increase the damage that spells do. Damage is based on more than just attack; it also takes into account equipment, strength, and enemy defense. |
|
Defense |
The higher your defense, the less damage you'll take from physical attacks. It does not decrease damage taken from spells |
|
Strength |
Strength increases the damage a character does with physical attacks. It combines with attack and your equipment when taking into account your physical attack damage. |
|
Resilience |
Resilience works alongside defense and your equipment to decrease the damage you take from physical attacks. |
|
Agility |
The higher a character's agility, the sooner they'll take their turn in the turn order. |
|
Stamina |
The more stamina a character has, the more their HP is going to increase when they level. Building a character with high stamina isn't have an effect right away, but the effect will compound the more they level up. |
|
Wisdom |
Wisdom determines how much damage a spell deals. Alongside that, wisdom also functions similarly to stamina, but for MP instead of HP. The higher your wisdom, the more your MP is going to increase when you level up. |
|
Luck |
Luck is the most multi-faceted attribute. Luck comes into play both offensively and defensively: it determines your chances of gaining a critical hit, and it determines how likely you are to avoid getting hit with a negative status effect. |
Increasing Attributes With Seeds
There are six different kinds of seeds in DQ3 Remake, and there are two different ways to obtain them.
- You'll gain five seeds when creating a character and can choose whatever seeds you'd like.
- You'll find seeds randomly throughout the world, in chests, pots, bags, and as rewards.
Types Of Seeds
There are six different kinds of seeds available, each one increasing one attribute by a random, small amount.
|
Effect | ||||||||||||
|---|---|---|---|---|---|---|---|---|---|---|---|---|---|
| Seed of Strength | Increases the character's strength by a small amount. | ||||||||||||
| Seed of Resilience | Increases a character's resilience by a small amount. | ||||||||||||
| Seed of Stamina | Increases the character's stamina by a small amount. | ||||||||||||
| Seed of Wisdom | Increases the character's wisdom by a small amount. | ||||||||||||
| Seed of Luck | Increases the character's luck by a small amount. |
The Best Attributes For A Warrior

The Warrior is the only vocation in the game capable of fulfilling a sort of tank role within the party. Because of that, you're going to need to give them quite a bit of survivability.
The Warrior is also capable of dealing quite a bit of single-target damage as well, making them capable of dealing a meaningful amount of damage for your lineup, especially in the early to mid game.
|
Attribute |
Role |
Explanation |
|---|---|---|
|
Resilience |
Tank | Resilience is needed to survive the big hits; it might not make a difference on the lighter attacks, but when your Warrior gets hit hard, Resilience is going to come in exponentially more beneficial. |
|
Stamina |
Tank | Stamina will make a big difference in how much HP your Warrior is working with, and stacking stamina quickly will reap rewards sooner, because it will mean you've gotten big upgrades on your HP much sooner. |
|
Luck |
Tank/Damage | Luck is the attribute that's good to upgrade either way. For a tank, you don't want to be unable to control your character or have them unable to act at all. If that's the case, they can't defend their team. On the damage-dealing side of things, the higher the Warrior's luck, the more often they'll deal critical damage. |
|
Strength |
Damage | Strength is only going to come into play when you're dealing damage as a Warrior. But, considering how high the single-target damage possibilities are for a Warrior, strength can end up playing a big factor. |
The Best Attributes For A Priest

Priests are almost entirely support-style characters, and because of this, they have a very focused upgrade path when it comes to attributes. They need to be able to use an extraordinary amount of MP, and they can't afford to be put to sleep, stunned, or otherwise incapacitated.
|
Role | Explanation | |||||||||
|---|---|---|---|---|---|---|---|---|---|---|---|
| Wisdom | Support | Wisdom will be important not for the extra spell damage but for the extra MP that it will net you over time. That extra MP is going to equal more healing and reviving allies, and more debuff spells you can cast. | |||||||||
| Luck | Support | Luck will be a factor against enemies with negative status effects they can apply to your characters. For example, if a Priest is paralyzed for a couple of turns, it could put your entire party in a hole they can't dig out of. |
The Best Attributes For A Mage

Mages can do many different things, but they do everything in the same way: casting spells. This means that, like the Priest, they can have a very singular attribute focus, one that's possibly more straightforward than the Priest.
|
Role | Explanation | |||||||||
|---|---|---|---|---|---|---|---|---|---|---|---|
| Wisdom | Damage | Mage's are one of the most spell-focused class in the game; on turns when support isn't needed, a Priest could simply defend and not use MP. But a Mage is relied on to deal damage, and they almost entirely do that with spells. | |||||||||
| Agility | Damage | Agility is going to be a secondary priority for basically any vocation that focuses on it. But, for damage-dealing characters, if they can defeat the enemy before the enemy can act, then support characters won't need to act as often. |
The Best Attributes For A Martial Artist

Martial Artists are possibly the best single-target damage characters in the game. They have some of the best critical damage potential and can change the course of a battle with one good hit.
|
Role | Explanation | ||||||||||||
|---|---|---|---|---|---|---|---|---|---|---|---|---|---|---|
| Strength | Damage | Strength is going to improve the baseline damage of your attacks. This is going to help not just your normal attacks but your crit damage, too, because critical damage takes into account your base damage. | ||||||||||||
| Luck | Damage | Luck is going to increase the chance of you getting a critical hit, and should be your focus with the Martial Artist, alongside strength. | ||||||||||||
| Agility | Damage | Secondary to the other two attributes, Agility is going to help your Martial Artist attack before the enemy does, ideally defeating one of them before they get the chance. |
The Best Attributes For A Sage

The Sage is basically a combination Mage and Priest, and so their focus is usually going to be a little bit split. Because of this, you have some choices with their attributes, depending on whether you want to lean either direction, or play it closer to the middle.
|
Role | Explanation | ||||||||||||
|---|---|---|---|---|---|---|---|---|---|---|---|---|---|---|
| Wisdom | Support/Damage | Wisdom is paramount regardless of what you're looking to do with your Sage, because either way, they're going to be casting spells. | ||||||||||||
| Luck | Support | Luck is going to be much more beneficial when using the Sage as a support character, but that's not to say there isn't any value in it otherwise. | ||||||||||||
| Agility | Damage | Agility is a bit of a coin toss, really. We've discussed why it's good for a damaging character. Support-wise, on some turns, it would be better to make your move after the enemy deals damage so that your heal is used to its fullest, but sometimes, you need to heal a character before they get hit again. It can't hurt to have some extra agility, though it should be prioritized behind Wisdom and Luck. |
The Best Attributes For A Gadabout

The Gadabout's only real purpose is to hang around until they're level 20, when they can freely transition into a Sage. Until then, you're hoping that, in the best case, they make a positive difference, and in the worst case, they don't get in the way.
This makes them a little unique in the attribute department. On one hand, when they transition into a Sage, their stats are halved. This means that ratio-wise, you can still stack things favorably for the future.
But, getting to 20 with a Gadabout can come with ups and downs. And, if you stack them more in favor of passive bonuses and not aggressive ones, their negative impact can be lessened.
|
Attribute |
Role |
Explanation |
|---|---|---|
|
Luck |
Don't Get In The Way | Gadabout's have high luck by default, so leaning into that accentuates one of their strengths. That luck stat won't come in crucial if you turn them into a Sage, but it will help them avoid negative status effects. |
|
Wisdom |
Sage, Eventually | Getting a head start on a good amount of Wisdom cannot hurt as a Gadabout. Though your stats get halved when you transition into a Sage, it will still give you better footing to start with. |
|
Resilience |
Don't Get Killed | Considering a Gadabout oftentimes does whatever they'd like, they can end up getting themselves in a spot of trouble. If they've got high resilience, they will, at the very least, take less damage. |
|
Stamina |
Don't Get Killed | For the same reason as resilience, higher stamina means higher HP, which means dying less often. |
The Best Attributes For A Merchant

Merchants are not exceedingly valuable, combat-wise. They don't do anything particularly well, but they do have value because they provide you with quite a bit of extra gold at the end of battles.
This means they'll primarily be used when you're grinding, but if you build them well, they don't have to be a detriment.
|
Role | Explanation | |||||||||
|---|---|---|---|---|---|---|---|---|---|---|---|
| Strength | Damage | Because Merchants don't have particularly high attributes to begin with, you're going to need to start with a foundation to make them useful in combat. Increasing their strength is going to increase their damage and make them a bit more potent on every turn. | |||||||||
| Luck | Damage | The purpose of increasing a Merchant's luck is to increase how often they deal critical damage. If they can do so semi-regularly, it'll severely impact how valuable they are in a fight. |
The Best Attributes For A Thief

Thieves might not be the best around, but similar to a Merchant, they provide extra value outside of combat. Thieves have a chance to steal items from the enemy once the enemy is defeated, and over time, it's going to grant you quite a bounty of extras.
The strength of the Thief's attack comes from their ability to use weapons that hit multiple enemies at once, like the boomerang and the whip.
|
Role | Explanation | |||||||||
|---|---|---|---|---|---|---|---|---|---|---|---|
| Luck | Damage | Because a Thief is likely going to be hitting multiple enemies on the same attack, their critical chances are going to roll multiple times on one turn. This is going to exponentially increase how many critical attacks you manage, and higher luck is going to provide extra value. | |||||||||
| Strength | Damage | Strength will come in secondary to luck for the Thief, but extra strength is still going to increase your damage overall, and still has good value. |
The Best Attributes For The Hero

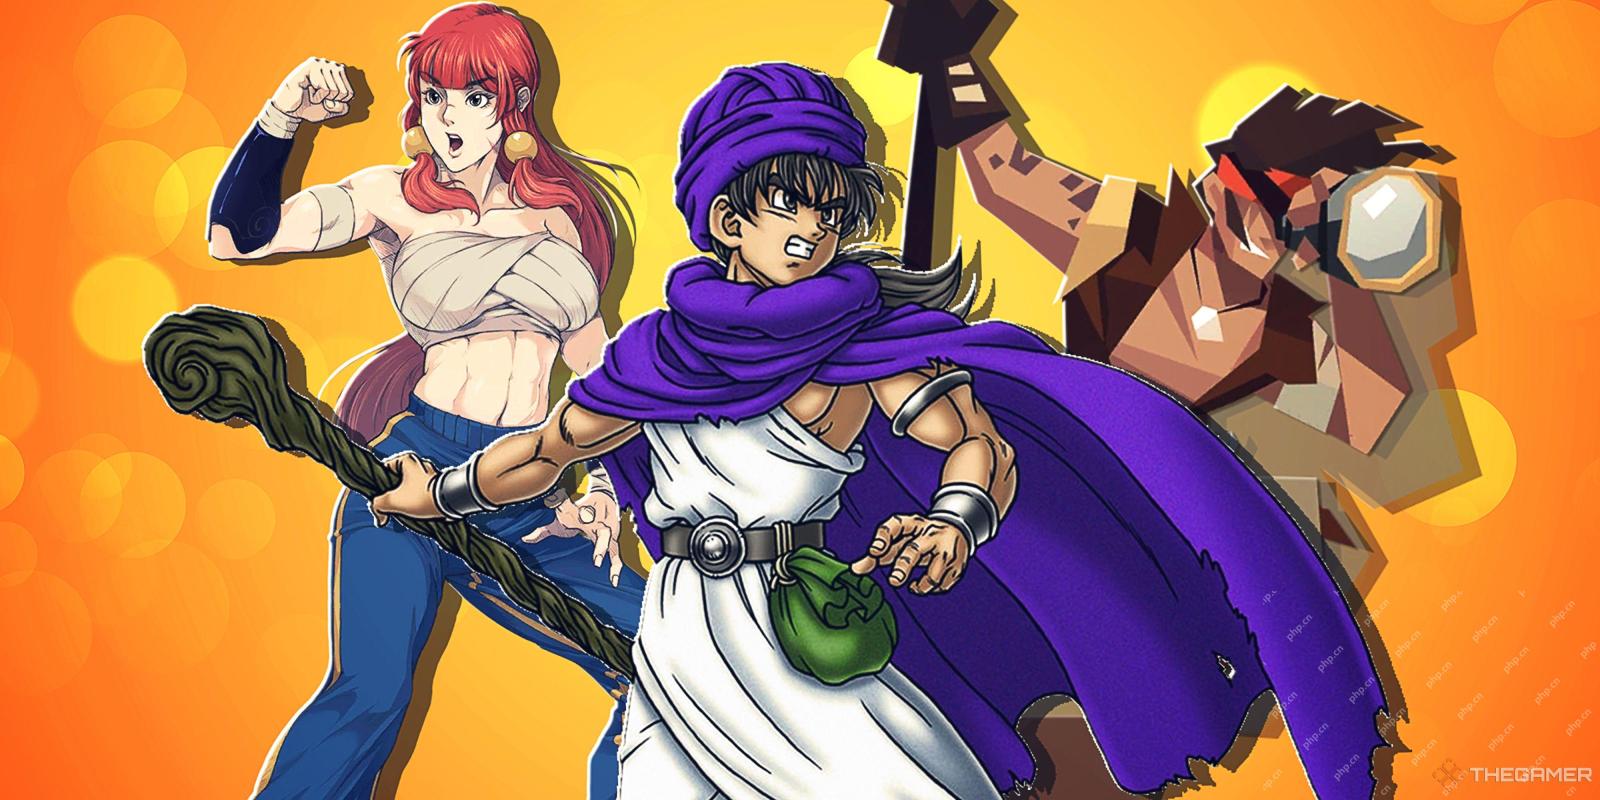
Last but the opposite of least, the Hero is the most versatile character in the game. They have access to multiple roles spells, and have a wide variety of abilities that no other character has access to.
This means the Hero has the most flexibility in the way that you build them, too, and much of that is going to come down to how the rest of your team is built.
|
Attribute |
Role |
Explanation |
|---|---|---|
|
Strength |
Damage | Starting with damage, strength is going to provide a lot of value for a Hero that isn't primarily focused on support. If the Hero has a strong weapon and generally attacks with that weapon as opposed to spells/abilities, strength is the route to go. |
|
Luck |
Damage/Support | Going hand-in-hand with strength, luck is going to be great for a Hero focused on physical damage, particularly if the Hero is using a boomerang. Luck is also going to be beneficial if the Hero has any support responsibilities, because they cannot fulfill them while they unable to act. |
|
Wisdom |
Damage/Support | Heroes focused on dealing ability or spell damage are going to want to stack wisdom as much as possible. It's going to enable you to use those abilities and spells much more often, and make them more potent. It's also going to increase how often the Hero is able to provide support. |
|
Stamina |
Any | Stamina is very useful in any regard, for the Hero. The Hero is generally going to be the most powerful character present, so ensuring they stay on their feet is going to improve your odds dramatically. |
|
Resilience |
Any | Exactly like Stamina, higher resilience is going to keep the Hero alive longer. And the longer the Hero is alive, the better your chances of everyone getting out alive. |

The above is the detailed content of Dragon Quest 3 Remake: Most Important Attributes For Each Vocation. For more information, please follow other related articles on the PHP Chinese website!
 NYT Mini Crossword Answers And Hints - May 9, 2025May 09, 2025 pm 12:02 PM
Stuck on today's NYT Mini Crossword? Need a fresh perspective on those tricky clues? Don't worry, we've got you covered! Sometimes a different angle is all you need to crack the code. Whether you're looking for subtle nudges or outright answers, w
 All Pokémon TCG Pocket Secret Missions listedMay 09, 2025 am 11:27 AM
Secret Missions in Pokémon TCG Pocket are exactly what they sound like - missions which you won't know exist when you first start Pokémon Pocket. In fact, the game will only let you know they exist when you collect all of t
 Pokémon Go May Field Research tasks and their rewards explainedMay 09, 2025 am 11:26 AM
Pokémon Go's field survey mission joined the game in 2018, giving players new missions. Complete these tasks to receive unique rewards, such as research breakthrough rewards, while special research tasks can help you discover unprecedented Pokémon, including the elusive Pokémon Dream. This article covers: Pokémon Go May field survey mission and research breakthrough rewards Detailed explanation of Pokémon Go field survey mission Detailed explanation of research breakthroughs What are special research tasks? Pokémon Go Research Mission Everything else you need to know Examples of task types include: Capture one or two specific Pokémons (e.g. 3 Little Radas or Dark Ravens) Capture specific genus
 Pokémon GO Mega Evolutions list and how to get Mega EnergyMay 09, 2025 am 11:18 AM
Pokémon Go Mega Evolution: Your Guide to Powerful Transformations Mega Evolutions in Pokémon Go temporarily boost your Pokémon to incredible power. First seen in Pokémon X and Y, they now require Mega Energy in Pokémon Go. A major update in April 20
 Best mods in Oblivion Remastered and how to install themMay 09, 2025 am 11:15 AM
Oblivion Remastered: Enhance Your Experience with the Best Mods Oblivion Remastered beautifully revitalizes the original game while retaining its charm. However, as with other Bethesda titles, the modding community is already hard at work, offering
 How to remove bounty in Oblivion RemasteredMay 09, 2025 am 11:05 AM
Oblivion Remastered: Various ways to clear bounty In the remake of "The Elder Scrolls IV: Annihilation", clearing the bounty can not only clear the charges, become a new person, but also get rid of the guards' pursuit and continue your criminal career. The choice is in your hands, depending on what role you want to play. Fortunately, the game offers several ways to clear bounty, some of which depend on the amount of your coins, and the other requires you to maintain good behavior for a while. Here are a few ways to clear the bounty in the Elder Scrolls IV: Annihilation remake: Pay a fine to the guard As long as the bounty is not more than 5,000 gold coins, you can pay the guards a fine. When the guard catches you, the "Pay fine" option appears on the left side of the screen. Need a note
 How to Enchant Arrows in Oblivion RemasteredMay 09, 2025 am 11:02 AM
Oblivion Remastered: Can You Enchant Arrows? A Comprehensive Guide You've mastered archery, you've got a potent enchanting altar at your disposal, but can you enchant arrows in Oblivion Remastered? Let's find out. Enchanting Arrows in Vanilla Obliv


Hot AI Tools

Undresser.AI Undress
AI-powered app for creating realistic nude photos

AI Clothes Remover
Online AI tool for removing clothes from photos.

Undress AI Tool
Undress images for free

Clothoff.io
AI clothes remover

Video Face Swap
Swap faces in any video effortlessly with our completely free AI face swap tool!

Hot Article

Hot Tools

Atom editor mac version download
The most popular open source editor

SAP NetWeaver Server Adapter for Eclipse
Integrate Eclipse with SAP NetWeaver application server.

PhpStorm Mac version
The latest (2018.2.1) professional PHP integrated development tool

SublimeText3 Chinese version
Chinese version, very easy to use

SublimeText3 Linux new version
SublimeText3 Linux latest version


