


Villages are very useful in Minecraft. The villagers who live here can have all sorts of professions, and you can take advantage of this in order to benefit your playthrough of the game. Building a village in Minecraft is a complex process that can take a lot of time and resources.

It takes quite a bit of effort and determination, especially if you run into trouble, like zombies, creepers, skeletons, and other types of enemies. Our guide will help you through every step of the way and walk you through the lengthy process of making your own village and getting villagers.
Updated November 14, 2024 by Jacqueline Zalace: Still want to make a village and get villagers in Minecraft? We've updated this guide with a bit more information to help you make a safe village filled with villagers that you can trade with. Additionally, we've included some information on a mod that can help with villager transportation.
How To Find A Village

There is no guaranteed way to find a village without using a command code or a website that maps out your seed. Instead, you will need to manually find the village in the following biomes.
- Plains
- Meadow
- Desert
- Savanna
- Snowy Plains
- Taiga
- Snowy Taiga (Bedrock only)
- Sunflower Plains (Bedrock only)
To find a village with a command code, begin typing the following into the command bar.
- /locate structure
From here, you will need to choose a village type, with the following options.
- minecraft:village_desert
- minecraft:village_plains
- minecraft:village_savanna
- minecraft:village_snowy
- minecraft:village_taiga
If you aren't sure which village to pick, try using one from a biome that you are either currently in or nearby. You can also cycle through all of them to see which is the closest.
How To Make Your Own Village

You are also able to make your own village; to make it natural though, you will first need to place down some houses.
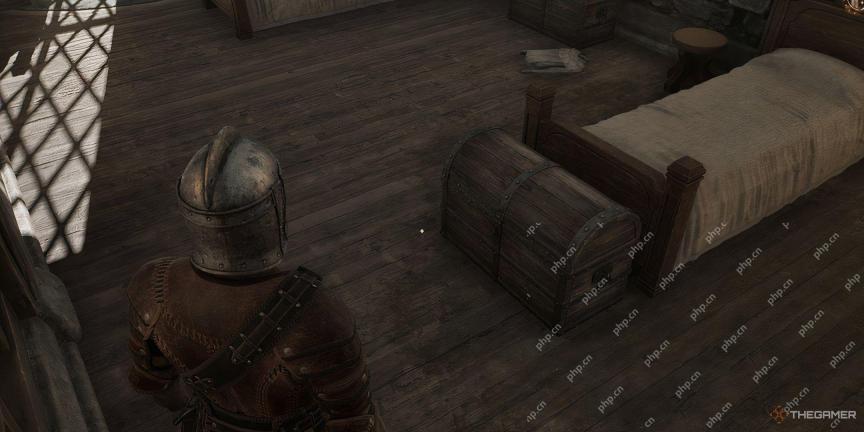
For the game to consider a building to be an actual house, at least one bed has to be placed inside. Of course, you can make bigger houses and place multiple beds inside. It depends on how many villagers you want in your village.
Since villagers will only breed if there are beds for themselves and for the babies, you need to craft and place extra beds in your village. To craft a bed, you just need the following materials.
- 3x Wool (matching colors)
- 3x Plank (any type)
How To Get Your First Villagers

The next step in this process is probably the most complicated one. The first villagers are the hardest to obtain because it all comes down to luck. This is because there are only two ways to get your villagers. You can either do it by curing zombie villagers that spawn near your base or kidnapping villagers that already live in a village.
Next, we are going to talk about both of these villager acquisition methods in detail.
How To Transport Villagers

This process requires the least amount of resources and luck. However, it can be dull and time-consuming. Plus, depending on how distant the nearest village is, you might have to fight off monsters as you take the villager to your base. You might even have to go through the Nether to reduce the distance between your starting location and your destination.
You will only need to transport two villagers, as they will breed more. If you want to speed up the process though, you can kidnap a few more.
Transportation By Water

If the village you are targeting is along the water, you can transport the villagers by boat.
You can force villagers into a boat by pushing them or driving the boat into the villager. The villager will not escape unless the boat is broken, so you can travel great distances this way.
Keep in mind that even though boats work on land, they're extremely slow and can only go on flat ground. Even a dirt block that has a path on it can be an obstacle for the simple boat.
Transportation By Land

If, on the other hand, you are trying to transport villagers on land, you can use minecarts instead. By pushing a villager into a minecart, they will be stuck similarly to how they are in boats. Now, you just need to lay down some rails and send the villager along the track.
This can be done with redstone and powered rails, but you can also use a minecart with furnace that has a bit of coal in it. When you put coal inside, the furnace will act as an engine, pushing the villager minecart along the track.
Transportation By Nether Shortcut

Both of the above methods can be combined with a Nether shortcut. To do this, all you need to do is build a Nether Portal and send your villager through it. If you are using a boat, be sure that the bottom of the portal lines up with the ground, since boats can't go up a block.
Once on the other side, you just need to continue your journey in the direction of your base. Remember, one block in the Nether is equal to Eight blocks in the Overworld.
Transportation With A Bell

The humble bell is a great block that can be used to make the players go home. By ringing it, the villagers will go running home to where their bed is. So, if you want to direct a villager to their home, the bell is ideal.
You can even follow behind the villager and close off their house once they arrive, ensuring that they stay put. This isn't too helpful if you don't have houses set up, but it's great for managing your villagers if they move around a bit too much.
You cannot craft a bell in Minecraft. Instead, you'll need to go find one in a village.
How To Cure A Zombie Villager

Although this method is technically faster, you do need to have a few specific items stored away beforehand. Additionally, zombie villagers will rarely spawn, so you need to be quite lucky for one to spawn so you can then cure it.
Prior to beginning the curing process, you will first need the following items.
- Splash Potion of Weakness
- Golden Apple
From here, use the splash potion and then feed them the Golden Apple while they are under the effects of the potion. After a short period of time, they will transform into a normal villager.
Be sure to do this process under a roof. When it becomes day, any zombie villager under the sun will burn and disappear.
Why Cure Zombie Villagers?
You know how to cure a zombie villager, but what are some reasons that you'd want to do it? Firstly, it's a good way to get a few more villagers. This isn't necessary if you have a least two though, as they can breed.
Curing zombie villagers is also a great way to get both a new achievement and discounted items from the villager's shop. These discounts will be permanent, so it's a great way to reduce the trading requirements.
How To Breed Villagers

Villagers will breed whenever they are willing to. Certain conditions must be met for this to happen.
Villagers must have 12 beetroots, 12 carrots, 12 potatoes, or three bread in their inventories to be willing to breed. Only one type of food requirement must be satisfied.
Throw the items at the villagers, and they will pick them up. Alternatively, make Farmers out of your villagers - these will grow, collect, and even share food with their neighbors. Eventually, they will breed and create a baby villager, as long as an accessible bed is nearby.
The more food a villager has, the more likely they are to breed.
To make a village, keep repeating this process with the villagers once they grow into adult villagers. Growth will happen much faster since you won't have to go out and collect more villagers.
Villager Professions

There are 15 types of villagers in Minecraft. Villagers can either be unemployed or nitwit villagers, and then there are 13 different professions. Nitwit villagers can't acquire professions, but unemployed villagers can if they have access to a workstation.
A villager will become employed by claiming a workstation block as their own. Only one villager can claim any individual workstation block. Workstation blocks can only be claimed if they are close enough, within the village's boundaries.
These are all the villager professions in the game, according to their workstation.
|
Profession |
Workstation Block |
Trades |
|---|---|---|
|
Armorer |
Blast Furnace | Armor |
|
Butcher |
Smoker | Cooked meat |
|
Cartographer |
Cartography Table | Maps and banners |
|
Cleric |
Brewing Stand | Redstone dust, lapis lazuli, glowstone, ender pearls, bottles o' enchanting |
|
Farmer |
Composter | Cooked meals |
|
Fisherman |
Barrel | Cooked fish, enchanted fishing rods |
|
Fletcher |
Fletching Table | Bows and arrows |
|
Leatherworker |
Cauldron | Leather armor, saddles |
|
Librarian |
Lectern | Books, bookshelves, compasses, name tags |
|
Stone Mason |
Stonecutter | Bricks and blocks |
|
Shepherd |
Loom | Items made from wool |
|
Toolsmith |
Smithing Table | Tools |
|
Weaponsmith |
Grindstone | Swords and axes |
The above is the detailed content of Minecraft: How To Make A Village And Populate It. For more information, please follow other related articles on the PHP Chinese website!

 Oblivion Remastered: Namira Quest WalkthroughApr 28, 2025 am 06:11 AM
In The Elder Scrolls IV: Oblivion Remastered, rings are often overlooked, frequently found as sellable loot. However, enchanted rings, especially, are worth keeping due to their negligible weight and the ability to wear two simultaneously. One such
 Oblivion Remastered: Difficulty Levels, ExplainedApr 28, 2025 am 06:10 AM
Oblivion Remastered Difficulty Guide: A Deep Dive into Damage Modifiers The Elder Scrolls IV: Oblivion Remastered simplifies the difficulty system compared to the original game. Instead of a customizable slider, it offers five pre-set difficulty lev
 Fatal Fury: City Of The Wolves - How To Find And Defeat Nightmare GeeseApr 28, 2025 am 06:09 AM
Fatal Fury: City of the Wolves offers a variety of modes and features that can benefit from long-term play, as they significantly enhance the gaming experience or unlock unique props. There is another reason to explore these modes: Single player mode provides extremely challenging boss battles that can push your skills to the limits and bring a sense of nostalgia to veteran players. "Nanzhen Chapter" and arcade mode are worth a try, they will test your strength and let you meet familiar faces! How to challenge the nightmare Gith in "Nanzhen Chapter" "Nanzhen Chapter" is a new single player "RPG" mode added in "Fatal Fury: City of the Wolves". You can choose a character.
 Oblivion Remastered: How To Repair Armor And Enchanted ItemsApr 28, 2025 am 06:08 AM
In Oblivion Remastered, gear repair is inevitable. Weapon and armor use degrades durability, rendering items unusable at zero. This guide covers repairing your equipment, both independently and via merchants, including enchanted items. Repairing Y
 Clair Obscur: Expedition 33 - How To RespecApr 28, 2025 am 06:06 AM
Respeccing your character in Clair Obscur: Expedition 33 is a lifesaver. Early game mistakes in attribute and skill point allocation are easily rectified thanks to recoats. This guide details how to respec and where to find the necessary recoats. Y
 Mandragora: Whispers Of The Witch Tree - How To Find The AlchemistApr 28, 2025 am 06:05 AM
In Mandragora: Whispers of the Witch Tree, mana management is crucial, especially for magic users. Fortunately, recruiting Alchemist Alannah provides a simple solution: stronger, more affordable potions. This guide details how to find her, overcome
 Oblivion Remastered: How To Defeat Will-O-The-WispsApr 28, 2025 am 06:04 AM
Conquering Oblivion's Elusive Will-o'-the-Wisps: A Comprehensive Guide The remastered Elder Scrolls IV: Oblivion presents unique challenges, and the Will-o'-the-Wisp is a prime example. These creatures are immune to many spells, making them formidab
 Oblivion Remastered: Peryite Quest WalkthroughApr 28, 2025 am 04:16 AM
Seeking the best gear in The Elder Scrolls IV: Oblivion Remastered? Daedric artifacts are your answer. Unlike other quest rewards, these powerful items are always at their peak, regardless of your level. For sword-and-shield warriors, the Spell Bre


Hot AI Tools

Undresser.AI Undress
AI-powered app for creating realistic nude photos

AI Clothes Remover
Online AI tool for removing clothes from photos.

Undress AI Tool
Undress images for free

Clothoff.io
AI clothes remover

Video Face Swap
Swap faces in any video effortlessly with our completely free AI face swap tool!

Hot Article
Hot Tools

SublimeText3 English version
Recommended: Win version, supports code prompts!

ZendStudio 13.5.1 Mac
Powerful PHP integrated development environment

Safe Exam Browser
Safe Exam Browser is a secure browser environment for taking online exams securely. This software turns any computer into a secure workstation. It controls access to any utility and prevents students from using unauthorized resources.

SublimeText3 Chinese version
Chinese version, very easy to use

EditPlus Chinese cracked version
Small size, syntax highlighting, does not support code prompt function

