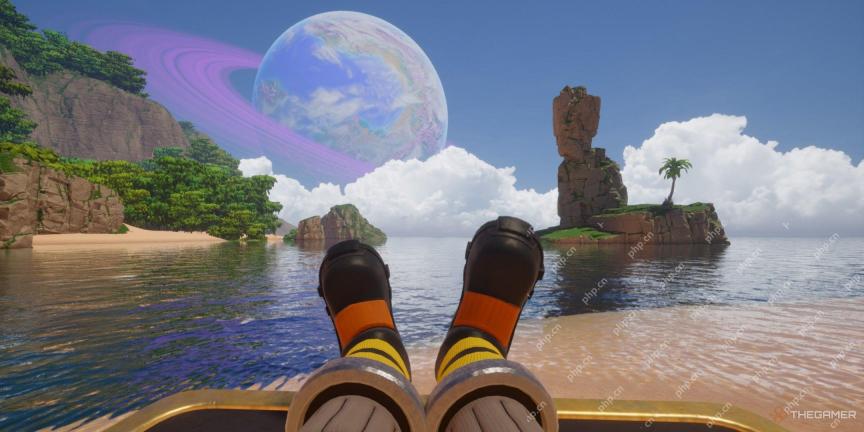
In Webfishing, the key is to enjoy fishing and have fun. However, the game is not without purpose. Completing the tasks at the Pawprint Point sign in the hub can take up quite a bit of your time, or trying to catch all the fish in the journal can be a great goal.

There are many species in the game; there are numerous targets to catch, from turtles and manta rays to oysters and clownfish. While catching fish is easy, knowing where to catch them is crucial. With this guide, you can determine how and under what conditions each fish can be caught.
Every Fish Location In Webfishing

Where you fish is important for the types of fish you catch. In addition to your location, certain time-based events also determine the fish you can catch. Here’s an explanation of the locations and time-based events in the game:
|
Location/Event |
Description |
|---|---|
|
Freshwater |
Freshwater represents the lakes in the game. This means you can catch freshwater fish anywhere that isn’t the ocean or a river. Additionally, with the Fresh Lure, you will be able to catch freshwater fish regardless of where you are fishing. |
|
Saltwater |
Saltwater represents the ocean and rivers. This means that any fish you catch outside of lakes will be of the saltwater type. Additionally, with the Salty Lure, you will catch Saltwater Fish no matter where you fish. |
|
Rain Event |
Some fish can only be caught during rainy weather. For these fish, your location doesn't matter; you just need to be under a rain cloud. Remember, as long as the rain cloud is present, you can follow it and stay underneath it. |
|
Meteor Event |
Only one fish, the Unidentified Fish Object, can be caught through the meteor event. Make sure to listen carefully to the game's audio for the meteor event, as you'll hear a sound similar to a rock hitting the water. Once you hear this sound, you'll have about a minute to locate the meteor. After that, it will disappear, so it's important to be in a more central location. |
|
Treausure/Trash |
Some items caught with a fishing rod may not be fish. They can be either treasures or trash. Your location does not matter when catching these. If you use a Magnet Lure, your chances of catching them will be higher than normal. |
Remember that the lure you use is crucial in determining the type of fish you’ll catch. For example, if you’re looking for a small fish, you should use the Fly Hook lure. If you’re searching for a high-tier fish, the Sparkling Lure will be the right choice. If you’re looking for a large fish, you should use the Large Lure.
In the table below, you can see where all the fish can be caught:
|
Fish Name |
Required Bait |
Tier |
Location |
|---|---|---|---|
| Alligator | Any bait except Worms | Tier 3 | Freshwater |
| Angelfish | Any bait | Tier 1 | Saltwater |
| Anomalocaris | Any bait | Tier 1 | Rain |
| Atlantic Salmon | Any bait | Tier 1 | Saltwater |
| Axolotl | Any bait except Worms | Tier 3 | Freshwater |
| Bluegill | Any bait | Tier 1 | Freshwater |
| Bluefish | Any bait | Tier 1 | Saltwater |
| Bone (Trash) | Any bait | Tier 1 | Anywhere |
| Bowfin | Any bait | Tier 2 | Freshwater |
| Branch (Trash) | Any bait | Tier 1 | Anywhere |
| Bull Shark | Any bait except Worms | Tier 3 | Freshwater |
| Carp | Any bait | Tier 1 | Freshwater |
| Catfish | Any bait | Tier 1 | Freshwater |
| Clownfish | Any bait | Tier 1 | Saltwater |
| Coelacanth | Any bait except Worms | Tier 3 | Saltwater |
| Crab | Any bait | Tier 2 | Freshwater |
| Crappie | Any bait | Tier 2 | Freshwater |
| Crayfish | Any bait | Tier 1 | Freshwater |
| Diamond (Treasure) | Any bait except Worms | Tier 1 | Anywhere |
| Dogfish | Any bait | Tier 1 | Saltwater |
| Drink Rings (Trash) | Any bait | Tier 1 | Anywhere |
| Drum | Any bait | Tier 1 | Freshwater |
| Eel | Any bait | Tier 1 | Saltwater |
| Flounder | Any bait | Tier 1 | Saltwater |
| Frog | Any bait | Tier 1 | Freshwater |
| Gar | Any bait except Worms | Tier 3 | Freshwater |
| Golden Bass | Any bait except Worms | Tier 3 | Freshwater |
| Golden Manta Ray | Any bait except Worms | Tier 3 | Saltwater |
| Goldfish | Any bait | Tier 1 | Freshwater |
| Great White Shark | Any bait except Worms | Tier 3 | Saltwater |
| Grouper | Any bait | Tier 1 | Saltwater |
| Guppy | Any bait | Tier 1 | Freshwater |
| Hammerhead Shark | Any bait | Tier 2 | Saltwater |
| Helicoprion | Any bait | Tier 2 | Rain |
| Herring | Any bait | Tier 1 | Saltwater |
| Horseshoe Crab | Any bait | Tier 1 | Rain |
| King Salmon | Any bait except Worms | Tier 3 | Freshwater |
| Koi | Any bait | Tier 1 | Freshwater |
| Krill | Any bait | Tier 1 | Saltwater |
| Largemouth Bass | Any bait | Tier 1 | Freshwater |
| Leech | Any bait | Tier 2 | Freshwater |
| Leedsichthys | Any bait except Worms | Tier 3 | Rain |
| Lionfish | Any bait | Tier 2 | Saltwater |
| Lobster | Any bait | Tier 1 | Saltwater |
| Man O' War | Any bait except Worms | Tier 3 | Saltwater |
| Manta Ray | Any bait except Worms | Tier 3 | Saltwater |
| Marlin | Any bait | Tier 2 | Saltwater |
| Mooneye | Any bait except Worms | Tier 3 | Freshwater |
| Muskellunge | Any bait | Tier 2 | Freshwater |
| Octopus | Any bait | Tier 2 | Saltwater |
| Old Boot (Trash) | Any bait | Tier 1 | Anywhere |
| Oyster | Any bait | Tier 1 | Saltwater |
| Perch | Any bait | Tier 1 | Freshwater |
| Pike | Any bait | Tier 2 | Freshwater |
| Plastic Bag (Trash) | Any bait | Tier 1 | Anywhere |
| Pupfish | Any bait except Worms | Tier 3 | Freshwater |
| Rainbow Trout | Any bait | Tier 1 | Freshwater |
| Salmon | Any bait | Tier 1 | Freshwater |
| Sawfish | Any bait | Tier 1 | Saltwater |
| Seahorse | Any bait | Tier 2 | Saltwater |
| Sea Turtle | Any bait except Worms | Tier 3 | Saltwater |
| Shrimp | Amy bait | Tier 1 | Saltwater |
| Snail | Any bait | Tier 1 | Freshwater |
| Soda Can (Trash) | Any bait | Tier 1 | Anywhere |
| Squid | Any bait except Worms | Tier 3 | Saltwater |
| Sting Ray | Any bait | Tier 2 | Saltwater |
| Sturgeon | Any bait | Tier 1 | Freshwater |
| Sunfish | Any bait | Tier 1 | Saltwater |
| Swordfish | Any bait | Tier 2 | Saltwater |
| Toad | Any bait | Tier 2 | Freshwater |
| Tuna | Any bait | Tier 1 | Saltwater |
| Turtle | Any bait | Tier 2 | Freshwater |
| Unidentified Fish Object | Any bait | Tier 2 | Meteor Area |
| Walleye | Any bait | Tier 1 | Freshwater |
| Weed (Trash) | Any bait | Tier 1 | Anywhere |
| Whale | Any bait except Worms | Tier 3 | Saltwater |
| Wolffish | Any bait | Tier 2 | Saltwater |
How To Track Your Fish Collection

You can press the Tab key or click on the Backpack - Wallet and Exchange icon in the upper right corner to view the fish you've caught. By clicking on the fish icon in the resulting screen, you can see the fish you've caught. The caught fish are divided into three categories: Freshwater, Saltwater, and Misc. These relate to where you caught the fish.
The Misc category does not require you to be in any specific location.
Additionally, under these three categories, you will see the Journal Progress. Each category has its own progress bar, showing the percentage of fish caught based on their rarity. There are a total of six rarity categories:
- Normal
- Shining
- Glistening
- Opulent
- Radiant
- Alpha
Remember that to unlock achievements, you need to catch all versions of each fish across all rarity categories. Also, when you catch all the fish of a particular rarity level in the journal, you will receive a cash reward and a new rod from the Pawprint Point sign.

The above is the detailed content of Webfishing: Every Fish Location. For more information, please follow other related articles on the PHP Chinese website!
 NYT Connections Answers And Hints - May 10, 2025 Solution #699May 09, 2025 pm 08:11 PM
Solve today's New York Times Connections puzzle with these helpful hints! Preserve your winning streak by using our clues, ranging from subtle suggestions to outright answers. We've ordered the hints from easiest (yellow) to hardest (purple) catego
 Genshin Impact: Whirling Waltz Complete Event GuideMay 09, 2025 pm 08:09 PM
Genshin Impact Version 5.6's Whirling Waltz event offers approximately 1100 Primogems and a four-star character or weapon. This Fontaine-based event involves managing Fantasyland with Kinich, focusing on maximizing customer satisfaction. After unco
 Revenge Of The Savage Planet: All Quasadron IX Selfie LocationsMay 09, 2025 pm 08:03 PM
Quasadron IX, the second largest world in Revenge of the Savage Planet, presents a challenging selfie hunt amidst ambushing Babutts. This guide pinpoints all four selfie locations, detailing their proximity to the nearest teleporter. Remember, journ
 Mafia: The Old Country Pre-Order Guide - Editions, Prices, And BonusesMay 09, 2025 pm 06:04 PM
Mafia is back! Almost a decade after the last main installment, the series returns with Mafia: The Old Country, a prequel set in early 1900s Sicily. This departure from the previous urban settings offers a fresh perspective, showcasing protagonist
 Wordle Answer And Hints - May 10 2025 Solution #1,421May 09, 2025 pm 06:03 PM
Today's Wordle challenge awaits! Think you can conquer it? Want to make it even tougher? Try hard mode! Need a little assistance? We've got you covered. All solutions and letters remain hidden to prevent accidental spoilers. However, we offer som
 NYT Mini Crossword Answers And Hints - May 9, 2025May 09, 2025 pm 12:02 PM
Stuck on today's NYT Mini Crossword? Need a fresh perspective on those tricky clues? Don't worry, we've got you covered! Sometimes a different angle is all you need to crack the code. Whether you're looking for subtle nudges or outright answers, w
 All Pokémon TCG Pocket Secret Missions listedMay 09, 2025 am 11:27 AM
Secret Missions in Pokémon TCG Pocket are exactly what they sound like - missions which you won't know exist when you first start Pokémon Pocket. In fact, the game will only let you know they exist when you collect all of t
 Pokémon Go May Field Research tasks and their rewards explainedMay 09, 2025 am 11:26 AM
Pokémon Go's field survey mission joined the game in 2018, giving players new missions. Complete these tasks to receive unique rewards, such as research breakthrough rewards, while special research tasks can help you discover unprecedented Pokémon, including the elusive Pokémon Dream. This article covers: Pokémon Go May field survey mission and research breakthrough rewards Detailed explanation of Pokémon Go field survey mission Detailed explanation of research breakthroughs What are special research tasks? Pokémon Go Research Mission Everything else you need to know Examples of task types include: Capture one or two specific Pokémons (e.g. 3 Little Radas or Dark Ravens) Capture specific genus


Hot AI Tools

Undresser.AI Undress
AI-powered app for creating realistic nude photos

AI Clothes Remover
Online AI tool for removing clothes from photos.

Undress AI Tool
Undress images for free

Clothoff.io
AI clothes remover

Video Face Swap
Swap faces in any video effortlessly with our completely free AI face swap tool!

Hot Article

Hot Tools

WebStorm Mac version
Useful JavaScript development tools

SublimeText3 English version
Recommended: Win version, supports code prompts!

Dreamweaver CS6
Visual web development tools

DVWA
Damn Vulnerable Web App (DVWA) is a PHP/MySQL web application that is very vulnerable. Its main goals are to be an aid for security professionals to test their skills and tools in a legal environment, to help web developers better understand the process of securing web applications, and to help teachers/students teach/learn in a classroom environment Web application security. The goal of DVWA is to practice some of the most common web vulnerabilities through a simple and straightforward interface, with varying degrees of difficulty. Please note that this software

SublimeText3 Chinese version
Chinese version, very easy to use


