


To install OneKey Wallet on your Apple device, follow these steps: Download the app via the App Store. Create an account and enter your name, email and password. Back up your wallet, using iCloud, Google Drive, or a mnemonic phrase. Add assets, search and add assets to manage. Send and receive assets via the Send and Receive icons.

Detailed steps for installing OneKey wallet on Apple
To install OneKey wallet on Apple device, please follow the steps below:
Step 1: Download the OneKey app
- Search for "OneKey" through the App Store.
- Click the "Get" button to download the app.
Step 2: Create an account
- Open the OneKey app.
- Click "Create New Wallet".
- Follow the prompts and enter your name, email address, and password.
Step 3: Back up your wallet
- After creating your account, you will be prompted to back up your wallet.
- Choose a safe and convenient method to back up your wallet (such as iCloud, Google Drive, or a mnemonic phrase).
Step 4: Add Assets
- Click the "Add Asset" icon at the bottom of the app page.
- Search for the asset you want to add (e.g. Bitcoin or Ethereum).
- Click the "Add" button to add the asset to your wallet.
Step 5: Send and Receive Assets
- To send assets, click the Send icon, enter the recipient address and amount, and Click "Send".
- To receive assets, click on the "Receive" icon and your wallet address will be displayed on the screen.
Note:
- Keep your password safe and secure and do not share it with others.
- Back up your wallet regularly to prevent data loss.
- The OneKey app is free to download and use.
- If you encounter any problems, please visit the OneKey official website for support.
The above is the detailed content of OneKey Wallet Apple Installation and Use Tutorial. For more information, please follow other related articles on the PHP Chinese website!

 比特币创世钱包成功添加了26.9枚BTC,中本聪是否复苏?Jan 19, 2024 pm 04:27 PM
比特币之父中本聪(SatoshiNakamoto)消失多年后终于出现新线索。根据Blockchain.com链上数据,最新的数据显示,今天凌晨,有一个以bc1q9开头的地址从币安购买了27枚比特币。根据当前的比特币价格(43,506.45美元),这笔交易价值约为117.4万美元。这些比特币随后被发送到中本聪的钱包地址:"1A1zP1eP5QGefi2DMPTfTL5SLmv7DivfNa"。这一发现引起了人们对中本聪真实身份的猜测与关注。该地址是被标记为"Satoshi1",是中本聪在2009年
 哪个国家对比特币的接受度最高?Jan 19, 2024 pm 02:48 PM
比特币当前已经在全球普及,很多企业也开始接受比特币作为支付方式,但是比特币在各个国家发展并不相同,每个国家有自己的法律法规,比如中国已经明确禁止比特币挖矿,但其他国家、地区则表示对比特币的交易表示支持、欢迎,比如非洲、美国等,关于比特币最受欢迎的国家是哪个?也是一个有意思的话题,因为似乎支持比特币的国家都欢迎比特币的加入,根据Google搜索指标,非洲的尼尔利亚在比特币搜索领域名列第一,接下来小编为大家详细说说。比特币最受欢迎的国家是哪个?比特币在非洲大陆的尼日利亚是最受欢迎的国家之一。据统计,
 贝莱德向SEC确认比特币现货ETF交易代码为IBITJan 19, 2024 pm 03:30 PM
全球最大的资产管理公司BlackRock(贝莱德)最新文件显示,其正式名称代号为「IBIT」。再进一步:确认代号IBIT贝莱德的现货比特币ETF最近公开确认其交易代码为「IBIT」,在本周一提交给SEC的修订版S-1文件中披露了这一重要进展。重点解读:SEC与贝莱德协商模式中BlackRock(贝莱德)在最新文件中增加了关于基金创建和赎回机制的新设计,这一点尤其引人注目。据了解,BlackRock(贝莱德)希望采用「实物创建」(in-kind)的模式,以增加管理投资组合的灵活性。然而,SEC更倾
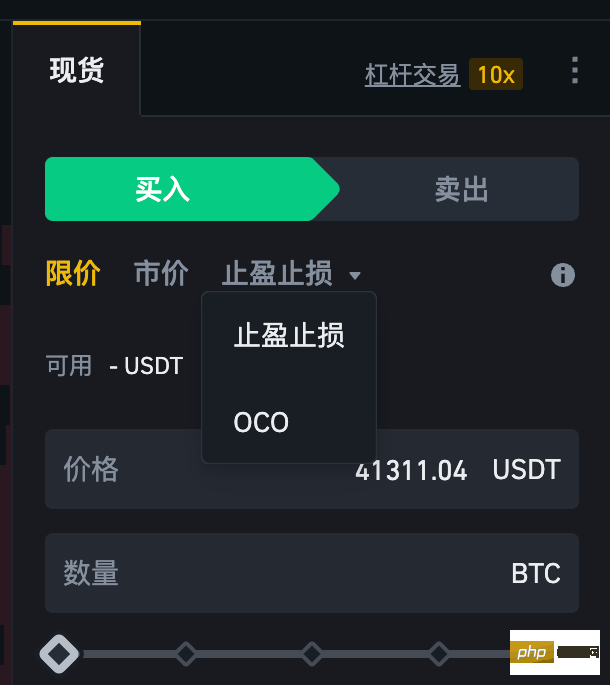 什么是OCO订单?Apr 25, 2023 am 11:26 AM
二选一订单(OneCancelstheOther,简称OCO)可让您同时下达两个订单。它结合了限价单和限价止损单,但只能执行其中一个。换句话说,只要其中的限价单被部分或全部成交、止盈止损单被触发,另一个订单将自动取消。请注意,取消其中一个订单也会同时取消另一个订单。在币安交易平台进行交易时,您可以将二选一订单作为交易自动化的基本形式。这个功能可让您选择同时下达两个限价单,从而有助于止盈和最大程度减少潜在损失。如何使用二选一订单?登录您的币安帐户之后,请前往基本交易界面,找到下图所示的交易区域。点
 索尼、富达、方舟等公司向美国证券交易委员会递交比特币现货ETF的证券注册申请Jan 19, 2024 pm 02:18 PM
随着市场预测美国证券交易委员会(SEC)将在1月8号至1月10号期间批准首个比特币现货ETF,现货ETF似乎已接近最后一步。越来越多的迹象和消息显示这一进展,使得投资者对比特币市场的前景更加乐观。根据最新提交给SEC的文件显示,一些著名的比特币现货ETF发行商,如富达、灰度、方舟、Valkyrie和VanEck等,都已经递交了证券注册的「8-A表格」。而Bitwise则是在上周五就率先递交了8-A表格。这些举动表明这些公司正计划发行比特币ETF,以满足市场对于加密货币的投资需求。这也意味着投资者
 Mercari:日本最大的二手电商开始接受比特币支付,活跃用户达到2200万Jan 19, 2024 pm 02:30 PM
根据日本经济新闻报道,二手交易电商平台Mercari计划从今年6月开始接受比特币支付。为了处理比特币支付,Mercari的子公司Melcoin将负责相关服务,并将所有比特币支付转换为日元。这意味着买家可以选择使用比特币进行支付,但卖家最终会收到法定货币。在Mercari平台上,商品的定价是以日元计算的,而不是以比特币计价。然而,用户在结账时可以选择使用比特币作为付款方式。日本最大二手交易电商平台Mercari成立于2013年,是日本最大的二手交易电商平台。2018年,该公司在东京证交所创业板上市
 数字货币交易所的合法性和安全性如何?Jan 30, 2024 pm 02:09 PM
监管政策仍在不断演变和发展中,一些国家对加密货币持开放态度,将其视为一种数字资产,允许合法交易和持有,而另一些国家则对加密货币持谨慎态度,可能限制或禁止其交易和使用,因此了解在交易所买卖数字货币合法吗?对于投资者合法合规地进行数字货币交易十分重要。在交易所买卖数字货币合法吗?在大部分国家,购买和出售数字货币是合法的,比如比特币、以太坊等。然而,不同国家和地区对数字货币的法律和监管状况存在差异,因此投资者需要根据所在地的法律了解相关规定。在一些国家,政府已经制定了特定的法规和监管机制来管理数字货币
 前SEC主席Jay Clayton:现货比特币ETF的批准势不可挡Jan 19, 2024 pm 03:45 PM
比特币现货ETF发行商在1月8日提交修订文件和公布费用结构,同时注入种子基金。SEC主席GaryGensler在此时发推呼吁加密相关风险,被视为发行前的最后提醒。SEC前主席JayClayton接受CNBC专访时也表明,批准ETF是势在必行。JayClayton:批准ETF势在必行JayClayton表示,批准比特币ETF已经是不可避免的事情,而且目前没有任何未解决的疑虑。他强调,SEC对各方提供的信息感到满意。CNBC主持人JoeKernen最近了解到投资比特币ETF所需的成本,这是需要让大家

Hot AI Tools

Undresser.AI Undress
AI-powered app for creating realistic nude photos

AI Clothes Remover
Online AI tool for removing clothes from photos.

Undress AI Tool
Undress images for free

Clothoff.io
AI clothes remover

AI Hentai Generator
Generate AI Hentai for free.

Hot Article
Hot Tools

SAP NetWeaver Server Adapter for Eclipse
Integrate Eclipse with SAP NetWeaver application server.

Dreamweaver Mac version
Visual web development tools

ZendStudio 13.5.1 Mac
Powerful PHP integrated development environment

Atom editor mac version download
The most popular open source editor

SublimeText3 Linux new version
SublimeText3 Linux latest version

