Home >System Tutorial >Windows Series >How to use Win10 system custom settings display zoom_How to use Win10 system custom settings display zoom
How to use Win10 system custom settings display zoom_How to use Win10 system custom settings display zoom
- PHPzOriginal
- 2024-09-05 10:13:411265browse
When using multiple monitors, you may need to adjust display scaling to ensure the best viewing experience. This article will provide you with a clear and simple guide on how to customize display scaling in Windows 10. PHP editor Zimo has carefully compiled step-by-step instructions so that you can easily solve related problems. Read on for detailed instructions and tips.
How to use Win10 system custom settings to display zoom
1. First, we need to open the settings function of the computer. You can open it through the start menu.
2. After opening, find the system option and click to enter.
3. After entering, find the display option and click on it.
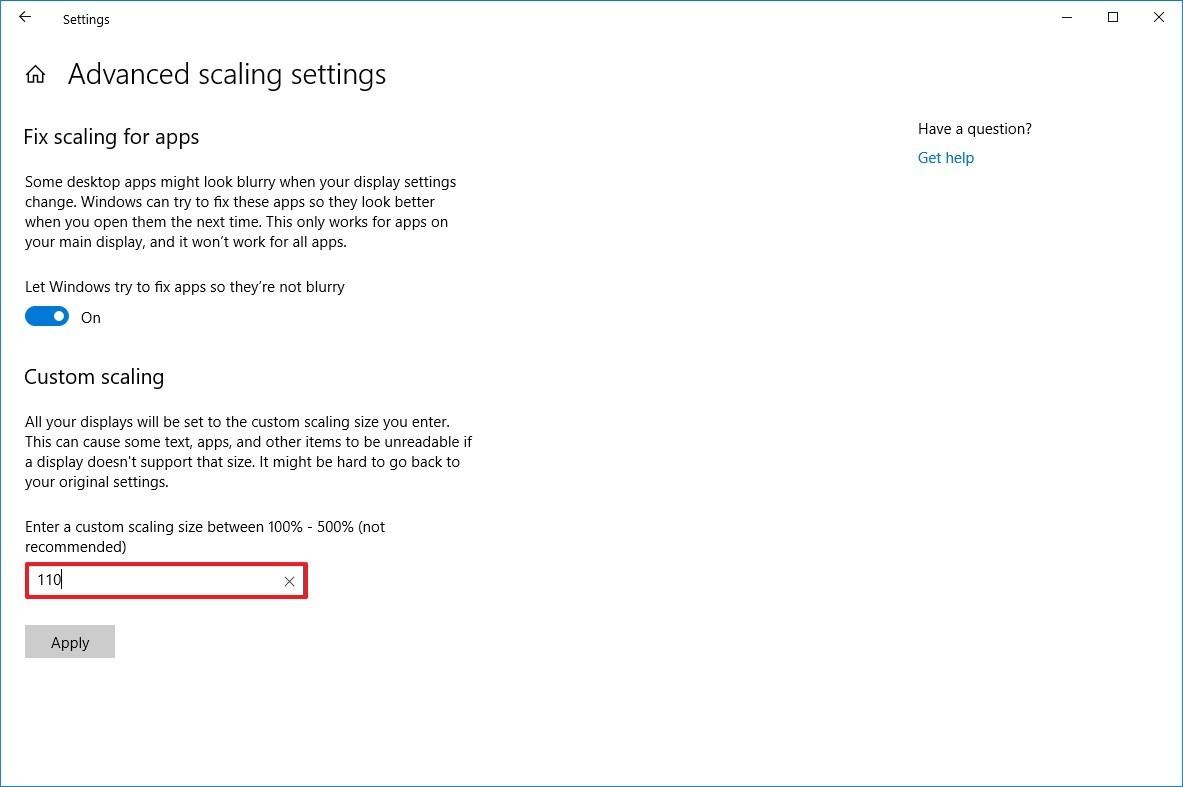
4. Then find the "Scale and Layout" function, and continue to find "Advanced Zoom Settings" here to click.
5. Then you can customize the zoom size between 100 and 500% under the "Custom Zoom" option.

6. After you set the value, click the Apply option below.
7. Then close the window and exit.
8. Finally, log in to the account again.
After completing these steps, text, applications, and other items should scale to the size you specified.
If icons and other items don't scale correctly on your desktop, use the same instructions listed above to slightly increase or decrease the scale size number until you find the right balance.
The above is the detailed content of How to use Win10 system custom settings display zoom_How to use Win10 system custom settings display zoom. For more information, please follow other related articles on the PHP Chinese website!
Related articles
See more- Discord Will Soon Be Integrated Into More Games
- What to do if Windows 10 fonts are blurry What to do if Windows 10 fonts are blurry
- How to cast win10 screen to TV Tips for casting win10 screen to TV
- Fix: Windows 10 Password Not Working After Update 2021
- How to Remove I Forgot My Pin from Login Screen in Windows 10

