
Home >Web Front-end >HTML Tutorial >HTML Style Attribute
HTML Style Attribute

- PHPzOriginal
- 2024-09-04 16:18:09957browse
HTML code needs the style attribute for web pages rendered in web browsers like Chrome, Firefox, and IE to be displayed as they are intended to look. HTML tags can contain various information, and the style attribute controls the appearance of information in HTML blocks using inline styling.
This article will learn more about the HTML style attribute, which is nothing more than a set of rules defining how a page will be rendered in the web browser.
List of HTML Style Attributes
Here’s a list of all the style properties that can be used to influence and control the design of HTML elements, accompanied by a practical example :
1. Background-Color
This CSS property allows us to set the background color for any HTML element like
, etc.
Example
<div style="background-color:blue">My background is blue</div>
Output:

2. Color
The font color of the text in an HTML element can be controlled by setting its color attribute to the right color name, HEX code, or RGB code.
Example
<div style="color:blue">My font color is blue</div>
Output:

3. Border Color
We can set the border color of any HTML element if we’d like to add a border to it.
Example
<p style="border: 1px solid red">My border is red</p>
Output:

As the code above shows, the border property accepts three properties in the following order: “Border-width border-style border-color.”
4. Background-Image
We can also set an image as a background by using the background-image property as follows:
Example:
<div style="background-image: url('https://www.google.com/images/branding/googlelogo/2x/googlelogo_color_272x92dp.png');height :365px">
Output:
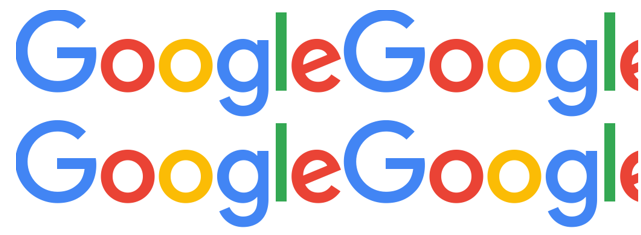
5. Background-Repeat
As you see in the above example, when an image is set as background using the background-image property, it, by default, repeats the image both horizontally as well as vertically. However, some images may need to be repeated either vertically or horizontally, or they may not be needed to be repeated. This behavior can be controlled by setting the desired value against the property of background-repeat, and it can be only used when background-image is being used; else, it won’t add any styling value when used as a standalone property.
The value “repeat-x” allows the image to be repeated only horizontally.
The value “repeat-y” allows the image to be repeated only vertically.
The value “no-repeat” is used to stop any repetition of the background image.
Let us modify the above example to improve the background image.
Example
<div style="background-image: url('https://www.google.com/images/branding/googlelogo/2x/googlelogo_color_272x92dp.png');height :365px; background-repeat:no-repeat">
Output:

We can compare the examples above and understand that with a background image; we can add an image as the background, and with a background repeat, we can control the repetition of the background image.
6. Background-Position
With this property, we can define the position of the background image.
Example
<div style="background-image: url('https://www.google.com/images/branding/googlelogo/2x/googlelogo_color_272x92dp.png');height :365px; width:500px;background-repeat: no-repeat; background-position: left bottom;">
</div>
Output:
7. Margins
CSS provides us with properties to set margins on all four sides of an HTML element, or we could add margins to a particular side of the element.
With margin-top can add a margin to the top of the element, margin-right will add a margin to the right of the element, margin-left will add a margin to the left of the element, and margin-bottom will add a margin to the bottom. Instead of using these four properties, we can also use the margin property and set its values as per our requirements.
Example
p {
margin-top: 25px;
margin-bottom: 75px;
margin-right: 50px;
margin-left: 100px;
}
or
p
{
margin: 25px 50px 75px 100px;
}
8. Padding
The padding property defines the space between the content of an element and its borders. We can use the “padding” property or individual padding properties like padding-top, padding-bottom, padding-left, and padding-right to set the padding for the top, bottom, left, or right of the content of an element.
p {
padding-top: 25px;
padding-bottom: 75px;
padding-right: 50px;
padding-left: 100px;
}
or
p
{
padding: 25px 50px 75px 100px;
}
9. Height and Width
The most basic CSS properties used to define the height and width of any HTML element are height and width. You can set them to a pixel value, such as 200px, or a percentage, such as 10%, 20%, etc.
10. Text-Align
You can use this property to set the horizontal direction for text alignment in an element. The value options are center, right, or left.
p {
text-align: center;
}
or
p {
text-align: left;
}
or
p {
text-align: right;
}
11. Text-Decoration
Text decoration property can be used to set decorations like underline, line-through, or overline over text in HTML.
Example:
<p style="text-decoration:underline">This is underline</p>
Output:

12. Letter-Spacing
As the name suggests, this property defines the spacing between letters/characters in a word. You can assign a positive or negative pixel value to increase or decrease the spacing between letters.
Example:
<p style="letter-spacing: -3px">My words are overlapped </p>
Output:

13. Line-Height
Line height defines the distance between vertical lines. You can set the line height to a positive or negative pixel value, similar to letter spacing. Let’s review the example below to understand better:
Example:
<p style="line-height: 0.7px">This paragraph has a small line-height.<br>This paragraph has a small line-height.<br>
</p>
Output:

14. Text Direction
Sometimes, if the web page’s content is not in English but in some other language like Arabic, which follows a right to the left convention, we would need to change the direction of the text. In such cases, we can reverse the text direction.
Example:
<p style="direction: rtl"><bdo dir="ltr">I am right to left</bdo></p>
Output:

15. Text Shadow
This property adds a shadow to the text.
Example:
<p style="text-shadow: 3px 2px gray;"> I’ve got a gray shadow</p>
Output:

16. Font Family
We can define the font class for text in an element. We can define multiple font families separated by a comma as a fallback system to handle scenarios where a preferred font class cannot be loaded.
- Font style: We can add italic or oblique effects to the text with the font-style property.
Example:
<p style="font-style: oblique">This is oblique style.</p>
Output:

- Font weight: This property defines the weight of a font.
Example:
<p style="font-weight: 900"> This is a bold paragraph</p>
Output :

The styling attributes showcased above are our building blocks with UI and UX designing. New versions of CSS continue to evolve.
The above is the detailed content of HTML Style Attribute. For more information, please follow other related articles on the PHP Chinese website!