

 Mobile Game TutorialMobile Game GuideStar Wars Outlaws Mirogana treasure guide: Locations and how to get all treasures
Treasures can be just about anything and range from easy to acquire to obnoxiously tricky. If you’re struggling to find these coveted items in Star Wars Outlaws, here’s a treasure guide for Mirogana, including locations and instructions on how to get them.
Table of contents
- Star Wars Outlaws: How to get all treasures in Mirogana
- Kerro’s Speakeasy
- Maintenance Room
- Che Mosska
- Crimson Dawn Vault
- Jodara’s Stash
- Pyke Syndicate Vault
- Pyke Cardroom
Star Wars Outlaws: How to get all treasures in Mirogana
The biggest hurdle with Treasure hunting is reaching all of the prerequisites first. You’ll likely figure out each Treasure’s whereabouts long before you can open them. Mirogana, in particular, is a frustrating location because you won’t be able to reach most treasures on your first attempt.
When looking for the last treasures, I highly recommend going to the question marks that pop up as you explore. These are almost always treasure locations.
At the time of writing, we mostly have you covered, but we will update once we’ve found everything.
Kerro’s Speakeasy

The first Treasure you’ll likely find in Morgana is easy to reach but difficult to open. There’s a locked room in the location marked above, but a vent on the side offers easy access. You’ll find an energy door that you can’t open at the start of the game, as you require an upgrade to your Slicer Kit.
Without delving into spoilers, you will obtain the upgrade through regular gameplay on the planet, as it’s part of a mandatory quest called The Slicer. Once you have the improved Slicer Kit, you can use it on the control panel outside the door.

Unfortunately, I can’t give you the password, as it’s randomized. The minigame is the same as regular Slicing, although there are four symbols to decipher instead of three. My best advice is to focus on trying every symbol you’ve not used first. It’s more important to work out which symbols are required over their locations.
Once you’ve broken into the Treasure room, feel free to exit from the front door as there’s no security.
Maintenance Room

One of the few Treasures you can reach immediately in Mirogana is in the Maintenance Room. Head to the location in the image above, and use Nix’s Sense (Up on Dpad, B on Keyboard). You should see a vent hidden behind some boxes, highlighted in blue.

There’s a thin entryway you can slip through next to the boxes. Open the vent and head inside. You’ll see several Space Roombas having a party (I’m serious), and they’ll leave you to loot the area.
Che Mosska

This treasure is easily my favorite so far, and it’s a pity you cannot replay it. The treasure isn’t hidden in or around the food stall. Instead, it’s tied to a food mini-game. Take a seat by the stall and order some food. There’s only one dish available, and it costs 200 Credits.
Once you purchase the meal, you’re treated to a cutscene of Kay and Nix sharing the dish. You must hit some easy button prompts (QTEs) during the sequence. It doesn’t seem to matter if you fail any of them on your first attempt.
Some inputs are a little unclear, but you must tilt the control sticks in the direction the arrow points if those show up. You’ll complete the sequence after a couple of minutes and earn a unique ability for Nix for your troubles.
Crimson Dawn Vault
Even if you’re chummy with the Crimson Dawn faction, you can still raid their Vault, but it’s a multi-step process. In fact, I recommend it to make getting to the vault that much easier. The easiest way to get a head start on the Vault is to steal the blaster parts from the Crimson Dawn instead of the Pyke Syndicate in the main story.

To reach the vault, head into Crimson Dawn territory and sneak into the restricted area. You must deactivate the large fan blocking the way (pictured above). The switch is obvious, but it doesn’t stay flipped long enough for you to activate it and reach the fan.
A pair of guards patrolling the area won’t be happy to see you, even if you’re in good standing with the Crimson Dawn. Crouch behind the boxes by the fan, and send Nix to flip the switch, then head inside when the coast is clear.
When you reach the vault, collect the Blaster parts off the table if needed and interact with the computer terminal. The terminal has an easy Data Slice puzzle that will reveal the location of three Keycards. You need to return with all of them to access the vault.
Jodara’s Stash

You’ll earn access to Jodara’s Stash through story progression on the planet with the Crimson Dawn faction. Once the treasure is visible on the map, you can go for it. Head to the restricted area of the Crimson Dawn hideout.

The map is particularly unhelpful here as it suggests the Stash is dead center of the circular platform. In truth, it’s hidden above ground level (pictured above), and you can climb the nearby scenery to reach it. Keep an eye out for the patrolling guards, who will escort you from the premises if they see you.
Pyke Syndicate Vault

Much like the Crimson Dawn Vault, the Pyke Syndicate has the same security measures, locked with three separate Keycards. Fortunately, there’s an easy-access vent right outside, and you can enter the Vault room from there.
Access the Computer Terminal inside and Data Spike it to get the locations of every Card.
Even if you’re not on good terms with the Pyke Syndicate, sneaking here is fairly easy, and no one is guarding the interior.
Pyke Cardroom

The Pyke Cardroom is a unique treasure challenge as you must play and win a card game to earn it. The issue is you’re likely to be spotted and thrown out if you’re not friendly with the Pyke Syndicate.

You can sneak into Pyke territory through the vent by the entrance, but I recommend taking out the guard in the image above if you want to play cards. Even if you slip into a game undetected, the guard can still spot you between rounds.
The other issue with this treasure is the fee. You’re going to bleed credits while you learn the game. At 100 Credits a try, you can burn a painful hole in your wallet, so it may be best to return when your bankroll is healthier.
You earn a few Shift Tokens for the Kessel Sabacc Card Game as a treasure if you beat every player.
You may be surprised to learn that Kay’s antics in Outlaws are technically canon, and the timeline regarding the video games is pretty fascinating.
The above is the detailed content of Star Wars Outlaws Mirogana treasure guide: Locations and how to get all treasures. For more information, please follow other related articles on the PHP Chinese website!

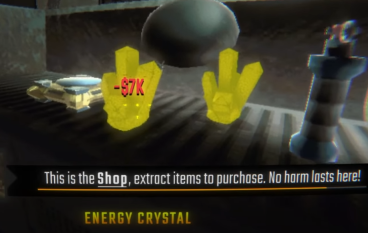 R.E.P.O. Energy Crystals Explained and What They Do (Yellow Crystal)Mar 18, 2025 am 12:07 AM
I bought expensive weapons or drones in R.E.P.O. but found that the energy was exhausted and became useless? Don't worry, you don't have to spend $50,000 on replacements, just charge your gear! That strange machine at the back of your truck is not a decoration. Here are how to get energy crystals and use them to keep your gear running continuously to avoid bankruptcy. More Reads: All R.E.P.O. Items How to get energy crystal You can buy energy crystals from the service store between levels. They usually cost between $7,000 and $9,000 — while expensive, they are far cheaper than repurchasing gear. In the first few levels, no purchase is required. You don't need them for the time being, so
 Repo: How To Revive TeammatesMar 04, 2025 am 02:44 AM
In the terrifying co-op horror game, R.E.P.O, you and your friends must gather loot and extract valuables. Navigating the creepy corridors and shadowy rooms is perilous, with lurking enemies and horrors around every corner. (Or, let's be honest, so
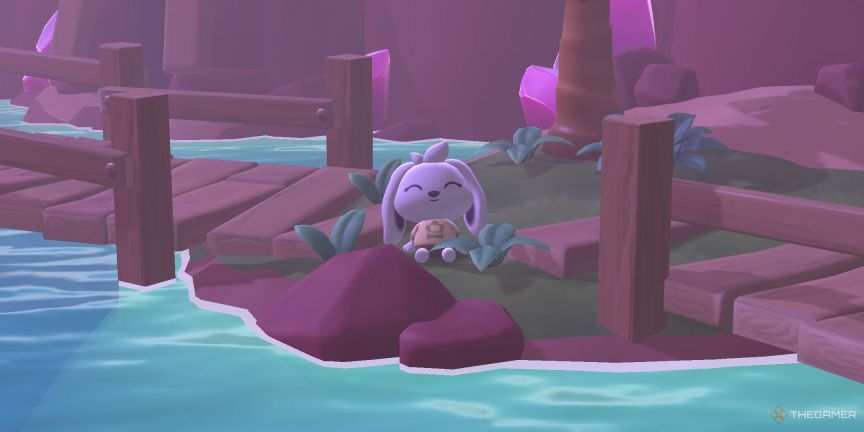 Hello Kitty Island Adventure: How To Get Giant SeedsMar 05, 2025 am 04:03 AM
Explore the enchanting Merry Meadows in Hello Kitty Island Adventure! This guide reveals the secrets to unlocking and utilizing Giant Seeds to reach new heights in this delightful game. Friendship Island initially offers five zones, but three more u
 How Long Does It Take To Beat Split Fiction?Mar 07, 2025 am 04:16 AM
Detailed explanation of the game duration of "Split Fiction": main line, branch line and 100% completion Like Hazelight Studio's previous works, Split Fiction is a relatively linear game, but it also contains some extra interesting content. There are some side stories, optional dialogues and easter eggs in the game, but there are not many elements to collect. Although the level is long and includes multiple mechanisms and boss battles, it still takes a considerable time to complete "Split Fiction", especially to achieve 100% completion. The following is a detailed analysis of the game duration: The main plot duration In the case of two-player game (the player level is comparable), it takes about 12 hours to pass the main plot. But this game is more suitable
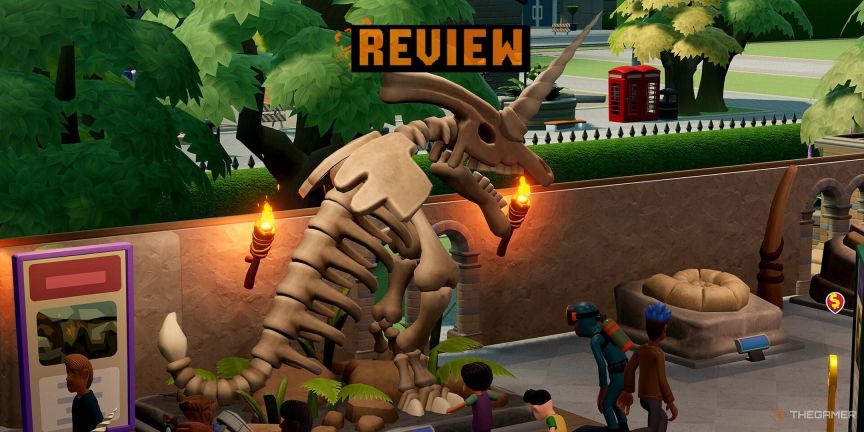 Two Point Museum: All Exhibits And Where To Find ThemMar 05, 2025 am 01:02 AM
Two Point Museum: A Comprehensive Guide to Exhibit Discovery Embark on exciting expeditions across various locations in Two Point Museum to unearth a wealth of curiosities for your museums. This guide details how to plan expeditions, manage your fin
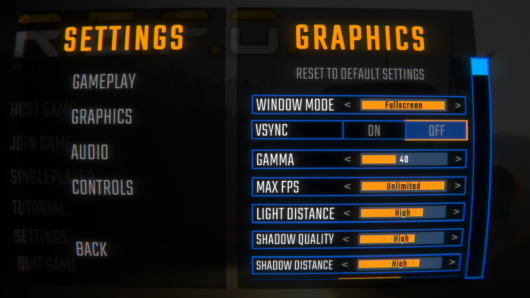 R.E.P.O. Best Graphic SettingsMar 18, 2025 am 01:33 AM
R.E.P.O. Game Screen Setting Guide: How to improve frame rate while ensuring picture quality? This article will guide you to optimize game settings and find the best balance point. Step 1: Full Screen Mode and Frame Rate Adjustment Before adjusting other settings, make sure the game is running in the best mode: Display Mode: Full Screen - Always use Full Screen Mode for optimal performance. Window mode will reduce the frame rate. Vertical Sync (V-Sync): Off - Unless a screen tear occurs, turn off vertical synchronization for a smoother gaming experience. Maximum FPS: Unlimited - If your computer is configured strongly, you can set it to Unlimited. Otherwise, it is recommended to limit it to 60 frames or match your monitor refresh rate. second
 R.E.P.O. How to Fix Audio if You Can't Hear AnyoneMar 17, 2025 pm 06:10 PM
Can't hear other players' voices in the R.E.P.O. game? Even if your microphone is working properly, it can be a problem caused by audio settings or device conflicts. Here are some effective solutions to help you restore your voice chat functionality. 1. Check the output device Open the audio settings of R.E.P.O. and check the output device settings. If set to "Default", manually select your headset or speaker. Restart the game and test voice chat again. 2. Adjust Windows sound settings If R.E.P.O. does not output the sound to the correct device, check the Windows Sound Settings: Right-click the speaker icon in the taskbar and select Sound Settings. Under "Output",
 Suikoden 1 HD Remaster: How To Win The Duel With General TeoMar 06, 2025 pm 06:03 PM
In "Awakening 1&2 HD Remake", some seemingly invincible boss battles can actually be won, and the duel between General Theo and Paine is the best example. In difficult and difficult terms, this battle is very tricky, and you might think that Paine will definitely die. But that's not the case. This guide will explain in detail the key duel: the timing of the duel, the best equipment of Paine, the conditions to be met before the battle, and General Theo's action prediction to help you defeat him. Paine recommended levels and equipment First, go to the Emperor Garden to sharpen Paine's claws to level 12 (the highest level in this stage of the game). Then, equip ninja suits, headdresses and two bodyguard rings (available at Antai’s Armory). Finally, Paine's level should be higher than level 30, at least level 30, the closer it is to 35


Hot AI Tools

Undresser.AI Undress
AI-powered app for creating realistic nude photos

AI Clothes Remover
Online AI tool for removing clothes from photos.

Undress AI Tool
Undress images for free

Clothoff.io
AI clothes remover

AI Hentai Generator
Generate AI Hentai for free.

Hot Article
Hot Tools

Safe Exam Browser
Safe Exam Browser is a secure browser environment for taking online exams securely. This software turns any computer into a secure workstation. It controls access to any utility and prevents students from using unauthorized resources.

DVWA
Damn Vulnerable Web App (DVWA) is a PHP/MySQL web application that is very vulnerable. Its main goals are to be an aid for security professionals to test their skills and tools in a legal environment, to help web developers better understand the process of securing web applications, and to help teachers/students teach/learn in a classroom environment Web application security. The goal of DVWA is to practice some of the most common web vulnerabilities through a simple and straightforward interface, with varying degrees of difficulty. Please note that this software

SublimeText3 English version
Recommended: Win version, supports code prompts!

EditPlus Chinese cracked version
Small size, syntax highlighting, does not support code prompt function

SublimeText3 Linux new version
SublimeText3 Linux latest version

