


Black Myth: Wukong contains magic spells that can be used in combat. Knowing how to get them is important to exploit boss weaknesses and make the game easier.
You can fast travel between chapters at any time from Keeper’s Shrines. There’s still free-roam after the story. After the endboss you are put back in the Title Screen, here choose to Continue, it will spawn you before the final boss. You can still revisit all places from this point. Just don’t “Enter a New Cycle” in the Title Screen as this starts New Game+ and overwrites your save with no way back.
Chapter 1: Black Wind Mountain
1. Immobilize
Automatically given during boss fight against “Bullguard” (unmissable from story in Chapter 1). You encounter this boss in the woods after the very first main boss, shortly after the start of the game.
2. Red Tides
Unlocked from beating the optional boss “Guangzhi” in Forest of Wolves > Outside the Forest > from this shrine take the left path, go across the wooden bridge and follow the torches along the path to reach the boss arena at the end.
3. Cloud Step
Unlocked automatically after “Black Wind King” main boss (unmissable from story in Chapter 1).
Chapter 2: Yellow Wind Ridge
4. Rock Solid
Unlocked automatically after “Tiger Vanguard” boss.
5. A Pluck of Many
Crouching Tiger Temple > Temple Entrance: after defeating “Tiger Vanguard” boss, interact with the statue in the boss arena. If you can’t interact with it, make sure you also defeated the boss “Stone Vanguard”. It will trigger a cutscene where the blood drains from the arena and a hatch opens from the ground. Enter the hatch and drop down, follow the path through the cellar until you get a cutscene. You get this automatically after the cutscene. Alternatively, you can also get to this place via the Shrine Yellow Wind Formation > Windseal Gate, by opening the big gate and going up the sandy path directly across from the gate.
6. Azure Dust
Reward for defeating “Man-in-Stone” boss. He is located at Fright Cliff > Squall Hideout > from the shrine, take the path to the right, go through the ravine that has a little bit of water in it. At the end of the ravine are some black thorns, interact with them, it’s actually a guy trapped in them. You have to give him the key item “Stone Essence” which is dropped by the “Mother of Stone” boss, she is found in the cave between the shrines “Squall Hideout” and “Rockrest Flat”. Go up in the cave and hit the 3 blue crystals (Rockrest Flat). Afterward you can return to the Man-in-Stone and give him the item.
Chapter 3: The New West
7. Ring of Fire
Pagoda Realm > Warding Temple: From this shrine go up the stairs into the temple courtyard to trigger boss fight against “Macaque Chief“. Defeat him, afterward you get a cutscene where an old man gives you this spell.
8. Spell Binder
Reward from completing the Treasure Hunter side questline in Chapter 3.
9. Umbral Abyss
Reward for finishing Chapter 3, after the main boss “Yellowbrow” (after second encounter with him).
Chapter 4: The Webbed Hollow
No spells in this chapter.
Chapter 5: Flaming Mountains
10 Dark Thunder
Reward for freeing the horse NPC from the element cart he’s stuck in.
- First, you must beat Chapter 5.
- After reaching Chapter 6, fast travel back to Chapter 5 > Furnace Valley > Valley Entrance: From this shrine walk down the path, then enter the lava pool on the right. Go to the corner of the lava to find a stuck Element Cart surrounded by a bunch of enemies (the cart won’t attack you). Interact with the cart to pull a string. After pulling out the string you unlock this character entry. You can’t pull the string during Chapter 5. You have to beat Chapter 5 first, then come back here. Doing so will unlock this trophy as well as the “Dark Thunder” spell.
Note: it’s currently unconfirmed if you need to talk to the horse NPC at each of his locations throughout the game or if he spawns at the end even if you missed him earlier. I did talk to him at every spot throughout the game which is 100% confirmed to spawn him in Chapter 5. He can be found in every Chapter from Chapter 1 – 5 but when you start a new chapter he disappears from the previous chapter (could be a missable trophy if it’s required).
Horse NPC Locations:
- Chapter 1 > Bamboo Grove > Back Hills: From this shrine go down the stairs and then take the path left to find a cave entrance. Inside you find the horse NPC sitting on the side of the cave. Exhaust all dialogues with him. (A meditation spot is also here in the middle of the cave)
- Chapter 2 > Sandgate Village > Village Entrance: From this shrine go forward and then to the right to enter the village area. Keep going forward through the village (past rat archers on the cliffs), then take the road left to get to a meadow where the Earth Wolf boss awaits. This is the opposite side of the gate you saw from Village Entrance shrine. After defeating the Earth Wolf, check the pagoda on the side to find the horse NPC. He’s tied-up there. Exhaust all dialogue.
- Chapter 3 > New Thunderclap Temple > Temple Entrance > From this shrine go forward, through a temple building, then up the stairs in front of you. Then go down the stairs on the left side and straight ahead into the next building. Inside this building go up the stairs to reach the upper balcony. From here you can go over a wooden bridge on the side of the balcony, the horse NPC stands at the end of it. Exhaust all dialogue.
- Chapter 4 > Webbed Hollow > Middle Hollow / Bonevault: On your way to the next shrine called “Cliff of Oblivion” you will automatically run into the horse NPC again. You can’t miss him here, he’s on the main story path and will talk to you automatically. He pops out of a spider cocoon.
- Chapter 5 > Furnace Valley > Valley Entrance: Go down the path and enter the lava lake on the right side, in the corner of the lava lake interact with the Element Cart to pull a string from it. The Horse NPC is stuck inside the cart.
Chapter 6: Mount Huaguo
11. Somersault Cloud
Automatic story-related reward. From the first main story boss in Chapter 6 “Supreme Inspector“.
The above is the detailed content of Black Myth: Wukong All Spell Locations. For more information, please follow other related articles on the PHP Chinese website!

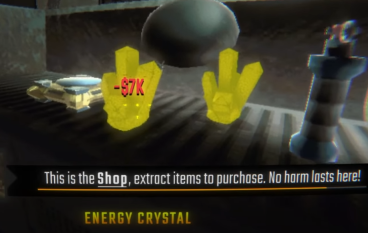 R.E.P.O. Energy Crystals Explained and What They Do (Yellow Crystal)Mar 18, 2025 am 12:07 AM
I bought expensive weapons or drones in R.E.P.O. but found that the energy was exhausted and became useless? Don't worry, you don't have to spend $50,000 on replacements, just charge your gear! That strange machine at the back of your truck is not a decoration. Here are how to get energy crystals and use them to keep your gear running continuously to avoid bankruptcy. More Reads: All R.E.P.O. Items How to get energy crystal You can buy energy crystals from the service store between levels. They usually cost between $7,000 and $9,000 — while expensive, they are far cheaper than repurchasing gear. In the first few levels, no purchase is required. You don't need them for the time being, so
 Repo: How To Revive TeammatesMar 04, 2025 am 02:44 AM
In the terrifying co-op horror game, R.E.P.O, you and your friends must gather loot and extract valuables. Navigating the creepy corridors and shadowy rooms is perilous, with lurking enemies and horrors around every corner. (Or, let's be honest, so
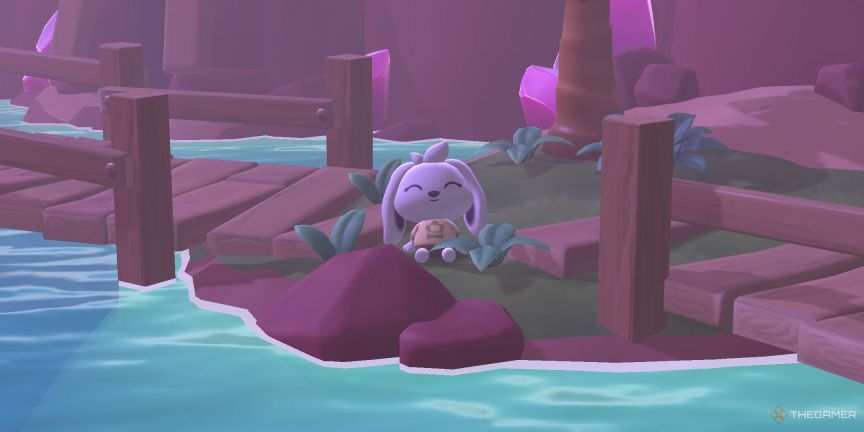 Hello Kitty Island Adventure: How To Get Giant SeedsMar 05, 2025 am 04:03 AM
Explore the enchanting Merry Meadows in Hello Kitty Island Adventure! This guide reveals the secrets to unlocking and utilizing Giant Seeds to reach new heights in this delightful game. Friendship Island initially offers five zones, but three more u
 How Long Does It Take To Beat Split Fiction?Mar 07, 2025 am 04:16 AM
Detailed explanation of the game duration of "Split Fiction": main line, branch line and 100% completion Like Hazelight Studio's previous works, Split Fiction is a relatively linear game, but it also contains some extra interesting content. There are some side stories, optional dialogues and easter eggs in the game, but there are not many elements to collect. Although the level is long and includes multiple mechanisms and boss battles, it still takes a considerable time to complete "Split Fiction", especially to achieve 100% completion. The following is a detailed analysis of the game duration: The main plot duration In the case of two-player game (the player level is comparable), it takes about 12 hours to pass the main plot. But this game is more suitable
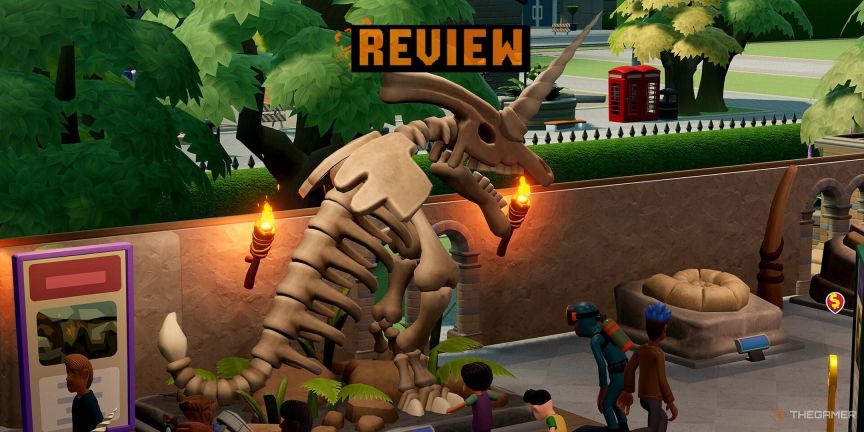 Two Point Museum: All Exhibits And Where To Find ThemMar 05, 2025 am 01:02 AM
Two Point Museum: A Comprehensive Guide to Exhibit Discovery Embark on exciting expeditions across various locations in Two Point Museum to unearth a wealth of curiosities for your museums. This guide details how to plan expeditions, manage your fin
 Monster Hunter Wilds Bow Guide: Builds & CombosMar 01, 2025 am 02:03 AM
Master the Monster Hunter Wilds Bow: A Comprehensive Guide The bow in Monster Hunter Wilds offers a thrilling blend of technical prowess and exhilarating gameplay. Its versatility shines through its diverse elemental options, debilitating ailments, f
 Kingdom Come: Deliverance 2 - The Peasants' Revolt Quest WalkthroughMar 01, 2025 pm 02:05 PM
Kingdom Come: Deliverance 2's expansive world offers countless adventures. This guide focuses on completing the Peasants' Revolt quest in the Kuttenberg region. Starting the Quest: After finishing the "Speak of the Devil" main quest, locat
 Suikoden 1 HD Remaster: How To Win The Duel With General TeoMar 06, 2025 pm 06:03 PM
In "Awakening 1&2 HD Remake", some seemingly invincible boss battles can actually be won, and the duel between General Theo and Paine is the best example. In difficult and difficult terms, this battle is very tricky, and you might think that Paine will definitely die. But that's not the case. This guide will explain in detail the key duel: the timing of the duel, the best equipment of Paine, the conditions to be met before the battle, and General Theo's action prediction to help you defeat him. Paine recommended levels and equipment First, go to the Emperor Garden to sharpen Paine's claws to level 12 (the highest level in this stage of the game). Then, equip ninja suits, headdresses and two bodyguard rings (available at Antai’s Armory). Finally, Paine's level should be higher than level 30, at least level 30, the closer it is to 35


Hot AI Tools

Undresser.AI Undress
AI-powered app for creating realistic nude photos

AI Clothes Remover
Online AI tool for removing clothes from photos.

Undress AI Tool
Undress images for free

Clothoff.io
AI clothes remover

AI Hentai Generator
Generate AI Hentai for free.

Hot Article
Hot Tools

Zend Studio 13.0.1
Powerful PHP integrated development environment

SublimeText3 Chinese version
Chinese version, very easy to use

SublimeText3 Linux new version
SublimeText3 Linux latest version

Notepad++7.3.1
Easy-to-use and free code editor

Dreamweaver CS6
Visual web development tools

