


Want to give your W7 computer a new look, but are troubled by paid themes? Don’t worry, PHP editor Yuzai will help you solve it! This article will introduce you how to download various cool W7 computer themes for free, allowing you to easily beautify your desktop and create a personalized visual experience. Read the following content quickly and start your free journey of computer themes!

1. How to download various cool W7 computer themes for free?
W7 Computer Theme: Personalize your computer
Are you tired of the monotonous interface of your computer? Want to add a little personality and coolness to your Windows 7 computer? no problem! In this article, we will introduce you how to download various cool W7 computer themes for free to give your computer a brand new look.
Free theme websites: Wonderful themes are all there
First of all, we recommend you to go to free theme websites. These websites provide a large number of high-quality W7 computer themes for users to download for free. On these websites, you can choose various styles and types of themes according to your interests and hobbies, such as natural scenery, celebrity photos, animation games, etc., to meet your personalized needs.
Microsoft official website: Officially certified themes
In addition, you can also go to the official Microsoft website to download officially certified W7 computer themes. These themes have been officially reviewed, their quality is guaranteed, and they are perfectly compatible with Windows 7 systems, so there is no need to worry about security and stability issues.
Customize the theme: Create a unique personalized interface
If you are not satisfied with the existing theme, you can also try to customize the theme and create a unique one by changing the desktop background, window color, sound and screen saver, etc. Personalized interface. As long as you have some basic computer skills, you can easily implement a custom theme.
Note: Ensure safe downloading and avoid malware intrusion
When downloading W7 computer themes, be sure to choose a reliable and safe website for downloading to avoid downloading themes with viruses or malware, which may cause computer security risks. In addition, before installing the theme, it is best to conduct a comprehensive scan with anti-virus software to ensure the security of the theme files.
Through the above methods, I believe you have learned how to download various cool W7 computer themes for free to give your computer a brand new look. I hope you can find your favorite theme to add a touch of personality and charm to your computer.
Thank you for reading this article. I hope it can help you find your favorite W7 computer theme, customize it for your computer, and let you enjoy a new computer experience!
2. How to reinstall the system of Great Wall Computer using the w7 system CD?
You can install it if you have a CD-ROM drive. If it’s simpler, just buy an installation CD and insert it into your computer to install it. If not, you can create a CD-ROM drive first and use something like ultros.
Or you can use a USB flash drive to create a boot disk for installation. For specific steps to reinstall the system from a USB flash drive, please refer to:
3. How to record video on a W7 computer?
Open the run window, enter cmd in the window and enter the administrator interface. In the administrator interface, enter psr.exe or psr and press Enter to confirm. Open the problem step recorder, click on the tool to start recording, and click on the location of the problem to generate , click to stop recording and a save window will pop up. Select the save path and edit the save file name. Open the compressed file in the save path and view it in html. The pictures can be saved and used by right-clicking the mouse and selecting Save Picture As. In the question step Select the right drop-down triangle in the recorder and select Settings, where you can set the save path and enable settings such as turning off screen capture.
4. The screen of w7 projection computer is black?
The WC projection computer has a black screen. This is because the match is not successful and the screen cannot be cast.
5. How to reinstall the computer w7 system
How to reinstall the computer w7 system
For many computer users, reinstalling the Windows 7 operating system is a common task. Whether it is for performance optimization purposes or to fix system errors, reinstalling Windows 7 can be an effective way to solve the problem. In this article, we will discuss in detail how to reinstall Windows 7 system on your computer.
Back up important data
Before you start reinstalling Windows 7, you first need to make sure you back up all your important data. This can be accomplished by copying the files to an external hard drive or using a cloud storage service. During the process of reinstalling the system, your data may be deleted, so backup is crucial.
Get the installation disc or USB drive
To reinstall the Windows 7 system, you need to have the installation disc or a USB drive made into a bootable disk. This can be done by downloading the Windows 7 image file and burning it to a disc, or using a specialized tool to transfer it to a USB drive.
Set the BIOS startup sequence
When starting the computer, press the corresponding key (usually the F2, F10 or Delete key) to enter the BIOS settings. In it, you need to set the boot order to boot from the disc or USB drive first so that the computer boots during the reinstallation process.
Start the installation process
Insert the installation CD or USB drive into your computer and restart your computer. You will be asked if you want to boot from an external device, select Yes and follow the on-screen prompts. During the installation process, you can select your desired language, time zone, and keyboard layout options.
Select the installation type
During the installation process, you will be asked to select the installation type. There are usually two options: upgrade your existing system or customize your installation. Choose Upgrade if you want to keep your existing files and applications, or choose Custom Installation if you want to wipe your system and reinstall Windows 7.
Partition and Format Hard Drive
After selecting Custom Installation, you will be prompted to select the target hard drive on which you want to install Windows 7. In this step, you can choose to partition and format the hard drive. If you want to clear all data and reinstall the system, it is recommended to format the hard drive to avoid data retention.
Install Drivers and Updates
After completing the installation of Windows 7, you need to install your computer’s drivers to ensure that all hardware devices are working properly. In addition, you need to download and install operating system updates to improve system security and stability.
Restore Personal Files and Settings
After installing all necessary drivers and updates, you can start restoring your backed up personal files and settings. Copy the previously backed up data back to your computer and make sure all software settings and personal files are fully restored.
Summary
Reinstalling Windows 7 system may be an effective way to solve computer problems, but before doing this, be sure to back up important data and proceed with caution. By following the above steps, you can successfully reinstall your Windows 7 system and restore your computer to a good working condition.
6. Connect Bluetooth headset to w7 computer
How to connect Bluetooth headset on Windows 7 computer
Bluetooth technology has become an indispensable part of modern life, allowing us to easily transfer data and connect between various devices Peripheral devices such as Bluetooth headsets. However, in some cases, connecting Bluetooth headphones to a Windows 7 computer may present some challenges. This article will show you the detailed steps on how to connect a Bluetooth headset on a Windows 7 computer.
Step 1: Open Bluetooth settings
First, open Bluetooth settings on your Windows 7 computer. To do this, click the "Start" button at the bottom of the desktop and select "Control Panel." In Control Panel, find and click "Hardware and Sound" and then select the "Bluetooth Devices" option.
Step Two: Enable Bluetooth Features
Once in the Bluetooth Devices window, look for the “Enable Bluetooth” option and make sure it is turned on. This will cause your computer to start searching for nearby Bluetooth devices, including your Bluetooth headphones.
Step 3: Prepare your Bluetooth headset
Make sure your Bluetooth headset is charged and in pairing mode. Generally speaking, Bluetooth headsets will automatically enter pairing mode when they are first started. You can also press the corresponding button to start pairing mode.
Step 4: Search and connect your Bluetooth headset
Return to the Bluetooth device window on your Windows 7 computer and click the "Add Device" button to let your computer start searching for nearby Bluetooth devices. Once your Bluetooth headset appears in the list of available devices, tap its name to start pairing and connecting.
Step Five: Complete the Connection
If everything goes well, your Windows 7 computer and Bluetooth headset should be paired and connected successfully. In some cases, it may be necessary to enter a pairing code or confirm a connection request. Once connected, you can start using your Bluetooth headset to listen to music, make calls, or do any other Bluetooth audio related activities.
FAQs
Problem: My Bluetooth headset is not showing up in the device list. Solution: Make sure the Bluetooth headset is in pairing mode and search for the device again on the Windows 7 computer.Summary
With the steps provided in this article, you should be able to successfully connect your Bluetooth headphones on your Windows 7 computer. The development of Bluetooth technology has made life more convenient, and correctly connecting your Bluetooth headphones is only a small part of the equation. I hope this article is helpful to you and allows you to enjoy the convenience brought by Bluetooth technology.
7. How to adjust the size of W7 computer icons?
How to adjust the size of computer icons in Windows 7
As an old operating system, Windows 7 provides great flexibility in adjusting the size of icons. Users can customize the size of icons according to their own preferences and needs. The following will introduce you how to adjust the size of computer icons in Windows 7.
Method 1: Adjust through the right-click menu on a blank space on the desktop
1. First, you can right-click on a blank space on the desktop and select the "View" menu. 2. In the View menu, you will see three preset icon sizes: Large, Medium, and Small. 3. Select the icon size you want and click to complete the adjustment.
Method 2: Adjust through personalization
1. Right-click a blank space on the desktop and select the "Personalization" option to enter the personalization interface. 2. Select the Window Color option in the left menu. 3. In the new window, click the "Advanced Appearance Settings" link. 4. In the pop-up "Advanced Appearance Settings" window, you can see the "Icon" option, click this option. 5. In the "Modify Icon" window, select the icon size you want and click the "OK" button to save the settings.
Method 3: Adjust through the control panel
1. Click the Windows Start button and select "Control Panel" to enter the control panel interface. 2. Select the "Appearance and Personalization" option in the Control Panel. 3. Click the "Adjust screen resolution" link. 4. In the new window, click the "Make text and other items larger or smaller" link. 5. Here you can choose a preset percentage, or make finer adjustments with the Custom option.
Through the above methods, you can easily adjust the size of computer icons in Windows 7 to show the style of the desktop according to your own preferences and habits. I hope this article is helpful to you, thank you for reading!
8. How to cancel the activation of W7 computer?
The method to shut down and activate the Win7 system is very simple. The specific operation process is as follows:
The first step is to enter "cmd" in the start menu in the lower left corner of the desktop;
The second step: select "cmd.exe" in the search results ", after selecting, right-click, "Run as administrator";
Step 3: Enter "slmgr -upk" in the black window, uninstall the key program directly, and restart the computer to take effect.
9. How to install W7 system on the computer?
Windows 7 hard drive installation method:
1. Prepare hard drive space. The partition for installing Win7 system is generally 30 to 50G in size and is in NTFS format. Because the current computer has XP installed on the C drive, you need to prepare a 30-50G D drive or E drive to install Win7. 2. Win7 file preparation. ①Download the ISO file of Win7 to the local hard drive. ②Extract the Win7 startup file. Use UltraISO software or a virtual CD-ROM drive to load the ISO file of Win7, and copy the bootmgr file and the boot, efi, and sources folders to the C drive (sources only need to copy the boot.wim file, and the rest does not need to be copied, so you can create a new one on the C drive in advance folder sources, and then copy the boot.wim file into it). ③Extract the Win7 installation files. Use the same method as ② to copy the sources folder to the E drive (it can also be placed on the F drive, etc., as long as it is not placed on the D drive where Win7 is to be installed).
3. Win7 boot format preparation.
Open the command line window in the XP system (the method is: Start → Run, fill in CMD and press Enter), type the command in the command line window and press Enter: c:bootbootsect.exe /nt60 c: Note: If you install 64 bit Win7/Vista, because the bootsect.exe in the system image is 64-bit and cannot run under a 32-bit system. After decompression, just overwrite the 64-bit bootsect.exe in the boot folder.
4. Start the Win7 PE system. Restart the computer and you will enter the WinPE system. After the startup is completed, the Win7 installation interface will pop up. Click "Next" → "Repair Computer" → "No" → "Next" → "Command Prompt" to pop up the command line window.
5. Clean startup files.
It is necessary to delete the bootmgr file and the boot, efi, and sources folders originally copied to the C drive to avoid failure due to confusion in the startup files when installing Win7. Type the commands in the command line window and press Enter:
del c:bootmgr
rd /s c:boot
rd /s c:efi
rd /s c:sources
6. Format the D drive.
Type the following command and press Enter: format d: /q /fs:ntfs
If the D drive is already in NTFS format, you do not need to add the /fs:ntfs parameter. If the D drive is empty, there is no need to format it and skip this step.
7. Run the win7 installation command.
Type the following command and press Enter:
E:SOURCESsetup.exe
8. Complete the installation.
Follow the prompts to complete the win7 installation step by step. The process is the same as the CD installation.
After the installation is completed, you will have a Win7-XP dual system.
Things to note: ① When prompted to select "Installation Type", do not select "Upgrade", select "Custom (Advanced)"; ② When prompted to select which disk to install to, select "Partition 2" (i.e. D drive) ), don’t make a mistake; ③When prompted to enter the product key, enter the key you applied for (searched for), or you can leave it blank, click "Next" directly, and activate after the installation is completed.
10. The edge of the w7 computer screen turns red?
1.
Color setting problem.
Open the "Control Panel" in the "Start Menu" and click "Color Management";
After entering the "Color Management" interface, we click the "Advanced" tab;
2.
Poor contact. Sometimes the cable between our monitor and the host computer becomes loose for some reason, which may cause this kind of travel. The solution is also very simple. After the user shuts down the computer...
3.
Graphics card problem.
The above is the detailed content of How to download various cool W7 computer themes for free?. For more information, please follow other related articles on the PHP Chinese website!

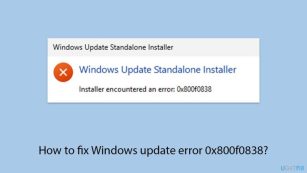 How to fix Windows update error 0x800f0838?Mar 11, 2025 am 12:00 AM
Windows updates are essential components delivered by Microsoft to enhance the functionality, security, and stability of the Windows operating system. These upd
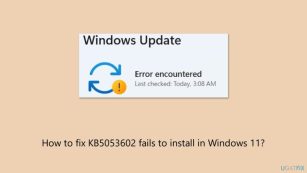 How to fix KB5053602 fails to install in Windows 11?Mar 13, 2025 am 10:00 AM
The KB5053602 patch, released on March 11, 2025, targets Windows 11 editions 22H2 and 23H2, elevating the OS to OS Builds 22621.5039 and 22631.5039, respectivel
 Spotlight on KB5053606 Not Installing for Windows 10, Exact StepsMar 13, 2025 pm 08:02 PM
Windows 10 KB5053606 Update installation failed? This guide provides effective solutions! Many users are having problems trying to install the Windows 10 KB5053606 update released on Tuesday of Microsoft's March 2025 patch, such as SSH connection interruption, Dwm.exe unresponsiveness, or input method editor (IME) issues. Updates may be stuck during downloading or installation, or error codes may appear, such as 0x800f0922, 0xd000034, 0x80070437 and 0x80072efe. KB5053606 installation failure is usually caused by a variety of reasons, including Windows update component failure, system file corruption, and disk
 What if KB5053598 Fails to Install on Windows 11? Fixes HereMar 13, 2025 pm 08:03 PM
Microsoft's March 11, 2025 update, KB5053598, is a crucial patch for Windows 11 24H2 (OS Build 26100.3476). This MiniTool guide covers everything you need to know, including troubleshooting installation problems. What's New in KB5053598? Released on
 GTA V Enhanced ERR_GFX_D3D_NOD3D12, Quick Fix in 4 WaysMar 14, 2025 pm 08:04 PM
GTA 5 Enhanced ERR_GFX_D3D_NOD3D12 Error Fix Guide Grand Theft Auto V Enhanced (GTA 5 Enhanced) is an upgraded game, but some players encounter the "ERR_GFX_D3D_NOD3D12: DirectX 12 adapter or runner found" error when starting. This article provides several solutions. Cause of the Error: This error usually indicates that your system is missing a DirectX 12 runtime library or a compatible DirectX 12 graphics card. Solution: Method 1: Install DirectX Runtime Library Inspection
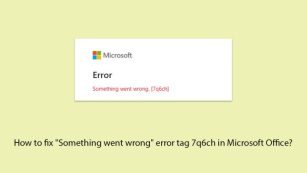 How to fix 'Something went wrong' error tag 7q6ch in Microsoft Office?Mar 15, 2025 am 02:00 AM
The “Something went wrong” error tag 7q6ch in Microsoft Office disrupts your workflow during essential tasks such as creating documents or handling emails it a
 AI LIMIT Save File Location & Saved File Protection-Full GuideMar 17, 2025 pm 10:05 PM
Mastering AI LIMIT's Save File Location and Protection: A Comprehensive Guide Planning to dive into the action-packed sci-fi RPG, AI LIMIT, launching March 27, 2025? Understanding your save file location and implementing robust protection methods is
 How to fix KB5053598 fails to install in Windows 11?Mar 13, 2025 am 10:01 AM
Windows 11 receives regular updates to enhance security, fix bugs, and introduce new features. One aspect of this update process is Patch Tuesday, which occurs


Hot AI Tools

Undresser.AI Undress
AI-powered app for creating realistic nude photos

AI Clothes Remover
Online AI tool for removing clothes from photos.

Undress AI Tool
Undress images for free

Clothoff.io
AI clothes remover

AI Hentai Generator
Generate AI Hentai for free.

Hot Article
Hot Tools

SublimeText3 Chinese version
Chinese version, very easy to use

SAP NetWeaver Server Adapter for Eclipse
Integrate Eclipse with SAP NetWeaver application server.

VSCode Windows 64-bit Download
A free and powerful IDE editor launched by Microsoft

Dreamweaver CS6
Visual web development tools

SublimeText3 Mac version
God-level code editing software (SublimeText3)

