Home >Backend Development >Golang >Master Golang with Nunu: Complete Guide
Master Golang with Nunu: Complete Guide
- WBOYWBOYWBOYWBOYWBOYWBOYWBOYWBOYWBOYWBOYWBOYWBOYWBOriginal
- 2024-08-22 12:34:07826browse
Golang, also known as Go, is a modern and competing programming language developed by Google. With its simple and concise syntax, Golang has become a popular choice among distributed systems developers and competitors. Nunu, in turn, is a command-line tool that allows you to create and manage applications efficiently. In this article, we'll explore how to get started with Golang and Nunu, covering the basics and practices for developers who want to build scalable, concurrent applications.

Why choose Golang?
Simplicity and Productivity
Golang was designed to be simple and productive. Its clear and concise syntax allows developers to write clean, maintainable code. Unlike other programming languages, Golang eliminates many unnecessary complexities, allowing you to focus on the logic of your program.
Exceptional Performance
One of the main reasons for Golang's popularity is its exceptional performance. As a compiled language, Golang offers execution speed close to low-level languages like C, but with the convenience of modern syntax and high-level features.
Read more about Golang's performance
See how to use a Linux terminal on Windows using WSL2 Windows.
Built-in Competition
Golang shines when it comes to concurrent programming. With goroutines and channels, Golang makes writing concurrent code as simple as traditional sequential programming. This is especially useful in distributed systems and applications that need to handle multiple tasks simultaneously.
Configuring your Development Environment
Installing Golang on Linux
To get started with Golang on Linux, follow these steps:
- Download the installation package from the official Golang website.
- Extract the file to the /usr/local directory:
sudo tar -C /usr/local -xzf go1.x.x.linux-amd64.tar.gz
- Add the Go directory to your PATH:
   echo 'export PATH=$PATH:/usr/local/go/bin' >> ~/.bashrc
   source ~/.bashrc
- Check installation:
go version
Introduction to Nunu
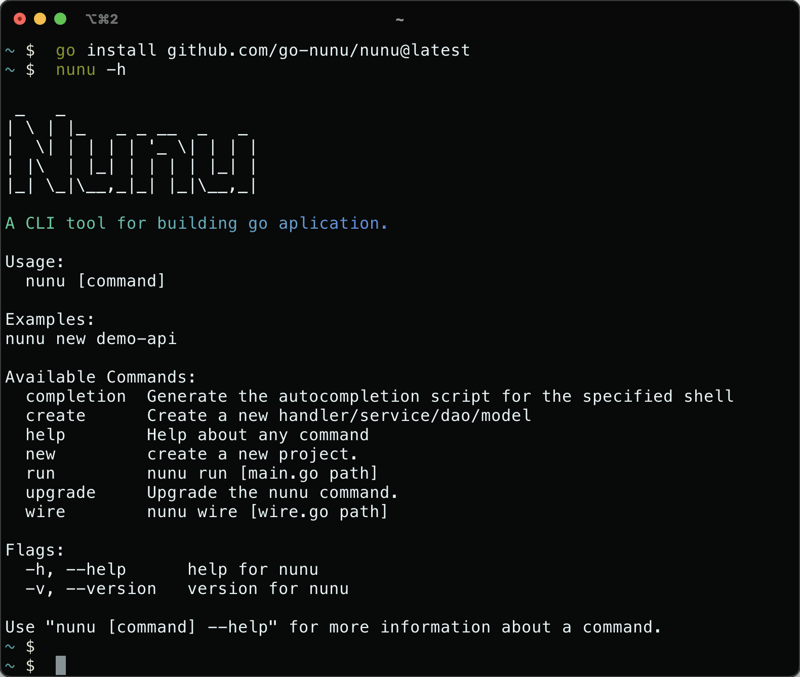
Nunu is an innovative tool that simplifies Golang development. It offers a set of features that speed up the process of creating, testing and deploying Go applications.
To install Nunu, run:
go install github.com/nunu-framework/nunu@latest
Learn more about Nunu and its features
Creating your First Golang Project with Nunu
Starting a New Project
With Nunu installed, creating a new Golang project is simple:
- Open the terminal.
- Navigate to the directory where you want to create your project.
- Run the command:
nunu new meu-projeto-go
- Nunu will create a standard project structure for you.
Project Structure
The typical structure of a Golang project created with Nunu includes:
meu-projeto-go/
├── cmd/
│   └── main.go
├── internal/
│   ├── config/
│   ├── handler/
│   ├── model/
│   └── service/
├── pkg/
├── go.mod
└── go.sum
This structure promotes a clean and modular organization of your code, facilitating project maintenance and scalability.
Developing with Golang and Nunu
Writing Code with Golang
Now that you have a project created, it's time to write your first code with Golang. Open the main.go file and add the following code:
package main

import (
    "fmt"
    "net/http"
)

func main() {
    http.HandleFunc("/", func(w http.ResponseWriter, r *http.Request) {
        fmt.Fprint(w, "Olá, mundo!")
    })

    http.ListenAndServe(":8080", nil)
}
This code demonstrates the simplicity and clarity of Go syntax. The main function is the entry point of the program, and we use the fmt package to print to the screen.
This code creates a simple HTTP server that prints "Hello world!" when you access the server root.
Running the Code with Nunu
To run the code, use the nunu run command in the terminal. This will start the server and you can access it at http://localhost:8080.
Using Nunu Resources
Nunu offers several tools to accelerate your development. For example, to generate a new HTTP handler:
nunu generate handler user
This command will create a new handler file with basic structure to handle user-related HTTP requests.
Testing and Debugging
Writing Tests in Go
Golang has native support for testing. Create a file main_test.go:
package main

import "testing"

func TestHelloWorld(t *testing.T) {
    expected := "Hello, World!"
    if got := helloWorld(); got != expected {
        t.Errorf("helloWorld() = %q, want %q", got, expected)
    }
}
Run the tests with:
go test
Debugging with Delve
For advanced debugging, we recommend using Delve, a powerful debugger for Go. Install it with:
go install github.com/go-delve/delve/cmd/dlv@latest
Learn more about debugging in Go with Delve
Implantação e Considerações Finais
Compilando para Produção
Para compilar seu programa Go para produção:
go build -o meu-app cmd/main.go
Este comando criará um executável binário otimizado para produção.
Dicas de Desempenho
- Use goroutines para tarefas concorrentes.
- Aproveite o garbage collector de Go, mas esteja ciente de seu impacto.
- Utilize benchmarks para identificar gargalos de desempenho.
Explore mais dicas de otimização em Go
Conclusão
Iniciar com Golang usando Nunu abre um mundo de possibilidades para desenvolvimento eficiente e poderoso. A combinação da simplicidade e desempenho de Go com as ferramentas práticas do Nunu cria um ambiente de programação ideal para projetos de qualquer escala.
Lembre-se, a jornada de aprendizado em programação é contínua. Continue explorando, praticando e construindo projetos para aprimorar suas habilidades em Golang.
Quer aprofundar seus conhecimentos em Golang e desenvolvimento em Linux? Confira nossos outros artigos e tutoriais sobre programação avançada e práticas de DevOps!
Para saber mais sobre Golang e Nunu, consulte os seguintes links:
Site oficial do Go: https://golang.org/
Repositório do GitHub do Nunu: https://github.com/nunu/nunu
The above is the detailed content of Master Golang with Nunu: Complete Guide. For more information, please follow other related articles on the PHP Chinese website!

