
Home >Java >javaTutorial >How to start a Spring Boot + JPA + MySQL application
How to start a Spring Boot + JPA + MySQL application

- 王林Original
- 2024-08-21 22:31:21779browse
Before we go to create the project, I will briefly explain what the technologies Spring Boot, JPA and MySQL.
are.- Spring Boot: is a Java framework used to simplify the development of Spring applications, allowing the creation of standalone applications, which can be executed with a simple command, without the need for complex configuration.
- JPA: Java Persistence API is a Java specification that defines how Java objects should be mapped to relational databases (ORM).
- MySQL: World famous open source Relational Database Management System (RDBMS). It is widely used to store, organize and manage large volumes of data in web and enterprise applications.
With these 3 technologies, we can develop robust, scalable and high-performance web applications.
Project Creation
We will be creating the project in an online tool called: Spring Initializr which facilitates the creation of Spring Boot projects.
When you enter the URL, you will see a screen like this:
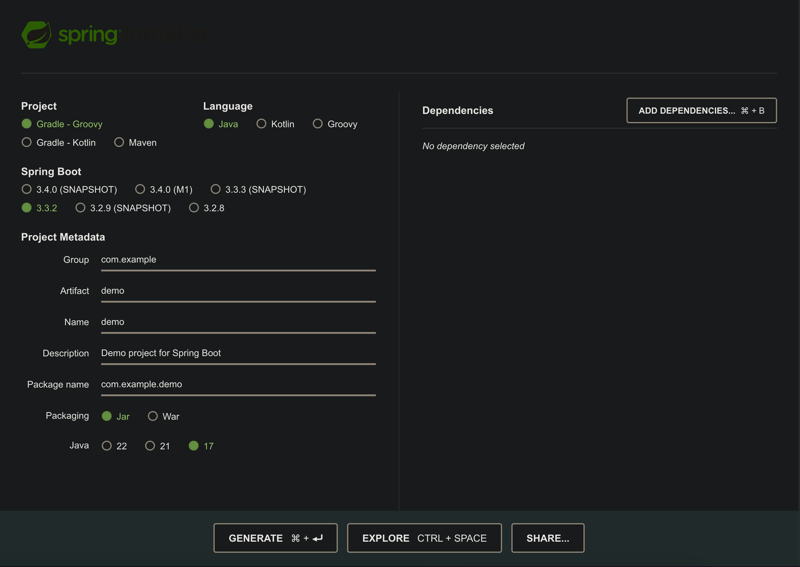
We will be configuring some things on the left side, such as:
- Project Type: Maven
- Language: Java
- Spring Boot Version: 3.3.2
In Project Metadata you will go by:
- Group: br.com.(ex: br.com.josemarinho)
- Artifact and Name: spring-jpa-mysql
- Description: Project using Spring Boot, JPA and MySQL
- Package name: automatically generated based on Group and Artifact.
- Packaging: Jar
- Java: 17
On the right side you will have the dependencies of our project, we need to add 3, namely:
- Spring Web
- Spring Data JPA
- MySQL Driver
In the end it will look like this:
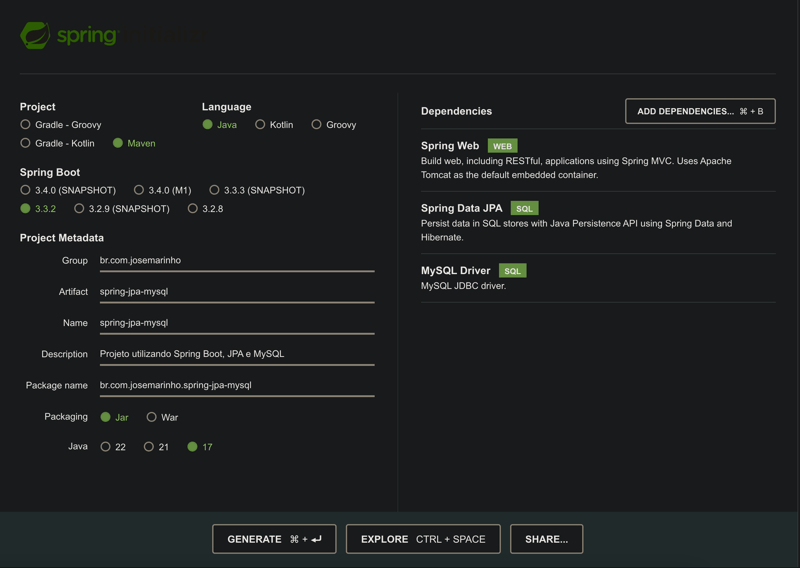
After configuration, just press the Generate button, where you will start downloading a Zip containing all the project directories/files. Afterwards, just unzip and open in your preferred IDE.
First run
As soon as you open the project and try to run the program, it will report a run-time error saying the following:
Description:

Failed to configure a DataSource: 'url' attribute is not specified and no embedded datasource could be configured.

Reason: Failed to determine a suitable driver class
This occurs because Spring Boot cannot automatically configure a DataSource for the application. Shall we configure?
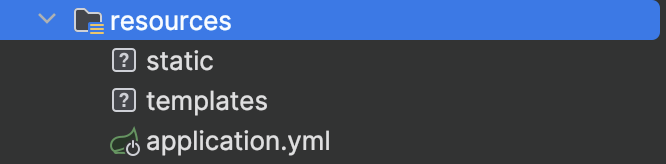
In the project there will be a directory called resources, within this directory there are some files, among them a file called application.properties which is where the settings of a spring boot project are located. I like to use its YAML/YML version, so just delete this file and create another one called application.yml, looking like this:
Let's define the url where our app will connect, driver, username and password:
spring:
  datasource:
    driver-class-name: com.mysql.cj.jdbc.Driver
    username: username
    password: password
    url: jdbc:mysql://127.0.0.1:3306/seu_banco_de_dados
In application.properties it would look like this:
spring.datasource.driver-class-name=com.mysql.cj.jdbc.Driver
spring.datasource.username=username
spring.datasource.password=password
spring.datasource.url=jdbc:mysql://localhost:3306/seu_banco_de_dados
Okay, now just run the project again and you will see output like this.

Entity Creation
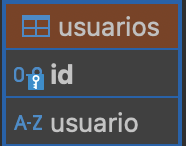
In my database I have a simple table called users in which there are 2 fields:
- id: primary key integer auto increment
- user: varchar(255)
With it, we will take the first step to map this table in a Java context, creating an Entity. To do this, create a class called User, in the end it should look like this:
@Entity
@Table(name = "usuarios")
public class Usuario {

    @Id
    @GeneratedValue(strategy = GenerationType.IDENTITY)
    private Integer id;
    private String usuario;

    // Getters e Setters
}
- @Entity: Marca a classe como uma entidade JPA. Isso indica ao JPA que a classe deve ser persistida em um banco de dados.
- @Table(name = "produto"): Especifica o nome da tabela no banco de dados à qual a entidade está mapeada. Se essa anotação não for fornecida, o JPA assumirá que o nome da tabela é o mesmo que o nome da classe.
- @Id: Indica que o campo é a chave primária da entidade.
- @GeneratedValue: Indica a estratégia que iremos gerar os valores, no caso escolhemos que o próprio banco de dados irá gerar automaticamente para nós, o padrão é o GenerationType.AUTO.
Agora que temos nossa entidade já desenvolvida precisamos criar nossos Repositórios que implementarão o JPA para realizar manipulações no Banco de Dados.
Criação dos Repositórios utilizando JPA
Para iniciar crie uma interface chamada UsuarioRepositorio, essa interface vai herdar as características de JpaRepository<> passando dois valores genéricos, o primeiro é a entidade e o segundo é o tipo do Id. Não podemos deixar de esquecer de anotar a classe com a anotação @Repository, ficando dessa forma:
@Repository
public interface UsuarioRepositorio extends JpaRepository<Usuario, Integer> { }
O JpaRepository é uma interface do Spring Data JPA que fornece diversos métodos prontos para realizar operações de acesso a dados em uma aplicação, como por exemplo o findAll() que retorna todos os dados de uma determinada tabela de banco de dados. No final do artigo estarei deixando alguns links falando mais sobre.
Já temos o suficiente para realizar algumas consultas, vamos criar um ponto de entrada na nossa aplicação para ver esses dados.
Crie uma controller chamada: UsuariosController.
Nela vamos anotar com 2 anotações: @RestController e @RequestMapping("/v1/usuarios") para mapear a rota da nossa controller
Vamos fazer injeção de dependência da UsuarioRepository e criar um endpoint GET para obter os dados da controller.
No final ficará assim:
@RestController
@RequestMapping("/v1/usuarios")
public class UsuarioController {

    private UsuarioRepositorio usuarioRepositorio;

    public UsuarioController(UsuarioRepositorio usuarioRepositorio) {
        this.usuarioRepositorio = usuarioRepositorio;
    }

    @GetMapping()
    public ResponseEntity getUsuarios() {
        return ResponseEntity.status(HttpStatus.OK).body(usuarioRepositorio.findAll());
    }
}
Note que estou utilizando o método findAll() que mencionei mais acima existente na repository.
Em minha tabela de banco de dados, já possuo alguns dados. Fazendo uma consulta simples, virá o seguinte resultado:
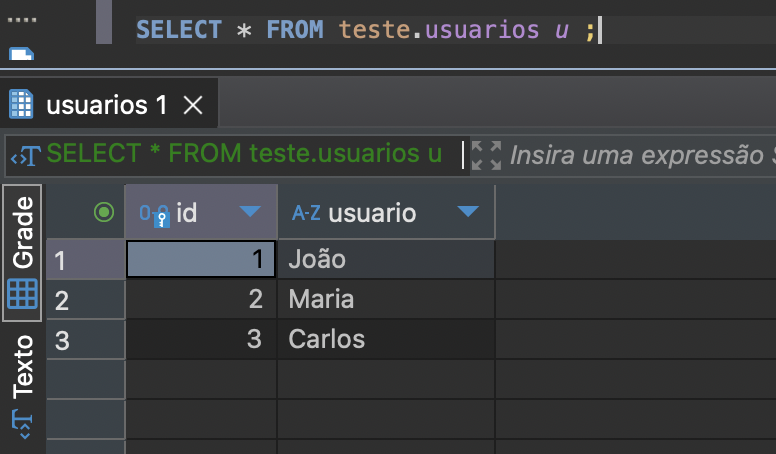
Vimos que temos 3 dados na tabela.
Após salvar o conteúdo da controller e executar novamente o projeto, quando realizarmos uma requisição do tipo GET na url localhost:8080/v1/usuarios, virá o seguinte resultado:
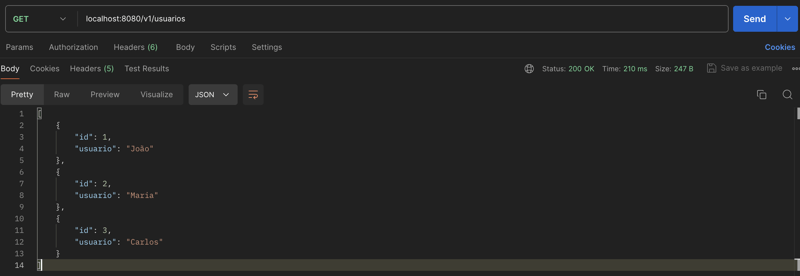
Vemos que o resultado que foi resgatado ao realizar uma consulta no banco de dados foi exatamente o mesmo ao fazer uma requisição GET em nossa aplicação graças ao JPA e ao Spring Boot.
Chegamos ao final de mais um post. Estarei deixando alguns links de referência:
- Jpa Repository
- Anotação Generated Value
- Driver MySQL JPA
- Spring Boot YAML vs Properties
- Spring Data JPA
O repositório do artigo se encontra nesse link: Repositório Projeto
Um abraço e bons estudos! Até mais.
The above is the detailed content of How to start a Spring Boot + JPA + MySQL application. For more information, please follow other related articles on the PHP Chinese website!