


Having trouble installing your computer system? Don't worry! PHP editor Apple brings you a computer system installation tutorial to guide you step by step to solve installation problems. From preparation to detailed steps to solutions to common problems, this article will provide you with a comprehensive, easy-to-understand installation guide. Come and learn the secrets of system installation and make your computer look brand new!

1. How to install the computer system?
1.
First open the software. The software will prompt you. After reading it carefully, click I Got It to enter the tool.
2.
Enter the system home, the tool will automatically detect the relevant information of the current computer system, click Next.
3.
After entering the interface, the user can choose to install Windows 10 64-bit system according to the prompts and click Next.
4.
After selecting the system, wait for the download of PE data and system.
5.
After the download is completed, the system will automatically restart the system.
6.
After restarting the system, the computer will enter a selection of startup items. At this time, we select Enter.
7.
After entering, the system will automatically perform backup and restore, waiting for completion.
8.
After the system backup and restore is completed, the system will automatically install. After the installation is completed, it will automatically restart and you can enter the system. Just wait for the win10 system installation to be completed.
2. How to correctly install computer system software? | Computer System Installation Guide
1. Preparation
Before starting to install the computer system software, we need to do some preparations. First, make sure you have a reliable system software installation media, such as an operating system CD or image file. Secondly, back up your important data to avoid losing it during the installation process. Finally, make sure your computer meets system requirements, such as processor, memory, hard drive space, etc.
2. Make a system startup disk
Before installing the computer system, you need to make a startup disk to boot the computer during the system installation process. Common methods of making a boot disk include using tools provided by the operating system or third-party software. When making a boot disk, make sure to select the correct operating system version and installation options.
3. Enter the system installation interface
Insert the prepared system startup disk and restart the computer. Follow the prompts to select the boot method in the startup interface. Generally, choose to boot from a CD or USB device. Next, the system will load the installer and enter the installation interface.
4. Install system software
In the system installation interface, follow the prompts to install. First, select the installation type, which generally includes a new installation or an upgrade installation. Then, select the installation location, you can choose the system partition or a new partition for installation. Next, the system will copy files, set configurations, and install drivers. This process may take some time, so just wait patiently.
5. Set up and optimize the system
After the system installation is completed, we need to perform some system settings and optimization. First, enter the administrator account and password and set up other user accounts. Then, install drivers, update system patches, and install necessary software as needed. Finally, adjust system settings such as display resolution, language settings, time zone, etc. to ensure the system operates properly and meets your personal needs.
6. Data recovery and backup
After completing the system installation, we can restore and restore the previously backed up data. Make sure you don't lose any important files or data. In addition, it is recommended to perform regular data backups to avoid the risk of data loss.
7. Anti-virus and system protection
Finally, after installing the system, we should turn our attention to security and system protection. Install and update anti-virus software in a timely manner, and perform regular system scans. In addition, system and software patches are regularly updated to fix possible security vulnerabilities and improve system stability and security.
Hope the above steps and guides can help you install computer system software correctly and safely. Thank you for reading, I hope this article is helpful to you.
3. How to install the iso of the computer system?
1. Download the iso image file system file package, and then unzip it. If the file to be decompressed is winrar, you only need to double-click with the left button to decompress it successfully. If it is a file in CD format, then we need to right-click and select "Extract to current folder (X)".
2. After extracting the file, we can find a folder named setup and double-click it.
3. At this time, a new program installation prompt will appear on the desktop. Wait for one minute.
4. A window to install updates pops up on the desktop. We click "Get the latest installation updates".
5. Select "I accept the license terms".
6. Click "Next".
7. Left-click to select the system disk, and then click "Next".
8. In this way, the iso image file starts to be installed.
4. How to boot and install the computer system?
Set the optical drive to start. The following are the specific setting methods for three different BIOSes: (On notebooks, you generally only need to press the F12 key to start the optical drive.)
1.Award BIOS 4.51PG設定
再起動し、DELを押してAward Bion 4.51PGインターフェイスに入り、ファンクションキー領域の方向キーを使用して2行目の「BIOS FEATURES SETUP」(BIOS機能設定)を選択し、Enterを押してに入りますBIOS FEATURES SETUP インターフェイスで、「BOOT SEQUENCE」を見つけ、pgup または pgdn を使用してその右側に表示される A と C を CD-ROM (光学ドライブの起動)、C、A に変更し、ESC を押し、F10 を押し、 Y、Enter キーを押し、保存して終了します。
2.BIOS 6.0 設定を獲得
再起動し、Del を押して BIOS に入り、Advanced Bios features (高度な BIOS パラメーター設定) を見つけて Enter を押して、Advanced Bios features (高度な BIOS パラメーター設定) インターフェイスに入ります。
最初の起動デバイスを検索し、PgUp または PgDn を使用してページをめくって HDD-O を CDROM (光学ドライブ ブート) に変更し、ESC キーを押し、F10 キーを押し、Y キーを押し、Enter キーを押し、保存して終了します。
3.AMI BIOS 8.0設定
コンピュータを起動し、Delを押してAMI BIOSセットアッププログラムのメインインターフェイスに入り、上部のメニューで「Boot」を見つけて選択し、Enterを押し、矢印キー↑↓を使用します。開いたインターフェイスで「起動デバイスの優先順位」を選択し、Enter キーを押して「1 番目の起動デバイス」インターフェイスに入り、Enter キーを押してオプション インターフェイスに入り、方向キー ↑↓ を使用して「CD/DVD: 3S-PH..」を選択します。 ." (光学ドライブの起動)、Enter キー、Esc キー、F10 キー、Y キーの順に押し、Enter キーを押し、保存して終了します。
インストール CD を光学ドライブに挿入し、再起動します。「CD...何かキーを押してください...」というメッセージがインターフェースの下部に表示されたら、適切なタイミングで任意のキーを押して、インストール CD が開き、起動します。それ以外の場合は、ハードディスクから再度起動します。
5. コンピューターシステムをインストールするにはどうすればよいですか?
システムをコンピュータにインストールする具体的な手順は次のとおりです:
1. まず、システムをインストールするための U ディスクを準備し、システムをインストールするコンピュータに U ディスクを挿入し、コンピュータの電源を入れます。システムをインストールするには、F12 キーを長押しします。
2. 次に、コンピューターはクイックスタートアップオプションに入り、起動するUディスクを選択します。
3. インストールする言語と入力方法を選択し、Enter ボタンを押して確定します。
6.Hongmeng コンピュータシステムをインストールするには?
Hongmeng システムはコンピュータにインストールできません。現在、Hongmeng システムは WINDOWS システムのみにインストールできます。Hongmeng システムは Huawei の携帯電話にのみ適しており、コンピュータにはまだ認可されていません。将来的には今すぐインストールできますが、まだインストールできません
7. コンピューター システムに WordPress をインストールします
WordPress をコンピューター システムにインストールします
WordPress は現在、世界で最も人気のあるコンテンツ管理システムの 1 つです。多くの Web サイトは、Web サイトのコンテンツの構築と管理に WordPress を使用することを選択しています。コンピューター システムに WordPress をインストールするのは基本的な作業です。この記事では、コンピューター システムに WordPress をインストールする方法について説明します。
準備
WordPress のインストールを開始する前に、次の準備が完了していることを確認する必要があります:
信頼できるネットワーク接続 ドメイン名とホスティング スペース FTP クライアント ツール テキスト エディタ準備ができたら、その方法を説明します。コンピューター システムに WordPress をインストールします。
WordPress をダウンロード
まず、最新バージョンの WordPress をダウンロードする必要があります。公式 WordPress Web サイトにアクセスし、そこから最新の WordPress zip ファイルをダウンロードできます。ダウンロードが完了したら、ファイルを選択したディレクトリに解凍します。
データベースを作成する
WordPress では、Web サイトのコンテンツと設定を保存するデータベースが必要です。 MySQL データベースまたはその他の互換性のあるデータベースを使用できます。データベース管理ツールで新しいデータベースを作成し、データベース名、ユーザー名、パスワードをメモします。
WordPress を設定する
WordPress ディレクトリで wp-config-sample.php文件,并将其重命名为wp-config.php。使用文本编辑器打开wp-config.php ファイルを見つけ、そのファイル内に次のコンテンツを見つけます:
8. Apple コンピュータ システムをインストールするには?
Apple コンピュータ システムのインストール プロセスは、システムのバージョンとインストールするハードウェア デバイスによって異なります。一般的なインストール手順は次のとおりです:
1. まず、データの損失を避けるためにデータをバックアップします。
2. 次に、インストールするオペレーティング システムのバージョンを決定します。インストール メディアがない場合は、Apple の公式 Web サイトにアクセスしてシステム イメージ ファイルをダウンロードするか、インストール ディスクまたは USB フラッシュ ドライブを購入してください。
3. インストール メディアを挿入し、コンピューターを再起動し、回復モードに入ります。この時点で、起動キーの組み合わせ (Command (⌘) + R) を使用するか、別のキーの組み合わせを使用して回復パーティションを指定できます。以前のシステム バージョンを使用する必要がある場合は、Option (⌥) + Command(⌘) + R、または Shift + Option(⌥) + Command(⌘) + R を使用します。
4. リカバリモードでは、システムプログラムのインストールに備えて、ディスクユーティリティを選択してディスクをフォーマットし、パーティションを作成できます。
5. 必要なパーティションをすべて作成したら、ディスクユーティリティを終了し、macOS のインストールを選択します。インストール ウィザードの指示に従ってインストール プロセスを続行し、インストール先のターゲット ディスクを選択します。インストールプロセス中に、Apple ID を入力するか、その他のシステムオプションを設定する必要がある場合があります。
6. インストールが完了すると、コンピューターが再起動し、新しくインストールされたオペレーティング システムが起動します。
ご注意ください: インストール手順は特定の状況に応じて異なる場合があり、より詳細な手順や提案が必要になる場合がありますので、インストール前に関連ドキュメントまたは公式 Web サイトを参照してください。
9. コンピュータシステムのインストール日を確認するにはどうすればよいですか?
「WIN+R」ショートカットキーを押し、「CMD」と入力してEnterを押し、DOSウィンドウで「systeminfo」コマンドを入力して、Windows XPの生年月日を表示します(Windows XPの最初のインストール日を指します)。 。 GHOST を使用してシステムを再インストールする場合は、前回の時間が引き続き使用されます。例: [スタート]--[ファイル名を指定して実行]--[cmd] でコマンド プロンプトを開きます。中にsysteminfoを入力します。システムのインストール時期を含む、システムに関するさまざまな情報が表示されます。たとえば、次のような情報が表示されます。 ホスト名: PFOS 名: Microsoft Windows XP ProfessionalOS バージョン: 5.1.2600 Service Pack 2 Build 2600OS メーカー: Microsoft CorporationOS 構成: スタンドアロン ワークステーション OS コンポーネントタイプ: ユニプロセッサ 無料 登録所有者: ビールキャップ 登録組織: ビール瓶 製品 ID: 76481-640-2449187-23168 初回インストール日: 2007-6-13、7:20:00 システム起動時間: 0 日、7 時間、3分、42 秒 システム メーカー: Lenovo システム モデル: Gemini I/II システム タイプ: X86 ベースの PC プロセッサー: 1 プロセッサーが搭載されています。 [01]: x86 Family 6 Model 13 Stepping 8 純正Intel ~595 MhzBIOS バージョン: PTLTD - 6040000
10. コンピューターのシステムディスクをインストールするにはどうすればよいですか?
インターネットから U ディスク起動ソフトウェアをダウンロードし、U ディスクを起動ディスクにするだけです。そして、対応するシステム イメージを USB フラッシュ ドライブの指定されたフォルダーに配置します。
その後、コンピューターを再起動し、USB フラッシュ ドライブから起動するように BIOS を設定します。 USB フラッシュ ドライブ経由で開始します。USB ブート インターフェイスに入ったら、プロンプトに従って段階的にシステムをハード ドライブにインストールします
The above is the detailed content of How to install the computer system?. For more information, please follow other related articles on the PHP Chinese website!

 Clipchamp Video Loss on Windows? 2 Ways to Recover Files!May 09, 2025 pm 08:12 PM
Recover Lost Clipchamp Videos: A Step-by-Step Guide Losing a video you've edited in Clipchamp can be frustrating. This guide provides effective methods to recover your lost Clipchamp video files. Finding Your Clipchamp Videos Before attempting recov
 7 Useful Fixes for Action Center Keeps Popping upMay 09, 2025 pm 08:07 PM
Action Center allows you to access quick settings and notifications. However, some users say that they encounter the “Action Center keeps popping up” issue on Windows 11/10. If you are one of them, refer to this post from MiniTool to get solutions.Qu
 Instant Ways to Restore Missing Google Chrome Icon on WindowsMay 09, 2025 pm 08:06 PM
Troubleshoot Missing Google Chrome Icon on Windows Can't find your Google Chrome icon on Windows? This guide offers several solutions to restore it. Why is my Chrome icon missing? Several factors can cause the Chrome icon to vanish from your desktop:
 Brave Browser High CPU and RAM Usage: Best 5 Tips to ReduceMay 09, 2025 pm 08:05 PM
Brave browser CPU and memory usage too high? Under Windows 10/11 system, Brave browser's high CPU and memory usage problems have troubled many users. This tutorial will provide a variety of solutions to help you easily resolve this issue. Quick navigation: Brave browser high CPU and memory footprint Solution 1: Clear cookies and cache data Solution 2: Disable hardware acceleration Solution 3: Close the tab and update the Brave browser Solution 4: Disable the plugin Solution 5: Create a new user profile Optional: Run MiniTool System Booster System Optimization Tool Summarize Brave browser high CP
 Targeted Fixes for Xbox Error 0x87e0000f When Installing GamesMay 09, 2025 pm 08:04 PM
Troubleshooting Xbox Error Code 0x87e0000f: A Comprehensive Guide Encountering the Xbox error code 0x87e0000f while downloading games from Xbox Game Pass can be frustrating. This guide provides several solutions to help you resolve this issue and get
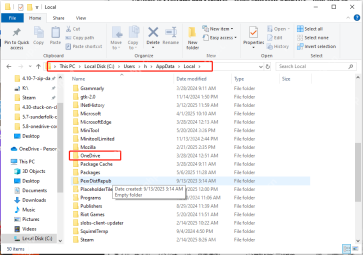 OneDrive Couldn't Start Files on Demand?Top 4 MethodsMay 09, 2025 pm 08:02 PM
OneDrive Files On-Demand troubleshooting: resolving the "OneDrive couldn't start Files On-Demand" error. This MiniTool guide provides solutions for the persistent "Microsoft OneDrive Couldn’t start files on Demand" error (codes 0x
 How to fix 'Microsoft Store is blocked' error in Windows?May 09, 2025 pm 06:00 PM
Microsoft Store is blocked error occurs when Windows prevents access to the Microsoft Store app, displaying the message Microsoft Store is blocked. Check with y
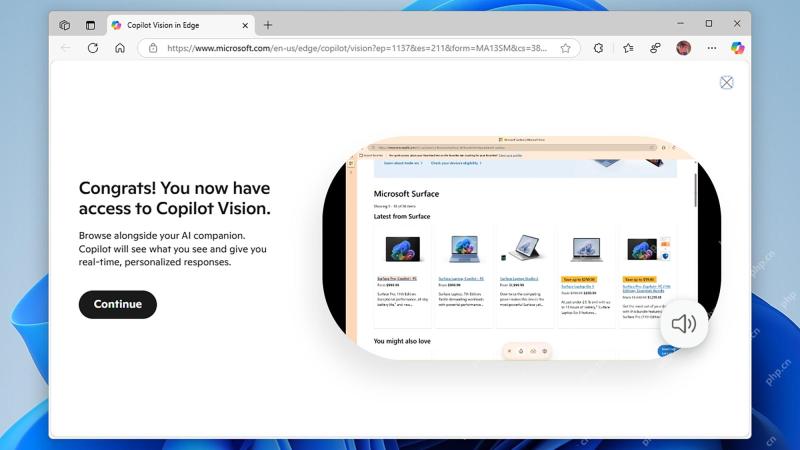 How to use Copilot Vision for free in Microsoft EdgeMay 09, 2025 am 10:32 AM
Staying current with all the new AI tools is a challenge. Many might even overlook readily available AI features. For instance, Copilot Vision is now free for all Microsoft Edge users – a fact easily missed if you don't regularly use Edge or haven't


Hot AI Tools

Undresser.AI Undress
AI-powered app for creating realistic nude photos

AI Clothes Remover
Online AI tool for removing clothes from photos.

Undress AI Tool
Undress images for free

Clothoff.io
AI clothes remover

Video Face Swap
Swap faces in any video effortlessly with our completely free AI face swap tool!

Hot Article
Hot Tools

SecLists
SecLists is the ultimate security tester's companion. It is a collection of various types of lists that are frequently used during security assessments, all in one place. SecLists helps make security testing more efficient and productive by conveniently providing all the lists a security tester might need. List types include usernames, passwords, URLs, fuzzing payloads, sensitive data patterns, web shells, and more. The tester can simply pull this repository onto a new test machine and he will have access to every type of list he needs.

DVWA
Damn Vulnerable Web App (DVWA) is a PHP/MySQL web application that is very vulnerable. Its main goals are to be an aid for security professionals to test their skills and tools in a legal environment, to help web developers better understand the process of securing web applications, and to help teachers/students teach/learn in a classroom environment Web application security. The goal of DVWA is to practice some of the most common web vulnerabilities through a simple and straightforward interface, with varying degrees of difficulty. Please note that this software

SublimeText3 Mac version
God-level code editing software (SublimeText3)

SublimeText3 English version
Recommended: Win version, supports code prompts!

SublimeText3 Linux new version
SublimeText3 Linux latest version

