Home >Backend Development >PHP Tutorial >How to deploy a Web App with CI/CD pipeline on Azure app service.
How to deploy a Web App with CI/CD pipeline on Azure app service.
- 王林Original
- 2024-08-09 09:25:521042browse
Deploying a web app with a Continuous Integration/Continuous Deployment (CI/CD) pipeline on Azure App Service using GitHub and Visual Studio Code involves several steps which i will be discussing below:
1. Setup Your Azure Account & Create a Web App:
- Sign in to Azure Portal: using https://portal.azure.com
- Create a App Service Plan:
- From the home page, search for App Service Plan as seen in the image below.

- Click on create.

- Fill in the required details (Subscription, Resource Group, Name, Operating system, Region, etc.).

- Choose your preferred pricing plan. Then click Review + Create.

- Click on create.

- Click on Go to Resources.

- Click on webapp-plan.


- Search and click on web app to create one.

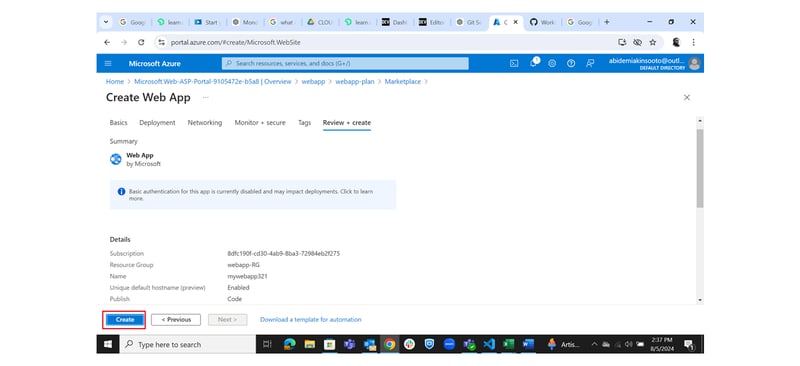
 Fill in the required details (Subscription, Resource Group, Web App Name, pubish, Runtime Stack, etc.).
 Review + Create.


2. Set Up Your Local Development Environment:
Install Visual Studio Code and Git if you haven't.
3. Initialize Git Repository and Create Web App in Visual Studio Code:
Open Git and create a new repository by clicking on New repository.


- Initialize Git from Visual studio code terminal:

 Run git init to initialize a Git repository.
Run git add . to stage your files.
Run git status
 Run git clone +url (from the repository created earlier)
 Run nano index php
Run cat index php

5. Back to our Azure page:
Go to your Web App in the Azure Portal.
In the Deployment section, select Deployment Center.

Select code source. Click on Github


6. Deploy the Application
Commit and Push: Commit and push your changes to GitHub. The GitHub Actions workflow will automatically start, build, and deploy your application to Azure App Service.
Needed to upgrade from the free subscription to be able to deploy as seen below:

After Upgrade, you can now add a slot.


7. Monitor Deployment
Check Deployment Status: You can monitor the progress of the deployment in the Actions tab on GitHub.
View the Web App: Once deployed, your web app should be accessible via the Azure App Service URL.


By following these steps, you will have successfully deployed a web app with a CI/CD pipeline using GitHub and Visual Studio Code on Azure App Service.
The above is the detailed content of How to deploy a Web App with CI/CD pipeline on Azure app service.. For more information, please follow other related articles on the PHP Chinese website!


 Fill in the required details (Subscription, Resource Group, Web App Name, pubish, Runtime Stack, etc.).
 Review + Create.


 Run git init to initialize a Git repository.
Run git add . to stage your files.
Run git status
 Run git clone +url (from the repository created earlier)
 Run nano index php
Run cat index php
