
Home >System Tutorial >Windows Series >Photos App Not Working after Windows 10 Update, How to Fix
Photos App Not Working after Windows 10 Update, How to Fix

- 王林Original
- 2024-08-06 02:33:32891browse
Sometimes, but not always, Windows 10 updates can cause some glitches. Some people report that the Photos app stopped working after the Windows 10 update. Similar problems occur, for instance, Photos app won't open, Photos app crashes whenever you try to use it, Photos app doesn't show photos, and so on. In any case, now here are four methods you can try to fix the "Windows 10 Photos app not working" problem. At least one method will help.
- Way 1: Using Windows Troubleshoot
- Way 2: Reset the Photos app
- Way 3: Remove the Windows update installed recently
- Way 4: Reinstall the Photos app
Way 1: Fix "Photos app not working" with Windows Troubleshooter
Windows 10 comes with a built-in Troubleshooter, which can help troubleshoot problems that may prevent Windows Store apps from working properly. If your Photos app failed to work properly, you could try the Troubleshooter first.
Step 1: Open the Settings app using Win + I key, and then go to Update & Security.
Step 2: Select Troubleshoot on the left pane. On the right pane, scroll down to the Windows Store Apps and highlight it, and then click on "Run the troubleshooter" button.
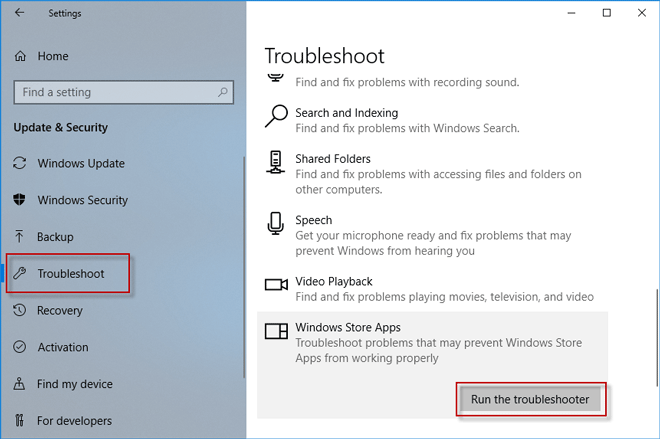
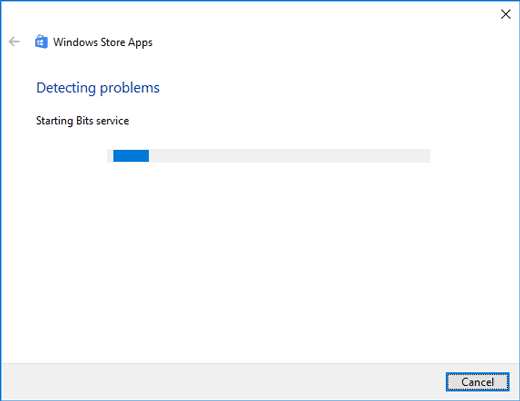
Step 3: Then Windows 10 will automatically detect all the Windows Store apps, including the Photos app, and gives workable solutions. You can follow the on-screen instructions to fix the app issue.
Way 2: Reset the Photos app
If the first method doesn't work, the second method you can try is to reset the Windows 10 Photos app to make it available.
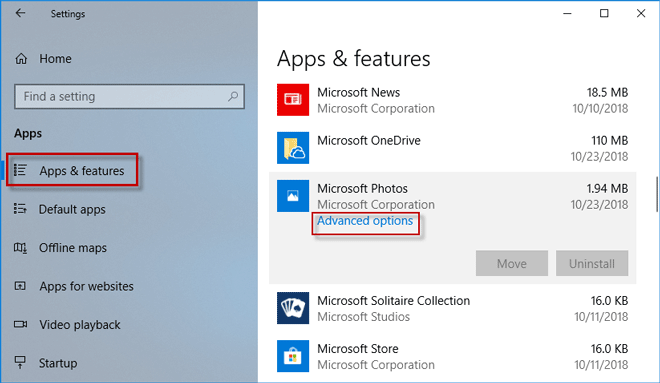
Step 1: Open the Settings app, and go to Apps.
Step 2: Select "Apps & features" on the left pane, then scroll down to the Microsoft Photos and highlight it. Then click on Advanced options.
Step 3: Now, click on the Reset button, and when prompted, click on Reset again. Once the reset is complete, you can see a tick appear next to the Reset button.
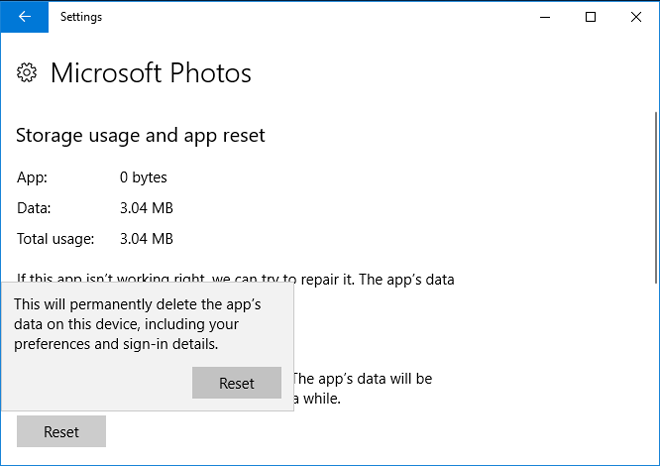
Step 4: Restart your Windows 10 and see if the Photos app can work normally.
Way 3: Remove the Windows updates installed recently
If your Windows 10 Photos app suddenly stopped working properly after certain Windows updates installed recently, and if the above two methods can't help fix the issue, then you could try removing the updates.
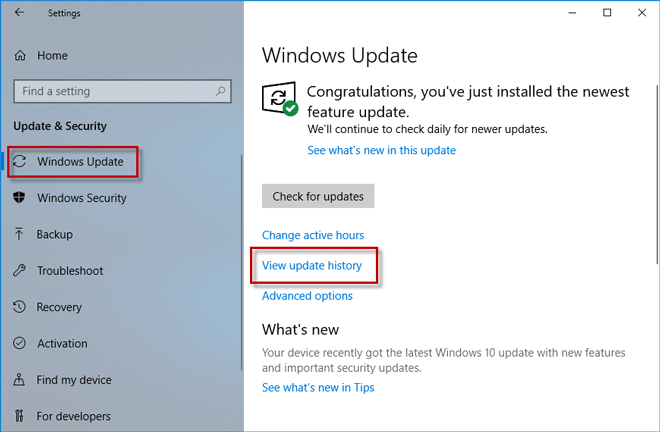
Step 1: Open the Settings and go to Update & security.
Step 2: Select Windows Update on the left pane, then on the right pane click on View update history.
Step 3: Now, you can see the Windows 10 updates installed recently appear here. It is the updates that most likely result in that your Windows 10 Photos app cannot work properly. Click on Uninstall updates.

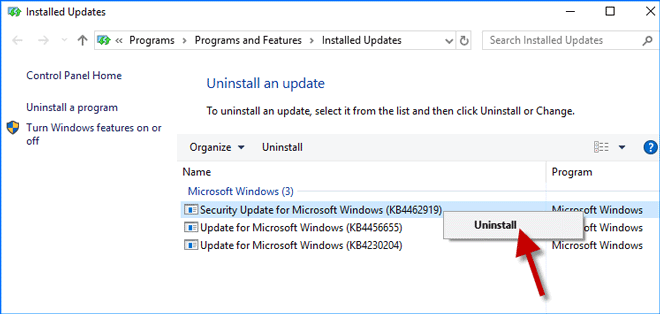
Step 4: You'll now be taken to the Installed Updates page on Control Panel and you can view the installed updates plainly in the list. Right click on the update, and click Uninstall. When prompted, click Yes to uninstall the update.
Step 5: Wait while the updates are being uninstalled. This might take several minutes.
Step 6: After the uninstallation is complete, restart your computer to apply the changes. After that, your Windows 10 Photos app may work normally.
方法 4:透過重新安裝修復「Windows 10 照片應用程式無法運作」
如果以上方法都不起作用,最後一個方法是卸載Windows 10照片應用程序,然後重新安裝。照片應用程式是 Windows 10 中的內建應用程序,您將無法正常卸載它,因此您必須透過 Windows PowerShell 或使用第三方卸載程式刪除照片應用程式。解除安裝後,從 Microsoft Store 重新下載,然後安裝到 Windows 10 上。通常情況下,重新安裝後照片應用程式可以正常運作。
The above is the detailed content of Photos App Not Working after Windows 10 Update, How to Fix. For more information, please follow other related articles on the PHP Chinese website!