


When many users encounter computer system failures, they choose to reinstall the system to solve the problem. The tutorial that php editor Banana brings to you today will explain in detail how to reinstall the Windows 10 system on your computer, from booting from the USB disk to system installation, and guiding you step by step through the reinstallation process.

1. How to reinstall system w10 on your computer
How to reinstall system W10 on your computer?
If your computer starts to become slow or develop various problems after running normally for many years, it may be time to consider reinstalling the operating system. As one of the most widely used operating systems currently, Windows 10 provides users with many powerful features and optimized performance. Therefore, reinstalling the Windows 10 system is a good choice. This blog post will help you understand how to reinstall system W10 on your computer.
Step 1: Back up important files
Before starting to reinstall the system, be sure to back up important files and data on your computer. Because reinstalling the system will erase all data on your computer, including applications, personal files, and settings. So, before proceeding, make sure you have backed up all important files to an external hard drive, cloud storage, or other reliable storage device.
Step 2: Prepare installation media
Before reinstalling W10, you need to prepare a bootable installation media, such as a USB flash drive or DVD. You can download the Windows 10 installation image file from the official Microsoft website, and then use professional software to write it to a USB flash drive or burn it to a DVD. Make sure to use installation images that are legal and from trusted sources.
Step 3: Enter the BIOS settings
After preparing the installation media, you need to enter the BIOS settings of your computer. Restart the computer and press the corresponding button when the startup screen appears. Different brands of computers may be F2, Delete, F12, etc. After entering the BIOS settings, set the boot sequence to boot from the USB flash drive or DVD.
Step 4: Start installing Windows 10
After restarting the computer, the system will boot from the USB flash drive or DVD and enter the Windows 10 installation interface. Follow the on-screen prompts step-by-step through the installation, including selecting your language, keyboard layout, and license agreement. Then, select the "Custom Installation" option so you can choose where to install your system.
Step 5: Partition and format the hard drive
Before installing W10, you need to partition and format the computer’s hard drive. You can choose to clear all partitions and create new ones to install W10, or just choose to clear the current system disk and keep other partitions. It should be noted here that partitioning and formatting operations will erase all data on the hard disk, so be sure to back up important data in advance.
Step 6: Wait for the installation to complete
Once the partition and format options are selected, the system will begin to install Windows 10 and perform a series of file copying and configuration processes. Please wait patiently for the installation to complete, which may take some time depending on the performance of your computer.
Step 7: Set personalization options
After the installation is completed, the system will ask you to make some personalization settings, such as selecting a time zone, setting a username and password, and other settings. Please configure accordingly according to your actual needs.
Step 8: Install Drivers
Once you enter the Windows 10 desktop, you need to install the drivers for your computer hardware to ensure the normal operation and good performance of your computer. You can download the latest drivers by visiting your computer manufacturer's official website, or use a driver update tool to automatically update your drivers.
Step 9: Install applications and configure settings
After installing the system and drivers, you can start to install the applications you need and make the corresponding settings and configurations. For example, install office software, browsers, image processing software, etc. At the same time, you also need to configure system settings, such as network settings, privacy settings, security settings, etc.
Step 10: Restore the backed up files
In the last step, you need to restore the important files you backed up to the newly installed system. Copy them from the external storage device to your computer and make sure they are placed in the appropriate directory.
To sum up, reinstalling the W10 system on your computer is not a complicated matter. You only need to follow the above steps to regain a clean and smooth Windows 10 system. Remember to back up important files before proceeding and make sure to use legal and trusted installation media. I wish you a smooth reinstallation of the system and enjoy a new computer experience!
2. How to reinstall the computer system win10
How to reinstall the computer system win10
Reinstalling the computer system is an important task, especially when your computer operation When it is unstable or has various problems. Today, Windows 10 has become one of the most popular operating systems, highly regarded for its stability and rich features. This article will introduce how to reinstall the system and install Windows 10.
重要なデータをバックアップしてください
システムの再インストールを開始する前に、必ず重要なデータをバックアップしてください。システムを再インストールするとハード ドライブ上のすべてのデータが消去されるため、事前にすべての重要なファイルとフォルダーをモバイル ハード ドライブやクラウド ストレージ サービスなどの外部ストレージ デバイスにコピーする必要があります。
Windows 10 インストール メディアを入手します
システムを再インストールする前に、Windows 10 インストール メディアを準備する必要があります。 Microsoft の公式 Web サイトからインストール メディアをダウンロードし、起動可能な USB フラッシュ ドライブまたは DVD に保存できます。このようにして、このメディアからコンピュータを起動し、インストール プロセスを開始できます。
BIOS セットアップに入る
システムを再インストールする前に、コンピューターの BIOS セットアップ インターフェイスに入り、最初に USB デバイスまたは光学式ドライブから起動するように起動順序を変更する必要がある場合があります。このようにして、USB フラッシュ ドライブまたは DVD から Windows 10 インストーラーを起動できます。
インストールプロセスを開始します
USBフラッシュドライブまたはDVDからコンピューターが起動すると、Windows 10のインストール画面が表示されます。画面上の指示に従って、適切な言語、タイムゾーン、キーボード レイアウトを選択します。次に、「次へ」をクリックして続行します。
インストールタイプ選択インターフェースで、「カスタム」オプションを選択します。これにより、インストール プロセス中にディスクをパーティション分割し、インストール場所を選択できるようになります。
次に、ディスクパーティションインターフェイスが表示されます。ハード ドライブが 1 つしかない場合は、それをフォーマットして新しいパーティションに Windows 10 をインストールすることを選択できます。複数のハード ドライブがある場合は、正しいディスクを選択し、適切なパーティションを設定していることを確認してください。
ディスクパーティションの設定が完了したら、「次へ」をクリックすると、システムインストーラーがWindows 10のインストールを開始します。コンピューターのパフォーマンスによっては、このプロセスに時間がかかる場合があります。
Windows 10 をアクティブ化する
システムのインストールが完了したら、すべての機能を利用するには Windows 10 をアクティブ化する必要があります。 Windows が起動したら、Win + I キーを押して [設定] メニューを開き、[更新とセキュリティ] オプションを選択します。このメニューで「ライセンス認証」オプションを選択し、画面上の指示に従って Windows 10 のライセンス認証プロセスを完了します。
バックアップ データを復元する
Windows 10 をライセンス認証すると、以前にバックアップしたデータをコンピューターに復元できるようになります。外部記憶装置をコンピュータに接続し、バックアップ ファイルを適切なフォルダにコピーします。
重要なファイルとフォルダーをすべてコピーし、それらの整合性を確認してください。こうすることで、以前にバックアップしたデータを保持したままコンピュータを使い続けることができます。
ドライバーをインストールする
システムの再インストールとデータの復元が完了したら、ハードウェア デバイスが正しく動作していることを確認するために、適切なドライバーをインストールする必要がある場合があります。最新のドライバーは、コンピューターの製造元の公式 Web サイトからダウンロードしてインストールできます。
概要
上記の手順により、システムを正常に再インストールし、Windows 10 をインストールできます。ただし、システムを再インストールする前に必ず重要なデータをバックアップし、Windows 10 インストール メディアがあることを確認してください。また、システムの再インストールが完了したら、Windows 10のライセンス認証とバックアップしたデータの復元を忘れずに行ってください。最後に、ハードウェア デバイスが正しく機能するように、必ず適切なドライバーをインストールしてください。
システムの再インストールは複雑な作業になる可能性があるため、慣れていない場合は、専門家の助けを求めることをお勧めします。システムを正しく再インストールすると、コンピュータのパフォーマンスと安定性が向上し、エクスペリエンスが向上します。
3. コンピューターに win11 を再インストールする方法
コンピューターに win11 を再インストールするにはどうすればよいですか?これは、多くのコンピュータ ユーザーが最近よく遭遇する問題です。 Windows 11 のリリースに伴い、多くの人がこの新しいオペレーティング システムを体験し、それがもたらす新機能を楽しみたいと考えています。ただし、オペレーティング システムの再インストールは、ほとんどの人にとって馴染みのないプロセスかもしれません。この記事では、Windows 11 を再インストールする方法を検討し、いくつかの重要な手順と考慮事項を示します。
準備
システム Win11 の再インストールを開始する前に、いくつかの準備が必要です。まず、重要なファイルとデータをバックアップする必要があります。システムを再インストールするとコンピュータのハードドライブが消去されるため、ファイルやデータが失われる可能性があります。外付けハードドライブ、クラウドストレージ、またはその他の安全なストレージメディアにバックアップすることは賢明な選択です。
また、Windows 11 をインストールするためのインストール メディアがあることを確認してください。 Microsoft の公式 Web サイトから Windows 11 の ISO イメージ ファイルをダウンロードし、CD に書き込むか、起動可能な USB フラッシュ ドライブに作成できます。システムを再インストールする前に、これらのインストール メディアが利用可能であることを確認してください。
システムを再インストールする手順
準備が完了したら、システム Win11 の再インストールを開始できます。参考のための重要な手順をいくつか示します:
インストール メディアを挿入します。 Windows 11 CD または起動可能な USB ディスクをコンピューターの光学式ドライブまたは USB インターフェイスに挿入します。 コンピュータを再起動します: コンピュータを再起動し、インストール メディアから起動することを確認します。コンピューターの電源を入れたときに表示されるキー (F12、F2、または Delete など) を押すと、起動デバイスを選択できます。 言語とその他の設定を選択する: コンピューターがインストール メディアから起動すると、優先言語、タイム ゾーン、キーボード レイアウトなどの設定を選択するように求められます。お好みに応じてお選びください。 使用許諾契約に同意する: Windows 11 使用許諾契約を読んで同意します。 インストール タイプを選択します。 [インストール タイプ] ページで、[カスタム インストール] を選択します。 インストール場所の選択: Windows 11 をインストールするディスク パーティションまたはドライブを選択します。 インストールの開始: [次へ] ボタンをクリックして Windows 11 のインストールを開始します。 インストールが完了するまで待ちます: インストールプロセスには時間がかかる場合があります。しばらくお待ちください。 環境設定の構成: インストールが完了すると、個人用設定、ネットワーク設定、アカウント設定などの環境設定を行うように求められます。 ファイルとデータを復元する: ファイルとデータを以前にバックアップしたことがある場合は、それらをコンピューターに復元できます。注意事項
Win11 システムを再インストールするプロセスでは、留意すべき重要な注意事項がいくつかあります:
重要なデータをバックアップする: システムを再インストールする前に、偶発的な損失を防ぐために、重要なファイルとデータを必ずバックアップしてください。 システム要件を確認する: コンピューターが Windows 11 のシステム要件を満たしていることを確認してください。お使いのコンピューターが古い場合、またはハードウェアに互換性がない場合、インストールが成功しない可能性があります。 安全を確保: Windows 11 インストール ファイルは公式 Web サイトからのみダウンロードし、インストール プロセス中にマルウェアがインストールされないように注意してください。 最新の状態を保つ: インストールが完了したら、Windows 11 を定期的に更新して、最新の機能とセキュリティ パッチを入手してください。 ヘルプを求める: Win11 の再インストール中に問題が発生した場合は、専門のテクニカル サポートを求めることができます。概要
システム Win11 の再インストールは、正しい手順に従い、インストール前に必要な準備を行っている限り、比較的簡単なプロセスである可能性があります。偶発的な損失を防ぐために、重要なファイルとデータを必ずバックアップしてください。同時に、システム要件とセキュリティの問題に注意し、システムを常に最新の状態に保ってください。何か問題が発生した場合は、遠慮せずに助けを求めてください。
4. Win10 コンピューターにシステムを再インストールする方法
Win10 コンピューターにシステムを再インストールする方法
時間の経過とともに、コンピューターの動作が遅くなり、動作効率が低下し、システム エラーが発生することがあります。頻繁になる。これは、長期間使用すると、コンピュータ システム内にファイルが散在し、ソフトウェアが冗長になり、ジャンク ファイルが蓄積されるためです。コンピュータの通常の動作を復元するには、システムを再インストールすることをお勧めします。
システムを再インストールすると、コンピューター内のすべてのファイルと設定がクリアされ、新しいオペレーティング システムが再インストールされます。これは、ソフトウェアの不具合、ウイルス、その他の潜在的な問題を取り除くのに役立ちます。 Win10 システムを再インストールする方法を知りたい場合は、この記事で詳細な手順を説明します。
重要なファイルをバックアップする
システムを再インストールする前に、必ず重要なファイルをバックアップしてください。システムを再インストールすると、ドキュメント、写真、ビデオ、その他の個人ファイルを含むすべてのファイルと設定が削除されます。これらのファイルは、USB ドライブや外付けハード ドライブなどの外部ストレージ デバイスにコピーできます。
オペレーティング システムのインストール メディアを探しています
システムを再インストールするには、オペレーティング システムのインストール メディアを使用する必要があります。 Win10 コンピューターの場合、次の 2 つの方法を使用してインストール メディアを入手できます:
公式ダウンロード ツールを使用して、Win10 インストール メディアをダウンロードします。 Win10のインストールCDを使用します。公式ダウンロード ツールの使用を選択した場合は、Microsoft の公式 Web サイトにアクセスし、お使いのバージョンに合った Windows 10 インストール メディアをダウンロードしてください。 Win10 インストール CD をすでにお持ちの場合は、その CD を直接使用して再インストールできます。
起動デバイスを準備する
システムを再インストールする前に、USB ドライブや DVD などの起動可能なデバイスを準備する必要があります。現在、ほとんどのコンピュータは USB デバイスからの起動をサポートしているため、USB ドライブを使用することをお勧めします。
デバイスの起動を準備する手順は次のとおりです:
USB ドライブをコンピューターに接続します。 コンピューターの BIOS 設定を開きます。 起動順序を変更して、USB ドライブを優先起動デバイスにします。 設定を保存し、コンピューターを再起動します。これらの手順により、コンピュータは USB ドライブから起動してシステムを再インストールできるようになります。
Win10システムを再インストールする手順
それでは、Win10システムを再インストールする手順を始めましょう:
オペレーティング システムのインストール メディアを起動可能デバイス (USB ドライブまたは DVD) に挿入します。 コンピュータを再起動します。 起動プロセス中に対応するボタンを押して、BIOS セットアップに入ります。 起動順序を変更して、起動可能デバイスを優先起動デバイスにします。 設定を保存し、コンピューターを再起動します。 起動中に画面上の指示に従って、言語やその他の設定を選択します。 「インストール」ボタンをクリックして、インストールプロセスを開始します。 インストールプロセス中に、「カスタム」インストールオプションを選択し、システムをインストールするディスクを選択する必要があります。 「次へ」をクリックしてインストールを続行します。 インストールが完了したら、画面上の指示に従って、ユーザー名とパスワードの追加などの基本設定をセットアップします。 引き続き画面の指示に従って、その他の設定を完了します。 セットアップが完了すると、Win10 システムが正常に再インストールされます。バックアップ ファイルを復元する
システムを再インストールした後、以前にバックアップしたファイルとデータを復元できます。バックアップ ファイルをコンピュータにコピーして戻すだけです。必要なファイルを簡単に見つけられるように、バックアップ ファイルとフォルダー構造が変更されていないことを確認してください。
概要
Win10 システムを再インストールすることは、コンピューター システムの問題を解決する効果的な方法です。再インストールする前に、必ず重要なファイルをバックアップし、オペレーティング システムのインストール メディアとブート デバイスを準備してください。詳細な手順に従うと、Win10 システムを簡単に再インストールし、コンピューターの通常の動作を復元できます。
この記事がお役に立てば幸いです。他の技術的な問題にご興味がある場合は、引き続きブログをフォローしてください。より役立つ技術ガイドを提供します。
5. コンピューターシステムを再インストールするにはどうすればよいですか?
Xiaobi USB フラッシュ ドライブ システム準備ツール:
1. Xiaobai のワンクリック再インストール ツール
2. 8G を超える USB フラッシュ ドライブ (最初に重要なデータを USB フラッシュ ドライブにバックアップすることをお勧めします)
3通常のインターネットにアクセスできるコンピューター
Xiaobai の U ディスク インストール システムの詳細な手順:
1. インターネットにアクセスできるコンピューターに U ディスクを挿入し、Xiaobi のシステム ソフトウェアのワンクリック再インストールを開きます
2.ソフトウェアの検出が完了したら、左側の本番システムをクリックします
3. ソフトウェアは自動的に U ディスク文字を認識し、クリックして本番モードを開始します
4. Xiaobai ソフトウェアは x86-64 ビット システムのインストールをサポートしています。選択するときは、システムの桁数に注意して、U ディスクをフォーマットするためのプロンプト ウィンドウが表示されます。ディスク データがバックアップされたら、[OK] をクリックします
6. システム インストール パッケージと PE システムのダウンロードを待ちます
7. ダウンロードが完了したら、ブート ディスクの作成を開始します
8. U ディスクのブート ディスクが作成されたら、が作成されたら、成功のプロンプトが表示されます。[キャンセル] をクリックします
9. 次に、ショートカット リストをクリックして、今後使用される起動ホットキーを確認します
10. 図に示すように、さまざまなブランドが表示されます。マザーボード、ラップトップ、デスクトップの起動ホットキーを確認し、システムを再インストールする必要があるコンピューターに対応する起動ホットキーを見つけて書き留めます
11. U ディスクを終了し、システムを再インストールする必要があるコンピューターにインストールします。
12. 電源ボタンを押した後、すぐに U ディスク起動ホットキーをクリックし、U ディスク オプションを選択して Enter キーを押します。最初の項目を選択して「Enter」をクリックします。
14. PE デスクトップがロードされ、Xiaobi インストール ツールが自動的に表示されるまで待ちます。先ほどダウンロードしたシステム イメージを選択し、[インストール] をクリックしてシステム ディスクの C ドライブにインストールし、[インストールの開始] をクリックします。左下隅
16 をクリックし、プロンプトウィンドウで [OK] をクリックします
17。その後、システムがインストールされるまで待ちます
18。インストールが完了したら、U ディスクを取り外し、[今すぐ再起動] をクリックします
19。システムを最適化するには、システムのデスクトップに入ります。それを使用します (注: この間にコンピューターは数回再起動しますが、心配する必要はありません。ましてや他の操作を実行する必要はありません)
The above is the detailed content of How to reinstall system w10 on computer. For more information, please follow other related articles on the PHP Chinese website!

 Spotlight on How to Fix Taskbar Search Bar Blank Box on WindowsApr 19, 2025 pm 08:06 PM
Troubleshooting a Blank Windows 11/10 Taskbar Search Box A blank search bar in Windows 10 or 11 severely impacts usability. This guide offers solutions to resolve this common issue, preventing you from easily searching for apps and files. The Proble
 How to Fix Forever Skies Crashing? Try the 6 Effortless WaysApr 19, 2025 pm 08:01 PM
Encountering crashes in Forever Skies? This guide offers solutions to get your game running smoothly. We'll cover troubleshooting steps for crashes on startup and provide fixes for common causes. Forever Skies Crashes at Startup: Common Causes Fore
 Device Manager Is Blank or Not Showing Anything? Fix It NowApr 19, 2025 pm 06:02 PM
Troubleshooting a Blank Device Manager in Windows Device Manager, a crucial Windows utility for managing hardware, can sometimes fail to display any content. This issue, often caused by disabled services or registry permission problems, can lead to v
 Encountering Schedule I Slow Motion on PC? Resolve It Here!Apr 19, 2025 pm 06:01 PM
Solve the slow motion problem of "Schedule I" PC version and enjoy a smooth gaming experience! Many players encounter annoying slow motion problems while playing Schedule I on PC, and this article will provide the best solution. Quick navigation: Question: Schedule I Slow Motion Method 1: Disable Vertical Synchronization (VSync) Method 2: Run the game with a standalone graphics card Method 3: Update/uninstall the graphics card driver Method 4: Update DirectX Summarize Schedule I is a popular indie game where players make and sell drugs. Fans of Breaking Bad will especially like the game because it has a lot of tribute elements. The game is currently in the early stage of experience
 RuneScape: Dragonwilds Fatal Error? Try Those Five Ways!Apr 18, 2025 pm 08:06 PM
Encountering a fatal error in RuneScape: Dragonwilds? Many players experience this frustrating issue. This guide offers five potential solutions to get you back in the game! Troubleshooting RuneScape: Dragonwilds Fatal Errors RuneScape: Dragonwilds,
 Secure Your PC While Malware Found in Schedule 1 ModsApr 18, 2025 pm 08:04 PM
The popular 2025 game, Schedule 1, recently faced a malware scare. Two popular mods, Froggyp’s Increased Stack Size Limit and Backpack Mod Reupload, were discovered to contain Trojan viruses. The Schedule 1 subreddit issued a warning and the mods w
 How to fix Microsoft Office error 2147483661 (Error tag 7Q6ca) in Windows?Apr 18, 2025 pm 08:00 PM
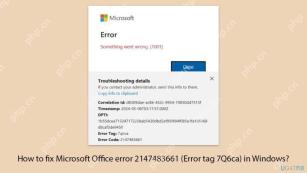
Microsoft Office remains to be among the most fundamental packages of software both for home and business use. From writing reports in Word, editing spreadsheet
 RuneScape Dragonwilds Black Screen on PC: Resolve It Here!Apr 18, 2025 pm 06:01 PM
RuneScape: Dragonwilds Black Screen Problem Solving Guide Many players encounter black screen problems when starting RuneScape: Dragonwilds, which causes the game to not run normally. Don't worry, this guide offers a variety of solutions to help you get back to the Dragon's Wilderness! RuneScape on PC: Dragonwilds black screen problem RuneScape: Dragonwilds is an open-world multiplayer online game spin-off that supports up to four-player teams, challenging dangerous environments full of dangerous creatures (especially dragons). Like other games, RuneScape: Dragonwilds has some malfunctions, such as black screen questions


Hot AI Tools

Undresser.AI Undress
AI-powered app for creating realistic nude photos

AI Clothes Remover
Online AI tool for removing clothes from photos.

Undress AI Tool
Undress images for free

Clothoff.io
AI clothes remover

Video Face Swap
Swap faces in any video effortlessly with our completely free AI face swap tool!

Hot Article
Hot Tools

SublimeText3 Linux new version
SublimeText3 Linux latest version

Dreamweaver Mac version
Visual web development tools

ZendStudio 13.5.1 Mac
Powerful PHP integrated development environment

SecLists
SecLists is the ultimate security tester's companion. It is a collection of various types of lists that are frequently used during security assessments, all in one place. SecLists helps make security testing more efficient and productive by conveniently providing all the lists a security tester might need. List types include usernames, passwords, URLs, fuzzing payloads, sensitive data patterns, web shells, and more. The tester can simply pull this repository onto a new test machine and he will have access to every type of list he needs.

SublimeText3 Mac version
God-level code editing software (SublimeText3)

