OOYi OKEx withdrawal tutorial: Log in to your account → Go to the asset page → Select the asset → Click to withdraw → Enter the address → Enter the amount → Select the network → Security verification → Check and confirm → Waiting for processing.

OKEx Withdrawal Tutorial
Step 1: Log in to your OKEx account
- Open the OKEx website or app and log in to your account.
Step 2: Go to the "Assets" page
- Click the "Assets" option in the navigation bar.
Step 3: Select the asset you want to withdraw
- On the Assets page, select the asset you want to withdraw, such as BTC, ETH or USDT.
Step 4: Click the “Withdraw” button
- Under the selected asset, click the “Withdraw” button.
Step 5: Enter the withdrawal address
- Enter the wallet address to which you want to withdraw your assets. Make sure the address is correct.
Step 6: Enter the withdrawal amount
- Enter the amount of assets you want to withdraw.
Step 7: Select a withdrawal network
- Choose the network for withdrawal, such as BTC Mainnet or ETH Mainnet, based on your wallet support.
Step 8: Set up security verification
- For security reasons, you need to verify via Google Authenticator (GA) or SMS verification code.
Step 9: Check and Confirm
- Double check that all the information is correct and click on the "Confirm" button.
Step 10: Waiting for processing
- OKEx will process your withdrawal request. Processing times vary and depend on network conditions.
Extra Tip:
- Minimum withdrawal amounts vary for different assets.
- OKEx will charge a small withdrawal fee.
- Before withdrawing your assets, please make sure your wallet supports the network you want to withdraw from.
- Update your security settings regularly to keep your account safe.
The above is the detailed content of Ouyiokex withdrawal tutorial. For more information, please follow other related articles on the PHP Chinese website!
 USDT ERC20转换为TRC20的简易指南Jan 18, 2024 pm 06:09 PM
我们逐步教您如何将USDTERC20转换为TRC20网络。这是因为许多人喜欢将USDT稳定币从以太坊网络转移到Tron网络,以节省交易费用。因此,如果您想将您的ERC-20代币转换为TRC-20,相信本教程会对您有所帮助。ERC-20和TRC-20的区别ERC-20代币和TRC-20代币分别代表基于以太坊网络和Tron网络的代币。这两个网络之间存在一些差异,主要表现在以下方面:首先,以太坊网络常常面临拥塞和高昂的汽油费问题,这可能导致交易延迟和高昂的交易成本。相比之下,Tron网络则相对拥塞较少
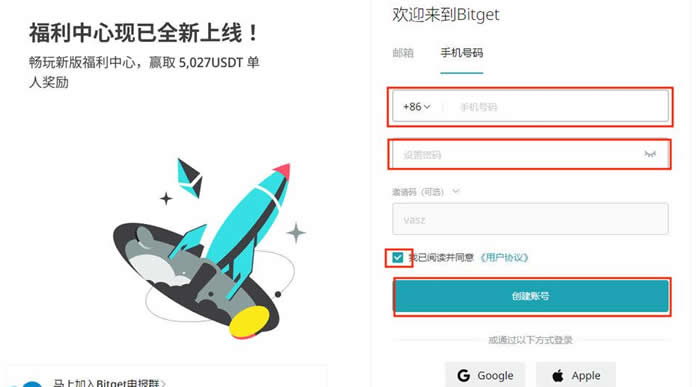
 Bitget交易所怎么充值?Bitget交易所充值及充币图文操作教程Jan 31, 2024 pm 12:18 PM
说起Bitget交易所想必各位投资者都不陌生,它凭借成交量大、深度好、盘口差价小等优势,赢得了大批忠实用户的入驻,近年Bitget交易所陆续上线了多种新型的交易功能:包括闪电开平仓、止盈止损、阶梯强平等,目的是为了给用户提供更加优质的交易体验,这也赢得了不少用户口碑。在投资者使用交易所时,不管是新手小白还是资深投资者都会面临充值问题,那在使用Bitget怎么充值?下面小编就来为大家详细介绍一下,带大家一文学会Bitget交易所充值及充币流程。Bitget怎么充值?Bitget交易所的充值及充币流
 世界十大USDT交易所哪个正规?盘点10大靠谱USDT购买平台Jan 31, 2024 am 08:21 AM
USDT作为一种备受关注的稳定货币,随着区块链技术的发展和加密货币市场的普及,逐渐占据了市场份额。但是在众多的usdt购买平台中,我们如何才能找到真正可靠、正规的交易所呢?以下是全球十大可靠usdt购买平台的盘点。盘点10大靠谱USDT购买平台1.OKx欧易OKEx是一家领先的数字资产交易平台,也是购买USDT的可靠选择。它提供了全面的交易功能和多样化的交易选择,并采取了多种安全措施来保护用户的资金和交易安全。通过OKEx购买USDT,用户可以享受高效、安全的交易体验。欧易OKX是全球领先的数字
 USDT交易平台有哪些?国内5大USDT交易所推荐Feb 02, 2024 am 09:42 AM
一、火币网火币网成立于2013年,是国内最早的数字货币交易平台之一。作为全球领先的数字资产金融服务提供商,火币网的平台不仅支持USDT交易,还提供了丰富的交易品种和深度。火币网致力于提供安全可靠的交易环境,并为用户提供多样化的交易工具。凭借其卓越的品牌声誉和用户信赖,火币网已经成为了业界的领导者之一。二、币安币安是全球知名的加密货币交易平台之一,以其高知名度和影响力在全球范围内闻名。作为最大的交易所之一,币安支持USDT交易,并以其高安全性和简便的交易流程备受用户欢迎。此外,币安还提供多元化的交
 HOO交易所可以提现USDT吗?提现流程步骤是怎样的?Jan 30, 2024 pm 08:42 PM
HOO交易所备受关注,尤其是其USDT提现功能。以下将从多个角度分析HOO交易所提现流程步骤。什么是HOO交易所?HOO交易所是一个创新的加密货币交易平台,提供多样化的数字资产交易服务。作为一个知名的交易所,HOO以其高效的交易执行和丰富的交易品种而备受用户青睐。HOO交易所是否支持USDT提现?HOO交易所允许用户将持有的USDT提现至其他钱包地址或平台,从而实现USDT资金的转移。这一功能使得用户可以将USDT转换为其他货币或进行其他交易操作。HOO交易所USDT提现流程步骤第一步:登录账户
 稳定可靠的虚拟币交易所推荐,比特币定投平台有哪些?Jan 31, 2024 pm 01:57 PM
哪里可以做比特币定投,推荐一个稳定可靠的虚拟币交易所,比特币做为虚拟币的龙头,一直引领着虚拟币进入一个新的时代,从刚开始出现的无人问津,很多人不相信,到现在不断的以涨服人,经历了多重的打压,还是屹立不倒,可以说比特币就像一个神话故事,不能深入研究,一旦深入研究它,就会为比特币的历史而着迷,如果你要定投虚拟币,那么比特币是必选的,做为一位币圈的老韭菜,下面给想做比特币定投的朋友,推荐一个稳定可靠的交易平台。我现在一直在gate交易所定投比特币,gate交易所中文名是芝麻开门,芝麻开门的意思让我们进
 买卖usdt的软件最靠谱的 十大usdt交易平台排行榜Feb 02, 2024 am 08:36 AM
买卖USDT最靠谱的10大交易平台排行榜近年来,数字货币市场的发展日益壮大,USDT(泰达币)作为一种稳定币,备受投资者关注。随着数字货币投资人数的增加,投资软件众多,那么在如此众多的投资软件中,哪些买卖USDT的交易平台值得选择呢?有哪些因素需要考虑?下面我们将为您推荐最靠谱的10大交易平台。1.币安币安是全球顶级交易平台之一,USDT在全球拥有领先的流动性,支持超过150种数字货币的交易。此外,币安还有专业的金融风控团队,确保用户的资金安全。2.火币作为全球排名第三的数字货币交易平台,火币是
 世界知名usdt交易所排名前十 盘点十大usdt交易所Jan 31, 2024 am 08:03 AM
世界知名USDT交易所排名前十USDT(Tether)是一种基于比特币区块链技术的数字货币,与美元挂钩,被广泛应用于加密货币交易。USDT交易所是提供USDT交易服务的平台,随着加密货币市场的不断发展,各国涌现了许多知名的USDT交易所。本文将盘点并深度分析全球排名前十的USDT交易所。1.币安(Binance)币安是全球最大的USDT交易所,也是市值最高的加密货币交易所之一。成立于2017年的币安,凭借强大的技术支持、丰富的交易品种和良好的用户体验,迅速成为行业领军者。币安拥有全球用户基础,提

Hot AI Tools

Undresser.AI Undress
AI-powered app for creating realistic nude photos

AI Clothes Remover
Online AI tool for removing clothes from photos.

Undress AI Tool
Undress images for free

Clothoff.io
AI clothes remover

AI Hentai Generator
Generate AI Hentai for free.

Hot Article

Hot Tools

Dreamweaver CS6
Visual web development tools

Zend Studio 13.0.1
Powerful PHP integrated development environment

EditPlus Chinese cracked version
Small size, syntax highlighting, does not support code prompt function

SublimeText3 English version
Recommended: Win version, supports code prompts!

ZendStudio 13.5.1 Mac
Powerful PHP integrated development environment


