Web3, the third generation of the Internet, emphasizes decentralization, user-controlled data and the integration of smart contracts. The Web3 wallet is one of the key factors in realizing this vision. It not only stores users’ cryptocurrencies, but also manages users’ digital identities and interactions with DApps. Under the wave of blockchain technology, Web3 wallet, as an important tool for users to manage digital assets and identities, is gradually becoming a bridge connecting decentralized applications (DApps). So, how should the permissions of web3 wallet be set better?

1. Definition of Web3 Wallet
Web3 wallet is a digital wallet that allows users to store cryptocurrency, manage digital identities, and interact with blockchain-based decentralized applications. Unlike traditional wallets, Web3 wallets usually do not store private keys, but allow users to keep them themselves, thus improving security.
2. Functions and functions of Web3 wallet
1. Cryptocurrency storage: Web3 wallet can store a variety of cryptocurrencies, providing users with a platform for centralized asset management.
2. Digital identity management: Web3 wallet allows users to create and manage digital identities, which can be used to log in to DApps and conduct decentralized transactions.
3. Smart contract interaction: Web3 wallet supports interaction with smart contracts, allowing users to participate in decentralized finance (DeFi) and other blockchain applications.
3. Reasons for setting Web3 wallet permissions
Setting Web3 wallet permissions is to protect the user’s asset security and privacy. Through granular permission management, users can control which DApps or services can access their wallets and the scope of these accesses, thereby avoiding unauthorized transactions or data leaks.

4. Web3 wallet permission setting operation process
The following are the steps for general Web3 wallet permission setting. The specific operations may vary depending on the wallet:
Step 1: Open the Web3 wallet
First, open your Web3 wallet app or web interface and double-check that your device is connected to the Internet.
Step 2: Access the settings menu
Find the "Settings" or "Security Settings" option on the main interface of the wallet and click to enter.
Step 3: Select Permission Management
In the settings menu, look for the options of "Permission Management" and "Connection Management".
Step Four: Review Connected Apps
View the list of DApps or services currently connected to your wallet and select the ones that require administrative permissions.
Step 5: Set permissions
For each app, you can set different permission levels, such as read-only access, transaction signing, or full access. Set permissions based on your needs and how much you trust the app.
Step 6: Save settings
After completing the permission settings, save the changes. Some wallets may require you to confirm the action to confirm that it is you who is setting it up.
Step 7: Regular review
Regularly review and update your permission settings to ensure the security of your wallet.
Permission setting for Web3 wallet is one of the key steps to protect your digital assets and identity. By properly configuring permissions, you can effectively reduce security risks while enjoying the convenience of decentralized applications. Always proceed with caution, your wallet settings reflect your level of trust and security needs for each application.
The above is the detailed content of How to set the permissions of web3 wallet? web3 wallet permission setting tutorial. For more information, please follow other related articles on the PHP Chinese website!
 如何将虚拟货币从web3钱包转移到交易所?Jan 19, 2024 pm 03:18 PM
步骤一:选择合适的交易所在进行Web3钱包转币操作之前,首先需要选择一个可靠的数字货币交易所。建议选择那些用户口碑较好、提供安全稳定的交易平台,并且支持Web3钱包的连接。您可以进行一些市场调研,选择最适合您的交易所,例如欧易和币安等知名交易所。这些交易所在业界享有良好的声誉,并提供高度安全的交易环境,能够满足您的需求。步骤二:下载并注册Web3钱包在进行转币操作之前,您需要先下载并注册一个Web3钱包应用程序。目前市面上有多种可选的Web3钱包,如Imtoken、tokenpocket、欧易的
 SATS币未来上涨空间大吗?SATS币怎么买?Feb 29, 2024 pm 04:20 PM
SATS币是一种纪念比特币创造者遗产的代币,最近经历了价值的持续下跌,也能感受到投资者的目光转移到了比特币ETF上。尽管币圈不乏对SATS币感兴趣的投资者,但对于SATS币的投资依旧保持谨慎,尤其是当前价格的下跌并不是一个好的现象,因此作为持有者更关心SATS币未来上涨空间大吗?这个问题,根据现有数据分析来看,其发展潜力一般,受到市场的影响比较明显。接下来小编为大家详细分析一下SATS币的未来发展。SATS币未来上涨空间大吗?SATS币未来上涨空间一般,根据官方数据记载,SATS币当前价格为0.
 什么是币安Web3钱包?如何使用币安Web3钱包Feb 26, 2024 am 10:19 AM
币安Web3钱包是一款创新的数字资产钱包,集便利性、安全性和实用性于一体。这款钱包通过多方计算(MPC)技术增强安全性,通过访问币安桥和其他服务提供商,提供顺畅的用户体验,从而促进跨不同区块链网络的代币兑换。用户不仅能在去中心化金融(DeFi)和去中心化应用程序(DApp)世界中遨游,还能享获全天候专属客户服务。什么是币安Web3钱包?币安Web3钱包是币安App的关键组成部分,为用户提供便利的去中心化金融(DeFi)服务,致力于打造用户友好的加密货币钱包。通过使用币安Web3钱包,用户可以便捷
 2024年SATS币会涨到1美金吗?Feb 12, 2024 am 08:20 AM
SATS币是比特币区块链上的一项创新,成为第一个原生铭文项目。允许用户将独特的数据,包括图像和文本,永久蚀刻到单个聪(sats)上,而聪是比特币的最小单位,随着SATS币的发展以及关注度越来越高,其价值也在上涨,当前价格已经达到了0.00063美元,对于这样的涨势币圈对2024年SATS币会涨到1美金吗?也展开了激烈的讨论,大部分认为1美元的概率还比较小的,下面小编为大家详细说说。2024年SATS币会涨到1美金吗?根据圈内分析师的观点,2024年SATS币涨至1美元的概率较小。然而,今年年底前
 欧易BRC-20交易&铭刻常见问题Feb 26, 2024 am 09:30 AM
欧易BRC-20交易&铭刻常见问题1、如何铭刻BRC-20?铭刻BRC-20,需要您的钱包持有一定数量的BTC,您可以通过在钱包内交易买入BTC,或向钱包内转入BTC。点击【市场】-【Ordinals】-【铭刻】,在BTC通用铭刻页面,您可以铭刻BRC-20、图片或文本。选择【BRC-20】,【类型】选择【铸造】,输入四位代币代码,即您要铭刻的【币种】如csas。填写铸造【数量】、【重复次数】以及【接收地址】-【确认】。铭刻后的BRC-20,您可以在首页,点击【币种管理】,输入BRC-20代币名
 TrendX 研究院:Merlin Chain 项目分析及生态盘点Mar 24, 2024 am 09:01 AM
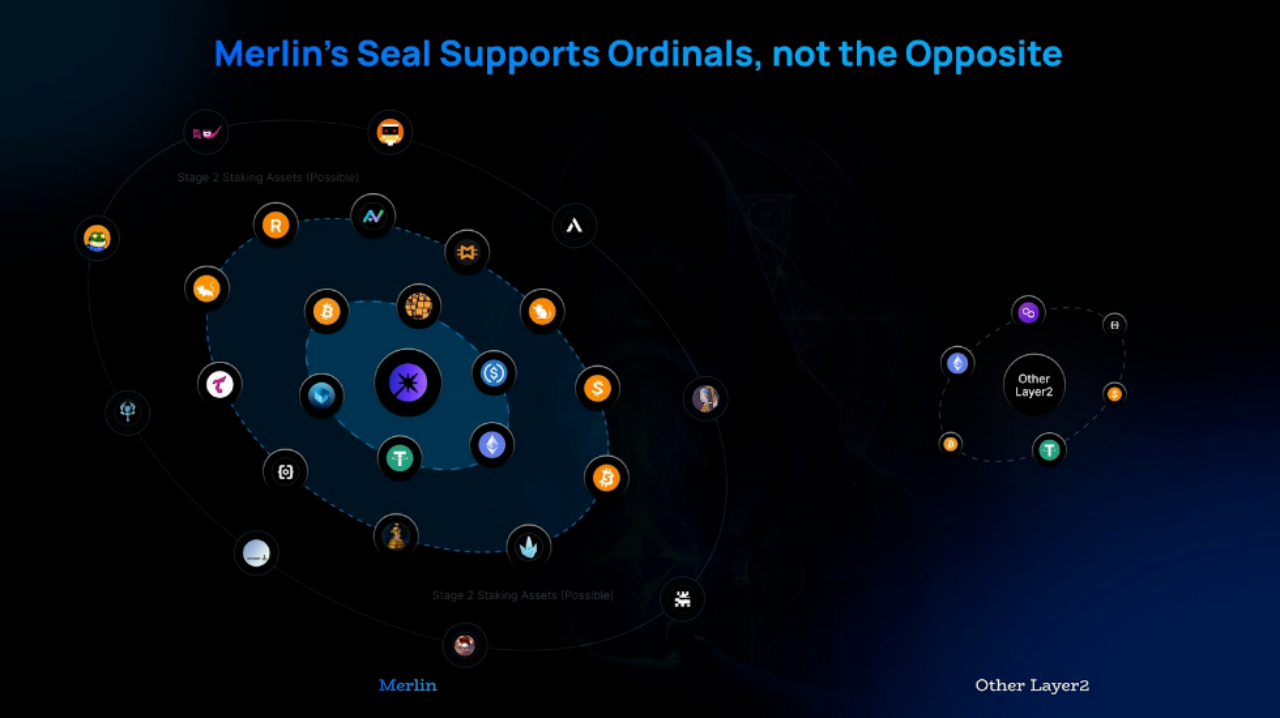
根据3月2日数据统计,比特币二层网络MerlinChain总TVL已达30亿美元。其中比特币生态资产占比达90.83%,包括价值15.96亿美元的BTC以及4.04亿美元的BRC-20资产等。上一个月,MerlinChain在开启质押活动14天内,其TVL总额就已经达到了19.7亿美元,超过了去年11月份上线也是最近同样引人注目的Blast。2月26日,MerlinChain生态内的NFT总价值超过了4.2亿美元,成为除以太坊以外NFT市值最高的公链项目。项目简介MerlinChain是OKX支
 web3钱包的权限怎么设置 ?web3钱包权限设置教程Jul 11, 2024 pm 07:41 PM
Web3,即第三代互联网,它强调去中心化、用户控制数据和智能合约的集成。而Web3钱包则是实现这一愿景的关键因素之一,它不仅存储用户的加密货币,还管理用户的数字身份和与DApps的交互。在区块链技术的浪潮下,Web3钱包作为用户管理数字资产和身份的重要工具,正逐渐成为连接去中心化应用(DApps)的桥梁。那么,web3钱包的权限应该怎么设置比较好呢?一、Web3钱包的定义Web3钱包是一种数字钱包,它允许用户存储加密货币、管理数字身份,并与基于区块链的去中心化应用进行交互。与传统钱包不同,Web

Hot AI Tools

Undresser.AI Undress
AI-powered app for creating realistic nude photos

AI Clothes Remover
Online AI tool for removing clothes from photos.

Undress AI Tool
Undress images for free

Clothoff.io
AI clothes remover

AI Hentai Generator
Generate AI Hentai for free.

Hot Article

Hot Tools

Zend Studio 13.0.1
Powerful PHP integrated development environment

Atom editor mac version download
The most popular open source editor

ZendStudio 13.5.1 Mac
Powerful PHP integrated development environment

SublimeText3 Mac version
God-level code editing software (SublimeText3)

Dreamweaver Mac version
Visual web development tools


