Question: The computer is running slowly? Maybe too much DNS cache is causing the system to run slowly, seriously affecting the user experience? Don't worry, this may be caused by excessive DNS cache. Want to know how to clear your DNS cache and get your computer running smoothly again? PHP editor Yuzai has prepared a detailed introduction for you to clear the DNS cache in Win7 system. Follow the steps below to easily clear cache and enjoy a smoother system experience!
Introduction to the method of clearing dns cache in win7 system
1. Click on the network connection in the lower right corner and select Status to check whether our current network connection is normal. (Is there a small exclamation mark?) As shown in the figure:

2. If the network connection is normal, click on the Start menu in the lower left corner of the computer, find the Control Panel option, and click to enter. As shown in the picture:

3. Enter the control panel, select View in the upper left corner to relax it to a small icon, and then find the management tool in the list below to open it. As shown in the picture:

#4. Enter the management tool interface, find the service option in the list, and click to enter. As shown in the figure:

5. Find the DNS Client and DHCP Client services, click Open, select Automatic, and start the service. As shown in the figure:

#6. After starting the service, click the start menu and enter CMD in the run bar to enter the command prompt interface. As shown in the figure:

#7. Then enter ipconfig/flushdns on the command line and click the Enter key to see if the DNS is refreshed successfully. As shown in the picture:

The above is the detailed content of How to clear dns cache in win7 system. For more information, please follow other related articles on the PHP Chinese website!
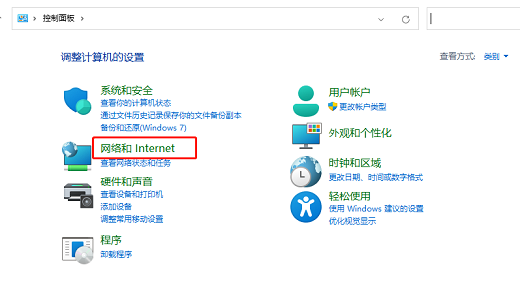 Win11无法保存ip设置请检查一个或多个设置并重试怎么办May 30, 2024 pm 07:21 PM
很多小伙伴在将电脑更新升级成Win11之后在设置IP的时候都出现了无法保存ip设置请检查一个或多个设置并重试的情况,这是怎么回事,下面小编就给大家详细介绍一下Win11无法保存ip设置请检查一个或多个设置并重试的解决方法,大家感兴趣的话就来看一看吧。Win11无法保存ip设置请检查一个或多个设置并重试的解决方法:1、"win+R"快捷键打开运行,输入"control"打开控制面板,点击其中的"网络和Internet"选项。2、接着点击&
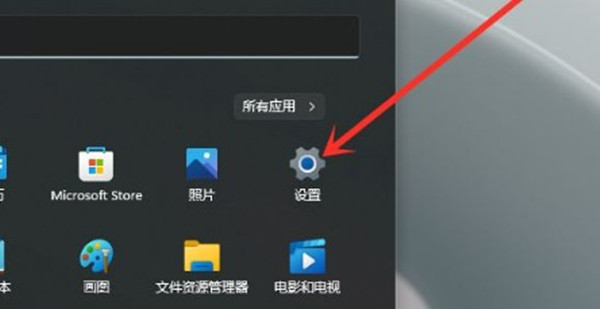 Win11怎么最小化输入法Jun 12, 2024 pm 03:38 PM
有小伙伴反映在将Win11系统进行升级之后,发现电脑上的输入法图标变得非常大,看起来不美观,想要将其最小化却不知道具体该怎么操作,这里小编就给大家详细介绍一下Win11最小化输入法的方法,有需要的小伙伴可以来看一看。操作方法:1、点击左下角任务栏中的"开始",选择菜单列表中的"设置"。2、进入到新的窗口界面后,点击左侧栏中的"时间和语言"选项,随后点击右侧中的"输入"。3、然后点击其中的"高级键盘设置&qu
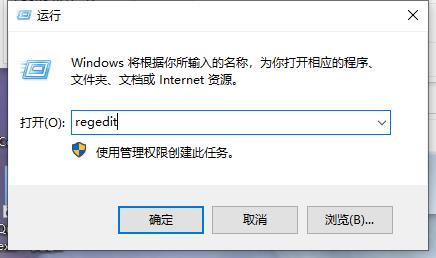 Win10系统怎么设置记事本背景颜色Jun 19, 2024 pm 06:40 PM
Win10的记事本是系统自带的文本编辑器,可以帮助用户记录一些待办事项。记事本默认的背景颜色是白色,有小伙伴想要更改记事本背景颜色却不清楚该怎么操作,这里小编就给大家详细介绍一下Win10设置记事本背景颜色的方法,有需要的小伙伴可以来看一看。设置方法:1、"win+R"快捷键开启运行,输入"regedit"回车打开。2、进入到注册表编辑器之后,依次点击左侧栏中的"HKEY_CURRENT_USERControlPanelColors".
 win10弹出"windows找不到文件请确定文件名是否正确后,再试一次"怎么办Jan 31, 2024 am 09:33 AM
近期有小伙伴反映在使用win10系统中,弹出了"windows找不到文件请确定文件名是否正确后,再试一次"的提示框,这是怎么回事呢,遇到这种问题应该怎么解决呢,为此小编这里就给大家详细介绍一下win10弹出"windows找不到文件请确定文件名是否正确后,再试一次"的解决方法,大家感兴趣的话快来看看吧。win10弹出"windows找不到文件请确定文件名是否正确后,再试一次"的解决方法:方法一:使用命令行1、快捷键"win+R"开启运行对话框,在其中输入"cmd/cfor%iin(%windir
 win11玩游戏键盘失灵怎么办Jun 03, 2024 am 09:44 AM
很多用户都将自己的电脑升级成win11系统,升级之后发现有时打游戏会出现键盘失灵的问题,这会严重的影响到用户的游戏体验感,遇到这种问题该怎么解决呢,这里小编就给大家详细介绍一下win11玩游戏键盘失灵的解决方法,大家感兴趣的话快来看看吧。win11玩游戏键盘失灵的解决方法:方法一:1、点击下方任务栏中的搜索图标,在其中输入"设备管理器"并将其打开。2、进入新界面后找到"键盘"并展开,右击下方的键盘设备选择"更新驱动程序"。3、最后在窗口
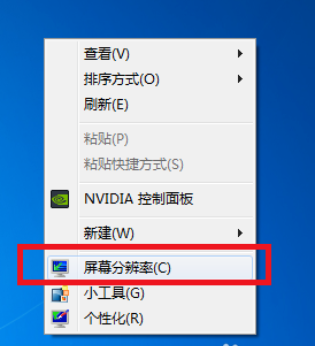 win7游戏不能全屏怎么办Jun 02, 2024 pm 08:38 PM
在使用电脑玩游戏的时候,全屏的模式可以说能够为你带来更加畅快的游戏体验,但是有时候win7游戏不能全屏怎么办?为此系统屋为你带来详细的win7游戏不能全屏解决方法,从而让你可以解决遇到的问题,使其获得更好的游戏体验!win7游戏不能全屏解决方法方法一:修改屏幕分辨率:1,大多情况都是由于没有设置好屏幕分辨率造成的,只需在桌面空白处,右键选择屏幕分辨率,分辨率改为推荐即可(一般为1280×800)。方法二,修改注册表:1,如果说屏幕分辨率没有问题,那么就是注册表的事了。首先点击开始——搜索”reg
 win10系统提示0x00000709无法连接网络共享打印机怎么解决Jun 16, 2024 pm 12:53 PM
win10系统在进行网络连接共享打印机的时候提示出现0x00000709导致无法连接怎么办,为此小编给你提供简单的win10连接网络共享打印机问题解决方法,通过该方法可以快速进行操作,让你可以体验到不错的打印机操作。win10连接网络共享打印机问题解决方法1、首先将系统下载补丁KB50006670,下载了查看是否已经下载安装完成。2、然后对于左下角的开始菜单进行打开,然后选择设置功能打开,然后选择Windows更新,通过查看更新历史记录找到卸载更新,然后你可以看到更新的补丁KB50006670。
 Win10系统7.1环绕声怎么关闭Jun 02, 2024 pm 01:42 PM
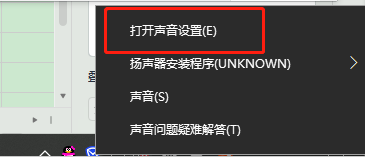
近期有很多小伙伴反映不太习惯使用Win10系统中的7.1环绕声,想要对其进行修改将其关闭,却不知道该怎么操作,这里小编就给大家详细介绍一下Win10系统关闭7.1环绕声的方法,有需要的小伙伴可以来看一看。关闭方法:1、右击右下角任务栏中的声音图标,接着选择选项列表中的"打开声音设置"。2、进入到新的窗口界面后,点击"相关设置"中的"声音控制面板"选项。3、在打开的窗口中,切换到上方中的"声音"选项卡。4、然后将&qu


Hot AI Tools

Undresser.AI Undress
AI-powered app for creating realistic nude photos

AI Clothes Remover
Online AI tool for removing clothes from photos.

Undress AI Tool
Undress images for free

Clothoff.io
AI clothes remover

AI Hentai Generator
Generate AI Hentai for free.

Hot Article

Hot Tools

PhpStorm Mac version
The latest (2018.2.1) professional PHP integrated development tool

Safe Exam Browser
Safe Exam Browser is a secure browser environment for taking online exams securely. This software turns any computer into a secure workstation. It controls access to any utility and prevents students from using unauthorized resources.

SublimeText3 English version
Recommended: Win version, supports code prompts!

Dreamweaver CS6
Visual web development tools

SublimeText3 Mac version
God-level code editing software (SublimeText3)


