

 Computer TutorialsTroubleshootingAssembling a computer What kind of CPU should I use with the ASUS H61 motherboard?
Assembling a computer What kind of CPU should I use with the ASUS H61 motherboard?

When assembling a computer, many friends encountered the problem of which CPU should be used with the ASUS H61 motherboard, and did not know how to choose the appropriate CPU. In this regard, php editor Xinyi brings you the ASUS H61 motherboard CPU matching recommendation, introduces the CPU models and performance characteristics that the motherboard is compatible with, and helps you easily configure your computer configuration. Please continue reading for details.

# Assembling a computer What kind of CPU should I use with the ASUS H61 motherboard?
If you want cost-effectiveness
3A platform is the highest
Recommended configuration
Processor R5 2600 6 cores 12 threads, not much compared to 2600x The big difference is that the main frequency is reduced from 3.6/4.2GHz to 3.4/3.9GHz, and the TDP is also reduced from 95W to 65W. In other aspects, it is the same as the R5 2600X. Paired with ASUS b450m motherboard, Corsair 2400 8g memory, Toshiba 240g solid state, Yeston 580 graphics card, Cooler Master 500w power supply, any chassis you choose, you can replace it if you don’t like it
Host effect
Asus How to use USB flash drive to install system on motherboard assembled computer?
Asus is a brand company from Taiwan. Its most famous products are computer motherboards and graphics cards. It is also a first-line brand that has attracted much attention and praise in the computer IT industry. ASUS is committed to providing individual and business users with the most innovative products and application solutions. Since the founding of the brand, Asus has produced laptops, computer motherboards, smartphones, LCD monitors, tablets, and other 3C products. Today, the editor will introduce how to use a USB flash drive to install the system on a computer assembled with an ASUS motherboard.
1. Insert the boot USB flash drive into the ASUS motherboard computer. Press F8 to bring up the boot menu during the restart process. Select the recognized USB flash drive and press Enter;
2. Boot into U disk menu, select Run PE system in the menu;
3. If partitioning is required, run the Diskgenius partition tool, delete the partition and then select;
4. Select the number of partitions and set each partition size, click OK to format;
5. Open the PE one-click installation, keep the default settings, select the location to be installed, such as C drive, and click OK;
6. Go to In this interface, perform the system decompression operation;
7. Then the computer automatically restarts, pull out the U disk, and start installing the system;
8. The subsequent installation process is performed automatically, wait The installation is complete. The above is a tutorial on how to use a USB flash drive to install the system on an ASUS motherboard computer. You can follow the above steps. I hope it will be helpful to you.
How to assemble a computer motherboard?
Pick up the chassis and lay it flat, grab the handle of the chassis baffle with your hand, pull it back, and the chassis baffle will be taken out.
1. Prepare tools and materials: You need to prepare all the tools and materials needed to assemble a computer host. This includes the computer host itself, monitor, keyboard and mouse, power supply, hard drive, memory stick, processor and radiator,
2. Open the host box: First, you need to open the host box for subsequent steps installation work. Usually, you can use a screwdriver to turn the screws on the corners of the main case, and then open the main case.
3. Install the power supply: The power supply is an important part of the computer host.
How does the ASUS host assemble the computer?
Purchase ASUS motherboard, ASUS graphics card, CPU, memory, hard drive, chassis and power supply and then install it.
How to turn off core on ASUS motherboard?
Which model of board you can check the manual first. Generally, there is a detailed introduction in the manual about opening the core. There is no need to open the case. It is too extreme to open the battery or something. Generally, the option to enable the core is acc or in the bios. An option consisting of three words axxxcxxxxcxxx can disable it. Of course, different motherboard brands and different options will have different options. Some of the names are very straightforward, such as unlockcore. You can directly choose 2-core, 3-core, and 4-core (the key is to read the manual). If it is unstable, if you use dual-core, you can open 4-core. If you want to core, you can try to turn off a core, or choose an option such as -2%. If it still doesn't work after selecting it, then select restore default settings in the bios to restore it to the factory default state
How to enable core display on ASUS motherboard?
1. Unlike laptops, the CPU core display and independent graphics card of desktop computers cannot be enabled at the same time in the operating system, that is, users can only use one graphics card.
2. When an independent graphics card is installed, the desktop computer motherboard will give priority to starting the computer from the independent graphics card by default. At this time, the user connects the monitor data cable to the independent graphics card, enters the operating system to install the driver, and then it can be used normally. If you want to use CPU core display, the first method is to remove the independent graphics card.
3. Connect the monitor data cable to the corresponding display port (VGA/DVI/HDMI) on the motherboard. When the computer is turned on, it will automatically select to boot from the nuclear display. Also enter the operating system and install the driver.
4. The second method is to connect the monitor to the independent graphics card without removing the independent graphics card. During the power-on self-test, enter the motherboard BIOS - Integrated Peripherals interface, find Init Dispay First (which graphics card should be started first), and change it to IGFX (built-in graphics card).
5. And make sure that the Internal Graphics (built-in display function) item is enabled (Enable or Auto). After the relevant settings are completed, shut down the computer and connect the monitor to the corresponding display port on the motherboard. Turn on the computer again. At this time, the computer should start from the CPU core display first.
6. Note: BIOS setting operations are different for different motherboards, and the user needs to have a good understanding of BIOS.
How to turn off the core display on ASUS motherboard?
The method to turn off the nuclear display is as follows:
Step 1: First use the right button of the mouse, click "This PC" on the desktop, and select "Manage".
Step 2: Then in the management, click "Device Manager".
Step 3: Finally, click "Display Adapter", select the name of the core display that needs to be disabled, right-click the core display, and select "Disable". At this time, the nuclear display is successfully turned off and only the independent display is used.
How to set up core on ASUS motherboard?
Asus motherboard core setting requires the following steps: first enable the core display option in the BIOS, then enable the core display function in the operating system, and finally set up the corresponding graphics card driver. This allows independent graphics cards and core graphics cards to be used at the same time to improve graphics processing capabilities. It should be noted that different models of ASUS motherboards have different core configurations, and the specific setting methods may be different. In addition to the above setting methods, further optimization and adjustment can also be carried out through some software. For example, you can use the Intel Graphics Control Panel for settings and adjustments, which can improve the performance and stability of your graphics card. In addition, you can also use some hardware monitoring software to monitor and manage the temperature and power consumption of the graphics card to ensure the stability and security of the hardware.
How to enable core graphics on ASUS motherboard?
Unlike laptop computers, the CPU core display and independent graphics card of desktop computers cannot be enabled at the same time in the operating system, that is, users can only use one graphics card.
2
/6
When a discrete graphics card is installed, the desktop computer motherboard gives priority to starting the computer from the discrete graphics card by default. At this time, the user connects the monitor data cable to the independent graphics card, enters the operating system to install the driver, and then it can be used normally. If you want to use the CPU core display, the first method is to remove the independent graphics card
3
/6
and connect the monitor data cable to the corresponding display port (VGA/DVI) on the motherboard /HDMI), it will automatically select to boot from the core display when booting, and also install the driver after entering the operating system.
4
/6
The second method is to first connect the monitor to the independent graphics card without removing the independent graphics card. During the power-on self-test, enter the motherboard BIOS - Integrated Peripherals interface, find Init Dispay First (which graphics card should be started first), and change it to IGFX (built-in graphics card). .
5
/6
And make sure the Internal Graphics (built-in display function) item is enabled (Enable or Auto). After the relevant settings are completed, shut down the computer and connect the monitor to the corresponding display port on the motherboard. Turn on the computer again. At this time, the computer should start from the CPU core display first.
6
/6
Note: BIOS setting operations are different for different motherboards, and users need to have a good understanding of BIOS
ASUS motherboard group How to install the system?
Asus computers can reinstall the system through the CD through the following steps:
1. Put the genuine DVD disc into the optical drive;
2. Restart the computer and click on the screen When the ASUS LOGO appears, press the key several times, select the optical drive (may be labeled "CD/DVD"), then press to boot with the Windows 7 installation CD;
3. After a few seconds, the words "Press any key to boot from cd..." will appear on the screen. At this time, you need to press any key on the keyboard to continue the CD-ROM boot. See the picture below:
4. CD-ROM boot After that, the following interface will appear continuously (estimated to take one minute):
5. The following default setting options will appear, taking the Simplified Chinese version as an example,,,, click:
6. Click;
7. After waiting for the installation program to start, the "Agree License Terms" window will appear. Check "I accept the license terms (A)" and click;
8. In the installation type In the selected screen, use the keyboard arrow keys or the mouse pointer to select;
9. Enter the partition interface and click;
10. Click to create a partition;
11. After setting the partition capacity, click;
12. If you use a new hard disk, or delete all partitions and recreate all partitions, the Windows 7 system will automatically generate a 100MB space to store the Windows 7 startup boot file. , the following prompt appears, click;
13. The disk status after creating the C drive, there will be a C drive, an unallocated space, and a 100MB space;
14. Same as the above method, please allocate the remaining hard disk space according to your usage needs;
15. Select the partition where you want to install the system and click;
16. Start the automatic installation of Window7 System (estimated to take ten minutes at the fastest);
17. It will automatically restart after the installation is completed (estimated to take two minutes);
18. Then the Windows startup interface will appear;
19. The installation program will continue to install automatically (it is expected to take ten minutes at the fastest);
The machine will automatically restart and the machine's startup program will be automatically installed.
The above is the detailed content of Assembling a computer What kind of CPU should I use with the ASUS H61 motherboard?. For more information, please follow other related articles on the PHP Chinese website!

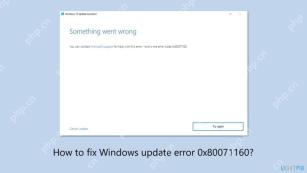 How to fix Windows update error 0x80071160?May 05, 2025 pm 10:00 PM
While many users dont realize that, Windows updates are among the most important features for maintaining the systems stability and security, as well as ensurin
 Must-Know Things: What to Check When Buying a Used LaptopMay 05, 2025 pm 08:01 PM
This MiniTool guide provides essential checks before buying a used laptop. It details how to assess the physical condition, test key hardware, and evaluate the software to ensure a sound purchase. Quick Navigation: What to Check When Buying a Used
 What to Do Before Replacing a Hard Drive? Learn Essentials!May 04, 2025 pm 08:02 PM
Upgrade the hard drive and improve the computer performance! This article will guide you the steps you need to take before replacing a hard drive on your Windows computer with a larger disk or SSD to avoid unnecessary hassle. Preparation: Choose the right hard drive: When choosing a hard disk, you should not only consider the difference between SSD and HDD, but also consider factors such as storage capacity, form factor size and budget. SSD capacity ranges from 256GB to 4TB or even larger, choose the capacity that suits your needs. Also, check which SSD slot is used for your laptop or desktop and make sure that the SSD you choose (such as 2.5-inch and 3.5-inch SATA SSD, M.2 2280/2230/2242 SSD, etc.) is compatible with your computer. Finally, according to
 Sultan's Game Save File Location: A Detailed Roadmap GuideMay 04, 2025 pm 08:01 PM
Mastering Sultan's Game: Save File Location and Backup Strategies This guide helps you locate and protect your Sultan's Game save files. Released on March 31st, 2025, Sultan's Game's engaging narratives and appealing visuals have made it a popular c
 A Step-by-Step Guide to Copy ESXi VM to a USB DriveMay 03, 2025 pm 08:01 PM
Offsite VM backups are crucial. This guide demonstrates how to easily copy ESXi virtual machines to a USB drive for secure, accessible storage. Method 1: Manual VM File Download This method copies the core VM files. Power off the target VM in the V
 Windows 10 KB5055612: New Features & What if It Failed to InstallMay 02, 2025 pm 08:01 PM
This non-security update, KB5055612 for Windows 10 version 22H2 and related versions, released April 22, 2025, offers several quality improvements. This guide details installation and troubleshooting steps. KB5055612: Key Improvements This update enh
 Unlock Helpful Methods to Fix KB5055642 Not InstallingMay 02, 2025 pm 06:01 PM
Troubleshooting KB5055642 Installation Problems on Windows 11 This guide offers solutions for users encountering issues installing Windows 11 Insider Preview Build 26200.5562 (KB5055642), released April 21, 2025. This update introduces enhanced featu
 How to fix Windows update error 0xca00a000?May 02, 2025 pm 06:00 PM
Updates are vital to ensure that a Windows system runs well and is protected from potential outside threats, such as software vulnerabilities. Unfortunately, Wi


Hot AI Tools

Undresser.AI Undress
AI-powered app for creating realistic nude photos

AI Clothes Remover
Online AI tool for removing clothes from photos.

Undress AI Tool
Undress images for free

Clothoff.io
AI clothes remover

Video Face Swap
Swap faces in any video effortlessly with our completely free AI face swap tool!

Hot Article
Hot Tools

PhpStorm Mac version
The latest (2018.2.1) professional PHP integrated development tool

Dreamweaver CS6
Visual web development tools

Dreamweaver Mac version
Visual web development tools

VSCode Windows 64-bit Download
A free and powerful IDE editor launched by Microsoft

Atom editor mac version download
The most popular open source editor

