


本文需要用的的文件都在我的网盘中,有需要的可以去下载 链接地址: http://xiaomeng008.ys168.com/ 编译过程如下: 1:新建工程,名称为:TestFfmpeg。下载output_example.c文件(本文下面给出),将文件添加到TestFfmpeg工程中 2:拷贝sdk中的include文件
本文需要用的的文件都在我的网盘中,有需要的可以去下载
链接地址:http://xiaomeng008.ys168.com/
编译过程如下:
1:新建工程,名称为:TestFfmpeg。下载output_example.c文件(本文下面给出),将文件添加到TestFfmpeg工程中
2:拷贝sdk中的include文件夹下的所有文件到工程目录下,和output_example.c 在同一目录中
3:去掉output_example.c中的#include“snprintf.h”,
4: 将sdk中的lib文件夹拷贝到工程目录下,然后打开project-->settings->Link, Category选择Input,
在Additional Library path中填入:build-test\lib,
在Project options中增加avcodec.lib avdevice.lib avfilter.lib avformat.lib avutil.lib swscale.lib。
5.打开project-->settings->C/C++, Category选择Precompiled Headers, 选择not using precompiled headers.
6.将sdk的bin目录下的文件拷贝到build-test、Debug目录下。
志不强者智不达” 博客,请务必保留此出处http://marico.blog.51cto.com/1929668/387152

 如何在Go中使用命名管道?May 11, 2023 pm 04:22 PM
命名管道是一种在操作系统中相对比较低级的进程通信方式,它是一种以文件为中介的进程通信方式。在Go语言中,通过os包提供了对命名管道的支持。在本文中,我们将介绍如何在Go中使用命名管道来实现进程间通信。一、命名管道的概念命名管道是一种特殊的文件,可以被多个进程同时访问。在Linux系统中,命名管道是一种特殊的文件类型,它们存在于文件系统的某个位置上,并且可以在
 如何在Go中使用第三方库?May 11, 2023 pm 03:30 PM
在Go语言中,使用第三方库是非常方便的。许多优秀的第三方库和框架可以帮助我们快速地开发应用程序,同时也减少了我们自己编写代码的工作量。但是如何正确地使用第三方库,确保其稳定性和可靠性,是我们必须了解的一个问题。本文将从以下几个方面介绍如何使用第三方库,并结合具体例子进行讲解。一、第三方库的获取Go语言中获取第三方库有以下两种方式:1.使用goget命令首先
 如何在PHP中使用协程?May 12, 2023 am 08:10 AM
随着传统的多线程模型在高并发场景下的性能瓶颈,协程成为了PHP编程领域的热门话题。协程是一种轻量级的线程,能够在单线程中实现多任务的并发执行。在PHP的语言生态中,协程得到了广泛的应用,比如Swoole、Workerman等框架就提供了对协程的支持。那么,如何在PHP中使用协程呢?本文将介绍一些基本的使用方法以及常见的注意事项,帮助读者了解协程的运作原理,以
 如何在PHP中使用变量函数May 18, 2023 pm 03:52 PM
变量函数是指可以使用变量来调用函数的一种特殊语法。在PHP中,变量函数是非常有用的,因为它可以让我们更加灵活地使用函数。在本文中,我们将介绍如何在PHP中使用变量函数。定义变量函数在PHP中,变量函数的定义方式非常简单,只需要将要调用的函数名赋值给一个变量即可。例如,下面的代码定义了一个变量函数:$func='var_dump';这里将var_dump函
 如何在 Windows 11 中按需使用 OneDrive 的文件Apr 14, 2023 pm 12:34 PM
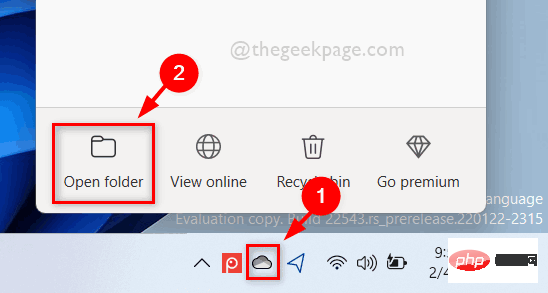
<p>Windows 系统上的 OneDrive 应用程序允许您将文件存储在高达 5 GB 的云上。OneDrive 应用程序中还有另一个功能,它允许用户选择一个选项,是将文件保留在系统空间上还是在线提供,而不占用您的系统存储空间。此功能称为按需文件。在这篇文章中,我们进一步探索了此功能,并解释了有关如何在 Windows 11 电脑上的 OneDrive 中按需使用文件的各种选项。</p><h2>如何使用 On
 如何在PHP中使用数据聚合函数May 18, 2023 pm 02:51 PM
数据聚合函数是一种用于处理数据库表中多行数据的函数。在PHP中使用数据聚合函数可以使得我们方便地进行数据分析和处理,例如求和、平均数、最大值、最小值等。下面将介绍如何在PHP中使用数据聚合函数。一、介绍常用的数据聚合函数COUNT():计算某一列的行数。SUM():计算某一列的总和。AVG():计算某一列的平均值。MAX():取出某一列的最大值。MIN():
 如何在Go中使用WebSocket?May 11, 2023 pm 04:17 PM
近年来,WebSocket技术已经成为了Web开发中不可或缺的一部分。WebSocket是一种在单个TCP连接上进行全双工通信的协议,它使得客户端和服务器之间的通信更加流畅和高效。如今,很多现代的Web应用程序都使用了WebSocket技术,例如实时聊天、在线游戏以及实时数据可视化等。Go语言作为一个现代的编程语言,自然也提供了很好的支持WebSock
 如何在Go中使用音频处理?May 11, 2023 pm 04:37 PM
随着音频处理在各种应用场景中的普及,越来越多的程序员开始使用Go编写音频处理程序。Go语言作为一种现代化的编程语言,具有优秀的并发性和高效率的特点,使用它进行音频处理十分方便。本文将介绍如何在Go中使用音频处理技术,包括读取、写入、处理和分析音频数据等方面的内容。一、读取音频数据在Go中读取音频数据有多种方式。其中比较常用的是使用第三方库进行读取,比如go-


Hot AI Tools

Undresser.AI Undress
AI-powered app for creating realistic nude photos

AI Clothes Remover
Online AI tool for removing clothes from photos.

Undress AI Tool
Undress images for free

Clothoff.io
AI clothes remover

AI Hentai Generator
Generate AI Hentai for free.

Hot Article
Hot Tools

MantisBT
Mantis is an easy-to-deploy web-based defect tracking tool designed to aid in product defect tracking. It requires PHP, MySQL and a web server. Check out our demo and hosting services.

Atom editor mac version download
The most popular open source editor

Dreamweaver Mac version
Visual web development tools

Notepad++7.3.1
Easy-to-use and free code editor

SublimeText3 English version
Recommended: Win version, supports code prompts!

