

Nodejs tutorial environment installation and operation_node.js

Let nodeJS run
The first step is of course to install the nodeJS environment. Now it is faster to install nodeJS on windows. Just download it directly:
http://www.nodejs.org/download/
Download here as needed. After the download is completed, just go to the next step. After that, we will have a nodeJS environment
The second step, in order to facilitate our subsequent operations, we directly created a folder blog on the D drive
Then open the windows command line tool, enter the d drive, enter:
Then there may be dependent packages inside. We need to enter the blog directory to install (the installation configuration is provided by package.json):
In this way, our dependency package has been downloaded. The dependency package, java package file, and .net bll file should be the same concept
At this time, our program is ready to run:
When you open the browser at this time, there will be a reaction:
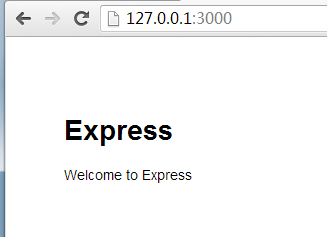
Here we are using express (a popular nodeJS web development framework) and the ejs template engine
File structure
The initialization file directory structure is as follows:
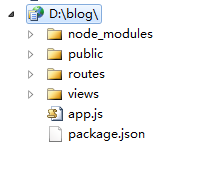
app.js is the entry file
package.json is a module dependency file. When we use npm install, it will download related packages from the Internet based on its configuration
node_modules is the downloaded module file (package.json)
public stores static resource files
routes stores routing files
views stores related view template files
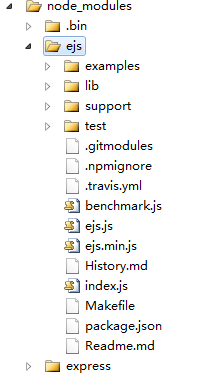
In this way, our basic directory structure comes out. Let’s briefly talk about the node_modules directory
node_modules/ejs
As we just said, downloaded modules are stored here. To put it bluntly, it is a collection of js files
var parse = exports.parse = function(str, options){
var options = options || {}
, open = options.open || exports.open || ' , close = options.close || exports.close || '%>'
, filename = options.filename
, compileDebug = options.compileDebug !== false
, buf = "";
buf = 'var buf = [];';
if (false !== options._with) buf = 'nwith (locals || {}) { (function(){ ';
buf = 'n buf.push('';
var lineno = 1;
var consumeEOL = false;
for (var i = 0, len = str.length; i
var stri = str[i];
if (str.slice(i, open.length i) == open) {
i = open.length
var prefix, postfix, line = (compileDebug ? '__stack.lineno=' : '') lineno;
switch (str[i]) {
case '=':
prefix = "', escape((" line ', ';
postfix = ")), '";
i;
break;
case '-':
prefix = "', (" line ', ';
postfix = "), '";
i;
break;
default:
prefix = "');" line ';';
postfix = "; buf.push('";
}
var end = str.indexOf(close, i)
, js = str.substring(i, end)
, start = i
, include = null
, n = 0;
if ('-' == js[js.length-1]){
js = js.substring(0, js.length - 2);
consumeEOL = true;
}
if (0 == js.trim().indexOf('include')) {
var name = js.trim().slice(7).trim();
if (!filename) throw new Error('filename option is required for includes');
var path = resolveInclude(name, filename);
include = read(path, 'utf8');
include = exports.parse(include, { filename: path, _with: false, open: open, close: close, compileDebug: compileDebug });
buf = "' (function(){" include "})() '";
js = '';
}
while (~(n = js.indexOf("n", n))) n , lineno ;
if (js.substr(0, 1) == ':') js = filtered(js);
if (js) {
if (js.lastIndexOf('//') > js.lastIndexOf('n')) js = 'n';
buf = prefix;
buf = js;
buf = postfix;
}
i = end - start close.length - 1;
} else if (stri == "\") {
buf = "\\";
} else if (stri == "'") {
buf = "\'";
} else if (stri == "r") {
// ignore
} else if (stri == "n") {
If (consumeEOL) {
consumeEOL = false;
} else {
buf = "\n";
lineno ;
}
} else {
buf = stri;
}
}
if (false !== options._with) buf = "'); })();n} nreturn buf.join('');";
else buf = "');nreturn buf.join('');";
Return buf;
};
For example, we used the ejs template and express module here, and then we curiously walked into the ejs program to see what the difference was
After opening ejs.js, let’s take a look at some code: We are familiar with this code. It has the same idea as underscore’s template engine code, which parses the template into a string
Then convert it into a function through the eval or new Function method, and pass in your own data object for easy analysis
As for the specific workflow, we don’t know yet. We can only study it later. Okay, let’s move on to other modules now
app.js
As the entry file, app.js plays a pivotal role:
/**
* Module dependencies.
*/
var express = require('express');
var routes = require('./routes');
var user = require('./routes/user');
var http = require('http');
var path = require('path');
var app = express();
// all environments
app.set('port', process.env.PORT || 3000);
app.set('views', path.join(__dirname, 'views'));
app.set('view engine', 'ejs');
app.use(express.favicon());
app.use(express.logger('dev'));
app.use(express.json());
app.use(express.urlencoded());
app.use(express.methodOverride());
app.use(app.router);
app.use(express.static(path.join(__dirname, 'public')));
// development only
if ('development' == app.get('env')) {
app.use(express.errorHandler());
}
app.get('/', routes.index);
app.get('/users', user.list);
http.createServer(app).listen(app.get('port'), function(){
console.log('Express server listening on port ' app.get('port'));
});
We load express and http modules through the require() command, and will load template files such as index user in the routes directory
app.set('port', process.env.PORT || 3000) is to set the port at startup
app.set('views', __dirname '/views') is to set the path to store the template file, where __dirname is a global variable, which stores the directory where the current script is located. We can view it like this:
console.log(__dirname);//Add the following code to index.js
/**
D:blog>node app
Express server li
D:blogroutes
*/
As for how this __dirname was obtained, we don’t need to pay attention for the time being
app.set('view engine', 'ejs') sets the template engine to ejs
app.use(express.favicon()) is to set the icon. If you want to modify it, just go to the images file under public
app.use(express.logger('dev')); express relies on connect, so the built-in middleware will output some logs
app.use(express.json()); is used to parse the request body, where the string will be dynamically converted into a json object
app.use(express.methodOverride()); connect has built-in middleware to process post requests and can disguise http methods such as put
app.use(app.router); Call router parsing rules
app.use(express.static(path.join(__dirname, 'public'))); connect built-in middleware, set public in the root directory to store static files
if ('development' == app.get('env')) {
app.use(express.errorHandler());
}
This sentence means that error messages should be output during development
app.get('/', routes.index);
app.get('/users', user.list);
These two sentences are specific processing files at the time of access. For example, when accessing directly here, the default access is routes.index
Then the template data is actually parsed internally:
exports.index = function (req, res) {
console.log(__dirname);
res.render('index', { title: 'Express' });
};
Finally, the above code will be called to create an http server and listen to port 3000. After success, it can be accessed on the web page
Routing
We used this method to build routing earlier
The above code can be replaced by this code (written in the app)
app.get('/', function (req, res) {
res.render('index', { title: 'Express' });
});
This code means that when accessing the homepage, the ejs template engine is called to render the index.ejs template file
Now make some modifications. The above code implements the routing function, but we cannot put the routing related code into the app. If there are too many routes, the app will become bloated, so we put the relevant configuration into the index
So delete the relevant routing functions in the app and add the code at the end of the app:
Then modify index.js
module.exports = function(app) {
app.get('/', function (req, res) {
res.render('index', { title: 'Express' });
});
};
It’s not clear yet how this code is organized, so I won’t pay attention to it. We will take a look at it later
Routing Rules
Express encapsulates a variety of http requests, we generally use get/post two types
app.get();
app.post();
The first parameter is the request path, the second parameter is the callback function, or the two parameters are request and response
Then, there are the following rules for req (request)
req.query handles get requests and obtains get request parameters
req.params handles get or post requests in the form of /:xxx
req.body processes post requests and obtains post request bodies
req.params handles get and post requests, but the search priority is req.params->req.body->req.query
Path rules also support regular expressions, we will talk about the details later...
Add routing rules
When we visit a non-existent link:
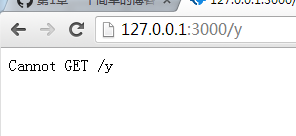
Because there is no routing rule for /y, and it does not mention files under public, so it is 404
Now we add relevant routes in index.js:
module.exports = function (app) {
app.get('/', function (req, res) {
res.render('index', { title: 'Express' });
});
app.get('/y', function (req, res) {
Res.send('Ye Xiaochai');
});
};
My page is garbled here:
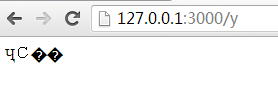
The reason is that after downloading, my file is encoded in gbk. We just need to change it to utf-8. We will not care about the template engine. Let’s go to the next section
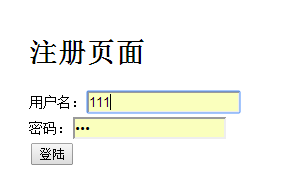
Registration function
Here we follow the original blogger to create a simple registration function. Here we use mongo db as the database, and we will improve the functions in sequence later
Create a new register route and create a new register template for it, so let’s get started
① Create a new route in index
app.get('/register', function (req, res) {
res.render('index', { title: 'Registration page' });
});
module.exports = function (app) {
app.get('/', function (req, res) {
res.render('index', { title: 'Express' });
});
app.get('/y', function (req, res) {
Res.send('Ye Xiaochai');
});
app.get('/register', function (req, res) {
res.render('register', { title: 'Registration page' });
});

MongoDB
MongoDB is a type of NoSQL based on distributed file storage. It is written in C. The data structure supported by MongoDB is loose, similar to json. We know that json can support any type, so it can create very complex structures
id: 1,
name: 'Ye Xiaochai',
frinds: [
{ id: 2, name: 'Su Huan Zhen' },
{ id: 3, name: 'One page book' }
]
}
Install MongoDB
First go to http://www.mongodb.org/downloads to download the installation file, then copy the file to the D drive and rename it mongodb, and then create a new blog folder in it
Link MongoDB
After the database is installed successfully, our program still needs the relevant "driver" program to link to the database. Of course, we must download the package at this time...
Open package.json and add a new line in dependencies
{
"name": "application-name",
"version": "0.0.1",
"private": true,
"scripts": {
"start": "node app.js"
},
"dependencies": {
"express": "3.4.8",
"ejs": "*",
"mongodb": "*"
}
}
Then run npm install to download the new dependency package. Now you have the driver related to mongoDB. To connect to databases such as mysql, you need other dependency packages
At this time, create the setting.js file in the root directory and save the database connection information
module.exports = {
cookieSecret: 'myblog',
db: 'blog',
host: 'localhost'
};
db is the database name, host is the database address, cookieSecret is used for cookie encryption and has nothing to do with the database
Next, create a new models folder in the root directory, and create a new db.js under the models folder
var settings = require('../settings'),
Db = require('mongodb').Db,
Connection = require('mongodb').Connection,
Server = require('mongodb').Server;
module.exports = new Db(settings.db, new Server(settings.host, Connection.DEFAULT_PORT), {safe: true});
Set the database name, database address and database port to create a database instance, and export the instance through module.exports, so that the database can be read and written through require
In order to successfully write to the database, the server-side program needs to process the post information, so we create a new user.js in the models folder
var mongodb = require('./db');
function User(user) {
this.name = user.name;
this.password = user.password;
};
module.exports = User;
//Storage user information
User.prototype.save = function (callback) {
//User documents to be stored in the database
var user = {
name: this.name,
Password: this.password
};
//Open database
mongodb.open(function (err, db) {
If (err) {
Return callback(err); //Error, return err information
}
//Read users collection
db.collection('users', function (err, collection) {
If (err) {
mongodb.close();
return callback(err); //Error, return err information
}
//Insert user data into users collection
collection.insert(user, {
safe: true
}, function (err, user) {
mongodb.close();
If (err) {
return callback(err); //Error, return err information
}
callback(null, user[0]); //Success! err is null and returns the stored user document
});
});
});
};
//Read user information
User.get = function(name, callback) {
//Open database
mongodb.open(function (err, db) {
If (err) {
Return callback(err);//Error, return err information
}
//Read users collection
db.collection('users', function (err, collection) {
If (err) {
mongodb.close();
return callback(err);//Error, return err information
}
//Find a document whose username (name key) value is name
collection.findOne({
name: name
}, function (err, user) {
mongodb.close();
If (err) {
return callback(err);//Failed! Return err information
}
callback(null, user);//Success! Return the queried user information
});
});
});
};
Here is one for writing data and one for reading data. We have the processing program. Now we need to add the following program in front of index.js
Modify app.post('/register')
app.post('/register', function (req, res) {
var name = req.body.name;
var pwd = req.body.password;
var newUser = new User({
name: name,
Password: pwd
});
newUser.save(function (err, user) {
//Related operations, write to session
res.send(user);
});
});
Then click register and you will get a response
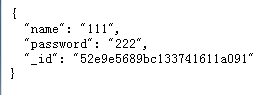
If you are not sure whether to write to the database at this time, you can enter the database to query, first switch to the database directory
Enter:
Then switch its database connection to blog
Last input
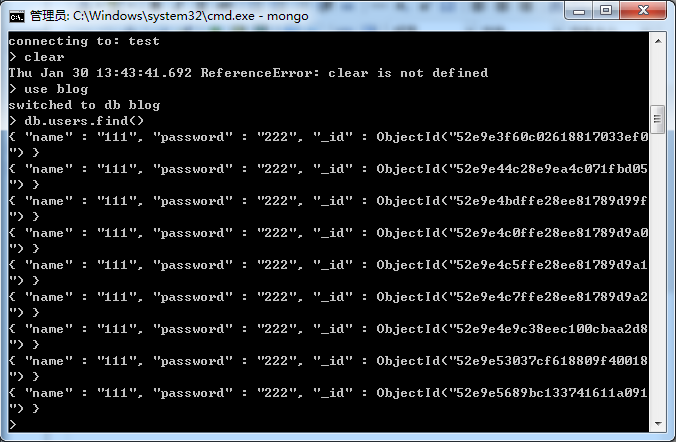
We were all happy to see the data written, so today’s study comes to an end for now
Conclusion
Today we followed a blog to complete the operation from installation to writing to the database. Tomorrow let us add other aspects and gradually deepen the learning of nodeJS

 Python vs. JavaScript: A Comparative Analysis for DevelopersMay 09, 2025 am 12:22 AM
The main difference between Python and JavaScript is the type system and application scenarios. 1. Python uses dynamic types, suitable for scientific computing and data analysis. 2. JavaScript adopts weak types and is widely used in front-end and full-stack development. The two have their own advantages in asynchronous programming and performance optimization, and should be decided according to project requirements when choosing.
 Python vs. JavaScript: Choosing the Right Tool for the JobMay 08, 2025 am 12:10 AM
Whether to choose Python or JavaScript depends on the project type: 1) Choose Python for data science and automation tasks; 2) Choose JavaScript for front-end and full-stack development. Python is favored for its powerful library in data processing and automation, while JavaScript is indispensable for its advantages in web interaction and full-stack development.
 Python and JavaScript: Understanding the Strengths of EachMay 06, 2025 am 12:15 AM
Python and JavaScript each have their own advantages, and the choice depends on project needs and personal preferences. 1. Python is easy to learn, with concise syntax, suitable for data science and back-end development, but has a slow execution speed. 2. JavaScript is everywhere in front-end development and has strong asynchronous programming capabilities. Node.js makes it suitable for full-stack development, but the syntax may be complex and error-prone.
 JavaScript's Core: Is It Built on C or C ?May 05, 2025 am 12:07 AM
JavaScriptisnotbuiltonCorC ;it'saninterpretedlanguagethatrunsonenginesoftenwritteninC .1)JavaScriptwasdesignedasalightweight,interpretedlanguageforwebbrowsers.2)EnginesevolvedfromsimpleinterpreterstoJITcompilers,typicallyinC ,improvingperformance.
 JavaScript Applications: From Front-End to Back-EndMay 04, 2025 am 12:12 AM
JavaScript can be used for front-end and back-end development. The front-end enhances the user experience through DOM operations, and the back-end handles server tasks through Node.js. 1. Front-end example: Change the content of the web page text. 2. Backend example: Create a Node.js server.
 Python vs. JavaScript: Which Language Should You Learn?May 03, 2025 am 12:10 AM
Choosing Python or JavaScript should be based on career development, learning curve and ecosystem: 1) Career development: Python is suitable for data science and back-end development, while JavaScript is suitable for front-end and full-stack development. 2) Learning curve: Python syntax is concise and suitable for beginners; JavaScript syntax is flexible. 3) Ecosystem: Python has rich scientific computing libraries, and JavaScript has a powerful front-end framework.
 JavaScript Frameworks: Powering Modern Web DevelopmentMay 02, 2025 am 12:04 AM
The power of the JavaScript framework lies in simplifying development, improving user experience and application performance. When choosing a framework, consider: 1. Project size and complexity, 2. Team experience, 3. Ecosystem and community support.
 The Relationship Between JavaScript, C , and BrowsersMay 01, 2025 am 12:06 AM
Introduction I know you may find it strange, what exactly does JavaScript, C and browser have to do? They seem to be unrelated, but in fact, they play a very important role in modern web development. Today we will discuss the close connection between these three. Through this article, you will learn how JavaScript runs in the browser, the role of C in the browser engine, and how they work together to drive rendering and interaction of web pages. We all know the relationship between JavaScript and browser. JavaScript is the core language of front-end development. It runs directly in the browser, making web pages vivid and interesting. Have you ever wondered why JavaScr


Hot AI Tools

Undresser.AI Undress
AI-powered app for creating realistic nude photos

AI Clothes Remover
Online AI tool for removing clothes from photos.

Undress AI Tool
Undress images for free

Clothoff.io
AI clothes remover

Video Face Swap
Swap faces in any video effortlessly with our completely free AI face swap tool!

Hot Article
Hot Tools

SublimeText3 English version
Recommended: Win version, supports code prompts!

Safe Exam Browser
Safe Exam Browser is a secure browser environment for taking online exams securely. This software turns any computer into a secure workstation. It controls access to any utility and prevents students from using unauthorized resources.

SecLists
SecLists is the ultimate security tester's companion. It is a collection of various types of lists that are frequently used during security assessments, all in one place. SecLists helps make security testing more efficient and productive by conveniently providing all the lists a security tester might need. List types include usernames, passwords, URLs, fuzzing payloads, sensitive data patterns, web shells, and more. The tester can simply pull this repository onto a new test machine and he will have access to every type of list he needs.

Notepad++7.3.1
Easy-to-use and free code editor

PhpStorm Mac version
The latest (2018.2.1) professional PHP integrated development tool

