1、新建一个800 * 800 像素的文件,背景填充白色,新建一个图层用钢笔勾出樱桃果实轮廓路径,转为选区如下图。

<图1> 2、选择渐变工具,颜色设置如图2,拉出图3所示的径向渐变。

<图2>

<图3>
3、选择加深工具,曝光度为:5%左右,把选区部分稍微加深一点,然后再把底部加深,效果如图5。

<图4>

<图5> 4、中间部分稍微用加深工具加深一下,如下图。

<图6>
5、新建一个图层,用钢笔勾出图7所示的选区,把前景颜色设置为:#F5B1AC,选择画笔工具,画笔透明度设置为:10%,把樱桃边缘部分涂上高光,效果如图8。

<图7>

<图8>
6、新建一个图层,同样的方法把右边边缘涂上高光,高光的颜色稍微深一些,效果如下图。

<图9> 7、新建一个图层,用钢笔勾出图10所示的选区,用画笔涂上高光,效果如图11。

<图10>

<图11>
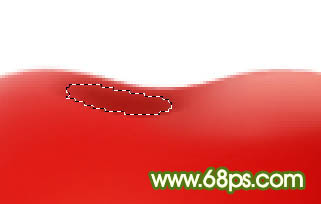
8、新建一个图层,用钢笔勾出图12所示的选区,把前景颜色设置为:#AA1B17,用画笔涂暗。

<图12
 Photoshop für Designer: Erstellen visueller KonzepteApr 13, 2025 am 12:09 AM
Das Erstellen von visuellen Konzepten in Photoshop kann in den folgenden Schritten erreicht werden: 1. Erstellen Sie ein neues Dokument, 2. Fügen Sie eine Hintergrundschicht hinzu, 3. Zeichnen Sie das Pinsel -Tool, um grundlegende Formen zu zeichnen. Anpassen Sie Farben und Helligkeit, 5. Text und Grafiken hinzufügen, 6. Verwenden Sie Masken für lokale Bearbeitung.
 Ist Photoshop kostenlos? Abonnementpläne verstehenApr 12, 2025 am 12:11 AM
Photoshop ist nicht kostenlos, aber es gibt verschiedene Möglichkeiten, es zu kostengünstig oder kostenlos zu verwenden: 1. Die kostenlose Testzeit beträgt 7 Tage, und Sie können alle Funktionen in diesem Zeitraum erleben. 2. Rabatte für Schüler und Lehrer können die Kosten um die Hälfte senken, und schulischer Beweis ist erforderlich. 3. Das CreativeCloud -Paket ist für professionelle Benutzer geeignet und enthält eine Vielzahl von Adobe -Tools. 4. Photoshopelements und Lightroom sind kostengünstige Alternativen mit weniger Funktionen, aber niedrigeren Preisen.
 Der Wert von Photoshop: Abwägung der Kosten gegen seine FunktionenApr 11, 2025 am 12:02 AM
Photoshop ist die Investition wert, da sie leistungsstarke Funktionen und eine breite Palette von Anwendungsszenarien bietet. 1) Zu den Kernfunktionen gehören Bildbearbeitung, Schichtmanagement, Produktion von Spezialeffekten und Farbanpassungen. 2) Geeignet für professionelle Designer und Fotografen, aber Amateure können Alternativen wie GIMP in Betracht ziehen. 3) Abonnieren Sie AdobecreativeCloud können nach Bedarf verwendet werden, um hohe einmalige Ausgaben zu vermeiden.
 Der Kernzweck von Photoshop: Kreatives BilddesignApr 10, 2025 am 09:29 AM
Die Kernverwendung von Photoshop im kreativen Bilddesign ist seine leistungsstarke Funktionalität und Flexibilität. 1) Es ermöglicht Designer, Kreativität in visuelle Realität durch Schichten, Masken und Filter zu verwandeln. 2) Zu den grundlegenden Verwendungen gehören die Anbaus, Größe und Farbkorrektur. 3) Fortgeschrittene Verwendungen wie Ebenenstile, Mischmodi und intelligente Objekte können komplexe Effekte erzielen. 4) Zu den häufigen Fehlern gehören eine unsachgemäße Schichtverwaltung und eine übermäßige Verwendung von Filtern, die durch das Organisieren von Schichten und die Verwendung von Filtern angemessen gelöst werden können. 5) Leistungsoptimierung und Best Practices umfassen die rationale Verwendung von Ebenen, regelmäßiges Speichern von Dateien und die Verwendung von Abkürzungsschlüssel.
 Photoshop für Webdesign: Erweiterte Techniken für UI/UXApr 08, 2025 am 12:19 AM
Photoshop kann im Webdesign verwendet werden, um Prototypen mit hohem Fidelity, Design-UI-Elemente und Simulation von Benutzerinteraktionen zu erstellen. 1. Verwenden Sie Schichten, Masken und intelligente Objekte für das grundlegende Design. 2. Simulieren Sie die Benutzerinteraktion durch Animations- und Timeline -Funktionen. 3.. Verwenden Sie Skripte, um den Entwurfsprozess zu automatisieren und die Effizienz zu verbessern.
 Neulingsartikel: Verwenden Sie die PS -Pinsel, um der Schriftzündung Crackeffekte hinzuzufügen (Share)Apr 07, 2025 am 06:21 AM
Im vorherigen Artikel "Unterrichten Sie Schritt für Schritt, um Plattenbildern mit PS (Favoriten) Druckeffekte hinzuzufügen, habe ich einen kleinen Trick eingeführt, um PS zu verwenden, um Plattenbilder mit PS zu Druckeffekten zu hindern. In dem folgenden Artikel wird Ihnen vorgestellt, wie Sie die PS -Pinsel verwenden, um der Schriftrisseffekte Risseffekte zu verleihen. Schauen wir uns an, wie es geht.
 Photoshop Erweiterte Typografie: Erstellen atemberaubender TexteffekteApr 07, 2025 am 12:15 AM
In Photoshop können Sie Texteffekte über Ebenenstile und Filter erstellen. 1. Erstellen Sie ein neues Dokument und fügen Sie Text hinzu. 2. Tragen Sie Ebenenstile wie Schatten und äußeres Glühen auf. 3. Verwenden Sie Filter wie Welleneffekte und fügen Sie Kegel- und Entlastungseffekte hinzu. 4. Verwenden Sie Masken, um den Effektbereich und die Intensität anzupassen, um die visuelle Auswirkung des Texteffekts zu optimieren.
 Wie man Bilder schneidetApr 06, 2025 pm 10:27 PM
Durch Schneiden wird der Hintergrundteil im Bild entfernt und das Thema zurückgelassen. Zu den gängigen Ausschnitten gehören: Manuelles Ausschnitt: Verwenden Sie die Bildbearbeitungssoftware, um den Rand des Motivs manuell zu skizzieren. Automatische Ausschnitte: Verwenden Sie Software, um das Thema automatisch zu identifizieren und vom Hintergrund zu trennen. Verwenden Sie Cutout-Tools von Drittanbietern: Verwenden Sie spezielle Tools, um Bilder auszuschneiden. Kanalausschnitt: Verwenden Sie den Kanal des Bildes, um Kanäle mit offensichtlichen Unterschieden von der Subjektfarbe für den Betrieb auszuwählen.


Heiße KI -Werkzeuge

Undresser.AI Undress
KI-gestützte App zum Erstellen realistischer Aktfotos

AI Clothes Remover
Online-KI-Tool zum Entfernen von Kleidung aus Fotos.

Undress AI Tool
Ausziehbilder kostenlos

Clothoff.io
KI-Kleiderentferner

AI Hentai Generator
Erstellen Sie kostenlos Ai Hentai.

Heißer Artikel

Heiße Werkzeuge

MantisBT
Mantis ist ein einfach zu implementierendes webbasiertes Tool zur Fehlerverfolgung, das die Fehlerverfolgung von Produkten unterstützen soll. Es erfordert PHP, MySQL und einen Webserver. Schauen Sie sich unsere Demo- und Hosting-Services an.

MinGW – Minimalistisches GNU für Windows
Dieses Projekt wird derzeit auf osdn.net/projects/mingw migriert. Sie können uns dort weiterhin folgen. MinGW: Eine native Windows-Portierung der GNU Compiler Collection (GCC), frei verteilbare Importbibliotheken und Header-Dateien zum Erstellen nativer Windows-Anwendungen, einschließlich Erweiterungen der MSVC-Laufzeit zur Unterstützung der C99-Funktionalität. Die gesamte MinGW-Software kann auf 64-Bit-Windows-Plattformen ausgeführt werden.

ZendStudio 13.5.1 Mac
Leistungsstarke integrierte PHP-Entwicklungsumgebung

EditPlus chinesische Crack-Version
Geringe Größe, Syntaxhervorhebung, unterstützt keine Code-Eingabeaufforderungsfunktion

Senden Sie Studio 13.0.1
Leistungsstarke integrierte PHP-Entwicklungsumgebung


