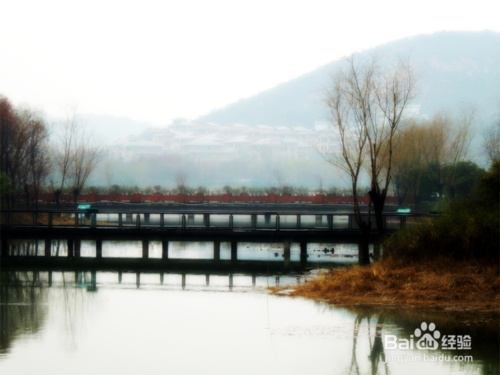
在某些场合增加些特效会更有意境,这里简单的介绍下如何用photoshop打造下雨效果。教程中素材取自于无锡长广溪湿地公园。
方法/步骤
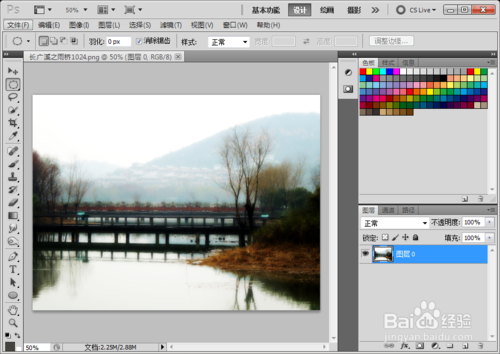
打开素材图片,
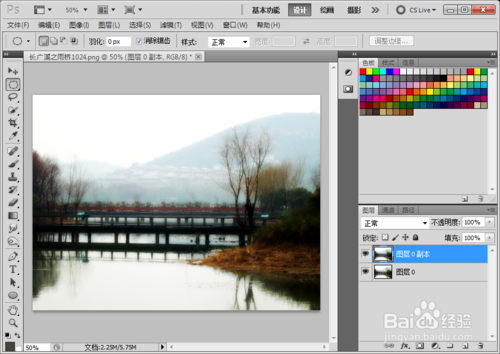
CTRL+L,复制图层。要养成良好的习惯,尽量避免在原图上绘制痕迹。
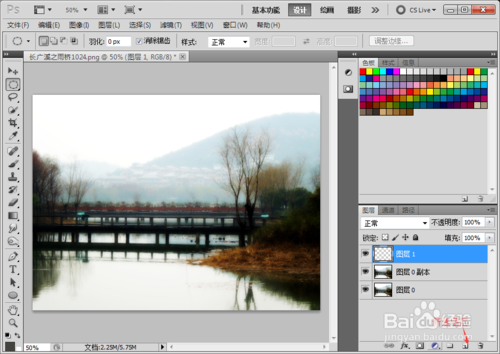
新建空白图层,填充前景色黑色。
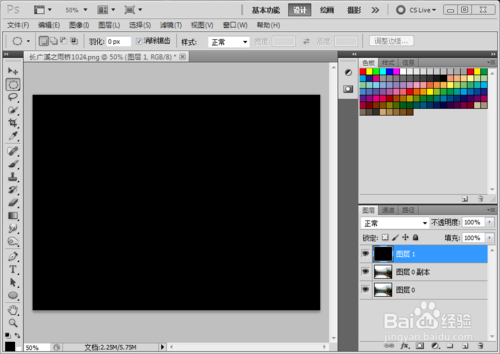
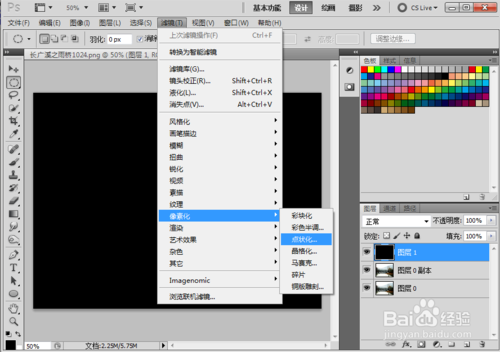
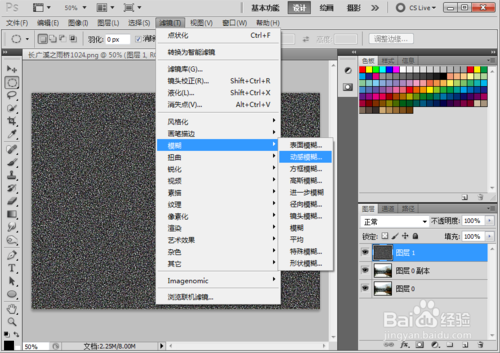
1:滤镜→像素化→点状化。
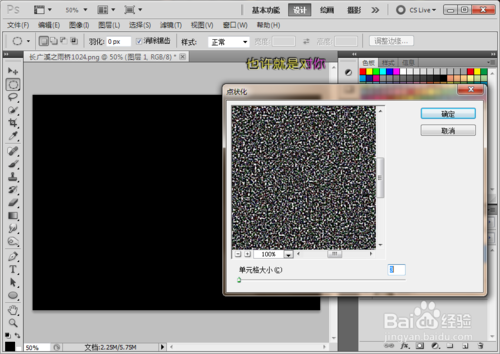
2:调整相应的值,一般调到最小比较合适。
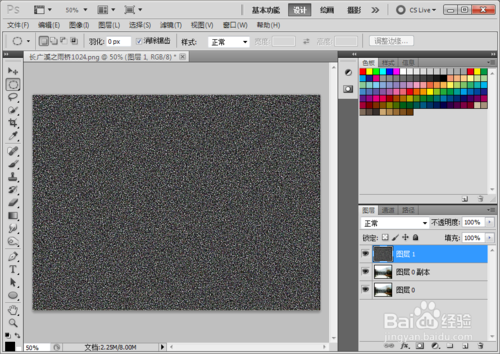
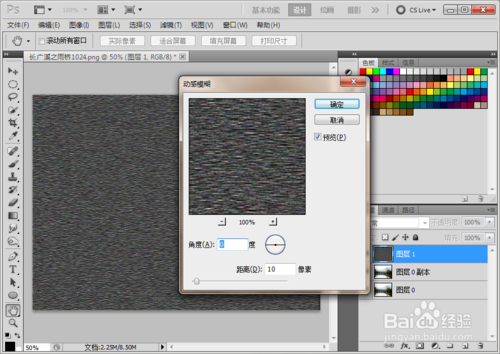
1:滤镜→模糊→动感模糊。
2:调整相应的角度值,这里调整为76的倾斜度。
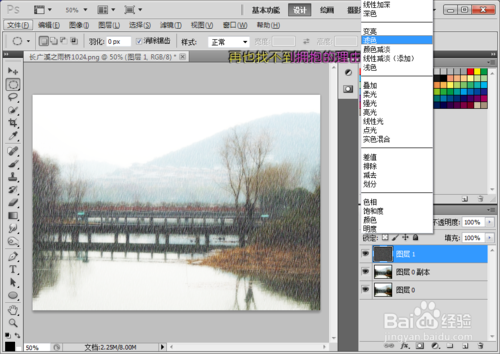
1:调整图层混合模式为滤色。
2:调整不透明度,这里降低为33.
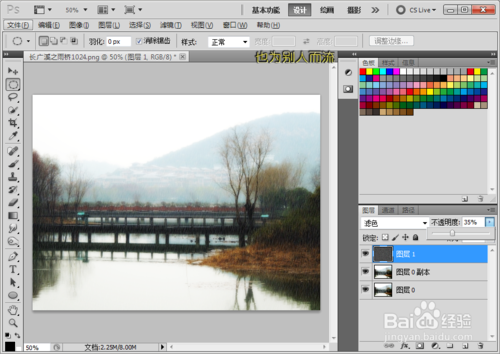
效果图展示
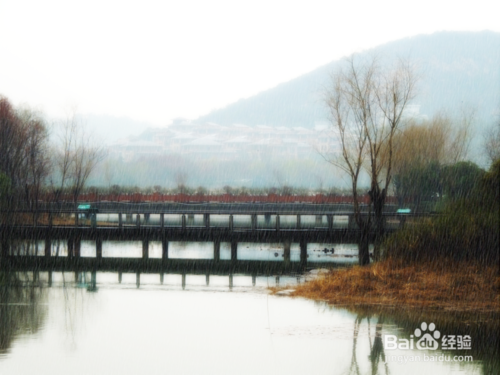
注意事项
点状化的值一般跳到最小
注意调整合适的倾斜度和不透明度
以上就是Photoshop打造逼真的下雨效果教程,希望大家喜欢!
 Jenseits der Bearbeitung: Photoshops kreative FunktionenMay 03, 2025 am 12:12 AM
Adobe Photoshop geht über die einfache Bearbeitung hinaus und wird zu einem kreativen Werkzeug für Künstler und Designer. 1) Es bietet eine Fülle von Werkzeugen wie Pinsel, Briefmarkenwerkzeugen, Mischmodi und Ebenenstilen, die Anpassungen von grundlegenden Bildern zu komplexen digitalen Gemälden und 3D -Designs unterstützt. 2) Diese Tools implementieren Funktionen über Operationen auf Pixelebene, sodass Benutzer einzigartige visuelle Effekte erstellen können.
 Photoshop: Erforschen von Preismodellen und OptionenMay 02, 2025 am 12:12 AM
Photoshop bietet zwei Preismodelle an: Single -Kauf- und Abonnementservice. 1. Einkauf: Zahlen Sie 699 US -Dollar in einer Pauschalbetrag, dauerhafte Verwendung, jedoch ohne Aktualisierungen und Cloud -Dienste. 2. Abonnementservice: 20,99 USD pro Monat oder 239,88 USD pro Jahr, und die neuesten Versionen und Cloud -Dienste sind verfügbar. 3. Enterprise Plan: 33,99 USD pro Benutzer und Monat, einschließlich Teamverwaltung und zusätzlichem Cloud -Speicher. V.
 Photoshop: Beherrschen von Schichten und KompositionMay 01, 2025 am 12:05 AM
Die Methode zum Erstellen einer neuen Ebene in Photoshop lautet: 1. Klicken Sie unten im Ebenenfeld auf die Schaltfläche "Neue Ebene"; 2. Verwenden Sie die Verknüpfungstasten Strg Shift N (Windows) oder Befehlsverschiebung N (MAC). Die Schichten sind wie transparente Blätter auf Leinwand, sodass Designelemente separat verwaltet, nicht zerstörerische Bearbeitung und Experimentierung sowie die Verbesserung der Entwurfsniveaus.
 Photoshop -Anwendungen: Von der Fotobearbeitung bis zur digitalen KunstApr 30, 2025 am 12:10 AM
Photoshop wird in den Feldern der Bildverarbeitung und der digitalen Kunst häufig verwendet und eignet sich für Fotobearbeitung und Erstellung digitaler Kunst. 1. Fotobearbeitung: Passen Sie die Helligkeit und den Kontrast ein. Verwenden Sie das Werkzeug "Helligkeit/Kontrast". 2. Digitale Kunst: Verwenden Sie Pinselwerkzeuge, um Gemälde zu erstellen. 3. Basisnutzung: Verwenden Sie das "rote Augenwerkzeug", um rote Augen zu entfernen. 4. Erweiterte Verwendung: Verwenden Sie Schichten und Masken für die Bildsynthese. 5. Debug: Erholen Sie die verlorenen Ebenen, indem Sie das Ebenenfeld überprüfen. 6. Leistungsoptimierung: Passen Sie die Speicherverwendung an, um die Laufgeschwindigkeit zu verbessern.
 Photoshops Kernfunktion: Bildbearbeitung und ManipulationApr 29, 2025 am 12:17 AM
Die Kernfunktionen von Photoshop sind Bildbearbeitung und -betrieb, einschließlich der Anpassung der Farbe, der Helligkeit, des Kontrasts von Bildern, der Anwendung von Filtereffekten, dem Anschneiden und Anpassen der Bildgröße, der Ausführung der Bildsynthese usw. 1. Einstellen von Helligkeit und Kontrast: Öffnen Sie das Bild, wählen Sie die Option "Bild" im Menü "Helligkeit/Kontrast" und passen Sie den Schieberegler an. 2. Verwenden Sie die Einstellungsschicht und die Schichtmaske für die Farbpegel: Klicken Sie auf die Schaltfläche "NEUE FILD ODER SCHALTEN", wählen Sie "Skalierung", stellen Sie die Farbpegel an, fügen Sie eine Ebenenmaske hinzu und steuern Sie das Pinselwerkzeug, um den Einstellungseffekt zu steuern.
 Photoshop: Die Kraft der RastergrafikbearbeitungApr 28, 2025 am 12:13 AM
Photoshop ist ein leistungsstarkes Werkzeug zum Umgang mit Rastergrafiken. Zu den Kernfunktionen gehören Ebenen und Masken, Filter und Anpassungen. 1. Schichten und Masken ermöglichen eine unabhängige Bearbeitung und nicht-zerstörerische Modifikationen. 2. Filter und Anpassungen können das Erscheinungsbild des Bildes schnell verändern, sollten jedoch mit Vorsicht verwendet werden, um die Bildqualität zu vermeiden. Indem Sie diese Funktionen und fortschrittlichen Fähigkeiten beherrschen, können Sie Ihre Bildbearbeitung und kreative Fähigkeiten erheblich verbessern.
 Photoshop: Ein vielseitiges Werkzeug für die BildmanipulationApr 27, 2025 am 12:13 AM
Photoshop ist aufgrund seiner Vielseitigkeit und intuitiven Betriebsoberfläche im Bereich der Bildverarbeitung so leistungsfähig. 1) Es kann verschiedene Aufgaben von der grundlegenden Anpassung zur komplexen Synthese erledigen, z. B. die Anpassung der Helligkeit und des Kontrasts. 2) Arbeiten basierend auf Schichten und Masken ermöglichen eine nicht-zerstörerische Bearbeitung. 3) Beispiele für die Nutzung sind das Anpassen der Farbbalance und das Erstellen von Schichtmasken. 4) Häufige Fehler wie übermäßige Bearbeitung können durch das Geschichtsfeld vermieden werden. 5) Vorschläge zur Leistungsoptimierung umfassen die Verwendung von intelligenten Objekten und Abkürzungsschlüssel.
 Photoshop -Versuche und Alternativen: Erforschen des freien ZugangsApr 26, 2025 am 12:23 AM
Photoshop bietet eine kostenlose 7-tägige Testzeit. Um die Verwendung des Testzeitraums zu maximieren, 1) Melden Sie sich für mehrere Adobe -Konten an, 2) verwenden Sie die Schülerversion oder die Bildungsversion und 3) Adobe CreativeCloud abonnieren. Kostenlose Alternativen umfassen: 1) Gimp, 2) Photopea, 3) Krita kann diese Software die täglichen Bildbearbeitungsanforderungen erfüllen.


Heiße KI -Werkzeuge

Undresser.AI Undress
KI-gestützte App zum Erstellen realistischer Aktfotos

AI Clothes Remover
Online-KI-Tool zum Entfernen von Kleidung aus Fotos.

Undress AI Tool
Ausziehbilder kostenlos

Clothoff.io
KI-Kleiderentferner

Video Face Swap
Tauschen Sie Gesichter in jedem Video mühelos mit unserem völlig kostenlosen KI-Gesichtstausch-Tool aus!

Heißer Artikel

Heiße Werkzeuge

SAP NetWeaver Server-Adapter für Eclipse
Integrieren Sie Eclipse mit dem SAP NetWeaver-Anwendungsserver.

VSCode Windows 64-Bit-Download
Ein kostenloser und leistungsstarker IDE-Editor von Microsoft

SublimeText3 Linux neue Version
SublimeText3 Linux neueste Version

mPDF
mPDF ist eine PHP-Bibliothek, die PDF-Dateien aus UTF-8-codiertem HTML generieren kann. Der ursprüngliche Autor, Ian Back, hat mPDF geschrieben, um PDF-Dateien „on the fly“ von seiner Website auszugeben und verschiedene Sprachen zu verarbeiten. Es ist langsamer und erzeugt bei der Verwendung von Unicode-Schriftarten größere Dateien als Originalskripte wie HTML2FPDF, unterstützt aber CSS-Stile usw. und verfügt über viele Verbesserungen. Unterstützt fast alle Sprachen, einschließlich RTL (Arabisch und Hebräisch) und CJK (Chinesisch, Japanisch und Koreanisch). Unterstützt verschachtelte Elemente auf Blockebene (wie P, DIV),

Dreamweaver CS6
Visuelle Webentwicklungstools


