Heim >Backend-Entwicklung >PHP-Tutorial >Hinzufügen von Schriftartoptionen: Ein umfassender Leitfaden für Anfänger zum Titan Framework
Hinzufügen von Schriftartoptionen: Ein umfassender Leitfaden für Anfänger zum Titan Framework
- WBOYWBOYWBOYWBOYWBOYWBOYWBOYWBOYWBOYWBOYWBOYWBOYWBOriginal
- 2023-09-02 18:21:09812Durchsuche
Endbenutzern zu erlauben, die Schriftarten eines Themes zu ändern, kann eine entmutigende Aufgabe sein, insbesondere wenn Sie diese Option in einem benutzerdefinierten Admin-Panel, einer Meta-Box oder sogar im Theme-Customizer anbieten möchten. Heute bespreche ich, wie man über Titan Framework benutzerdefinierte font-Typoptionen hinzufügt.
Schriftartoptionen im Titan-Framework
font Typoptionen sind eine der vielseitigsten Optionen im Titan Framework. Sie können damit nicht nur Schriftarten ändern, sondern es ist auch eine vollständige Schriftartenauswahl. Mit einem vollständigen Satz funktionsreicher Optionen können Sie aus websicheren Schriftarten und Google WebFonts wählen. Wenden Sie beliebig viele Stile an, z. B. Farbe, Buchstabenabstand, Schatten, Zeilenhöhe und mehr. Endbenutzer können auch Vorschauen von Schriftarten und deren Stilen anzeigen. So sieht die Option aus:
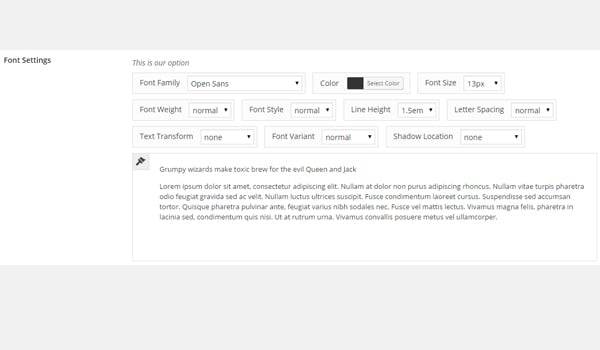
Wie detailliert die Schriftarteinstellungen sind, können Sie im Bild oben sehen. Dies kann durch einen großen Satz von Einstellungsparametern erreicht werden, die von dieser Option unterstützt werden. Es gibt einige obligatorische und optionale Parameter. Schauen wir uns zunächst die Pflichtfelder an:
-
name: (String) Definition Der Anzeigename der
font-Typoption. - id: (String) Dieser Parameter weist einen eindeutigen Namen zu, der beim Abrufen des Werts hilft.
- desc: (String) Kurze Beschreibung anzeigen.
Einige optionale Parameter, die Sie verwenden sollten, sind:
-
Standard: (boolean) In
fontTypoptionen verhält sich dieser Parameter etwas anders. Es benötigt ein Array mit einigen Standardschriftarten und -stilen, die Sie verwenden möchten (mehr dazu später). - css: (String) Dieser Parameter generiert automatisch CSS, wenn Sie diese Option auf der Admin-Seite und/oder im Theme-Customizer-Bereich hinzufügen (mehr dazu später).
Schließlich gibt es eine lange Liste bestimmter inspektionsbasierter Parameter, deren Standardwerte darauf festgelegt sind, true。让我们为它们命名,并了解如果设置为 falsewie sie sich verhalten.
-
show_font_family: (boolean) Wenn dieser Parameter auf
falsegesetzt ist, verschwindet der Abschnitt zur Schriftfamilie. -
show_color: (boolean) Wenn dieser Parameter auf
falsegesetzt ist, wird die Farbpalette nicht angezeigt. -
show_font_size: (boolean) Wenn dieser Parameter auf
falsegesetzt ist, verschwindet die Option für die Schriftgröße. -
show_font_weight: (boolean) Wenn dieser Parameter auf
falsegesetzt ist, verschwindet die Option „font-weight“. -
show_font_style: (Boolescher Wert) Wenn dieser Parameter auf
falsegesetzt ist, verschwindet die Einstellung für den Schriftstil. -
show_line_height: (boolean) Wenn dieser Parameter auf
falsegesetzt ist, kann die Zeilenhöhe nicht geändert werden. -
show_letter_spacing: (boolean) Wenn dieser Parameter auf
falsegesetzt ist, können Sie „letter_spacing“ nicht bearbeiten. -
show_text_transform: (boolean) Wenn dieser Parameter auf
falsegesetzt ist, verschwindet die Texttransformationsoption. -
show_font_variant: (boolean) Wenn dieser Parameter auf
falsegesetzt ist, wird das Feld „font-variant“ nicht angezeigt. -
show_preview: (Boolescher Wert) Wenn dieser Parameter auf
falsegesetzt ist, wird keine Live-Vorschau der Schriftart angezeigt. -
show_websafe_fonts: (Boolescher Wert) Wenn dieser Parameter auf
falsegesetzt ist, verschwindet die Liste der websicheren Schriftarten. -
show_google_fonts: (Boolescher Wert) Wenn dieser Parameter auf
falsegesetzt ist, werden Google-Schriftarten nicht angezeigt. - include_fonts: (Gemischt) Dies ist eine reguläre Ausdruckszeichenfolge, die die Schriftarten angibt, die Sie hinzufügen möchten.
-
enqueue: (boolean) Wenn auf
falsegesetzt, werden Google Fonts (falls verwendet) nicht automatisch in die Warteschlange gestellt.
Verfügbare Container für Schriftartoptionen
Sie können dort font Typoptionen hinzufügen:
- Admin-Panel
- Registerkarten verwalten
- Yuan-Box
- Theme-Customizer-Bereich
Der Gegenstand dieses Artikels ist nicht die Erstellung dieser Container. Wenn Sie mehr wissen möchten, können Sie sich meinen vorherigen Artikel ansehen.
Der Gesamtprozess zum Hinzufügen dieses Optionstyps bleibt derselbe:
- Erhalten Sie zunächst eine eindeutige Instanz über die Funktion
getInstance(). - Dann fügen Sie über die Funktion
createOption()eine Option hinzu. - Zum Schluss erhalten Sie den gespeicherten Wert über die Funktion
getOption().
Lassen Sie uns diese Option im Admin-Bereich erstellen.
Schrifttypoptionen im Admin-Bereich erstellen
Deklarationsbeispiel
Das ist der Code:
<?php
    /**
     *
     * Create font type option in an admin panel
     *
     */
    $aa_panel->createOption( array(

        'id'    => 'aa_font', // The ID which will be used to get the value of this option
        'type'  => 'font', // Type of option we are creating
        'name'  => 'My Font Option', // Name of the option which will be displayed in the admin panel
        'desc'  => 'Choose your font settings' // Description of the option which will be displayed in the admin panel

    ) );
Ich habe die createOption() 函数(第 7 行)在管理面板中添加了 font 类型选项 $ aa_panel。该函数占用一个参数数组。这就是为什么这里使用 name、id、type 和 desc 等参数。 ID 的值(即 aa_font-Typoption $ aa_panel im Admin-Panel mit der
name, id, type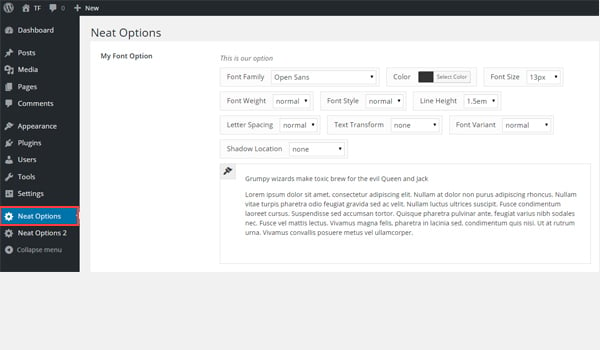 und
und
verwendet. Der Wert der ID (d. h. aa_font) sollte eindeutig sein, da er den gespeicherten Optionswert erhält.
fontIm Screenshot oben gibt es eine
My Font Option
im Admin-PanelNeat Options
. Es gibt mehrere Einstellungsoptionen, mit denen Sie Schriftarteinstellungen für Ihr Webentwicklungsprojekt konfigurieren können.
getInstance() 函数,该函数使用一个唯一参数,最好是您的主题名称(即 neat 中这个案例)。接下来,我使用了 getOption() 函数(第 6 行),该函数通过 ID aa_font 获取值,然后将其保存在新变量 $aa_font_arrayAnwendungsbeispiel
Jetzt werde ich den gespeicherten Optionswert abrufen. font 类型选项会占用一组参数设置,即使我们实际上没有定义它们,因为它们的默认值设置为 true
<?php
// 1. Get the titan framework instance and save it to a variable
$titan = TitanFramework::getInstance( 'neat' ); // we will initialize $titan only once for every file where we use it.

// 2. Get the value via ID using getOption function
$aa_font_array = $titan->getOption( 'aa_font' );


/**
 *
 * Printing font array values
 *
 */

var_dump( $aa_font_array );

?>
Der Prozess zum Abrufen des gespeicherten Werts ist fast der gleiche wie im vorherigen Artikel beschrieben. In Zeile #3 wird die Funktion
verwendet, die ein einzelnes Argument akzeptiert, vorzugsweise Ihren Theme-Namen (in diesem Fall also neat$aa_font_array 使用了 var_dump()
-Funktion (Zeile 6) verwendet, die den Wert anhand der ID aa_font abruft und ihn dann in einer neuen Variablen $aa_font_array speichert. Code>. <img src="/static/imghwm/default1.png" data-src="https://img.php.cn/upload/article/000/887/227/169365008334889.jpg" class="lazy" alt="添加字体类型选项:Titan 框架初学者综合指南">
Typoptionen eine Reihe von Parametereinstellungen beanspruchen, obwohl wir sie nicht tatsächlich definiert haben, da ihre Standardwerte auf true gesetzt sind. Bevor das Frontend die abgerufenen Werte anzeigt, möchte ich dieses vollständige Parameterarray ausdrucken. font
eine Funktion hinzu (Zeile #16). Mal sehen, wie dieses Array gedruckt wird:
Im obigen Screenshot ist eine detaillierte Beschreibung jedes Elements des Arrays aufgeführt. Es erklärt deutlich, wie man die -Typoptionen im Titan Framework einstellt.
Jetzt ist dieser Teil nur noch eine zusätzliche Sache – unser Hauptziel ist es, die Standard-Schriftarteinstellungen zu ändern und sie im Frontend auszudrucken. font-size
<?php
/**
 *
 * Replace this code on line #16
 *
 */
?>

<h3 style="font-size: <?php echo $aa_font_array['font-size']; ?>;">Pellentesque habitant morbi tristique.</h3>
In Zeile 7 verwende ich einen Inline-CSS-Stil innerhalb des H3-Tags (Überschrift 3). Der Wert, der dem Attribut
Stil 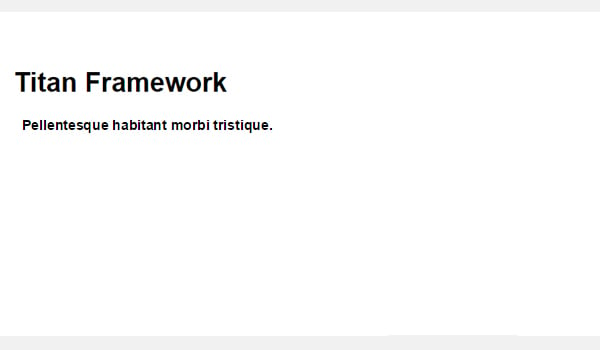 entspricht,
, d. h. 14px, wird auf der Vorderseite gedruckt.
Dafür verwende ich Inline-CSS. Das Frontend sieht zu diesem Zeitpunkt so aus:
30px
Die aktuelle Größe des gedruckten Textes beträgt 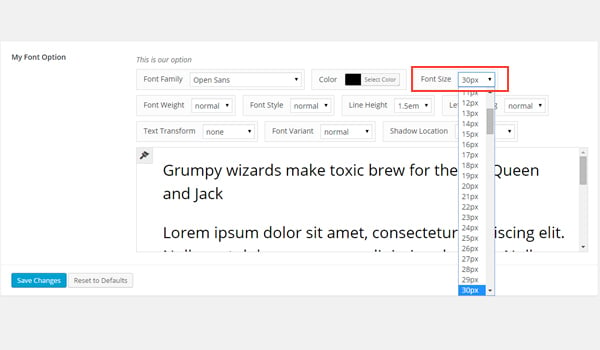 . Lassen Sie uns diesen Wert im Dashboard ändern und eine Vorschau der Ergebnisse anzeigen.
Ergebnisse im Frontend anzeigen
Angenommen, ich setze den Demowert auf 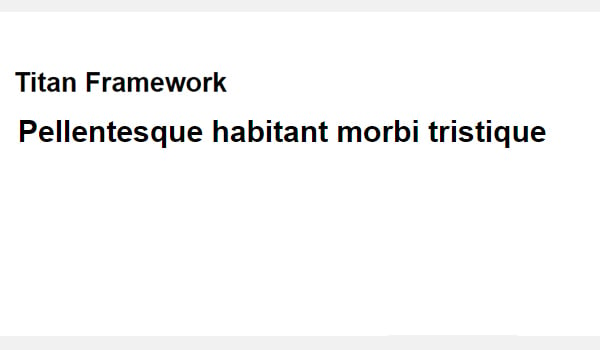 .
.
font-size
Speichern Sie diese Einstellung und sehen Sie sich die Änderungen an. Hier ist der Screenshot:
fontDer hinzugefügte Text ist deutlich sichtbar. Dadurch können Sie in Zeile 16 des Codes ein beliebiges Array-Element eingeben und eine Vorschau der Ergebnisse anzeigen.
Deklarationsbeispiel
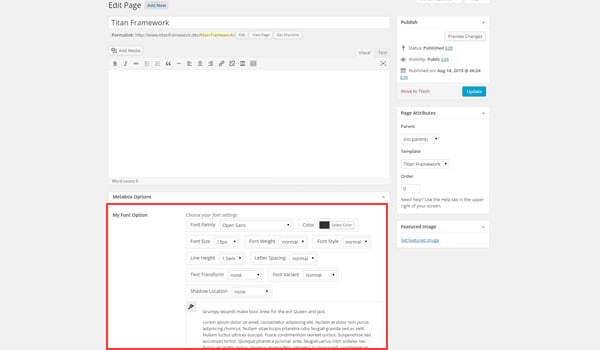
createOption() 在元框 <code class="inline">$aa_metbox 添加了 ID 为 aa_mb_font 的 font 类型选项Lassen Sie uns eine Typoption im Metafeld erstellen, die alle Stilfelder
<?php
    /**
     *
     * Create font type option in a metabox
     *
     */
    $aa_metbox->createOption( array(

        'id'   => 'aa_mb_font', // The ID which will be used to get the value of this option
        'type' => 'font', // Type of option we are creating
        'name' => 'My Font Option', // Name of the option which will be displayed
        'desc' => 'Choose your font settings' // Description of the option which will be displayed

    ) );
Ich habe die ID von aa_mb_font in der Metabox $aa_metbox über createOption() hinzugefügt <strong> Geben Sie die Funktion „Optionen</strong>“ ein (Zeile 8). Es erscheint neben dem Namen „Meine Schriftartoptionen
这是我使用 Titan Framework 创建的自定义元框。请参阅我之前的文章以了解具体操作方法。
用法示例
现在我将检索保存的选项值。
<?php
// 1. Get the titan framework instance and save it to a variable
$titan = TitanFramework::getInstance( 'neat' ); // we will initialize $titan only once for every file where we use it.

/**
 *
 * Get Option Value of metabox.
 *
 *
 */
$aa_mb_font1_array = $titan->getOption( 'aa_mb_font', get_the_ID() );

// Check if value was set / Validation
$aa_mb_font1_val = ( is_array( $aa_mb_font1_array ) && !empty( $aa_mb_font1_array ) ? TRUE : FALSE );

/////////////////////////////////////////////////////////////
// Get all the values you need Abstraction of PHP and HTML //
/////////////////////////////////////////////////////////////

// Get color value
$aa_mb_font1_clr_val = ( $aa_mb_font1_val == TRUE ? $aa_mb_font1_array['color'] : 'red' );

// Get font-family value
$aa_mb_font1_ffm_val = ( $aa_mb_font1_val == TRUE ? $aa_mb_font1_array['font-family'] : 'Arial' );

// Get font-size value
$aa_mb_font1_fsz_val = ( $aa_mb_font1_val == TRUE ? $aa_mb_font1_array['font-size'] : '14px' );

/**
 *
 * Print values at front-end
 *
 */
?>

    <div
        style="

                color:<?php echo $aa_mb_font1_clr_val; ?>;
                font-family: <?php echo $aa_mb_font1_ffm_val; ?>;
                font-size: <?php echo $aa_mb_font1_fsz_val; ?>;

        "
    >

        Printed value of font type option in metabox.

    </div>
获取我在这里使用的值的过程有点复杂。首先通过第 3 行中的 getInstance() 函数获取一个唯一实例。接下来,通过在 getOption() 函数内注册 ID aa_mb_font 作为参数来检索保存的值(第 11 行)。
现在,aa_mb_font 不是一个普通的 ID,而是包含我们的字体选项的完整关联数组。我将此关联数组保存在新变量 $aa_mb_font1_array 中。
第 14 行验证变量 $aa_mb_font1_array 中是否存在数组,并检查它是否不为空。这一步很重要,因为我们不想因为输出变量的元素而导致致命的 PHP 错误,而该变量本来就不是数组。
有时,当用户未保存仪表板中的任何值并且您未设置任何默认值时,此 getOption 函数会获取 NULL。为此,使用基于检查的语句。如果它是一个数组并且不为空,则它会放置一个 TRUE 值,否则,如果它不是一个数组并且为空,那么它会将 FALSE 设置为以下值: $aa_mb_font1_val。
如果 TRUE,则意味着:
-
$aa_mb_font1_array是一个数组。 -
$aa_mb_font1_array不是一个空数组,而是其中包含元素。 - 最终结果是第 11 行已成功检索其内容。
如果 FALSE,则意味着:
-
$aa_mb_font1_array不是数组,或者$aa_mb_font1_array是一个空数组,其中没有任何元素。 - 最终结果是第 11 行无法检索其内容。
这是对字体数组的整体验证。现在我将把这个过程扩展到单个数组元素。第 #21 行到第 #27 行获取关联数组中各个键的值,如果不存在值则定义默认值。
例如,第 #21 行解释了如果定义的条件满足 TRUE,这意味着存在一个值,则获取数组的 color 并将其保存在变量 $aa_mb_font1_clr_val。如果不存在此类值,则将该值设置为 red,在本例中为默认值。有很多方法可以解决这个问题,所以这只是我喜欢的方法之一。
简而言之,如果用户从他或她的仪表板中保存了任何新的字体颜色,则会出现所选的字体颜色;否则会显示 red。我建议在设置字体时设置默认选项以避免任何此类问题。
同样的解释也适用于第 #24 行和第 #27 行,除了这些行验证 font-family 和 font-size 的值。 p>
最后,我刚刚编写了在前端打印结果的代码。在第 #38 行到第 #48 行中,用 HTML 创建了一个 div。然后我通过内联 CSS 样式回显所有所需变量的值。
在前端显示结果
假设我设置以下演示字体设置:
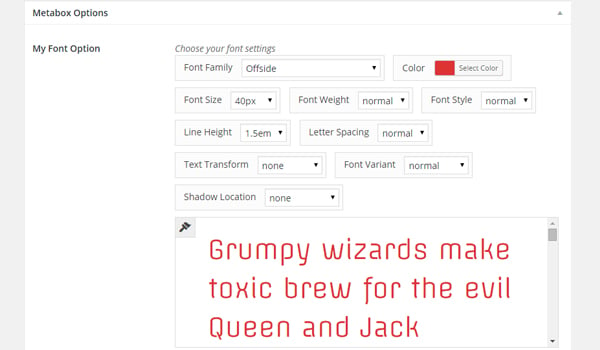
这是它在前端的显示方式:
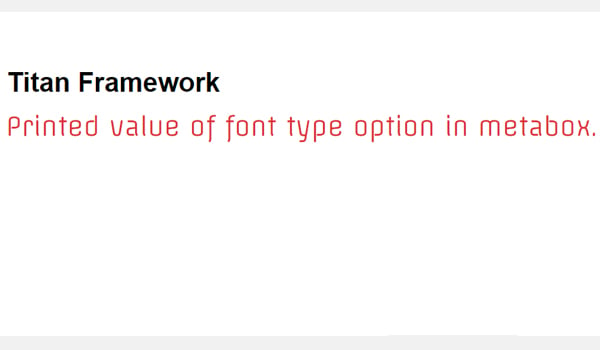
您现在可以自己尝试一些新设置。
在管理选项卡内创建字体类型选项
声明示例
让我们在管理选项卡中创建此选项,但采用不同的方法。
<?php
    /**
     *
     * Create font type option in an admin tab
     *
     */
    $aa_tab1->createOption( array(

        'id'   => 'aa_font_in_tab1_panel2', // The ID which will be used to get the value of this option
        'type' => 'font', // Type of option we are creating
        'name' => 'My Font Option', // Name of the option which will be displayed in the admin panel
        'desc' => 'Choose font settings', // Description of the option which will be displayed in the admin panel
        'show_font_weight'    => false,  //Font-weight field is not shown
        'show_font_style'     => false,  //Font-style field is not shown
        'show_line_height'    => false,  //Line-height field is not shown
        'show_letter_spacing' => false,  //Letter-spacing field is not shown
        'show_text_transform' => false,  //Text-transform field is not shown
        'show_font_variant'   => false,  //Font-variant field is not shown
        'show_text_shadow'    => false,  //Text-shadow field is not shown
        'default'             => array(
                                    'font-family' => 'Arial', //Default value of font-family
                                    'color'       => 'red', //Default value of font color
                                    'line-height' => '2em', //Default value of line-height
                                    'font-weight' => '500' //Default value of font-weight
        )

    ) );
这次我添加了 font 类型选项,但只允许显示一些样式字段。此选项的唯一 ID 是 aa_font_in_tab1_panel2。查看参数列表,您就会发现这段代码与之前的代码有何不同。
我已将几个基于检查的参数的默认值更改为 false。这意味着第 #13 行到第 #19 行的所有样式字段都不会出现。另请注意样式选项的默认值,如字体系列、颜色、行高和字体粗细。
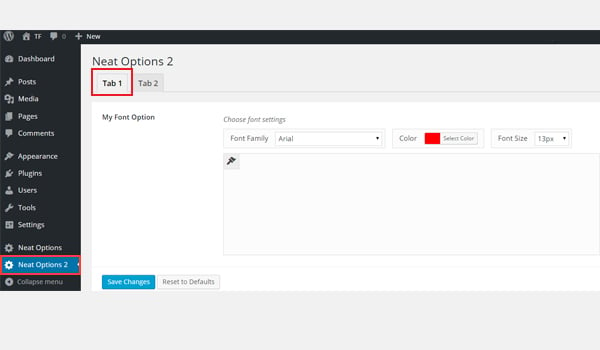
名为我的字体选项的类型选项存在Neat Options 2的strong>选项卡1。如果您想了解如何通过 Titan Framework 制作此管理选项卡,请浏览本系列之前的文章。
在上面的屏幕截图中,字体菜单在样式字段方面显得不太详细。原因很明显,即我的代码中许多参数的 false 状态。请注意另一件事:选项的默认值是自动设置的,即 'font-family' => 'Arial' 和 color => 'red'。
我是否跳过了任何细节?是的!我相信您一定想知道 line-height 和 font-weight 的默认值去了哪里。再次查看参数列表,您会发现 show_line_height 和 show_font_weight 的值设置为 false。
这意味着无论您以什么身份定义参数,只有在设置为 true 后才会起作用。添加这两个参数的唯一目的是解释这个概念。目前,您也可以忽略这些。
用法示例
让我们获取保存的选项值:
<?php
// 1. Get the titan framework instance and save it to a variable
$titan = TitanFramework::getInstance( 'neat' ); // we will initialize $titan only once for every file where we use it.

/**
 *
 * Get Option Value of metabox.
 *
 *
 */
$aa_font2_array = $titan->getOption( 'aa_font_in_tab1_panel2' );

// Check if value was set / Validation
$aa_font2_val = ( is_array( $aa_font2_array ) || !empty( $aa_font2_array ) ? TRUE : FALSE );

/////////////////////////////////////////////////////////////
// Get all the values you need Abstraction of PHP and HTML //
/////////////////////////////////////////////////////////////

// Get color value
$aa_font2_clr_val = ( $aa_font2_val == TRUE ? $aa_font2_array['color'] : 'red' );

// Get font family value
$aa_font2_ffm_val = ( $aa_font2_val == TRUE ? $aa_font2_array['font-family'] : 'Arial' );

// Get font size value
$aa_font2_fsz_val = ( $aa_font2_val == TRUE ? $aa_font2_array['font-size'] : '14px' );

/**
 *
 * Print values at front-end
 *
 */

?>

    <div style="

                color:<?php echo $aa_font2_clr_val; ?>;
                font-family: <?php echo $aa_font2_ffm_val; ?>;
                font-size: <?php echo $aa_font2_fsz_val; ?>;

        "
    >

        Printed value of font type option in tab.

    </div>
为检索保存的选项值而编写的行与我之前为元框编写的行几乎相同。只是变量名和ID不同。所以,我只是总结上面写的步骤:
- 获取一个唯一的实例。 (第 3 行)
- 获取关联字体数组。 (第 11 行)
- 验证字体数组是否存在并检查其状态,即它是否为空。 (第 14 行)
- 获取关联数组中任意键的值,如果没有值则定义默认值。再检查一遍。 (第 21 行到第 27 行)
- 打印数组元素。 (第 #38 至 #48 行)
在前端显示结果
在此阶段,如果我预览前端,它将仅显示默认设置,如下所示:
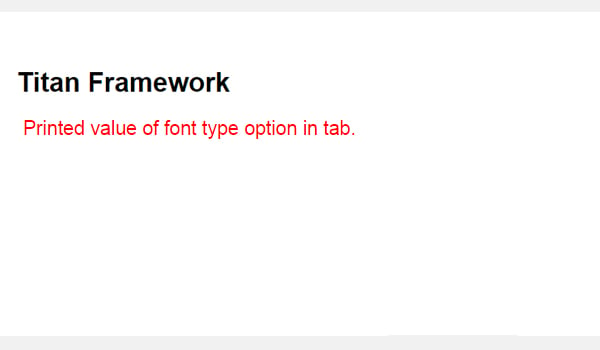
假设这些是我们的新字体设置:
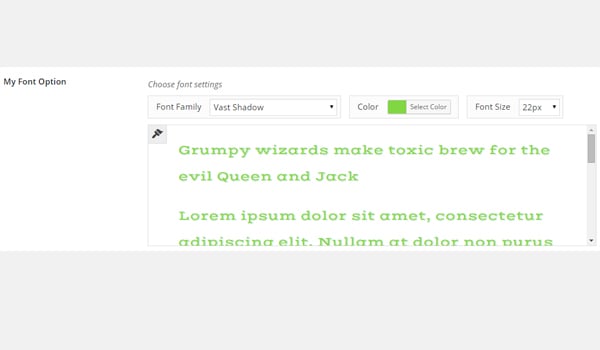
以下是此新配置的屏幕截图:
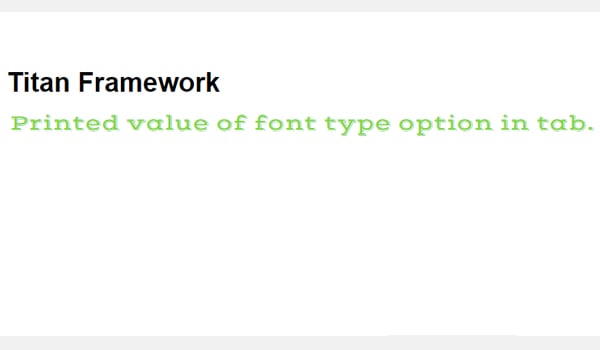
两种设置之间的差异非常明显。
在主题定制器部分内创建字体类型选项
声明示例
最后,让我们在定制器中创建此选项。
<?php

    /**
     *
     * Create font type option in a customizer
     *
     */
     $aa_section1->createOption( array(

        'id'   => 'aa_sec_font', // The ID which will be used to get the value of this option
        'type' => 'font', // Type of option we are creating
        'name' => 'My Font Option', // Name of the option which will be displayed
        'desc' => 'Choose your font settings' // Description of the option which will be displayed

    ) );
主题定制器部分 $aa_section1 中存在一个 font ID 为 aa_sec_font 的类型选项。它的名称为“我的字体选项”。其余参数相同。
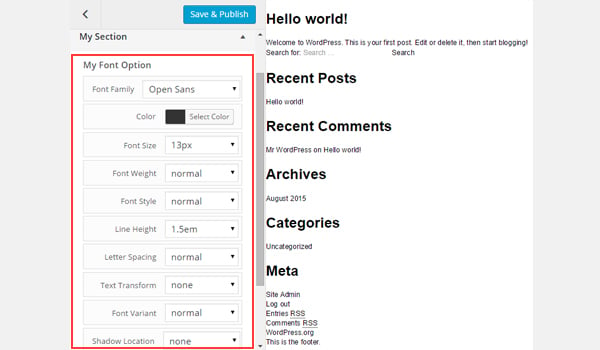
您可以在名为我的部分的主题定制器部分中找到此选项。
用法示例
让我们获取它保存的值。
<?php
// 1. Get the titan framework instance and save it to a variable
$titan = TitanFramework::getInstance( 'neat' ); // we will initialize $titan only once for every file where we use it.

// Body bg color
$aa_sec_font3_array = $titan->getOption( 'aa_sec_font' );

// Check if value was set / Validation
$aa_sec_font3_val = ( is_array( $aa_sec_font3_array ) || !empty( $aa_sec_font3_array ) ? TRUE : FALSE );

/////////////////////////////////////////////////////////////
// Get all the values you need Abstraction of PHP and HTML //
/////////////////////////////////////////////////////////////

// Get color value
$aa_sec_font3_clr_val = ( $aa_sec_font3_val == TRUE ? $aa_sec_font3_array['color'] : 'red' );

// Get font family value
$aa_sec_font3_ffm_val = ( $aa_sec_font3_val == TRUE ? $aa_sec_font3_array['font-family'] : 'Arial' );

// Get font size value
$aa_sec_font3_fsz_val = ( $aa_sec_font3_val == TRUE ? $aa_sec_font3_array['font-size'] : '14px' );

/**
 *
 * Print values at front-end
 *
 */

?>
    <div
        style="

                color:<?php echo $aa_sec_font3_clr_val; ?>;
                font-family: <?php echo $aa_sec_font3_ffm_val; ?>;
                font-size: <?php echo $aa_sec_font3_fsz_val; ?>;

              "
    >

        Printed value of font type option in customizer.

    </div>
这段代码再次与我在管理选项卡和元框的情况下编写的代码完全相同。只是变量名和ID不同。因此,请参阅上面写的详细信息。
在前端显示结果
让我们看一下我所做的更改的实时预览。
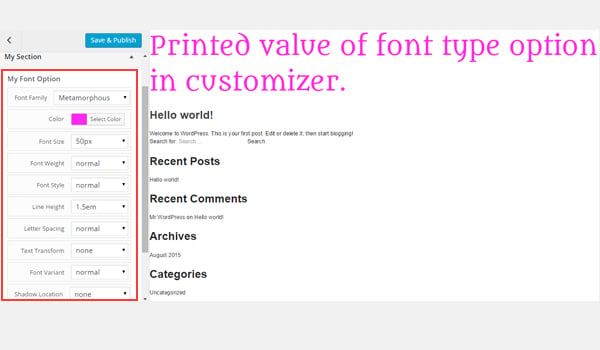
在我们对 Titan Framework 中的 font 类型选项的讨论中,我们了解到它的 CSS 参数与其他选项相比,其行为略有不同。今天,在本文中,我将向您展示如何在自定义管理面板甚至主题定制器部分中自动生成字体类型选项的 CSS。
字体类型选项中的 CSS 参数
一般来说,css 是一个 string 类型参数,因此,如果您设置它,每次在管理面板内创建 Titan Framework 选项时,它都会自动生成 CSS和/或主题定制器部分。
我们知道,Titan Framework 中的 font 类型选项基本上是一个关联数组,其中包含一系列样式字段,例如 color、 font-family、font-size 等。同样,您可能会在主题或插件的其他位置使用相同的样式属性。在 css 参数中写入这么多选项可能是一项重复且浪费时间的任务。当您不使用某些属性时,该怎么办?
为了让事情变得更简单,Titan Framework 允许您通过字体的 css 参数将所有样式分配给 CSS 选择器。只需在此参数中使用术语 value 即可完成您的工作。让我向您展示如何操作:
<?php
/**
 *
 * 'css' parameter in 'font' type option
 *
 */

'css' => 'h1.site-header {

    value

}'
既然我们知道 css 参数会生成所有必要的 CSS 规则,那么让我们讨论一下它何时位于以下容器内:
- 管理面板
- 主题定制器部分
注意:本文的范围仅涉及 Titan Framework 中 css 参数以及 font 类型选项的用法和行为。如果您想了解这些容器的制作方法或如何在 Titan Framework 中添加 font 类型选项,请参阅我之前的文章。
在管理面板中使用 CSS 参数
声明示例
让我们编写它的代码。
<?php
/**
 *
 * Using 'css' parameter inside an admin panel option
 *
 */
$aa_panel->createOption( array(

    'id'                  => 'aa_font', // The ID which will be used to get the value of this option
    'type'                => 'font', // Type of option we are creating
    'name'                => 'My Font Option', // Name of the option which will be displayed
    'desc'                => 'Choose your font settings', // Description of the option which will be displayed
    'show_font_style'     => false,
    'show_letter_spacing' => false,
    'show_text_transform' => false,
    'show_font_variant'   => false,
    'show_text_shadow'    => false,
    'default'             => array(
                                'font-family'         => 'Exo 2',
                                'color'               => '#888888',
                                'line-height'         => '2em',
                                'font-weight'         => '500',
                            ),
    'css'                 => '.aa_site_font1 { value }'

) );
此代码在管理面板 $aa_panel 中创建一个具有有限样式字段的 font 类型选项。该选项的 ID 为 aa_font。值设置为 false 的所有参数(第 13 行到第 17 行)都不会出现。我还为 font-family、color、line-height 和 font-weight 添加了默认值设置。
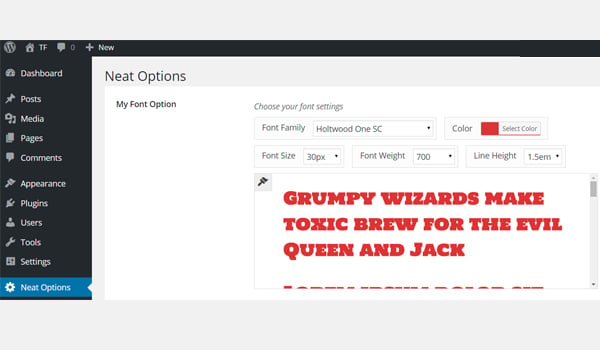
第 24 行为名为 .aa_site_font1 的类定义了 css 参数。请注意,在这个类定义中,我只编写了 value。这意味着该字段将生成的所有 CSS 将放置在写入 value 的位置。因此,无论何时使用此类,它都会自动加载 CSS 属性。
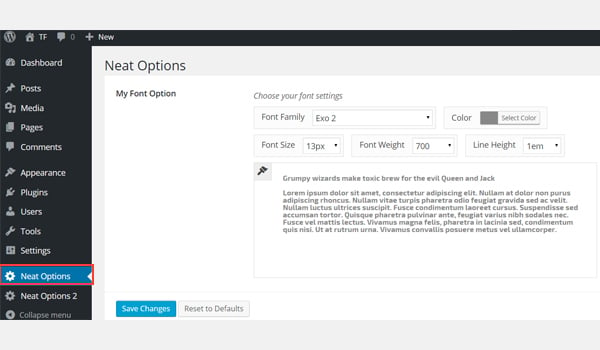
上面的屏幕截图显示了当前的字体设置,并清楚地表明此选项是在我的第一个管理面板中创建的,即简洁的选项。
用法示例
让我们使用 aa_site_font1 类创建一个 div 标签,并在前端查看结果。
<!-- A div tag with class aa_site_font1 to prview the font properties-->
<div class="aa_site_font1">
	Value of 'css' in tab 2 of amdin panel2
</div>
如果您查看上面的代码,我们会为 font 字段的 css 参数提供一个应输出 CSS 结果的类,该类就是 aa_site_font1。因此,我继续创建了一个带有类 aa_site_font1 的 div,以在前端显示结果。
在前端显示结果
在这个阶段,如果你看前端,它会是这样的:
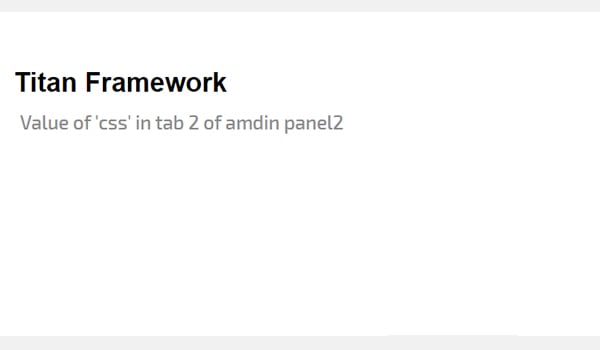
现在让我们更改默认设置,使字体变大并呈红色。
新的更改会像这样出现在前端。请记住,它只是前端的一个 div,其中包含 CSS 类 aa_site_font1,我们在 css 参数中使用了它。
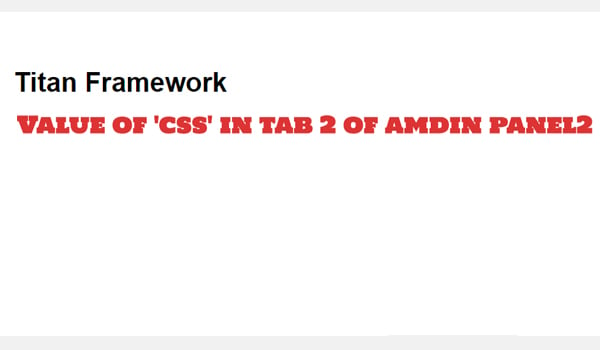
通过此方法可以在 内添加 <code class="inline">css 参数font 类型选项。 Titan Framework 将在您的主题中自动为其生成 CSS。
在主题定制器部分中使用 CSS 参数
声明示例
看看它的代码。
<?php
/**
 *
 * Use 'css' parameter in a theme customizer
 *
 */
 $aa_section1->createOption( array(

    'id'   => 'aa_sec_font', // The ID which will be used to get the value of this option
    'type' => 'font', // Type of option we are creating
    'name' => 'My Font Option', // Name of the option which will be displayed
    'desc' => 'Choose your font settings', // Description of the option which will be displayed
    'css'  => '.aa_site_font2 { value }'

) );
这次,我添加了 css 参数以及 class .aa_site_font2。它在 font 类型选项内定义,其中包含所有样式字段。
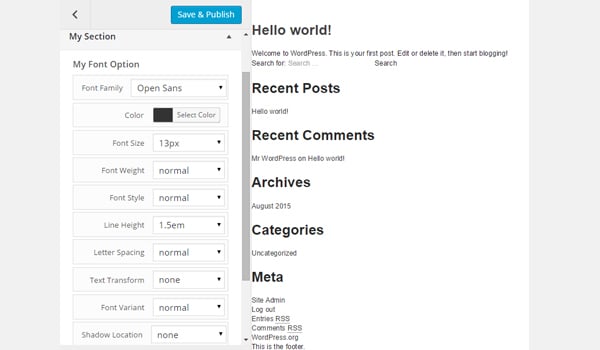
上面的屏幕截图显示了主题定制器部分 $aa_section1 中的此选项。另外,请查看当前设置的设置。
用法示例
我将再次展示类 aa_site_font2 的样式属性在其他地方的使用,例如在出现在所有帖子和页面编辑屏幕上的元框中。
<!-- A div tag with class aa_site_font2 to prview the font properties-->
<div class="aa_site_font2">
    Value of 'css' in a metabox
</div>
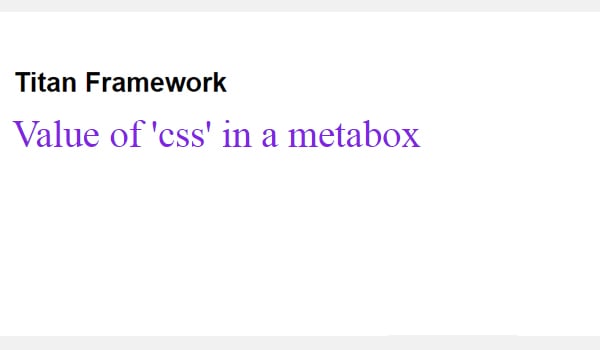
我再次有一个包含 aa_site_font2 类的 div。其中有一些虚拟文本,但忽略该文本并查看它是如何自动设置样式的。
在前端显示结果
让我们从主题定制器部分设置任何演示字体设置,如下所示:
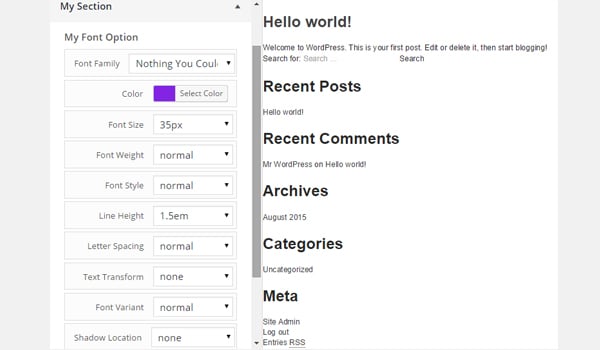
So sieht das Frontend aus:
Fazit
Hier geht es um die Verwendung der Typoption font im Titan Framework. Ich habe fast jeden Aspekt dieser Option ausführlich erklärt.
Titan Framework ist definitiv ein intuitives Skript, das es Ihnen ermöglicht, eine Reihe cooler Optionen zu erstellen und dabei trotzdem schlank und gemein zu bleiben. Übertreiben Sie es nicht mit diesen Optionen – denken Sie an die Philosophie „Entscheidungen statt Optionen“.
Probieren Sie diese Option aus und posten Sie Ihre Fragen im Kommentarfeld unten oder kontaktieren Sie mich auf Twitter.
Das obige ist der detaillierte Inhalt vonHinzufügen von Schriftartoptionen: Ein umfassender Leitfaden für Anfänger zum Titan Framework. Für weitere Informationen folgen Sie bitte anderen verwandten Artikeln auf der PHP chinesischen Website!
In Verbindung stehende Artikel
Mehr sehen- So verwenden Sie cURL zum Implementieren von Get- und Post-Anfragen in PHP
- So verwenden Sie cURL zum Implementieren von Get- und Post-Anfragen in PHP
- So verwenden Sie cURL zum Implementieren von Get- und Post-Anfragen in PHP
- So verwenden Sie cURL zum Implementieren von Get- und Post-Anfragen in PHP
- Alle Ausdruckssymbole in regulären Ausdrücken (Zusammenfassung)

