Heim >Betrieb und Instandhaltung >Nginx >So erstellen Sie mit Nginx einen Bildserver in Windows
So erstellen Sie mit Nginx einen Bildserver in Windows
- PHPznach vorne
- 2023-05-13 08:34:222437Durchsuche
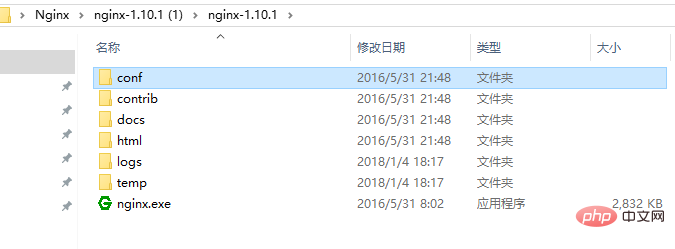
1. Gehen Sie zur offiziellen Website, um das komprimierte Nginx-Paket herunterzuladen:

#user nobody;
worker_processes 1;
#error_log logs/error.log;
#error_log logs/error.log notice;
#error_log logs/error.log info;
#pid logs/nginx.pid;

events {
worker_connections 1024;
}

http {
include mime.types;
default_type application/octet-stream;

#log_format main '$remote_addr - $remote_user [$time_local] "$request" '
# '$status $body_bytes_sent "$http_referer" '
# '"$http_user_agent" "$http_x_forwarded_for"';

#access_log logs/access.log main;

sendfile on;
#tcp_nopush on;

#keepalive_timeout 0;
keepalive_timeout 65;

#gzip on;

server {
listen 8089;
server_name localhost;

#charset utf-8;
#access_log logs/host.access.log main;

#添加博客的代码
location ~ .*\.(gif|jpg|jpeg|png)$ {
expires 24h;
root g:/images/;#指定图片存放路径
access_log g:/images/log;#图片路径
proxy_store on;
proxy_store_access user:rw group:rw all:rw;
proxy_temp_path g:/images/;#图片路径
proxy_redirect off;

proxy_set_header host 127.0.0.1;
proxy_set_header x-real-ip $remote_addr;
proxy_set_header x-forwarded-for $proxy_add_x_forwarded_for;
client_max_body_size 10m;
client_body_buffer_size 1280k;
proxy_connect_timeout 900;
proxy_send_timeout 900;
proxy_read_timeout 900;
proxy_buffer_size 40k;
proxy_buffers 40 320k;
proxy_busy_buffers_size 640k;
proxy_temp_file_write_size 640k;
if ( !-e $request_filename)
{
proxy_pass http://169.254.140.133:8089; #代理访问地址
}
}

location / {
root html;
index index.html index.htm;
}

#error_page 404 /404.html;

# redirect server error pages to the static page /50x.html
#
error_page 500 502 503 504 /50x.html;
location = /50x.html {
root html;
}

# proxy the php scripts to apache listening on 127.0.0.1:80
#
#location ~ \.php$ {
# proxy_pass http://127.0.0.1;
#}

# pass the php scripts to fastcgi server listening on 127.0.0.1:9000
#
#location ~ \.php$ {
# root html;
# fastcgi_pass 127.0.0.1:9000;
# fastcgi_index index.php;
# fastcgi_param script_filename /scripts$fastcgi_script_name;
# include fastcgi_params;
#}

# deny access to .htaccess files, if apache's document root
# concurs with nginx's one
#
#location ~ /\.ht {
# deny all;
#}
}


# another virtual host using mix of ip-, name-, and port-based configuration
#
#server {
# listen 8000;
# listen somename:8080;
# server_name somename alias another.alias;

# location / {
# root html;
# index index.html index.htm;
# }
#}


# https server
#
#server {
# listen 443 ssl;
# server_name localhost;

# ssl_certificate cert.pem;
# ssl_certificate_key cert.key;

# ssl_session_cache shared:ssl:1m;
# ssl_session_timeout 5m;

# ssl_ciphers high:!anull:!md5;
# ssl_prefer_server_ciphers on;

# location / {
# root html;
# index index.html index.htm;
# }
#}
}
3. Klicken Sie auf das grüne nginx.exe-Symbol, um den Server zu starten erfolgreich# 🎜🎜#
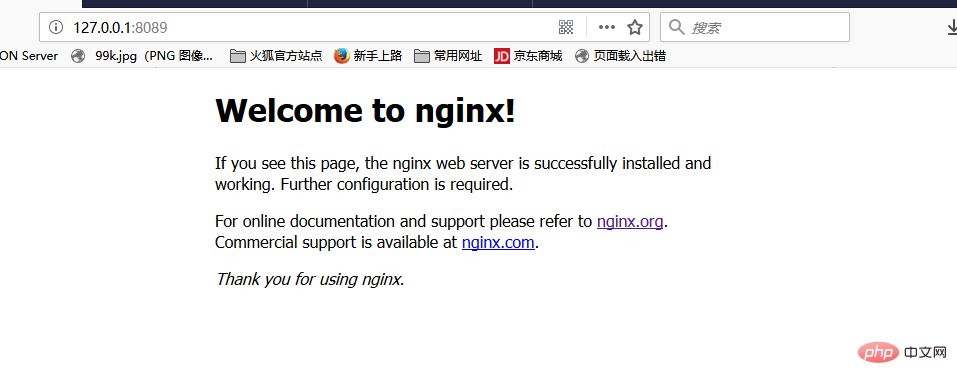
 4. Geben Sie http://127.0.0.1:8089 in den Browser ein, um
 5. Platzieren Sie ein Bild unter g:/images/ und geben Sie http://127.0.0.1:8089/img.jpg in die Adressleiste des Browsers ein, um auf das Bild auf dem Server zuzugreifen
Das obige ist der detaillierte Inhalt vonSo erstellen Sie mit Nginx einen Bildserver in Windows. Für weitere Informationen folgen Sie bitte anderen verwandten Artikeln auf der PHP chinesischen Website!
Stellungnahme:
Dieser Artikel ist reproduziert unter:yisu.com. Bei Verstößen wenden Sie sich bitte an admin@php.cn löschen
Vorheriger Artikel:Strukturmethode der Nginx-KonfigurationsdateiNächster Artikel:Strukturmethode der Nginx-Konfigurationsdatei

