Heim >Web-Frontend >CSS-Tutorial >Lassen Sie uns in einem Artikel über 9 unbeliebte CSS-Eigenschaften sprechen
Lassen Sie uns in einem Artikel über 9 unbeliebte CSS-Eigenschaften sprechen
- 青灯夜游nach vorne
- 2022-09-13 10:38:042185Durchsuche
Vielleicht glauben wir manchmal unbewusst, dass das Attribut css in der aktuellen tatsächlichen Entwicklung ausreicht, aber vor einiger Zeit dachten wir plötzlich: „Ist es möglich, dass sich unser Denken nur auf häufig verwendetes CSS beschränkt?“ „Attribut, wodurch die Kreativität verloren geht“, genau wie die Erfindung des Autos. Bevor die meisten Leute dachten, dass Reiten schnell genug sei, um ihre Bedürfnisse zu erfüllen, habe ich es speziell organisiert Schauen Sie sich meine Studiennotizen an und lernen Sie einige unpopuläre css-Attribute kennen css. css属性已经足够用了, 但是前段时间突然想到:"会不会我们只是思维被限制在了常用的css属性中, 从而丧失了创造力", 就像发明 车 之前大多数人会认为 骑马 已经足够快可以满足自己的需求了, 所以我专门整理了一下自己的学习笔记并且专门去学习了一些冷门的css属性, 果然收获满满, 所以今天也要在这里把这些脑洞大开的属性较少给你, 准备好一起来感受css的魅力吧。
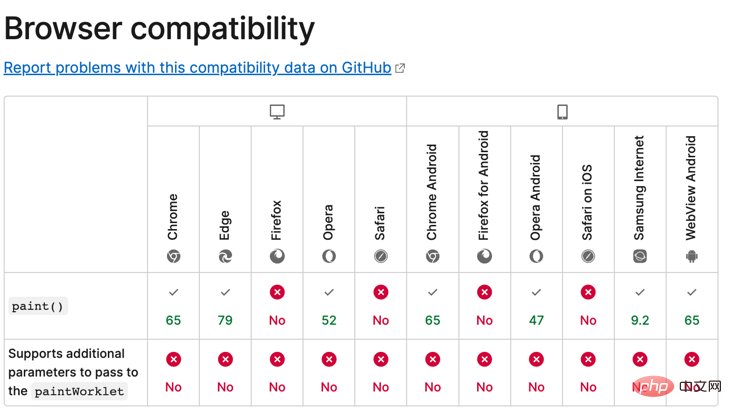
一、开胃菜 css画背景图: paint
我们开发中使用的背景图大部分是(png, webp等)图片、svg矢量图、canvas画图, 但是其实我们也可以选择css直接画图, 那css这种甚至都"称不上"编程语言的家伙怎么绘制复杂的图片那?【推荐学习:css视频教程】
1: 为元素赋予css属性
div class="box">
.box {
    width: 180px;
    height: 180px;
    border: 1px solid;
    background: paint(xxxx); // 主角在此
  }
paint(xxxx); 这里填入的是绘图的"方法名", 往下看就知道啥是"方法名"了, 之所以我这里写"xxxx"非常随意, 是因为我想表达这个名字随便起。
2: 引入js文件
    <script>
      if (window.CSS) {
        // 因为加载文件 需要启动server
        CSS.paintWorklet.addModule("./paint-grid.js");
      }
    </script>
用法有点诡异, 但核心其实是引入了一个js文件。
3: js文件内定义导出的方法
paint-grid.js文件:
registerPaint(
  "xxxx", // 这就是: 方法名
  class {
    paint(context, size) {
      context.fillStyle = 'red';
      context.fillRect(10, 10, 39, 39);
    }
  }
);
paint方法里面就类似canvas了, 可以正常使用部分js代码。
当前的效果展示: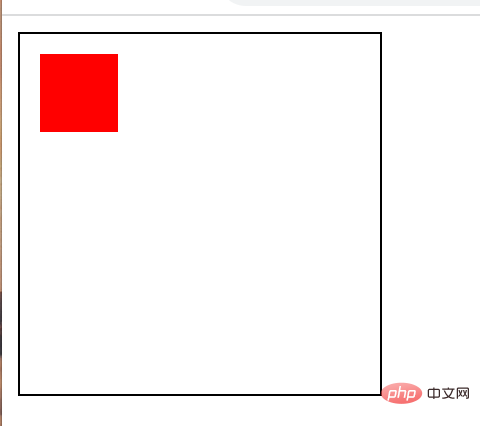
4: 可多导出
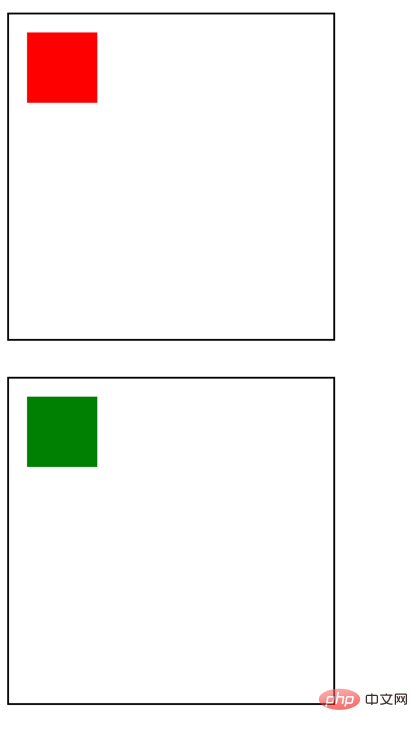
当看到需要指定绘制的"方法名"而不是"文件名", 我就知道他一定可以导出多个喽:
registerPaint(
  "xxxx1",
  class {
    paint(context, size) {
      context.fillStyle = 'red';
      context.fillRect(10, 10, 39, 39);
    }
  }
);

registerPaint(
  "xxxx2",
  class {
    paint(context, size) {
      context.fillStyle = 'green';
      context.fillRect(10, 10, 39, 39);
    }
  }
);
两个元素的样式设置
      .box {
        background: paint(xxxx1);
      }
      .box2 {
        margin-top: 20px;
        background: paint(xxxx2);
      }
5: 变量赋予背景灵动
我们时长遇到需要绘制"非固定大小背影", 此时在paint-grid.js中window是获取不到的, 但是我们可以使用css变量:
// 在全局定义方便js修改
  :root {
    --bg-size: 60;
  }
paint-grid.js文件
registerPaint(
  "xxxx1",
  class {
    static get inputProperties() {
      return ["--bg-size"];
    }
    paint(context, size, properties) {
      var bgSize = properties.get('--bg-size');
      context.fillStyle = "red";
      context.fillRect(10, 10, bgSize, bgSize);
    }
  }
);
inputProperties定义了需要获取哪些属性, paint的第三个参数可以接收这些属性, 这样瞬间就感觉这个属性还有点用啦。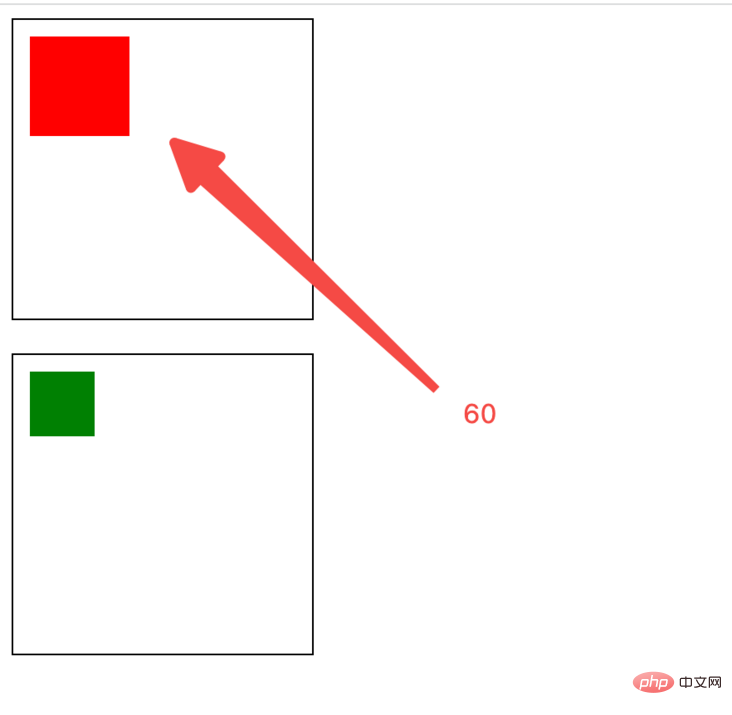
6: 注意事项
不能在
js文件的绘制方法里面写alert, 会导致报错阻断绘制:
要注意维护
paint-grid.js文件与css文件的相关性, 因为大家写代码会下意识的不会认为js方法被css1. Vorspeise-CSS-Hintergrundmalerei: Farbe-
Die meisten in unserer Entwicklung verwendeten Hintergrundbilder sind
(PNG, WebP usw.)-Bilder,SVG-Vektorbilder,Leinwandzeichnung, aber tatsächlich können wir auchcsszum direkten Zeichnen wählen, dann kanncssnicht einmal als Programmiersprache bezeichnet werden Sie zeichnen komplexe Bilder? [Empfohlenes Lernen: CSS-Video-Tutorial]

1: Weisen Sie dem Element CSS-Attribute zu
  p {
    font-size: 150px;
    color: white;
    -webkit-text-stroke: 6px red;
  }
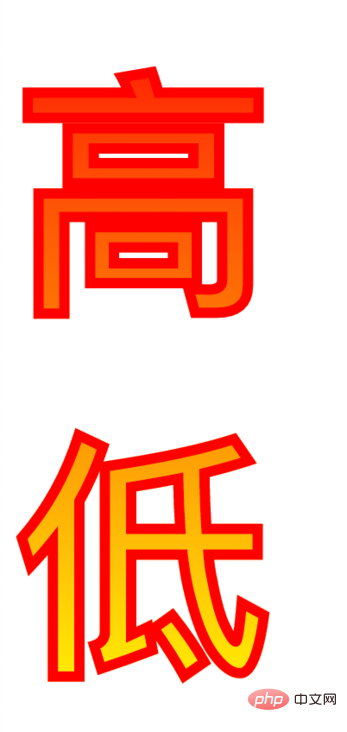
      p {
        font-size: 150px;
        color: white;
        -webkit-text-stroke: 6px red;
        background-color: rosybrown;
        background-image: -webkit-linear-gradient(top, red, #fd8403, yellow);
        -webkit-background-clip: text;
        color: transparent;
      }
paint(xxxx); Geben Sie hier den „Methodennamen“ der Zeichnung ein und gehen Sie nach unten Ich kann beim Betrachten erkennen, was ein „Methodenname“ ist. Der Grund, warum ich hier „xxxx“ schreibe, ist sehr beiläufig, weil ich zum Ausdruck bringen möchte, dass der Name beiläufig gewählt werden kann. 2: js-Datei einführen 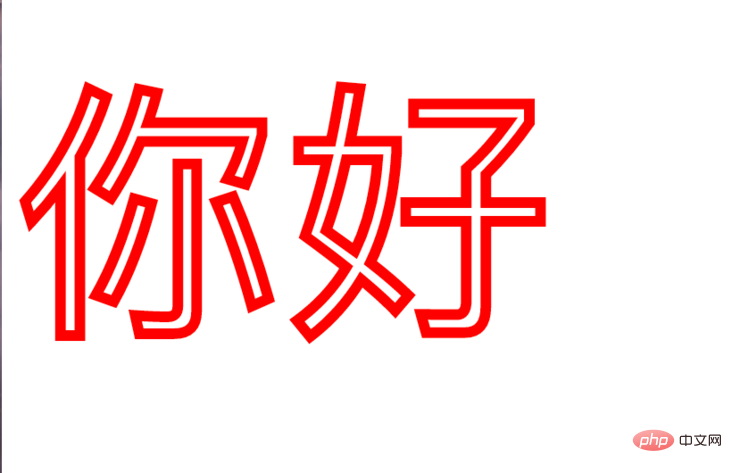
 <p>
  高
  <br>
  低
 </p>
Die Verwendung ist etwas seltsam, aber der Kern besteht darin, eine js-Datei einzuführen.
paint-grid.js-Datei:
      div {
        font-size: 150px;
        background: url(../imgs/jojo.webp) no-repeat;
        background-size: 100%;
        background-origin: border-box;
        -webkit-background-clip: text;
        color: transparent;
      }
Die paint-Methode ähnelt canvas code> können Sie einen Teil des <code>js-Codes normal verwenden. Aktuelle Effektanzeige: 🎜🎜🎜4: Sie können mehr exportieren🎜🎜🎜 Wenn Sie sehen, dass Sie den „Methodennamen“ anstelle des „Dateinamens“ angeben müssen Zum Zeichnen weiß ich, dass er mehrere exportieren kann:🎜
nbsp;html>
<style>
#wrap {
background-color: black;
width: 500px;
height: 500px;
margin: 0 auto;
overflow: hidden;
}
.box0 {
background: url(../imgs/jojo.webp) no-repeat;
}
.box1 {
background: url(../imgs/一起干饭.jpeg) no-repeat;
}
.box2 {
background: url(../imgs/gat.webp) no-repeat;
}
#box {
width: 500px;
height: 500px;
font-size: 150px;
margin: 0 auto;
background-size: 500px 500px;
background-position: center;
-webkit-background-clip: text;
-webkit-text-fill-color: rgba(0, 0, 0, 0.2);
display: flex;
justify-content: center;
align-items: center;
}
.text {
display: none;
}
</style>
<div>
<div>
<span>①</span>
<span>②</span>
<span>③</span>
</div>
</div>
<script>
const oBox = document.getElementById("box");
const textArr = document.getElementsByClassName('text')
let i = 0;
let n = 800;
setInterval(()=>{
oBox.style.fontSize = n + 'px';
n+=3
if(n > 800){
n = 10;
textArr[1].style.display = 'none'
textArr[2].style.display = 'none'
textArr[0].style.display = 'none'
textArr[i].style.display = 'block'
oBox.classList.remove('box1')
oBox.classList.remove('box2')
oBox.classList.remove('box3')
oBox.classList.add(`box${i}`)
i++
if(i > 2){
i = 0
}
}
},5)
</script>
🎜Stileinstellungen für zwei Elemente🎜<div>jojo的奇妙冒险</div>🎜
 🎜🎜🎜5: Variablen geben dem Hintergrund Flexibilität 🎜🎜🎜 Wir müssen wann zeichnen Wir stoßen auf das Problem.“ „Hintergrund ohne feste Größe“, zu diesem Zeitpunkt kann
 window nicht in paint-grid.js abgerufen werden, aber wir können verwenden CSS-Variablen: 🎜 <style>
.box {
quotes: "《" "》";
}
.box::before {
content: open-quote;
}
.box:after {
content: close-quote;
}
</style>🎜 paint-grid.jsDatei 🎜 :root {
--open: "《";
--close: "》";
}
div::before {
content: var(--open);
}
div::after {
content: var(--close);
}🎜 inputProperties definiert, welche Eigenschaften abgerufen werden müssen, und der dritte Parameter von paint kann diese Attribute erhalten, sodass ich sofort das Gefühl habe, dass dieses Attribut einigermaßen nützlich ist.  🎜🎜🎜6: Notizen🎜🎜
- 🎜🎜 können nicht in
js verwendet werden Dateien Das Schreiben von alert in der Zeichenmethode führt zu einem Fehler beim Blockieren des Zeichnens: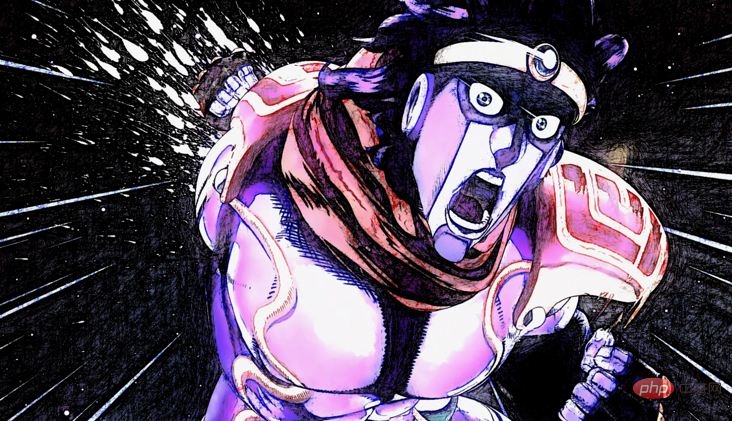 🎜🎜🎜🎜Achten Sie auf die Wartung
paint-grid. js und der Datei <code>css, denn wenn Leute Code schreiben, denken sie unbewusst nicht, dass die Methode js durch die Attribute in beeinflusst wird Die verwendete css-Datei kann zu Problemen führen, z. 🎜🎜🎜🎜Es eignet sich für die Verarbeitung einfacher Grafiken, wenn die Komplexität hoch ist oder andere „Bibliotheken“ benötigt werden, wird die Verwendung nicht empfohlen. 2. Dreifache Schriftart (hohl, Farbverlauf, Hintergrund) 🎜🎜🎜3 : Texthintergrund🎜🎜 我们把"白金之星"(jojo的奇妙冒险中的'人物')的图片作为文字的背景:
div {
font-size: 150px;
background: url(../imgs/jojo.webp) no-repeat;
background-size: 100%;
background-origin: border-box;
-webkit-background-clip: text;
color: transparent;
}
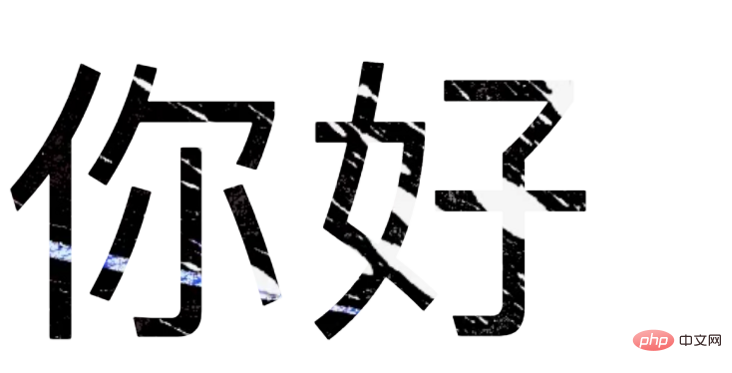
这里的关键点是-webkit-background-clip: text, 意思是将dom内文字以外的区域裁剪掉, 所以就剩文字区域了, 然后文字再设置成透明的。
三、他来了他来了, 他带着炫酷的过场动画走来了
先看一下咱们用css字体属性做的动动画效果:
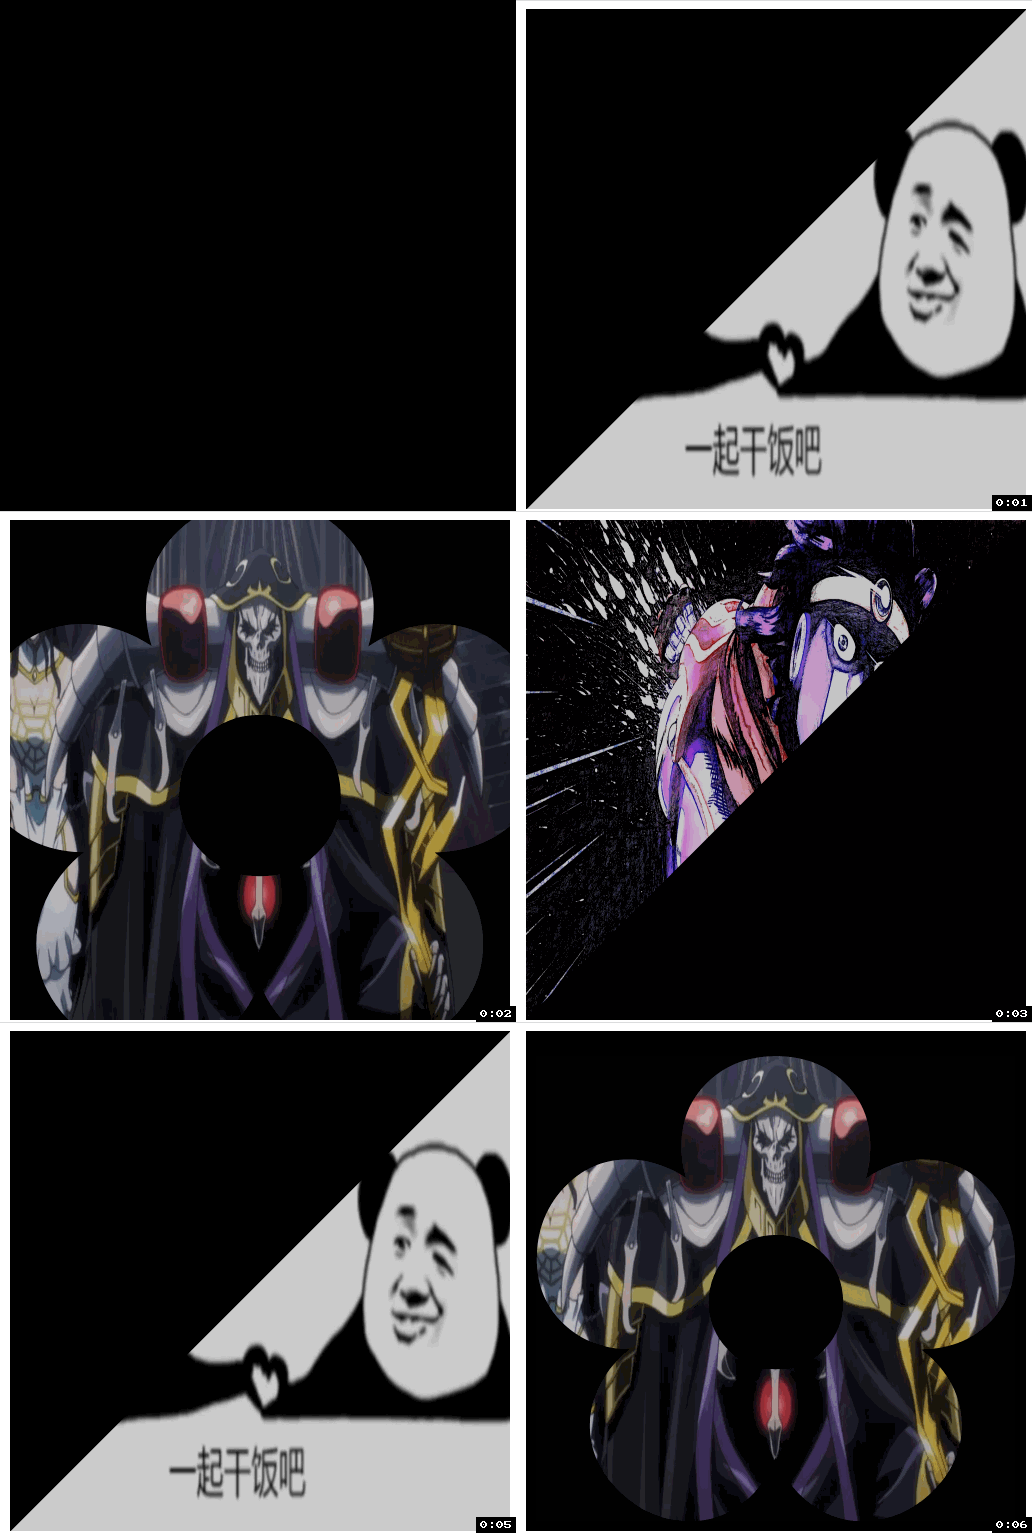
倒计时骨王登场:
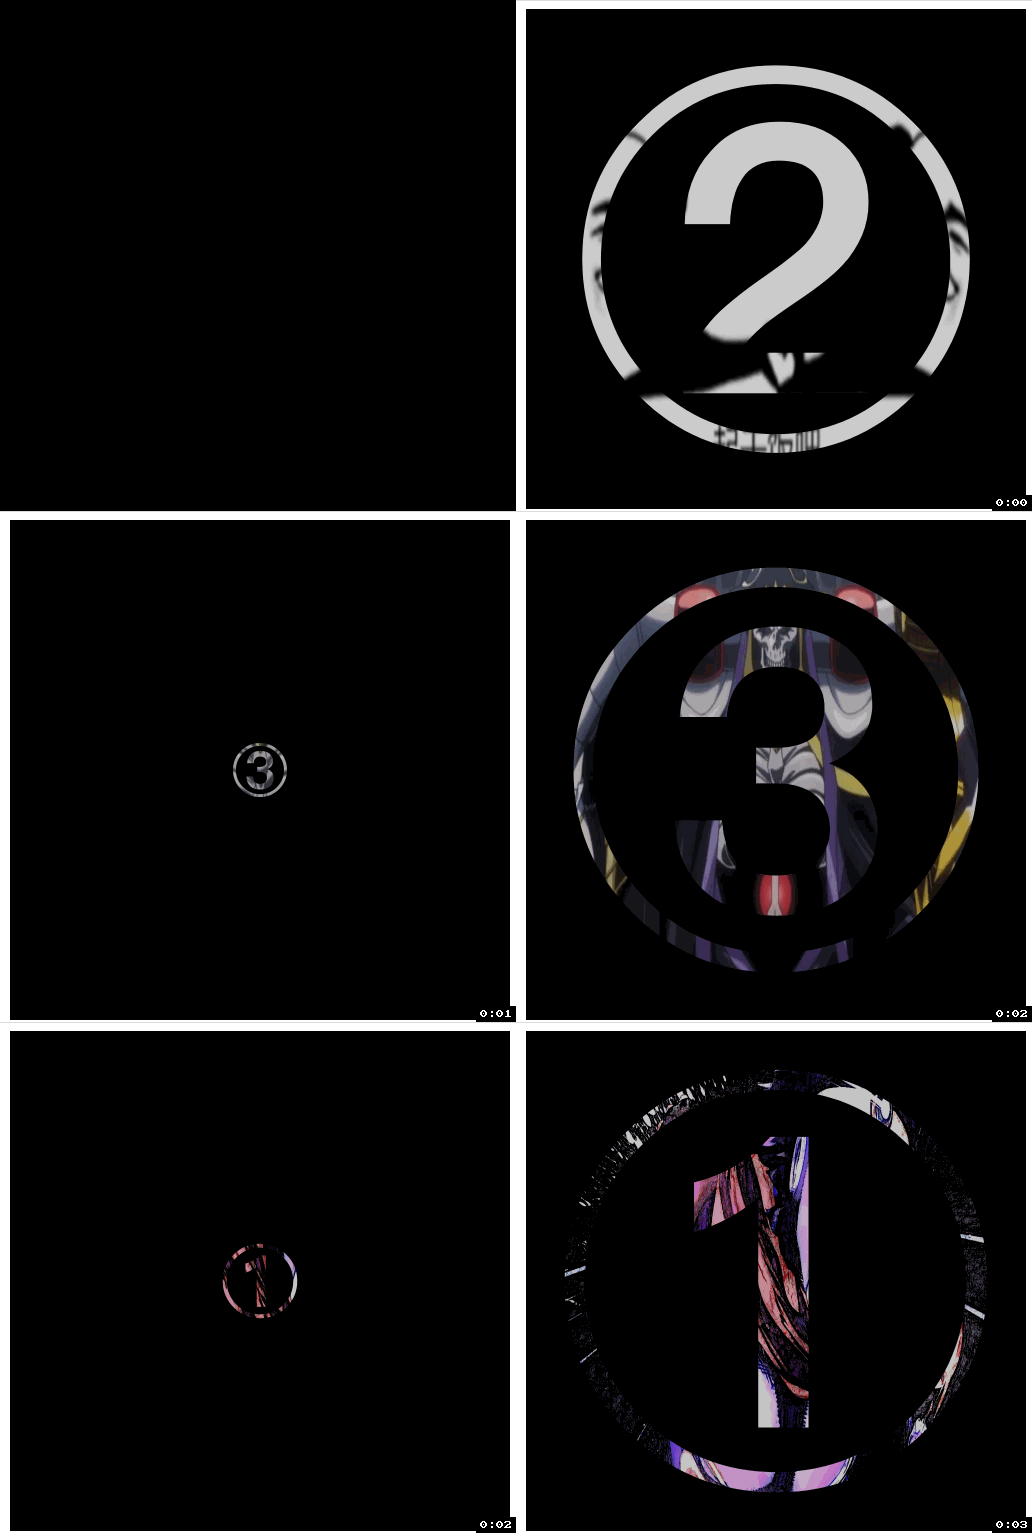
这里的思路就是利用文字的背景图属性, 但是难点是如何让文字变大。
1: 难点与坑点
文字变大有什么难的? 你可能会说这些so简单, 我们设置文字所在的span标签position: absolute;定位在父级中间不就OK了? 但是如果这样设置就会导致-webkit-background-clip: text;失效, 也就是文本脱离了文档流。
有同学有会想到 transform:scale(1.5); 来动态控制文字的变大, 但是transform依然会使-webkit-background-clip: text;失效。
所以我想到的是在div中设置flex让文字上下左右居中, 然后调大font-size属性。
还有一个问题就是背景色问题, 因为设置了背景图的同时没法设置文字外层的背景色。
2: 实现思路
首先总共需要三层结构, 第一层wrap负责黑色背景色以及overflow: hidden;来截断我们的文字变大, 第二层box负责文字的居中, 并且设置font-size属性让内部元素继承, 第三层span标签负责文字①②③的存放, 因为要控制这些文字的显隐所以需要dom标签包裹。
3: 实现代码
代码有些粗鄙没有润色
nbsp;html>
<style>
#wrap {
background-color: black;
width: 500px;
height: 500px;
margin: 0 auto;
overflow: hidden;
}
.box0 {
background: url(../imgs/jojo.webp) no-repeat;
}
.box1 {
background: url(../imgs/一起干饭.jpeg) no-repeat;
}
.box2 {
background: url(../imgs/gat.webp) no-repeat;
}
#box {
width: 500px;
height: 500px;
font-size: 150px;
margin: 0 auto;
background-size: 500px 500px;
background-position: center;
-webkit-background-clip: text;
-webkit-text-fill-color: rgba(0, 0, 0, 0.2);
display: flex;
justify-content: center;
align-items: center;
}
.text {
display: none;
}
</style>
<div>
<div>
<span>①</span>
<span>②</span>
<span>③</span>
</div>
</div>
<script>
const oBox = document.getElementById("box");
const textArr = document.getElementsByClassName('text')
let i = 0;
let n = 800;
setInterval(()=>{
oBox.style.fontSize = n + 'px';
n+=3
if(n > 800){
n = 10;
textArr[1].style.display = 'none'
textArr[2].style.display = 'none'
textArr[0].style.display = 'none'
textArr[i].style.display = 'block'
oBox.classList.remove('box1')
oBox.classList.remove('box2')
oBox.classList.remove('box3')
oBox.classList.add(`box${i}`)
i++
if(i > 2){
i = 0
}
}
},5)
</script>
把文案改成 "◤ ◢ ✿" 就会出现第一个动图的效果啦!
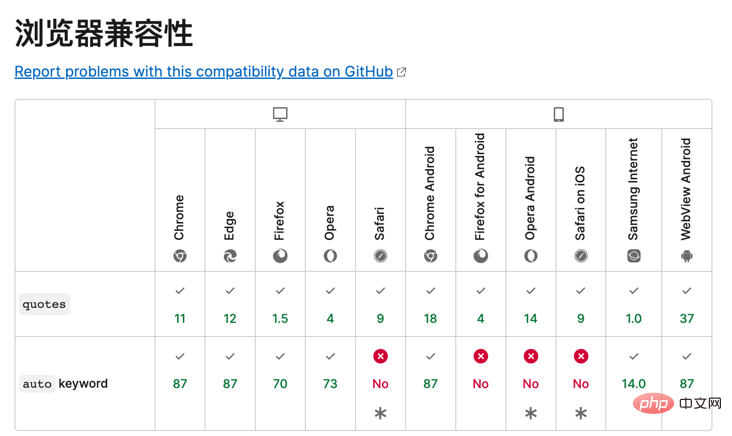
四、引号: quotes
所谓引号就相当于给书名加上'书名号', 给语言加上'冒号双引号', 当然他还有一些神奇玩法。
1: 基本使用
<div>jojo的奇妙冒险</div>
    <style>
      .box {
        quotes: "《" "》";
      }
      .box::before {
        content: open-quote;
      }
      .box:after {
        content: close-quote;
      }
    </style>
效果图:
这里要注意的是如果没写content: open-quote;会导致前后'书名号'都消失, 但是唯独没写content: close-quote;则会保留展示"《"。
2: 看似鸡肋?
当前这个基础写法也太鸡肋了, 不就是给"《"起了个别名叫open-quote吗? 并且关键是占用了我的before与after, 感觉画蛇添足, 比如我可以用如下的方法进行替换:
  :root {
    --open: "《";
    --close: "》";
  }
  div::before {
    content: var(--open);
  }
  div::after {
    content: var(--close);
  }
<div>jojo的奇妙冒险</div>
3: 套娃高手 quotes 雄起
其实quotes的看家本领是它可以接受n个参数!
  .box {
    quotes: "--- start" "---- end" "《" "》";
  }
  .box::before {
    content: open-quote;
  }
  .box:after {
    content: close-quote;
  }
<div>jojo的奇妙冒险</div>Overlord艾尔登法环
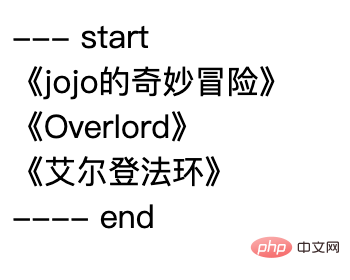
神奇的事情出现了, 当出现嵌套结构的时候, 内部的元素会使用第三个与第四个参数作为"引号", 套娃事件出现啦:
  .box {
    quotes: "--- start" "---- end" "(" ")" "《" "》";
  }
  .box::before {
    content: open-quote;
  }
  .box:after {
    content: close-quote;
  }
<div>
  <div>
    <span>jojo的奇妙冒险</span>
  </div>
  <div>
    <span>Overlord</span>
  </div>
  <div>
    <span>艾尔登法环</span>
  </div>
</div>
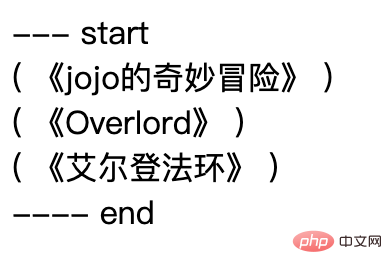
说实话这个套娃能力还挺厉害的, 并且我们可以讲 close-quote属性置空, 我想到的就是列表:
  .box {
    quotes: "--- start" "---- end" "1: " "" "-- 2:" "" "---- 3: " "" "------ 4: " "";
  }
  .box::before {
    content: open-quote;
  }
  .box:after {
    content: close-quote;
  }
    <div>
      <div>
        第一:
        <div>
          第二:
          <div>第三:</div>
        </div>
        <div>
          第二:
          <div>
            第三:
            <div>第四:</div>
          </div>
        </div>
      </div>
      <div>
        第一:
        <div>第二:</div>
      </div>
    </div>
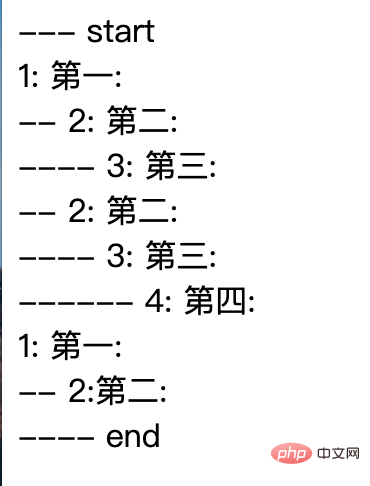
要注意不写close-quote会让css找不到在哪里结束, 所以最好写上并给空值。
五、还原大师: all
CSS all 简写属性 将除了 unicode-bidi 与 direction 之外的所有属性重设至其初始值,或继承值。
这是一个比较强硬的属性, 可以把几乎所有css属性进行重置:
我们先设置一下基础的环境
  .wrap {
    font-size: 30px;
    font-weight: 900;
  }
  .box {
    width: 100px;
    height: 100px;
    border: 1px solid;
    background-color: red;
    color: white;
  }
  .box1 {
    all: initial;
  }
  .box2 {
    all: inherit;
  }
  .box3 {
    all: revert;
  }
    <div>
      <div>你好</div>
      <div>你好: initial</div>
      <div>你好: inherit</div>
      <div>你好: revert</div>
    </div>
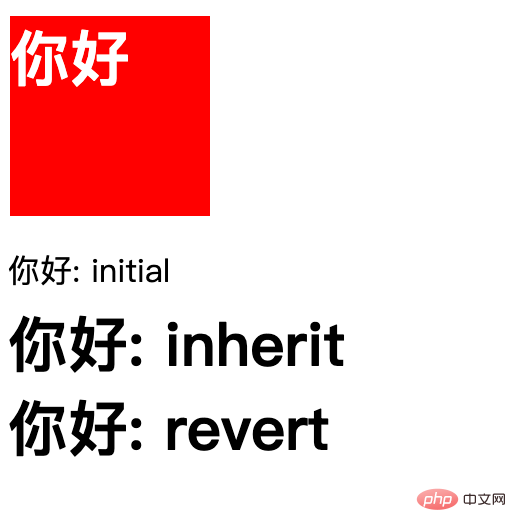
1: initial : 还原为初始值
顾名思义这里是将 div身上的所有属性都重置了, 不管是"背景颜色"还是"字体颜色", 甚至宽高, 所以这里属于是完全初始化了。
但是有个大坑, 他会把div原本的display: block改变成display: inline, 也就是说all: initial;将所有属性置为空了, 而不会根据标签属性进行筛选, 所以这个属性有点太绝对了要小心使用。
2: inherit: 集成值保留
依然是顾名思义, 将所有属性设置为 "继承父级", 并且还原自身的属性, 比如宽高都没有了但是继承了字体大小与字体粗细。
不是所有css属性的默认值都是'继承', 比如说position的默认值就不是集成, 但是position可以设置为position: inherit;, 这就埋下了隐患请看下一条属性。
3: revert: 还原
虽然看起来效果与inherit几乎一样, 但是实质上有大区别, 比如如果此时wrap父元素设置position: absolute;, 那么设置了all: inherit的元素为position: absolute;, 设置了all:revert的元素是position: static, 也就是说目标元素单纯的还原成最开始的样式, 剔除掉了后期设置的属性, 但保留一些默认的继承属性, 这个属性虽然兼容性超差但最牛!
4: all的优先级
.box{
    all: revert;
    background-color: red;
}
这里的背景色是可以设置成功的, 所以all应该算一锤子买卖, 只把设置all属性之前的样式重置。
// 父级
  .box {
    background-color: red !important;
  }
 .box1 {
   all: revert;
 }
上面是不生效的, 因为all只能重置优先级不如自己选择器的属性, 所以需要all: revert!important;。
六、目标元素样式 :target
这个属性让页面的url参数与dom元素互动起来
1: 跳转选中
比如当前url是https://www.xxxxxxxxxxx.com/#target_id则:
  :target {
    background-color: red;
    font-size: 200px;
  }
<div>
    你好
</div>
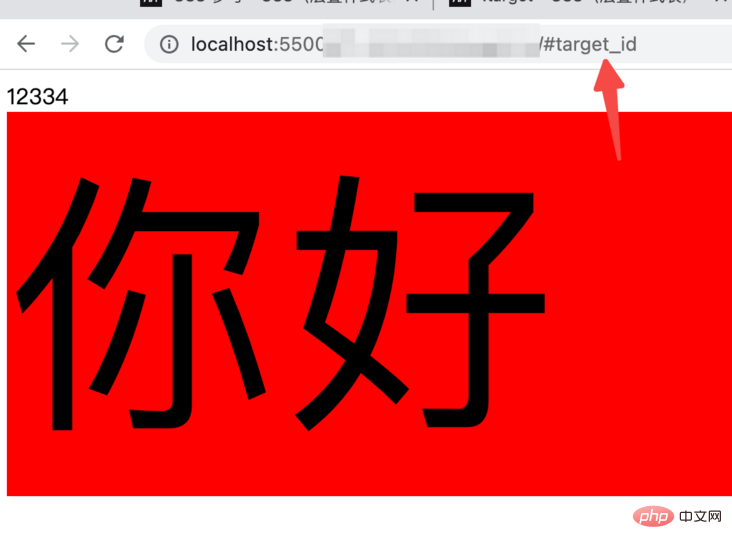
2: 跳转后动画
我想到的是每次选中元素后让元素有个动画效果, 实在太简单了就不演示了, 说一下这个属性的鸡肋点吧, 比如无法同时传递多个id, 或者传递class, 并且他让css属性与dom结构之间绑定关系变弱了代码不方便维护与阅读。
七、输入框的placeholder样式设置: placeholder-shown
可以设置当input组件中展示placeholder时的样式:
      input:placeholder-shown {
        background-color: lightblue;
      }

      input {
        width: 300px;
        height: 60px;
      }
<input>
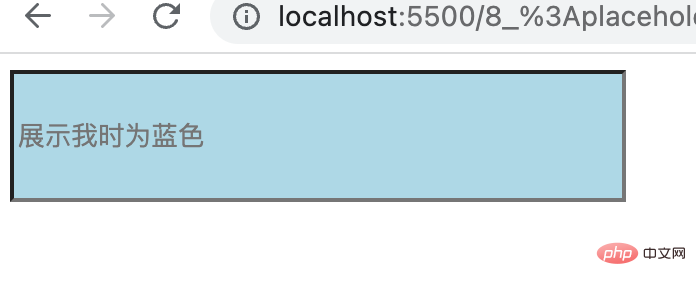
输入内容则还原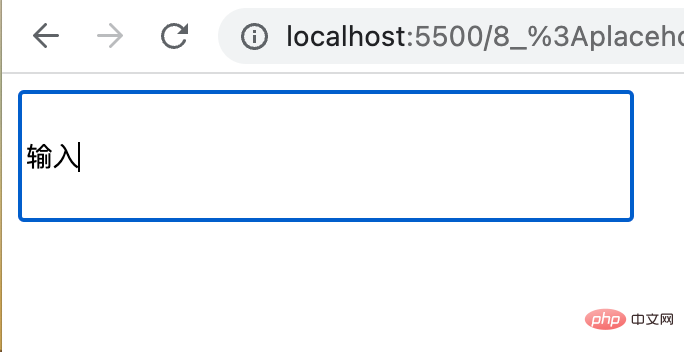
八、换行展示的艺术: hyphens
当英文单词必须折行时我们是否需要一个'连字符':
<div>
      The auto setting's behavior depends on the language being properly tagged
      so that the appropriate hyphenation rules can be selected.
    </div>
  .box {
    border: 1px solid black;
    width: 200px;
    height: 100px;
  }
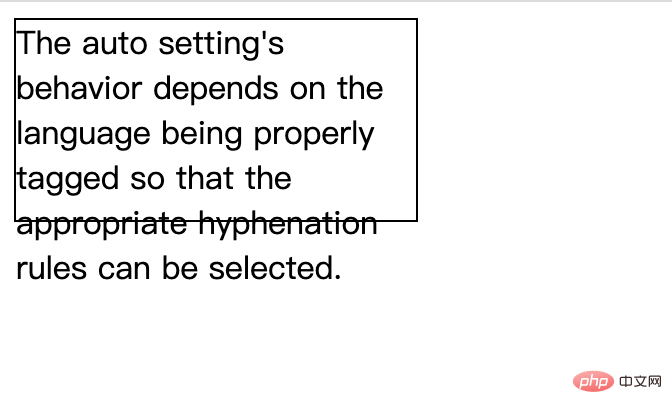
主角暴风登场
      .box {
        border: 1px solid black;
        width: 200px;
        height: 100px;
        hyphens: auto;
      }
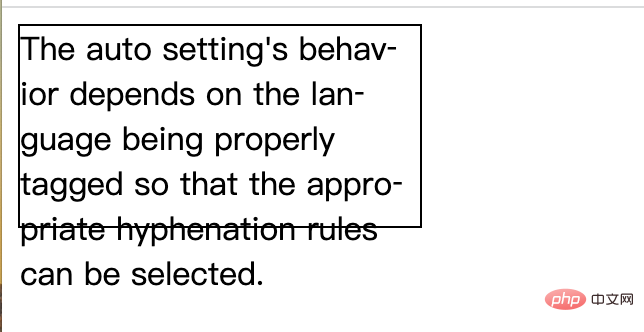
比较可惜的是无法自由定义'连字符'的样式, 否则一定有点有趣。
九、滚动的优质体验: scroll-snap-type
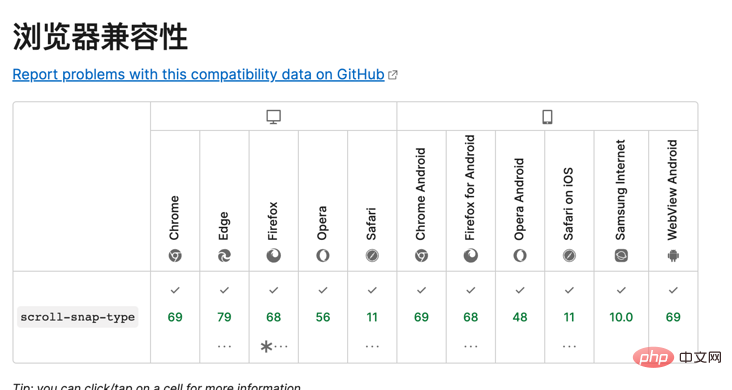
定义一个滚动时的"临时停顿点", 这个问题直接看gif动画比较直接:
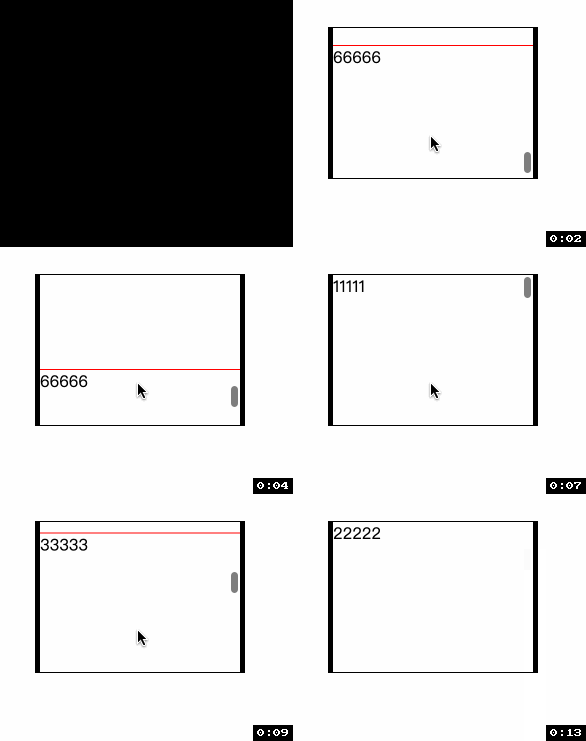
简单来看就是每次惯性滑动都会停留在特定元素所在位置, 有点像滚动的'锚点':
nbsp;html>


    <style>
      .box {
        width: 200px;
        height: 150px;
        border: 1px solid;
        border-left: 5px solid black;
        border-right: 5px solid black;
        margin: 40px;
        overflow: auto;
        scroll-snap-type: y mandatory;
      }
      .item {
        border-top: 1px solid red;
        height: 150px;
        /* scroll-margin-top:20px; */
        scroll-snap-align: start none;
      }
    </style>


    <div>
      <div>11111</div>
      <div>22222</div>
      <div>33333</div>
      <div>44444</div>
      <div>55555</div>
      <div>66666</div>
    </div>
scroll-snap-type: y mandatory;设置了y轴滚动时尽量停留在'元素点位'上, scroll-snap-align: start none;目标元素自身的滚动起始方向用来对齐, 也就是告诉浏览器滚动后要停留在子元素的哪里。
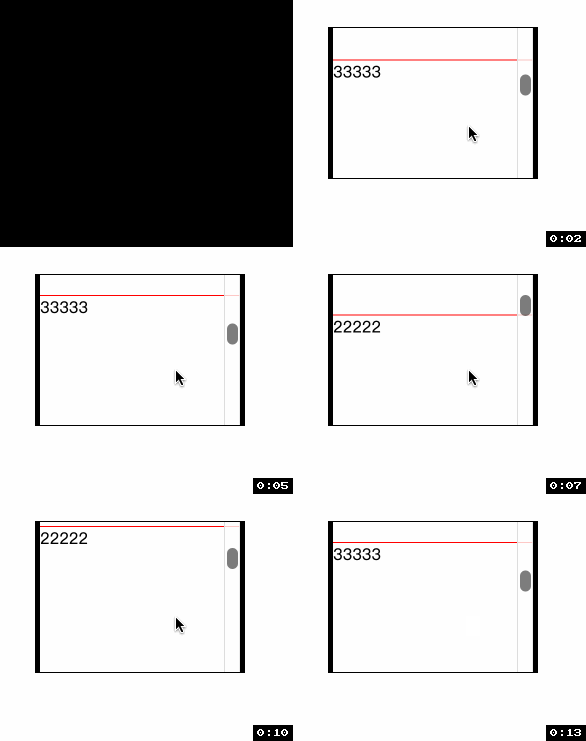
在子元素身上设置scroll-margin-top: 20px 可以设置一定的检测距离, 并附加回弹效果:
end
这次神奇的css之旅就是这样, 希望与你一起进步。
(学习视频分享:web前端)
Das obige ist der detaillierte Inhalt vonLassen Sie uns in einem Artikel über 9 unbeliebte CSS-Eigenschaften sprechen. Für weitere Informationen folgen Sie bitte anderen verwandten Artikeln auf der PHP chinesischen Website!
In Verbindung stehende Artikel
Mehr sehen- So konvertieren Sie Inline-Elemente in CSS in Elemente auf Blockebene
- Enthalten Selektoren in CSS Hypertext-Tag-Selektoren?
- So konvertieren Sie andere Elementtypen in CSS in Inline-Elemente
- Verwenden Sie CSS geschickt, um den 3D-Rotationseffekt der Maus zu realisieren und die Interaktion lebendiger zu gestalten!
- Nutzen Sie geschickt CSS-Mischmodi, um Text intelligent an die Hintergrundfarbe anzupassen
- Teilen von CSS-Tipps: Reines CSS zur Implementierung eines responsiven Tabellenlayouts


