
Heim >Backend-Entwicklung >PHP-Problem >So installieren und konfigurieren Sie PHP MySQL in Win7
So installieren und konfigurieren Sie PHP MySQL in Win7

- 藏色散人Original
- 2020-08-12 09:17:431959Durchsuche
win7安装配置php mysql的方法:首先下载php并将php压缩包解压到一个目录;然后将“PHP_HOME”添加到PATH变量中;接着配置Apache并安装mysql;最后重新启动httpd并进行测试即可。

推荐:《PHP视频教程》
说明:
作者的硬件环境为:windows 7 64位
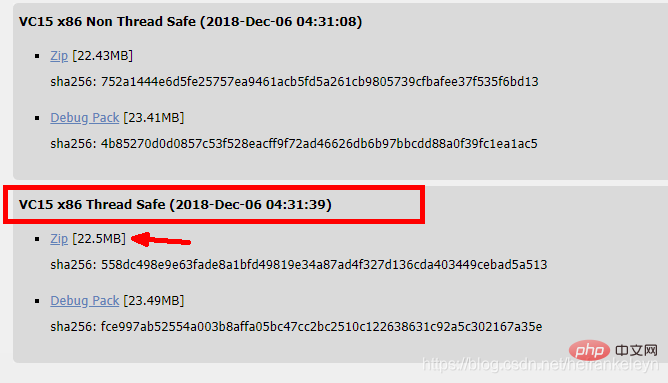
一、下载php
选择: VC15 x86 Thread Safe ,下载下来的文件名为:php-7.3.0-Win32-VC15-x86.zip
1.1 将压缩包,解压到一个目录
本次安装解压到:F:ApatchInstallWorkspacedevserversphp 下。
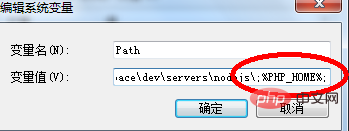
1.2 配置环境变量

1.3 将PHP_HOME 添加到PATH变量中
1.4 开发dos命令行,输入:php -version ,监测是否配置成功

二、运行PHP需要一个服务器,这里使用Apache web server
下载地址:下载地址: https://www.apachelounge.com/download/ ,选择Apache 2.3.37 win32 。(需要和php的版本对应)https://www.apachelounge.com/download/二、配置Apache , Erweitert um Apache 2.3.37 win32 ="230" src="https://img.php.cn/upload/article/000/000/020/97c7599edeacda406fcfbdc7142d93ff-4.png" width="681"/>
2.1 将httpd-2.4.37-win32-VC15.zip解压 h2>本次安装,解压到作者自定义的目录下:F:ApatchInstallWorkspacedevservershttpd
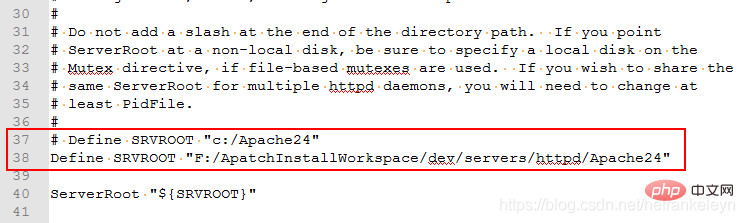
2.2 配置Apache24/bin/httpd.conf 文件

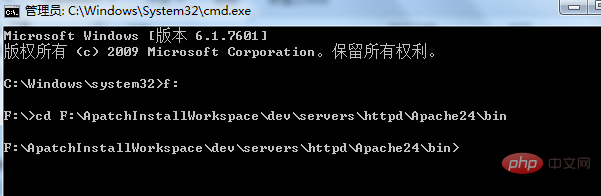
2.3 打开命令行,cd 到 Apache24bin 目录下,运行httpd.exe
2.3 开命令行,cd 到光标停留在最下面,并不断的闪烁Apache24bin 目录下运行httpd.exe
此时出现了“AH00558: httpd.exe……”的错误信息,是因为没有配置ServerName。打开Apache24/conf/httpd.conf,将 配置“ServerName localhost:80”,如下图:

再次在命令行中输入“httpd.exe”之后,按回车,就没有错误信息了,此时光标停在下一行不断的闪烁,如下图:

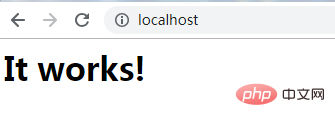
打开浏览器,在导航栏输入:http://localhost/ ,将看到下面的页面(证明Apache已经运行):

打开浏览器,在导航栏输入:http://localhost/回到命令行,按ctrl+c (可能会有延迟)停止apache 2.4 让apache安装成window下的一个服务,将看到下面的页面(证明Apache已经运行):

以管理员的身份,运行命令行,导航到:Apache24bin 目录下,如下图:
运行:httpd.exe -k install
可以在windows的“服务”中,启动或停止apache服务:

在命令行中输入:service.msc,将出现一个弹框,里面包含:

如果添加了重复的服务,可以使用:sc delete 服务名,进行删除,如下:
🎜


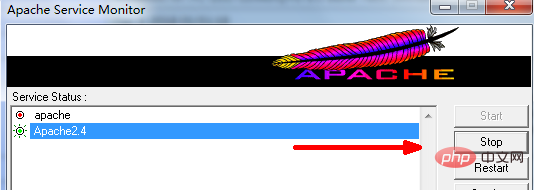
2.5 双击ApacheMonitor.exe,或者将它添加到启动目录
右击apache的光标,将看到一个弹框,点击弹框中的start就可以启动服务了,点击stop,就是关闭服务

如果服务启动了,在浏览器的导航栏中输入:http://localhost/ ,将会看到下面的内容,否则将访问不到页面。
三、安装一个mysql
作者在此之前已经安装过,版本如下:

四、配置Apache和PHP
4.1 需要配置apache的 httpd.conf 文件:
Öffnen Sie im Verzeichnis 在 F:ApatchInstallWorkspacedevservershttpdApache24conf 目录下,打开httpd.conf 文件,移动到文件的最后(或者在文件的任何地方),写入下面的内容:F:ApatchInstallWorkspacedevservershttpdApache24conf die Datei httpd.conf, gehen Sie zum Ende der Datei (oder an eine beliebige Stelle in der Datei) und schreiben Sie den folgenden Inhalt:
LoadModule php7_module "F:/ApatchInstallWorkspace/dev/servers/php/php7apache2_4.dll"
AddHandler application/x-httpd-php .php
PHPIniDir F:/ApatchInstallWorkspace/dev/servers/php
组件的版本必须匹配apache的版本(在这里,该版本是2_4) p>
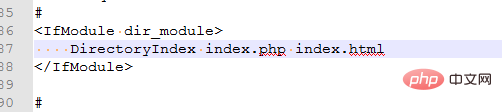
4.2 Weiter konfigurieren 4.2 继续在httpd.conf 文件中配置 DirectoryIndex
Suchen Sie 在文件中查找到 DirectoryIndex,配置下面的内容:4.3 导航到 F:ApatchInstallWorkspacedevserversphp 目录,配置php.ini in der Datei und konfigurieren Sie den folgenden Inhalt: p>
4.3 Navigieren Sie zum Verzeichnis 拷贝 php.ini-development 文件,将其命名为:php.iniF:ApatchInstallWorkspacedevserversphp, konfigurieren Sie php.ini
Kopieren Sie die Datei 找到修改下面几个参数:php.ini-development und benennen Sie sie: php. ini p>
4.4 在php.ini 中,找到 'Dynamic Extensions' 部分,修改下面的扩展(打开注释,并添加正确的路径):


extension=F:/ApatchInstallWorkspace/dev/servers/php/ext/php_curl.dll
extension=F:/ApatchInstallWorkspace/dev/servers/php/ext/php_gd2.dll
extension=F:/ApatchInstallWorkspace/dev/servers/php/ext/php_intl.dll
extension=F:/ApatchInstallWorkspace/dev/servers/php/ext/php_mbstring.dll
extension=F:/ApatchInstallWorkspace/dev/servers/php/ext/php_mysqli.dll
extension=F:/ApatchInstallWorkspace/dev/servers/php/ext/php_openssl.dll
extension=F:/ApatchInstallWorkspace/dev/servers/php/ext/php_soap.dll
extension=F:/ApatchInstallWorkspace/dev/servers/php/ext/php_xmlrpc.dll
4.5 重新启动httpd出现错误如下:
经过查询,发现是因为下错php包的问题(最开始下载的是:php-7.3.0-Win32-VC15-x64.zip),重新下载,下载php-7.3.0-Win32-VC15-x86.zip 的包

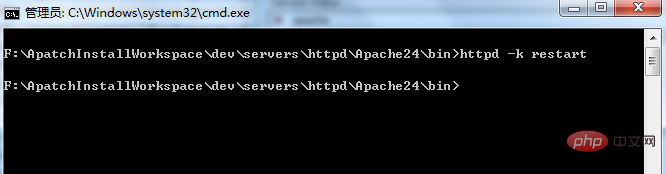
此时,执行httpd -k restart 就不会有问题了
五、测试安装
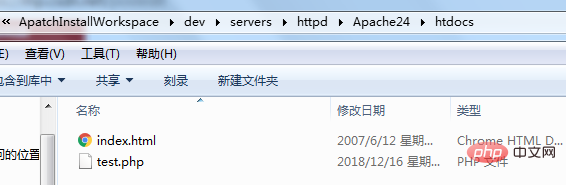
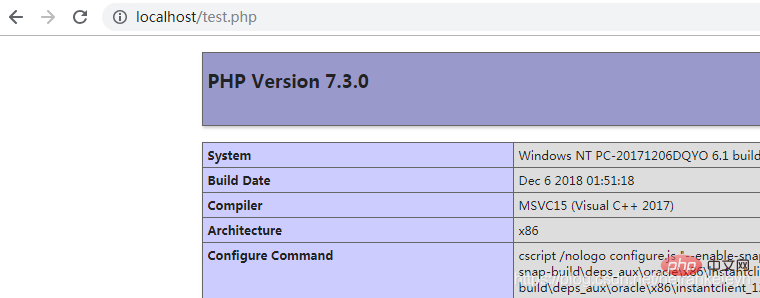
<?php phpinfo();在浏览器中导航栏中输入:http://localhost/test.php ,将会出现下面的页面: Fügen Sie eine Textdatei hinzu: test.php im Verzeichnis Apache24htdocs, geben Sie den folgenden Inhalt in diese Datei ein: (注意:Apache2.4 需要启动成功)
Geben Sie ein: http ://localhost/test.php 到此,php安装成功。 in der Navigationsleiste des Browsers erscheint folgende Seite:
🎜
🎜 🎜 Zu diesem Zeitpunkt ist PHP erfolgreich installiert.
Das obige ist der detaillierte Inhalt vonSo installieren und konfigurieren Sie PHP MySQL in Win7. Für weitere Informationen folgen Sie bitte anderen verwandten Artikeln auf der PHP chinesischen Website!