
Heim >Backend-Entwicklung >PHP-Tutorial >So stellen Sie eine PHP-Projektumgebung unter einem Linux-System bereit
So stellen Sie eine PHP-Projektumgebung unter einem Linux-System bereit

- 不言Original
- 2018-08-02 15:51:534138Durchsuche
Dieser Artikel stellt Ihnen vor, wie Sie die PHP-Projektumgebung unter dem Linux-System bereitstellen. Ich hoffe, dass er für Freunde hilfreich ist.
Die Umgebung für die Bereitstellung von PHP-Projekten unter Linux kann in zwei Typen unterteilt werden: Einer wird mit dem komprimierten Paket von Apache, PHP und MySQL installiert und der andere wird mit dem Befehl yum installiert.
Verwenden Sie zur Installation die komprimierten Pakete der drei Softwareprogramme. Sie müssen die Beziehung zwischen den dreien manuell konfigurieren. Die Konfiguration zwischen Apache und PHP ist nicht schwierig, aber bei der Konfiguration mit MySQL müssen Sie PHP verstehen.
Im Folgenden wird beschrieben, wie Sie mit yum die PHP-Umgebung unter Linux konfigurieren:
MySql installieren
1 .mysql und Apache werden am besten zuerst installiert, da sie bei der Konfiguration von PHP zusammen mit MySQL und Apache konfiguriert und getestet werden müssen
Laden Sie zuerst die MySQL-Sever-Datei herunter, da dies die Linux-Umgebung des Bloggers ist die CentOS-Version. Es scheint keine mysql-sever-Datei für die normale Installation von mysql in der yum-Quelle zu geben. Sie müssen sie von der offiziellen Website herunterladen
1.下载mysql-service文件
[root@tele-1 ~]# wget
mysql-service
[root@tele-1 ~]# rpm -ivh mysql-community-release-el7-5.noarch.rpm
3. Starten Sie nach Abschluss der Installation den MySQL-Dienst
[root@tele-1 ~]# yum install mysql-community-server
4. Die Erstinstallation von MySQL hat kein Passwort und der Standardbenutzername ist root. Wir müssen also das Passwort ändern und die MySQL-Befehlszeile verwenden, um es zu ändern muss MySQL ändern Die Benutzertabelle in der Datenbank
[root@tele-1 ~]# service mysqld restart
Sie können ein Datenelement ändern oder ein Datenelement hinzufügen. Es ist jedoch am besten, die oben blau markierten Daten nicht zu ändern. Die geänderte Anweisung hat das folgende Format:
mysql> wobei ??? 4. Beenden Sie es oder q wird gestartet Methode zum Verlassen der MySQL-Befehlszeile1.进入mysql命令行 [root@tele-1 ~]# mysql -urootWelcome to the MySQL monitor. Commands end with ; or \g.Your MySQL connection id is 474801Server version: 5.6.36 MySQL Community Server (GPL) Copyright (c) 2000, 2017, Oracle and/or its affiliates. All rights reserved.Oracle is a registered trademark of Oracle Corporation and/or its affiliates. Other names may be trademarks of their respective owners.Type 'help;' or '\h' for help. Type '\c' to clear the current input statement.mysql> 2.使用命令进行密码修改 mysql> set password for 'root'@'localhost' = password('你要修改的密码'); Query OK, 0 rows affected (0.06 sec)
Apache installieren
1 Die Apache-Installationsmethode ist relativ einfach 1.操作mysql数据库表
mysql> use mysql;
Reading table information for completion of table and column names
You can turn off this feature to get a quicker startup with -A
Database changedmysql>
<br><span style="font-family: 楷体; font-size: 14px">
2.查看user表中的数据(在mysql命令行中可以直接进行sql语句编写)</span>
mysql> select * from user;+-----------+------+-----------------------------------+-------------+-------------+-------------+-------------+-------------+-----------+-------------+---------------+--------------+-----------+------------+-----------------+------------+------------+--------------+------------+-----------------------+------------------+--------------+-----------------+------------------+------------------+----------------+---------------------+--------------------+------------------+------------+--------------+------------------------+----------+------------+-------------+--------------+---------------+-------------+-----------------+----------------------+-----------------------+-----------------------+------------------+
| Host | User | Password | Select_priv | Insert_priv | Update_priv | Delete_priv | Create_priv | Drop_priv | Reload_priv | Shutdown_priv | Process_priv | File_priv | Grant_priv | References_priv | Index_priv | Alter_priv | Show_db_priv | Super_priv | Create_tmp_table_priv | Lock_tables_priv | Execute_priv | Repl_slave_priv | Repl_client_priv | Create_view_priv | Show_view_priv | Create_routine_priv | Alter_routine_priv | Create_user_priv | Event_priv | Trigger_priv | Create_tablespace_priv | ssl_type | ssl_cipher | x509_issuer | x509_subject | max_questions | max_updates | max_connections | max_user_connections | plugin | authentication_string | password_expired |
+-----------+------+-----------------------------------+-------------+-------------+-------------+-------------+-------------+-----------+-------------+---------------+--------------+-----------+------------+-----------------+------------+------------+--------------+------------+-----------------------+------------------+--------------+-----------------+------------------+------------------+----------------+---------------------+--------------------+------------------+------------+--------------+------------------------+----------+------------+-------------+--------------+---------------+-------------+-----------------+----------------------+-----------------------+-----------------------+------------------+| % | root | *3ce8dad2446975d8b0c771bd7e48d15b | Y | Y | Y | Y | Y | Y | Y | Y | Y | Y | Y | Y | Y | Y | Y | Y | Y | Y | Y | Y | Y | Y | Y | Y | Y | Y | Y | Y | Y | | | | | 0 | 0 | 0 | 0 | mysql_native_password | | N || localhost | root | *3ce8dad2446975d8b0c771bd7e48d15b | Y | Y | Y | Y | Y | Y | Y | Y | Y | Y | Y | Y | Y | Y | Y | Y | Y | Y | Y | Y | Y | Y | Y | Y | Y | Y | Y | Y | Y | | | | | 0 | 0 | 0 | 0 | mysql_native_password | | N |
| 127.0.0.1 | root | *3ce8dad2446975d8b0c771bd7e48d15b | Y | Y | Y | Y | Y | Y | Y | Y | Y | Y | Y | Y | Y | Y | Y | Y | Y | Y | Y | Y | Y | Y | Y | Y | Y | Y | Y | Y | Y | | | | | 0 | 0 | 0 | 0 | mysql_native_password | | N |
| ::1 | root | *3ce8dad2446975d8b0c771bd7e48d15b | Y | Y | Y | Y | Y | Y | Y | Y | Y | Y | Y | Y | Y | Y | Y | Y | Y | Y | Y | Y | Y | Y | Y | Y | Y | Y | Y | Y | Y | | | | | 0 | 0 | 0 | 0 | mysql_native_password | | N || tele-1 | | | N | N | N | N | N | N | N | N | N | N | N | N | N | N | N | N | N | N | N | N | N | N | N | N | N | N | N | N | N | | | | | 0 | 0 | 0 | 0 | mysql_native_password | NULL | N |
+-----------+------+-----------------------------------+-------------+-------------+-------------+-------------+-------------+-----------+-------------+---------------+--------------+-----------+------------+-----------------+------------+------------+--------------+------------+-----------------------+------------------+--------------+-----------------+------------------+------------------+----------------+---------------------+--------------------+------------------+------------+--------------+------------------------+----------+------------+-------------+--------------+---------------+-------------+-----------------+----------------------+-----------------------+-----------------------+------------------+
5 rows in set (0.00 sec)mysql>
3.博主的表中是修改之后的表了,想要远程访问,就需要上边红色标注的数据了,Host指的是可以访问此数据库的ip地址,%代表的是所有的请求都可以连接进来。
2. Draußen Um über das Internet auf die Adresse in der virtuellen Maschine zuzugreifen, müssen wir die Apache-Konfigurationsdatei /etc/httpd/conf/httpd.conf ändern
use use with :80 Ändern zu ServerName localhost:80
Wie rechts gezeigt:
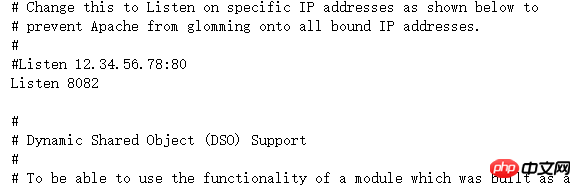
80XX)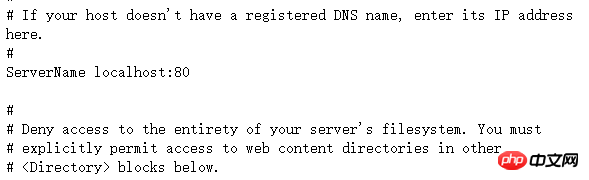
mysql> \q
Bye
4. Zu diesem Zeitpunkt können Sie auf Ihren Server zugreifen, localhost oder IP-Adresse eingeben und eine von Centos betriebene Apache-Testseite wird angezeigt erscheinen
PHP installieren
1. PHP-Installationsbefehl
[root@tele-2 ~]# yum install httpd
2. Installieren Sie es direkt nach dem Die Installation ist abgeschlossen. Starten Sie den httpd-Dienst erneut.
[root@tele-2 ~]# service httpd startRedirecting to /bin/systemctl start  httpd.service
[root@tele-2 ~]# service httpd statusRedirecting to /bin/systemctl status  httpd.service
● httpd.service - The Apache HTTP Server
   Loaded: loaded (/usr/lib/systemd/system/httpd.service; enabled; vendor preset: disabled)
   Active: active (running) since Mon 2017-06-05 15:57:34 CST; 5s ago
     Docs: man:httpd(8)
           man:apachectl(8)
  Process: 54532 ExecStop=/bin/kill -WINCH ${MAINPID} (code=exited, status=0/SUCCESS)
  Process: 39046 ExecReload=/usr/sbin/httpd $OPTIONS -k graceful (code=exited, status=0/SUCCESS)
 Main PID: 54573 (httpd)
   Status: "Processing requests..."
   Memory: 15.8M
   CGroup: /system.slice/httpd.service
           ├─54573 /usr/sbin/httpd -DFOREGROUND
           ├─54576 /usr/sbin/httpd -DFOREGROUND
           ├─54577 /usr/sbin/httpd -DFOREGROUND
           ├─54578 /usr/sbin/httpd -DFOREGROUND
           ├─54579 /usr/sbin/httpd -DFOREGROUND
           └─54580 /usr/sbin/httpd -DFOREGROUND

Jun 05 15:57:34 tele-2 systemd[1]: Starting The Apache HTTP Server...Jun 05 15:57:34 tele-2 systemd[1]: Started The Apache HTTP Server.
3. Nach dem Neustart testen wir die PHP-bezogenen Informationen. Wir erstellen eine neue PHP-Schnittstelle zum Testen. Erstellen Sie einen neuen Test. php-Seite unter dem Apache-Standardseitenpfad
und fügen Sie den Code[root@tele-2 ~]# yum install php
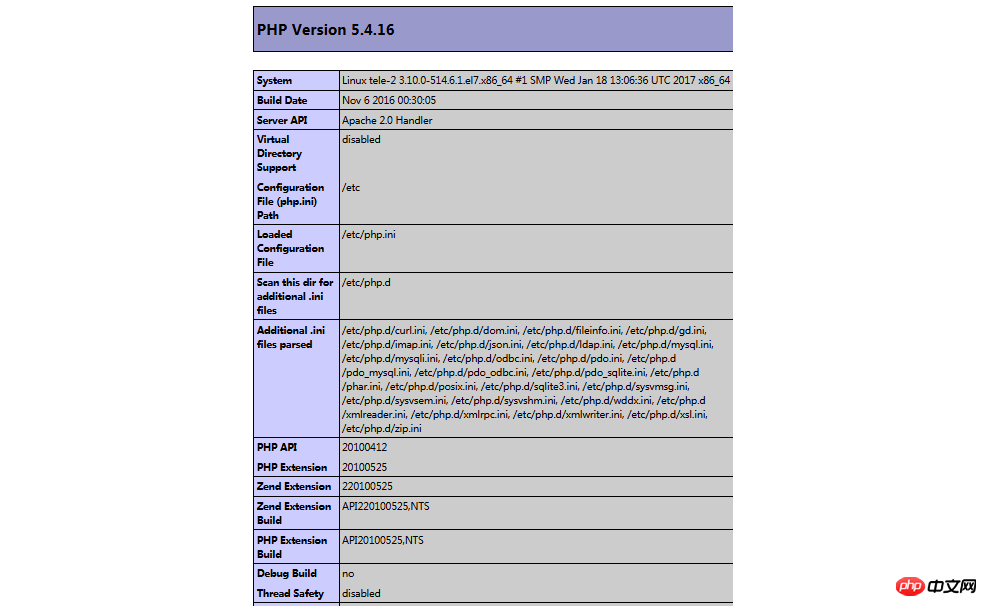
hinzu. 4. Besuchen Sie diese Seite, geben Sie localhost/test.php ein. oder
ip:port number/test.php, um die Konfigurationsinformationen der PHP-Umgebung anzuzeigen. Wie rechts gezeigt: /var/www/html
1. Suchmodul
[root@tele-2 ~]# service httpd startRedirecting to /bin/systemctl start httpd.service
2. Verwandte Module installieren
<?php phpinfo();?>
3. Die Installation ist abgeschlossen, mysqld neu starten, httpd neu starten
Besuchen Sie gerade die info.php erneut. Wir haben festgestellt, dass es mehr mit MySQL zu tun hat Information. Wie rechts gezeigt: Zu diesem Zeitpunkt wurde die PHP-Betriebsumgebung in Linux erfolgreich konfiguriert. 1.mysql yum Installations-Standardordner und zugehörige Befehle[root@tele-2 ~]# yum search php
 2.Apache
[root@tele-2 ~]# yum install php-mysql php-gd php-imap php-ldap php-odbc php-pear php-xml php-xmlrpc
3.php
/var/lib/mysql/

:/usr/share/mysql(mysql.server)

/usr/bin(mysqladmin mysqldump)

my.cnf: /etc/my.cnf

:/etc/rc.d/init.d/mysql
:service mysql start
停止命令:service mysql stop
运行状态:service mysql status
Empfohlene verwandte Artikel:
Parsen der TAL-Template-Engine-Syntax in PHP (Code) Einführung in das Upgrade von PHP7 für den Betrieb von MongoDBDas obige ist der detaillierte Inhalt vonSo stellen Sie eine PHP-Projektumgebung unter einem Linux-System bereit. Für weitere Informationen folgen Sie bitte anderen verwandten Artikeln auf der PHP chinesischen Website!
In Verbindung stehende Artikel
Mehr sehen- So verwenden Sie cURL zum Implementieren von Get- und Post-Anfragen in PHP
- So verwenden Sie cURL zum Implementieren von Get- und Post-Anfragen in PHP
- So verwenden Sie cURL zum Implementieren von Get- und Post-Anfragen in PHP
- So verwenden Sie cURL zum Implementieren von Get- und Post-Anfragen in PHP
- Alle Ausdruckssymbole in regulären Ausdrücken (Zusammenfassung)