Heim >Web-Frontend >js-Tutorial >So implementieren Sie ein Bildkarussell mit Vue
So implementieren Sie ein Bildkarussell mit Vue
- php中世界最好的语言Original
- 2018-06-14 14:46:515157Durchsuche
Dieses Mal zeige ich Ihnen, wie Sie Vue zum Implementieren eines Bildkarussells verwenden und welche Vorsichtsmaßnahmen für die Verwendung von Vue zum Implementieren eines Bildkarussells gelten. Das Folgende ist ein praktischer Fall, schauen wir uns das an.
Ich habe noch nie ernsthaft eine Komponente geschrieben. In der Vergangenheit habe ich beim Schreiben von Geschäftscode immer Komponenten verwendet, die von anderen gepackt wurden. Diesmal habe ich versucht, eine Bildkarussellkomponente zu schreiben. Obwohl sie nicht so gut ist wie die bekannte Karussellkomponente, sind ihre Funktionen im Grunde vollständig Beim Schreiben dieser Komponente habe ich viel gelernt und werde es hier mit Ihnen teilen. Wenn es Auslassungen gibt, korrigieren Sie mich bitte!
Bevor der Autor diese Komponente erstellt hat, hat er viele Artikel über Karussells gegoogelt und festgestellt, dass die Ideen zur Implementierung eines Karussells zwar unterschiedlich sind, die allgemeine Logik jedoch tatsächlich dieselbe ist. Dieser Artikel basiert hauptsächlich auf dem Fokusrad Auf MOOC. Für die Lektion zu Spezialeffekten für die Übertragung von Bildern verwendet MOOC hauptsächlich natives JS, um sie zu schreiben, während der Autor sie mit Vue rekonstruiert und einige Änderungen vorgenommen hat. Die fertigen Komponentendarstellungen lauten wie folgt:

1. Klären Sie die Ideen, verstehen Sie die Bedürfnisse und Prinzipien
1. Was für ein Karussell solltest du schreiben?
Wenn Sie auf den Pfeil rechts klicken, wird das Bild nach links zum nächsten Bild verschoben. Wenn Sie auf den Pfeil links klicken, wird das Bild verschoben direkt zum nächsten Bild
Klicken Sie auf den kleinen Punkt unten, schieben Sie zum entsprechenden Bild und der Stil des entsprechenden kleinen Punktes ändert sich ebenfalls
-
Um einen Übergangseffekt zu erzielen, schieben Sie langsam vorbei
Wenn die Maus über dem Bild schwebt, wird das Karussell angehalten, und wenn die Maus es verlässt, wird das Karussell fortgesetzt
Auto-Play-Funktion
Unendliches Scrollen, d. h. beim Scrollen zum letzten Bild, wenn Sie auf das nächste Bild klicken, wird es weiter verschoben Links zum ersten Bild, anstatt das Ganze zum ersten Bild zu ziehen.
Verstehen Sie das Prinzip des unendlichen Karussells >
Werfen wir zunächst einen Blick auf das schematische Diagramm: 


2. Lassen Sie die Bilder zuerst wechseln
1 Bereiten Sie sich vor
<template>
 <p id="slider">
  <p class="window">  // window上图中红线框
   <ul class="container" :style="containerStyle"> //注意这里的:style //这是图片列表,排成一排
    <li> //列表最前面的辅助图,它和图5一样,用于无限滚动
     <img :src="sliders[sliders.length - 1].img" alt="">
    </li>
    <li v-for="(item, index) in sliders" :key="index"> //通过v-for渲染的需要展示的5张图
     <img :src="item.img" alt="">
    </li>
    <li> //列表最后面的辅助图,它和图1一样,用于无限滚动
     <img :src="sliders[0].img" alt="">
    </li>
   </ul>
   <ul class="direction"> //两侧的箭头
    <li class="left">
     <svg class="icon" width="30px" height="30.00px" viewBox="0 0 1024 1024" version="1.1" xmlns="http://www.w3.org/2000/svg"><path fill="#ffffff" d="M481.233 904c8.189 0 16.379-3.124 22.628-9.372 12.496-12.497 12.496-32.759 0-45.256L166.488 512l337.373-337.373c12.496-12.497 12.496-32.758 0-45.255-12.498-12.497-32.758-12.497-45.256 0l-360 360c-12.496 12.497-12.496 32.758 0 45.255l360 360c6.249 6.249 14.439 9.373 22.628 9.373z" /></svg>
    </li>
    <li class="right">
     <svg class="icon" width="30px" height="30.00px" viewBox="0 0 1024 1024" version="1.1" xmlns="http://www.w3.org/2000/svg"><path fill="#ffffff" d="M557.179 904c-8.189 0-16.379-3.124-22.628-9.372-12.496-12.497-12.496-32.759 0-45.256L871.924 512 534.551 174.627c-12.496-12.497-12.496-32.758 0-45.255 12.498-12.497 32.758-12.497 45.256 0l360 360c12.496 12.497 12.496 32.758 0 45.255l-360 360c-6.249 6.249-14.439 9.373-22.628 9.373z" /></svg>
    </li>
   </ul>
   <ul class="dots"> //下面的小圆点
    <li v-for="(dot, i) in sliders" :key="i"
    :class="{dotted: i === (currentIndex-1)}"
    >
    </li>
   </ul>
  </p>
 </p>
</template>
<script>
export default {
 name: 'slider',
 data () {
  return {
   sliders:[
    {
     img:'../../static/images/1.jpg'
    },
    {
     img:'../../static/images/2.jpg'
    },
    {
     img:'../../static/images/3.jpg'
    },
    {
     img:'../../static/images/4.jpg'
    },
    {
     img:'../../static/images/5.jpg'
    }
   ],
   currentIndex:1,
   distance:-600
  }
 },
 computed:{
  containerStyle() { //这里用了计算属性,用transform来移动整个图片列表
   return {
    transform:`translate3d(${this.distance}px, 0, 0)`
   }
  }
 }
}
</script>
Okay, das Layout ist wahrscheinlich so, das Rendering ist wie folgt:

- Das Fenster ist ein roter Linienrahmen mit einer Breite von 600 Pixeln. Es wird sich nicht bewegen, ist der Container, der das Bild umhüllt lautet: style=" containerStyle", dies ist eine berechnete Eigenschaft. Verwenden Sie transform:translate3d(${this.distance, 0, 0}), um die linke und rechte Bewegung
- Distanz und zu steuern Der aktuelle Index in den Daten ist der Schlüssel, die Distanz steuert die Bewegungsdistanz, der Standardwert ist -600 und zeigt das zweite von 7 Bildern an, nämlich Abbildung 1. currentIndex ist der Index des vom Fenster angezeigten Bildes. Der Standardwert ist hier 1, was auch das zweite Bild unter den 7 Bildern ist.
- Es müssen nur 5 Bilder angezeigt werden, aber ein Bild 5 wird vor Bild 1 und ein Bild 1 nach Bild 5 platziert, um ein unendliches Scrollen zu erreichen. Das Prinzip wurde bereits erwähnt
- Wenn Sie auf den Pfeil rechts klicken, bewegt sich der Container nach links und der Abstand wird immer kleiner, wenn Sie auf den Pfeil links klicken. Der Behälter bewegt sich nach rechts und der Abstand wird immer größer. Machen Sie nicht die falsche Richtung.
2. 图片切换
我们在左侧和右侧的箭头上添加点击事件:
<ul class="direction">
    <li class="left" @click="move(600, 1)">
     <svg class="icon" width="30px" height="30.00px" viewBox="0 0 1024 1024" version="1.1" xmlns="http://www.w3.org/2000/svg"><path fill="#ffffff" d="M481.233 904c8.189 0 16.379-3.124 22.628-9.372 12.496-12.497 12.496-32.759 0-45.256L166.488 512l337.373-337.373c12.496-12.497 12.496-32.758 0-45.255-12.498-12.497-32.758-12.497-45.256 0l-360 360c-12.496 12.497-12.496 32.758 0 45.255l360 360c6.249 6.249 14.439 9.373 22.628 9.373z" /></svg>
    </li>
    <li class="right" @click="move(600, -1)">
     <svg class="icon" width="30px" height="30.00px" viewBox="0 0 1024 1024" version="1.1" xmlns="http://www.w3.org/2000/svg"><path fill="#ffffff" d="M557.179 904c-8.189 0-16.379-3.124-22.628-9.372-12.496-12.497-12.496-32.759 0-45.256L871.924 512 534.551 174.627c-12.496-12.497-12.496-32.758 0-45.255 12.498-12.497 32.758-12.497 45.256 0l360 360c12.496 12.497 12.496 32.758 0 45.255l-360 360c-6.249 6.249-14.439 9.373-22.628 9.373z" /></svg>
    </li>
   </ul>
   ......
   methods:{
      move(offset, direction) {
        this.distance += this.distance * direction
        if (this.distance < -3000) this.distance = -600
        if (this.distance > -600) this.distance = -3000
      }
   }
解释下上面的代码:点击左侧或者右侧的箭头,调用move函数,move接收偏移量offset和方向direction两个参数。direction只传两个值,1表示container向右移动,-1表示container向左移动;偏移量是600,也就是一张图片的宽度。如果移动到7张图片的最后一张,就把container拉到7张图片里的第二张;如果移动到7张图片里第一张,就把container拉到7张图片里的第5张。
效果:
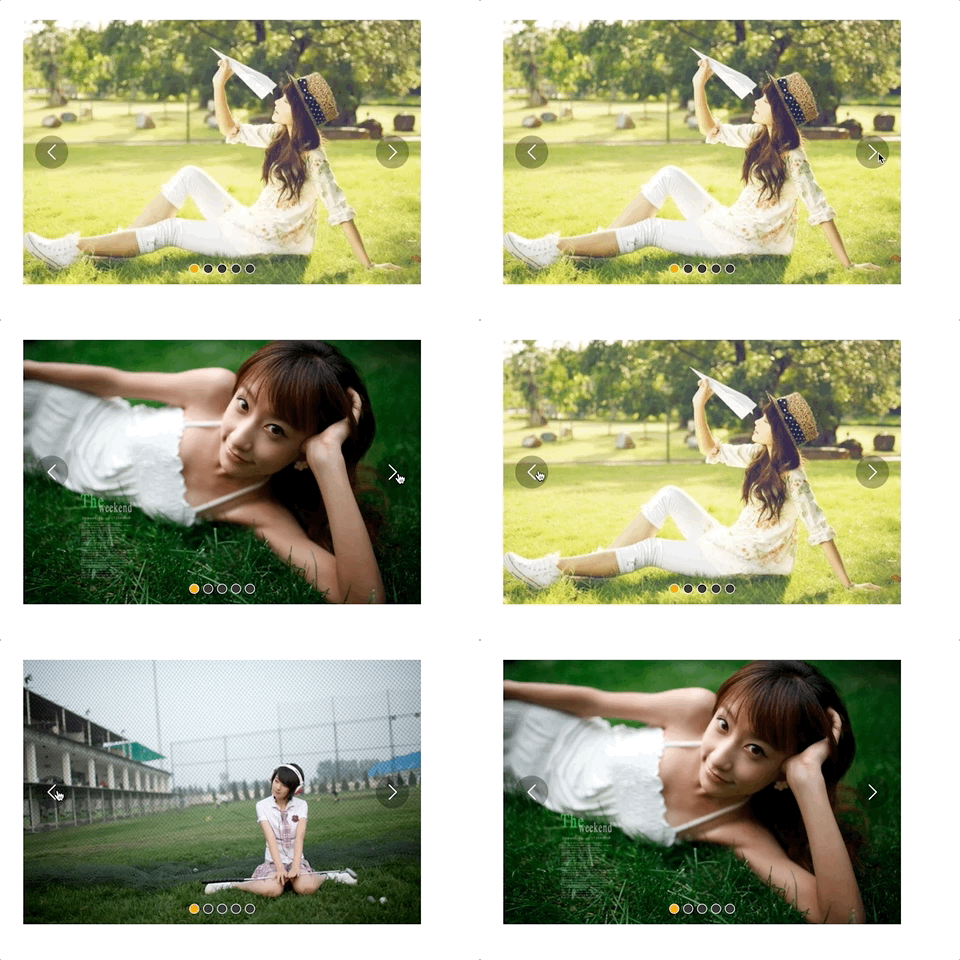
可以看到,图片切换效果已经出来了,但是下面的小圆点没有跟着变换。接下来我们把这个效果加上。从上面的html代码可以看到, :class="{dotted: i === (currentIndex - 1)}" ,小圆点的切换效果和data里的currentIndex值相关,我们只要随着图片切换变动currentIndex值就可以了。
修改move方法里的代码:
......
move(offset, direction) {
  direction === -1 ? this.currentIndex++ : this.currentIndex--
  if (this.currentIndex > 5) this.currentIndex = 1
  if (this.currentIndex < 1) this.currentIndex = 5
  this.distance = this.distance + offset * direction
  if (this.distance < -3000) this.distance = -600
  if (this.distance > -600) this.distance = -3000
  }
上面的添加的三行代码很好理解,如果是点击右侧箭头,container就是向左移动, this.currentIndex 就是减1,反之就是加1。
效果:
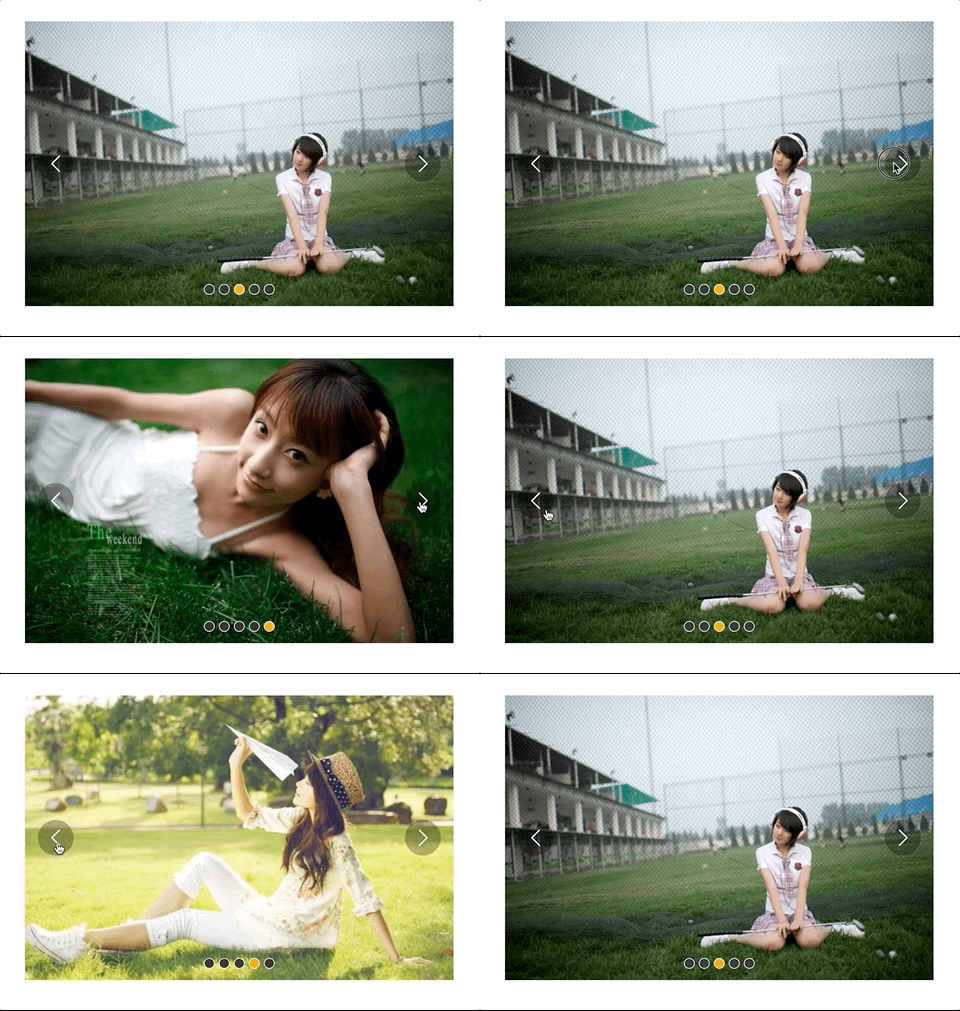
可以看到,小圆点的切换效果已经出来了。
三、过渡动画
上面的代码已经实现了切换,但是没有动画效果,显的非常生硬,接下来就是给每个图片的切换过程添加过渡效果。
这个轮播组件笔者并没有使用Vue自带的class钩子,也没有直接使用css的transition属性,而是用慕课网原作者讲的setTimeout方法加递归来实现。
其实我也试过使用Vue的钩子,但是总有一些小问题解决不掉;比如下面找到的这个例子:例子
这个例子在过渡的边界上有一些问题,我也遇到了,而且还是时有时无。而如果使用css的transition过渡方法,在处理边界的无限滚动上总会在chrome浏览器上有一下闪动,即使添加了 -webkit-transform-style:preserve-3d; 和 -webkit-backface-visibility:hidden 也还是没用,而且要配合transition的 transitionend 事件对于IE浏览器的支持也不怎么好。
如果大家有看到更好的办法,请在评论中留言哦~
下面我们来写这个过渡效果,主要是改写:
methods:{
  move(offset, direction) {
    direction === -1 ? this.currentIndex++ : this.currentIndex--
    if (this.currentIndex > 5) this.currentIndex = 1
    if (this.currentIndex < 1) this.currentIndex = 5
    const destination = this.distance + offset * direction
    this.animate(destination, direction)
  },
  animate(des, direc) {
    if ((direc === -1 && des < this.distance) || (direc === 1 && des > this.distance)) {
      this.distance += 30 * direc
      window.setTimeout(() => {
        this.animate(des, direc)
      }, 20)
    } else {
      this.distance = des
      if (des < -3000) this.distance = -600
      if (des > -600) this.distance = -3000
   }
  }
}
上面的代码是这个轮播我觉得最麻烦、也是最难理解的地方。
来理解一下:首先,我们对于move方法进行了改写,因为要一点点的移动,所以要先算出要移动到的目标距离。然后,我们写一个animate函数来实现这个过渡。这个animate函数接收两个参数,一个是要移动到的距离,另一个是方向。 如果我们点击了右侧的箭头,container要向左侧移动,要是没有移动到目标距离,就在 this.distance 减去一定的距离,如果减去后还是没有到达,在20毫米以后再调用这个 this.animate ,如此不断移动,就形成了过渡效果。而如果移动到了目标距离,那就将目标距离赋值给 this.distance ,然后再进行边界和无限滚动的判断。
当然,使用 window.setInterval() 也可以实现这个效果,而且会稍微好理解一点,因为没有用到递归:
methods:{
  move(offset, direction) {
    direction === -1 ? this.currentIndex++ : this.currentIndex--
    if (this.currentIndex > 5) this.currentIndex = 1
    if (this.currentIndex < 1) this.currentIndex = 5
    const destination = this.distance + offset * direction
    this.animate(destination, direction)
  },
  animate(des, direc) {
    const temp = window.setInterval(() => {
      if ((direc === -1 && des < this.distance) || (direc === 1 && des > this.distance)) {
        this.distance += 30 * direc
      } else {
        window.clearInterval(temp)
        this.distance = des
        if (des < -3000) this.distance = -600
        if (des > -600) this.distance = -3000
      }
    }, 20)
  }
}
实现出来的效果如下:

四、简单节流一下
写到这里,效果是出来了,但是会有一点问题,如果多次快速点击,就会有可能出现下面这种情况:
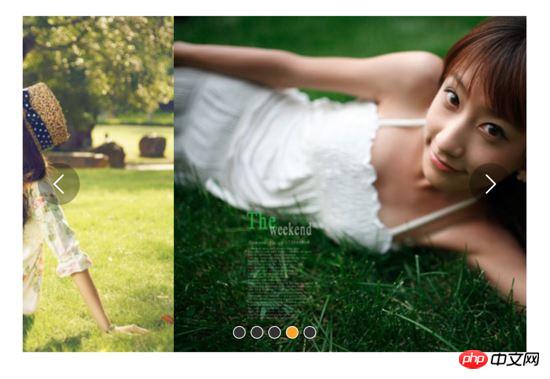
出现这种情况的原因很简单,因为是使用定时器过渡,所以连续快速点击就会出现错乱,简单节流一下就好了: 在过渡完成之前点击箭头无效,其实就是设了一个闸,第一次点击把闸打开,在闸再次打开之前,让一部分代码无法执行,然后再在恰当的时机把闸打开。
我们把这个闸设在move函数里:
move(offset, direction) {
  if (!this.transitionEnd) return //这里是闸
  this.transitionEnd = false    //开闸以后再把闸关上
  direction === -1 ? this.currentIndex++ : this.currentIndex--
  if (this.currentIndex > 5) this.currentIndex = 1
  if (this.currentIndex < 1) this.currentIndex = 5
  const destination = this.distance + offset * direction
  this.animate(destination, direction)
}
this.transitionEnd 是这个闸的钥匙,我们把它放到data里:
this.transitionEnd: true
这个闸一开始默认的状态是开着的,第一次点击以后,这个闸就关上了, this.tranisitonEnd = false ,在再次打开之前,后面的代码都执行不了。接下来就是在恰当的时机把这个闸打开,而这个恰当的时机就是过渡完成时,也就是在 animate函数 里:
animate(des, direc) {
  if (this.temp) {
    window.clearInterval(this.temp)
    this.temp = null
  }
  this.temp = window.setInterval(() => {
    if ((direc === -1 && des < this.distance) || (direc === 1 && des > this.distance)) {
     this.distance += 30 * direc
    } else {
     this.transitionEnd = true   //闸再次打开
     window.clearInterval(this.temp)
     this.distance = des
     if (des < -3000) this.distance = -600
     if (des > -600) this.distance = -3000
    }
  }, 20)
}
这下快速点击就没有之前的那个问题了:

五、点击小圆点实现图片过渡切换
到目前为止的代码:
<template>
 <p id="slider">
  <p class="window">
   <ul class="container" :style="containerStyle">
    <li>
     <img :src="sliders[sliders.length - 1].img" alt="">
    </li>
    <li v-for="(item, index) in sliders" :key="index">
     <img :src="item.img" alt="">
    </li>
    <li>
     <img :src="sliders[0].img" alt="">
    </li>
   </ul>
   <ul class="direction">
    <li class="left" @click="move(600, 1)">
     <svg class="icon" width="30px" height="30.00px" viewBox="0 0 1024 1024" version="1.1" xmlns="http://www.w3.org/2000/svg"><path fill="#ffffff" d="M481.233 904c8.189 0 16.379-3.124 22.628-9.372 12.496-12.497 12.496-32.759 0-45.256L166.488 512l337.373-337.373c12.496-12.497 12.496-32.758 0-45.255-12.498-12.497-32.758-12.497-45.256 0l-360 360c-12.496 12.497-12.496 32.758 0 45.255l360 360c6.249 6.249 14.439 9.373 22.628 9.373z" /></svg>
    </li>
    <li class="right" @click="move(600, -1)">
     <svg class="icon" width="30px" height="30.00px" viewBox="0 0 1024 1024" version="1.1" xmlns="http://www.w3.org/2000/svg"><path fill="#ffffff" d="M557.179 904c-8.189 0-16.379-3.124-22.628-9.372-12.496-12.497-12.496-32.759 0-45.256L871.924 512 534.551 174.627c-12.496-12.497-12.496-32.758 0-45.255 12.498-12.497 32.758-12.497 45.256 0l360 360c12.496 12.497 12.496 32.758 0 45.255l-360 360c-6.249 6.249-14.439 9.373-22.628 9.373z" /></svg>
    </li>
   </ul>
   <ul class="dots">
    <li v-for="(dot, i) in sliders" :key="i"
    :class="{dotted: i === (currentIndex-1)}"
    >
    </li>
   </ul>
  </p>
 </p>
</template>
<script>
export default {
 name: 'slider',
 data () {
  return {
   sliders:[
    {
     img:'../../static/images/1.jpg'
    },
    {
     img:'../../static/images/2.jpg'
    },
    {
     img:'../../static/images/3.jpg'
    },
    {
     img:'../../static/images/4.jpg'
    },
    {
     img:'../../static/images/5.jpg'
    }
   ],
   currentIndex:1,
   distance:-600,
   transitionEnd: true
  }
 },
 computed:{
  containerStyle() {
   return {
    transform:`translate3d(${this.distance}px, 0, 0)`
   }
  }
 },
 methods:{
  move(offset, direction) {
   if (!this.transitionEnd) return
   this.transitionEnd = false
   direction === -1 ? this.currentIndex++ : this.currentIndex--
   if (this.currentIndex > 5) this.currentIndex = 1
   if (this.currentIndex < 1) this.currentIndex = 5
   const destination = this.distance + offset * direction
   this.animate(destination, direction)
  },
  animate(des, direc) {
   if (this.temp) {
    window.clearInterval(this.temp)
    this.temp = null
   }
   this.temp = window.setInterval(() => {
    if ((direc === -1 && des < this.distance) || (direc === 1 && des > this.distance)) {
     this.distance += 30 * direc
    } else {
     this.transitionEnd = true
     window.clearInterval(this.temp)
     this.distance = des
     if (des < -3000) this.distance = -600
     if (des > -600) this.distance = -3000
    }
   }, 20)
  }
 }
}
</script>
接下来我们要实现点击下面的小圆点来实现过渡和图片切换。
<ul class="dots">
  <li v-for="(dot, i) in sliders" :key="i"
  :class="{dotted: i === (currentIndex-1)}"
  @click = jump(i+1)>
  </li>
</ul>
在点击小圆点的时候我们调用 jump 函数,并将索引 i+1 传给它。 这里需要特别注意,小圆点的索引和图片对应的索引不一致,图片共7张,而5个小圆点对应的是图片中中间的5张,所以我们才传 i+1 。
jump(index) {
  const direction = index - this.currentIndex >= 0 ? -1 : 1 //获取滑动方向
  const offset = Math.abs(index - this.currentIndex) * 600  //获取滑动距离
  this.move(offset, direction)
}
上面的代码有一个问题,在jump函数里调用move方法,move里对于currentIndex的都是 +1 ,而点击小圆点可能是将 currentIndex 加或者减好多个,所以要对move里的代码修改下:
direction === -1 ? this.currentIndex += offset/600 : this.currentIndex -= offset/600
改一行,根据offset算出currentIndex就行了。
但是又有一个问题,长距离切换速度太慢,如下:

所以我们需要控制一下速度,让滑动一张图片耗费的时间和滑动多张图片耗费的时间一样,给move和animate函数添加一个speed参数,还要再算一下:
jump(index) {
  const direction = index - this.currentIndex >= 0 ? -1 : 1
  const offset = Math.abs(index - this.currentIndex) * 600
  const jumpSpeed = Math.abs(index - this.currentIndex) === 0 ? this.speed : Math.abs(index - this.currentIndex) * this.speed
  this.move(offset, direction, jumpSpeed)
}
六、自动播放与暂停
前面的写的差不多了,到这里就非常简单了,写一个函数play:
play() {
  if (this.timer) {
    window.clearInterval(this.timer)
    this.timer = null
  }
  this.timer = window.setInterval(() => {
    this.move(600, -1, this.speed)
  }, 4000)
}
除了初始化以后自动播放,还要通过mouseover和mouseleave来控制暂停与播放:
stop() {
  window.clearInterval(this.timer)
  this.timer = null
}
七、 两处小坑
1. window.onblur 和 window.onfocus
写到这里,基本功能都差不多了。但是如果把页面切换到别的页面,导致轮播图所在页面失焦,过一段时间再切回来会发现轮播狂转。原因是页面失焦以后,setInterval停止运行,但是如果切回来就会一次性把该走的一次性走完。解决的方法也很简单,当页面失焦时停止轮播,页面聚焦时开始轮播。
window.onblur = function() { this.stop() }.bind(this)
window.onfocus = function() { this.play() }.bind(this)
2. window.setInterval() 小坑
当定时器 window.setInterval() 在多个异步回调中使用时,就有可能在某种机率下开启多个执行队列, 所以为了保险起见,不仅应该在该清除时清除定时器,还要在每次使用之前也清除一遍 。
八、用props简单写两个对外接口
props: {
  initialSpeed: {
   type: Number,
   default: 30
  },
  initialInterval: {
   type: Number,
   default: 4
  }
},
data() {
  ......
  speed: this.initialSpeed
},
computed:{
  interval() {
    return this.initialInterval * 1000
  }
}
然后再在相应的地方修改下就可以了。
完整的代码如下:
<template>
 <p id="slider">
  <p class="window" @mouseover="stop" @mouseleave="play">
   <ul class="container" :style="containerStyle">
    <li>
     <img :src="sliders[sliders.length - 1].img" alt="">
    </li>
    <li v-for="(item, index) in sliders" :key="index">
     <img :src="item.img" alt="">
    </li>
    <li>
     <img :src="sliders[0].img" alt="">
    </li>
   </ul>
   <ul class="direction">
    <li class="left" @click="move(600, 1, speed)">
     <svg class="icon" width="30px" height="30.00px" viewBox="0 0 1024 1024" version="1.1" xmlns="http://www.w3.org/2000/svg"><path fill="#ffffff" d="M481.233 904c8.189 0 16.379-3.124 22.628-9.372 12.496-12.497 12.496-32.759 0-45.256L166.488 512l337.373-337.373c12.496-12.497 12.496-32.758 0-45.255-12.498-12.497-32.758-12.497-45.256 0l-360 360c-12.496 12.497-12.496 32.758 0 45.255l360 360c6.249 6.249 14.439 9.373 22.628 9.373z" /></svg>
    </li>
    <li class="right" @click="move(600, -1, speed)">
     <svg class="icon" width="30px" height="30.00px" viewBox="0 0 1024 1024" version="1.1" xmlns="http://www.w3.org/2000/svg"><path fill="#ffffff" d="M557.179 904c-8.189 0-16.379-3.124-22.628-9.372-12.496-12.497-12.496-32.759 0-45.256L871.924 512 534.551 174.627c-12.496-12.497-12.496-32.758 0-45.255 12.498-12.497 32.758-12.497 45.256 0l360 360c12.496 12.497 12.496 32.758 0 45.255l-360 360c-6.249 6.249-14.439 9.373-22.628 9.373z" /></svg>
    </li>
   </ul>
   <ul class="dots">
    <li v-for="(dot, i) in sliders" :key="i"
    :class="{dotted: i === (currentIndex-1)}"
    @click = jump(i+1)
    >
    </li>
   </ul>
  </p>
 </p>
</template>
<script>
export default {
 name: 'slider',
 props: {
  initialSpeed: {
   type: Number,
   default: 30
  },
  initialInterval: {
   type: Number,
   default: 4
  }
 },
 data () {
  return {
   sliders:[
    {
     img:'../../static/images/1.jpg'
    },
    {
     img:'../../static/images/2.jpg'
    },
    {
     img:'../../static/images/3.jpg'
    },
    {
     img:'../../static/images/4.jpg'
    },
    {
     img:'../../static/images/5.jpg'
    }
   ],
   currentIndex:1,
   distance:-600,
   transitionEnd: true,
   speed: this.initialSpeed
  }
 },
 computed:{
  containerStyle() {
   return {
    transform:`translate3d(${this.distance}px, 0, 0)`
   }
  },
  interval() {
   return this.initialInterval * 1000
  }
 },
 mounted() {
  this.init()
 },
 methods:{
  init() {
   this.play()
   window.onblur = function() { this.stop() }.bind(this)
   window.onfocus = function() { this.play() }.bind(this)
  },
  move(offset, direction, speed) {
   if (!this.transitionEnd) return
   this.transitionEnd = false
   direction === -1 ? this.currentIndex += offset/600 : this.currentIndex -= offset/600
   if (this.currentIndex > 5) this.currentIndex = 1
   if (this.currentIndex < 1) this.currentIndex = 5
   const destination = this.distance + offset * direction
   this.animate(destination, direction, speed)
  },
  animate(des, direc, speed) {
   if (this.temp) {
    window.clearInterval(this.temp)
    this.temp = null
   }
   this.temp = window.setInterval(() => {
    if ((direc === -1 && des < this.distance) || (direc === 1 && des > this.distance)) {
     this.distance += speed * direc
    } else {
     this.transitionEnd = true
     window.clearInterval(this.temp)
     this.distance = des
     if (des < -3000) this.distance = -600
     if (des > -600) this.distance = -3000
    }
   }, 20)
  },
  jump(index) {
   const direction = index - this.currentIndex >= 0 ? -1 : 1
   const offset = Math.abs(index - this.currentIndex) * 600
   const jumpSpeed = Math.abs(index - this.currentIndex) === 0 ? this.speed : Math.abs(index - this.currentIndex) * this.speed
   this.move(offset, direction, jumpSpeed)
  },
  play() {
   if (this.timer) {
    window.clearInterval(this.timer)
    this.timer = null
   }
   this.timer = window.setInterval(() => {
    this.move(600, -1, this.speed)
   }, this.interval)
  },
  stop() {
   window.clearInterval(this.timer)
   this.timer = null
  }
 }
}
</script>
相信看了本文案例你已经掌握了方法,更多精彩请关注php中文网其它相关文章!
推荐阅读:
Das obige ist der detaillierte Inhalt vonSo implementieren Sie ein Bildkarussell mit Vue. Für weitere Informationen folgen Sie bitte anderen verwandten Artikeln auf der PHP chinesischen Website!
In Verbindung stehende Artikel
Mehr sehen- Eine eingehende Analyse der Bootstrap-Listengruppenkomponente
- Detaillierte Erläuterung des JavaScript-Funktions-Curryings
- Vollständiges Beispiel für die Generierung von JS-Passwörtern und die Erkennung der Stärke (mit Download des Demo-Quellcodes)
- Angularjs integriert WeChat UI (weui)
- Wie man mit JavaScript schnell zwischen traditionellem Chinesisch und vereinfachtem Chinesisch wechselt und wie Websites den Wechsel zwischen vereinfachtem und traditionellem Chinesisch unterstützen – Javascript-Kenntnisse

