Heim >Web-Frontend >js-Tutorial >Wie man mit Vue Bilder zuschneidet und sie gleichzeitig vergrößert, verkleinert und dreht (ausführliches Tutorial)
Wie man mit Vue Bilder zuschneidet und sie gleichzeitig vergrößert, verkleinert und dreht (ausführliches Tutorial)
- 亚连Original
- 2018-06-02 09:16:065156Durchsuche
In diesem Artikel wird hauptsächlich vorgestellt, wie Vue Bilder zuschneiden und gleichzeitig vergrößern, verkleinern und drehen kann. Jetzt teile ich ihn mit Ihnen und gebe ihn als Referenz.
In diesem Artikel wird hauptsächlich das Zuschneiden von Bildern beim Vergrößern, Verkleinern und Drehen vorgestellt. Ich möchte sie mit Ihnen teilen:
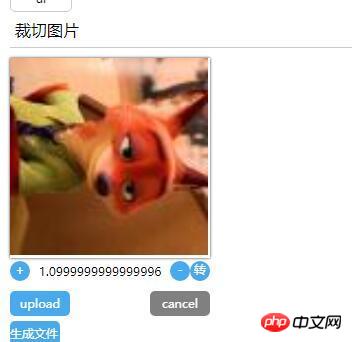
Erzielter Effekt :
Bild innerhalb des angegebenen Bereichs zuschneiden
Bild drehen
Vergrößern Sie das Bild
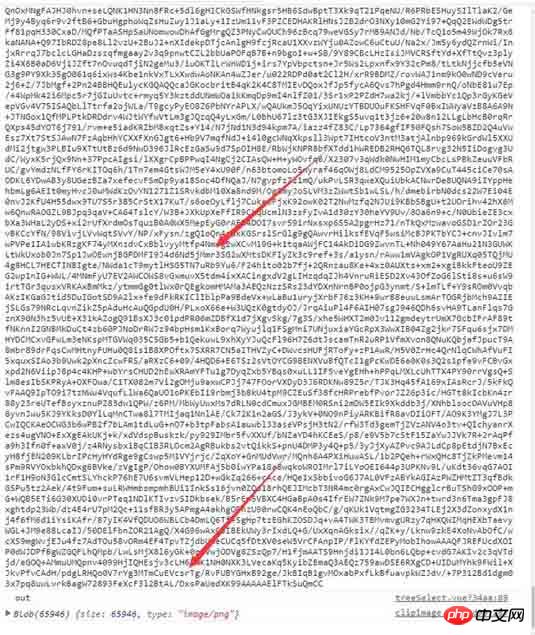
Die Ausgabedaten im Bol-Format werden dem formData-Objekt bereitgestellt
Rendering


Allgemeines Prinzip:
Verwenden Sie die h5 FileReader-Objekt zum Abrufen von 904906bb44f584d8dd536d0c81c60fbd "In den Browser hochgeladene Datei". Das Dateiformat ist das Base64-Format. Weisen Sie dem Canvas-Kontext Base64 zu.
Fügen Sie dann ein (Mousedown-)Hörereignis zum Canvas-Element hinzu. Wenn der Benutzer die linke Maustaste auf der Leinwand drückt:
Mousemove-Ereignis des Fensterobjekts einhängen ---> Die Leinwandposition wird verschoben.
Mounten Sie das Mouseup-Ereignis des Fensterobjekts und löschen Sie die Bindung des Mousemove-Ereignisses. (Gleichzeitig wird dieses Ereignis nach dem Auslösen gelöscht.)
Das verbleibende Zoomen, Verkleinern und Drehen sind Vorgänge am Leinwandobjekt/Koordinatensystem. Einzelheiten zur spezifischen API finden Sie im MDN-Canvas-Dokument
Code
dom.js
export const on = ({el, type, fn}) => {
if (typeof window) {
if (window.addEventListener) {
el.addEventListener(type, fn, false)
} else {
el.attachEvent(`on${type}`, fn)
}
}
}
export const off = ({el, type, fn}) => {
if (typeof window) {
if (window.addEventListener) {
el.removeEventListener(type, fn)
} else {
el.detachEvent(`on${type}`, fn)
}
}
}
export const once = ({el, type, fn}) => {
const hyFn = (event) => {
try {
fn(event)
}
finally {
off({el, type, fn: hyFn})
}
}
on({el, type, fn: hyFn})
}
// 最后一个
export const fbTwice = ({fn, time = 300}) => {
let [cTime, k] = [null, null]
// 获取当前时间
const getTime = () => new Date().getTime()
// 混合函数
const hyFn = () => {
const ags = argments
return () => {
clearTimeout(k)
k = cTime = null
fn(...ags)
}
}
return () => {
if (cTime == null) {
k = setTimeout(hyFn(...arguments), time)
cTime = getTime()
} else {
if ( getTime() - cTime < 0) {
// 清除之前的函数堆 ---- 重新记录
clearTimeout(k)
k = null
cTime = getTime()
k = setTimeout(hyFn(...arguments), time)
}
}}
}
export const contains = function(parentNode, childNode) {
if (parentNode.contains) {
return parentNode != childNode && parentNode.contains(childNode)
} else {
return !!(parentNode.compareDocumentPosition(childNode) & 16)
}
}
export const addClass = function (el, className) {
if (typeof el !== "object") {
console.log('el is not elem')
return null
}
let classList = el['className']
classList = classList === '' ? [] : classList.split(/\s+/)
if (classList.indexOf(className) === -1) {
classList.push(className)
el.className = classList.join(' ')
} else {
console.warn('warn className current')
}
}
export const removeClass = function (el, className) {
let classList = el['className']
classList = classList === '' ? [] : classList.split(/\s+/)
classList = classList.filter(item => {
return item !== className
})
el.className = classList.join(' ')
}
export const delay = ({fn, time}) => {
let oT = null
let k = null
return () => {
// 当前时间
let cT = new Date().getTime()
const fixFn = () => {
k = oT = null
fn()
}
if (k === null) {
oT = cT
k = setTimeout(fixFn, time)
return
}
if (cT - oT < time) {
oT = cT
clearTimeout(k)
k = setTimeout(fixFn, time)
}
}
}
export const Event = function () {
// 类型
this.typeList = {}
}
Event.prototype.on = function ({type, fn}){
if (this.typeList.hasOwnProperty(type)) {
this.typeList[type].push(fn)
} else {
this.typeList[type] = []
this.typeList[type].push(fn)
}
}
Event.prototype.off = function({type, fn}) {
if (this.typeList.hasOwnProperty(type)) {
let list = this.typeList[type]
let index = list.indexOf(fn)
if (index !== -1 ) {
list.splice(index, 1)
}
} else {
console.warn('not has this type')
}
}
Event.prototype.once = function ({type, fn}) {
const fixFn = () => {
fn()
this.off({type, fn: fixFn})
}
this.on({type, fn: fixFn})
}
Event.prototype.trigger = function (type){
if (this.typeList.hasOwnProperty(type)) {
this.typeList[type].forEach(fn => {
fn()
})
}
}
Komponentenvorlage
<template>
<p class="jc-clip-image" :style="{width: `${clip.width}`}">
<canvas ref="ctx"
:width="clip.width"
:height="clip.height"
@mousedown="handleClip($event)"
>
</canvas>
<input type="file" ref="file" @change="readFileMsg($event)">
<p class="clip-scale-btn">
<a class="add" @click="handleScale(false)">+</a>
<a @click="rotate" class="right-rotate">转</a>
<a class="poor" @click="handleScale(true)">-</a>
<span>{{scale}}</span>
</p>
<p class="upload-warp">
<a class="upload-btn" @click="dispatchUpload($event)">upload</a>
<a class="upload-cancel">cancel</a>
</p>
<p class="create-canvas">
<a class="to-send-file" @click="outFile" title="请打开控制台">生成文件</a>
</p>
</p>
</template>
<script>
import {on, off, once} from '../../utils/dom'
export default {
ctx: null,
file: null,
x: 0, // 点击canvas x 鼠标地址
y: 0,// 点击canvas y 鼠标地址
xV: 0, // 鼠标移动 x距离
yV: 0, // 鼠标移动 y距离
nX: 0, // 原始坐标点 图像 x
nY: 0,// 原始坐标点 图像 y
img: null,
props: {
src: {
type: String,
default: null
},
clip: {
type: Object,
default () {
return {width: '200px', height: '200px'}
}
}
},
data () {
return {
isShow: false,
base64: null,
scale: 1.5, //放大比例
deg: 0 //旋转角度
}
},
computed: {
width () {
const {clip} = this
return parseFloat(clip.width.replace('px', ''))
},
height () {
const {clip} = this
return parseFloat(clip.height.replace('px', ''))
}
},
mounted () {
const {$options, $refs, width, height} = this
// 初始化 canvas file nX nY
Object.assign($options, {
ctx: $refs.ctx.getContext('2d'),
file: $refs.file,
nX: -width / 2,
nY: -height / 2
})
},
methods: {
// 旋转操作
rotate () {
const {$options, draw} = this
this.deg = (this.deg + Math.PI /2)% (Math.PI * 2)
draw($options.img, $options.nX + $options.xV, $options.nY + $options.yV, this.scale, this.deg)
},
// 处理放大
handleScale (flag) {
const {$options, draw, deg} = this
flag && this.scale > 0.1 && (this.scale = this.scale - 0.1)
!flag && this.scale < 1.9 && (this.scale = this.scale + 0.1)
$options.img && draw($options.img, $options.nX + $options.xV, $options.nY + $options.yV, this.scale, deg)
},
// 模拟file 点击事件
dispatchUpload (e) {
this.clearState()
const {file} = this.$options
e.preventDefault()
file.click()
},
// 读取 input file 信息
readFileMsg () {
const {file} = this.$options
const {draw, createImage, $options: {nX, nY}, scale, deg} = this
const wFile = file.files[0]
const reader = new FileReader()
reader.onload = (e) => {
const img = createImage(e.target.result, (img) => {
draw(img, nX, nY, scale, deg)
})
file.value = null
}
reader.readAsDataURL(wFile)
},
// 生成 图像
createImage (src, cb) {
const img = new Image()
this.$el.append(img)
img.className = 'base64-hidden'
img.onload = () => {
cb(img)
}
img.src = src
this.$options.img = img
},
// 操作画布画图
draw (img, x = 0, y = 0, scale = 0.5,deg = Math.PI ) {
const {ctx} = this.$options
let {width, height} = this
// 图片尺寸
let imgW = img.offsetWidth
let imgH = img.offsetHeight
ctx.save()
ctx.clearRect( 0, 0, width, height)
ctx.translate( width / 2, height / 2, img)
ctx.rotate(deg)
ctx.drawImage(img, x, y, imgW * scale, imgH * scale)
ctx.restore()
},
// ... 事件绑定
handleClip (e) {
const {handleMove, $options, deg} = this
if (!$options.img) {
return
}
Object.assign(this.$options, {
x: e.screenX,
y: e.screenY
})
on({
el: window,
type: 'mousemove',
fn: handleMove
})
once({
el: window,
type: 'mouseup',
fn: (e) =>{
console.log('down')
switch (deg) {
case 0: {
Object.assign($options, {
nX: $options.nX + $options.xV,
nY: $options.nY + $options.yV,
xV: 0,
yV: 0
})
break;
}
case Math.PI / 2: {
Object.assign($options, {
nX: $options.nY + $options.yV,
nY: $options.nX - $options.xV,
xV: 0,
yV: 0
})
break;
}
case Math.PI: {
Object.assign($options, {
nX: $options.nX - $options.xV,
nY: $options.nY - $options.yV,
xV: 0,
yV: 0
})
break;
}
default: {
// $options.nY - $options.yV, $options.nX + $options.xV
Object.assign($options, {
nX: $options.nY - $options.yV,
nY: $options.nX + $options.xV,
xV: 0,
yV: 0
})
}
}
off({
el: window,
type: 'mousemove',
fn: handleMove
})
}
})
},
// ... 处理鼠标移动
handleMove (e){
e.preventDefault()
e.stopPropagation()
const {$options, draw, scale, deg} = this
Object.assign($options, {
xV: e.screenX - $options.x,
yV: e.screenY - $options.y
})
switch (deg) {
case 0: {
draw($options.img, $options.nX + $options.xV, $options.nY + $options.yV, scale, deg)
break;
}
case Math.PI / 2: {
draw($options.img, $options.nY + $options.yV, $options.nX - $options.xV, scale, deg)
break;
}
case Math.PI: {
draw($options.img, $options.nX - $options.xV, $options.nY - $options.yV, scale, deg)
break;
}
default: {
draw($options.img, $options.nY - $options.yV, $options.nX + $options.xV, scale, deg)
break;
}
}
},
// 清除状态
clearState () {
const {$options, width, height} = this
if ($options.img) {
this.$el.removeChild($options.img)
Object.assign($options, {
x: 0,
y: 0,
xV: 0,
yV: 0,
nX: -width / 2,
nY: -height / 2,
img: null,
})
}
},
// 输出文件
outFile () {
const {$refs: {ctx}} = this
console.log(ctx.toDataURL())
ctx.toBlob((blob) => {console.log(blob)})
}
}
}
</script>
<style>
@component-namespace jc {
@component clip-image{
position: relative;
width: 100%;
canvas {
position: relative;
width: 100%;
height: 100%;
cursor: pointer;
box-shadow: 0 0 3px #333;
}
input {
display: none;
}
.base64-hidden {
position: absolute;
top: 0;
left: 0;
display: block;
width: 100%;
height: auto;
z-index: -999;
opacity: 0;
}
.clip-scale-btn {
position: relative;
@utils-clearfix;
margin-bottom: 5px;
text-align: center;
a {
float: left;
width: 20px;
height: 20px;
border-radius: 50%;
color: #fff;
background: #49a9ee;
text-align: center;
cursor: pointer;
}
&>.poor, &>.right-rotate {
float: right;
}
&>span{
position: absolute;
z-index: -9;
top: 0;
left: 0;
display: block;
position: relative;
width: 100%;
text-align: center;
height: 20px;
line-height: 20px;
}
}
.upload-warp {
@utils-clearfix;
.upload-btn,.upload-cancel {
float: left;
display:inline-block;
width: 60px;
height: 25px;
line-height: 25px;
color: #fff;
border-radius: 5px;
background: #49a9ee;
box-shadow: 0 0 0 #333;
text-align: center;
top: 0;
left: 0;
right: 0;
bottom: 0;
margin: auto;
cursor: pointer;
margin-top: 5px;
}
.upload-cancel{
background: gray;
float: right;
}
}
.to-send-file {
margin-top: 5px;
display: block;
width: 50px;
height: 25px;
line-height: 25px;
color: #fff;
border-radius: 5px;
background: #49a9ee;
cursor: pointer;
}
}
Das Obige habe ich für Sie zusammengestellt. Ich hoffe, es wird Ihnen in Zukunft hilfreich sein.
Verwandte Artikel:
Wie implementiert man das Scrollen von Bildern mit Vue?
JS implementiert die Methode zum Betreiben von Binärdaten
Das obige ist der detaillierte Inhalt vonWie man mit Vue Bilder zuschneidet und sie gleichzeitig vergrößert, verkleinert und dreht (ausführliches Tutorial). Für weitere Informationen folgen Sie bitte anderen verwandten Artikeln auf der PHP chinesischen Website!
In Verbindung stehende Artikel
Mehr sehen- Eine eingehende Analyse der Bootstrap-Listengruppenkomponente
- Detaillierte Erläuterung des JavaScript-Funktions-Curryings
- Vollständiges Beispiel für die Generierung von JS-Passwörtern und die Erkennung der Stärke (mit Download des Demo-Quellcodes)
- Angularjs integriert WeChat UI (weui)
- Wie man mit JavaScript schnell zwischen traditionellem Chinesisch und vereinfachtem Chinesisch wechselt und wie Websites den Wechsel zwischen vereinfachtem und traditionellem Chinesisch unterstützen – Javascript-Kenntnisse

