
Heim >Backend-Entwicklung >PHP-Tutorial >So erstellen Sie eine Leistungstestumgebung für PHP7
So erstellen Sie eine Leistungstestumgebung für PHP7
- 一个新手Original
- 2017-10-24 09:11:083120Durchsuche
前言
我之前使用的是xhprof+xhgui分析线上环境的性能,然而PHP版本升级到PHP 7之后,xhprof已经不可用,于是改用tideways+xhgui,这实际上也是PHP7下开源方案的唯一选择,有兴趣的可看下参考资料,有详细说明。
本文主要根据参考资料[1]配置,因此会有大量重复的地方,我主要其基础上根据实际生产环境的要求多添加了以下额外配置:
mongodb只绑定到本地xhgui开启HTTP Basic认证xhgui在mongodb中只保留最近14天的数据
系统环境
CentOS 7.3 + nginx + mysql + php71
本文假设你的lnmp环境已经可以正常使用,并且是通过源码安装PHP,现在只是需要添加性能测试的功能。如果你不熟悉lnmp环境的配置,推荐使用https://lnmp.org/提供的一键安装包,本文的配置路径均基于该包的默认配置。
安装与配置
分成以下几个部分:
mongodb
tideways
xhgui
应用配置
1.mongodb
安装
#yum install mongodb-server mongodb -y
#pecl install mongodb
启动mongodb服务
#mongod --bind_ip 127.0.0.1
2.tideways
安装
git clone https://github.com/tideways/php-profiler-extension.git
cd php-profiler-extension
phpize
./configure --with-php-config=`which php-config`
make
sudo make install
配置
编辑php.ini文件,添加:
extension=tideways.so
tideways.auto_prepend_library=0
重启php-fpm,执行以下命令看到tideways的输出表示有生效:
#php -m | grep tide
tideways
3.xhgui
xhgui也是一个网站,最终需要通过web访问。官方版本是英文版,已经不更新了,有很多BUG,这里推荐使用中文版:https://github.com/maxincai/xhgui。
安装(假设在/home/wwwroot/目录下执行如下命令)
$ git clone https://github.com/maxincai/xhgui.git
$ cd xhgui
$ php install.php
配置
1.给数据库添加索引,非必须,但是强烈推荐:
$ mongo
 > use xhprof
 > db.results.ensureIndex( { 'meta.SERVER.REQUEST_TIME' : -1 } )
 > db.results.ensureIndex( { 'profile.main().wt' : -1 } )
 > db.results.ensureIndex( { 'profile.main().mu' : -1 } )
 > db.results.ensureIndex( { 'profile.main().cpu' : -1 } )
> db.results.ensureIndex( { 'meta.url' : 1 } )2.nginx配置(xhgui本身没有安全机制,它捕捉的数据中有敏感数据,因此开放到外网后必须开启HTTP Basic认证)
创建/usr/local/nginx/conf/vhost/xhgui.conf文件,内容如下:
server
{
    listen 8888; # 根据实际情况改成自己的端口
    server_name 127.0.0.1; #根据实际情况改成自己的域名
    index index.html index.htm index.php;
    root  /home/wwwroot/xhgui/webroot/;

    location ~ \.php
    {
        auth_basic "xhgui needs authentication"; # 开启HTTP Basic认证
        auth_basic_user_file htpasswd;  # 密码文件
        try_files $uri =404;
        fastcgi_pass  unix:/tmp/php-cgi.sock;
        fastcgi_index index.php;
        fastcgi_param SCRIPT_FILENAME $document_root$fastcgi_script_name;
        include fastcgi_params;
    }

    location / {
        try_files $uri $uri/ /index.php?$uri&$args;
    }

    location ~ .*\.(gif|jpg|jpeg|png|bmp|swf)$ {
        expires      30d;
    }

    location ~ .*\.(js|css)?$ {
        expires      30d;
    }

    access_log  /home/wwwlogs/xhgui.access.log;
    error_log  /home/wwwlogs/xhgui.error.log;
}开启HTTP Basic认证需要生成密码文件htpasswd。假设生成一个tester用户,密码为123456,则执行以下命令:
printf “tester:$(openssl passwd -crypt 123456)\n" >> /usr/local/nginx/conf/htpasswd
生成后记得检查下文件内容,格式内容应该类似如下:
$cat /usr/local/nginx/conf/htpasswd
tester:1qe8kAN82iOyo
完成配置重启,在浏览器中进入http://127.0.0.1:8888,应该能看到界面了,只是此时还没有数据。
3.进一步优化配置
xhgui 默认是按1%采集的,可是如果是排查问题时还是希望能够100%采集会比较方便。进入xhgui源码目录,修改config/config.default.php文件,平时仍然按1%的采样率采样,防止数据增长过快,当想调试时,就在URL中添加debug=1的参数即可。
在config/config.default.php中,找到profiler.enable这里,按如下修改:
'profiler.enable' => function() {
    // url 中包含debug=1则百分百捕获
    if(!empty($_GET['debug'])){
        return true;
    } else {
        // 1%采样
        return rand(1, 100) === 42;
    }
},如果不删除采集的数据,很快就会发现mongo数据库变得很大。因此推荐配置下mongo数据库,只保留最近14天的数据。
#mongo
> use xhprof
> db.results.ensureIndex( { "meta.request_ts" : 1 }, { expireAfterSeconds : 3600*24*14 } )
如果想手动全部删除,则执行如下命令:
$ mongo
$ use xhprof;
$ db.dropDatabase();
4.应用配置
让应用实现采集,需要修改对应的nginx配置文件,添加:
fastcgi_param TIDEWAYS_SAMPLERATE “100"; #是否采样取决于xhgui的随机数配置和这里的采样率配置,两者必须同时满足,这里简单设置成100,由xhgui去控制
fastcgi_param PHP_VALUE "auto_prepend_file=/home/wwwroot/xhgui/external/header.php";
完整的nginx示例配置文件如下:
server
{
listen 80; #根据实际情况修改
server_name test.dev; #根据实际情况修改
index index.html index.htm index.php;
root /home/wwwroot/test/web/;
location ~ \.php
{
fastcgi_pass unix:/tmp/php-cgi.sock;
fastcgi_index /index.php;
fastcgi_param SCRIPT_FILENAME $document_root$fastcgi_script_name;
fastcgi_param TIDEWAYS_SAMPLERATE "100”; # 此处为重点
fastcgi_param PHP_VALUE "auto_prepend_file=/home/wwwroot/xhgui/external/header.php”; # 此处为重点
include fastcgi_params;
}
try_files $uri $uri/ @rewrite;
location @rewrite {
rewrite ^/(.*)$ /index.php?_url=/$1;
}
location ~ .*\.(gif|jpg|jpeg|png|bmp|swf)$ {
expires 30d;
}
location ~ .*\.(js|css)?$ {
expires 30d;
}
access_log /home/wwwlogs/test.access.log;
error_log /home/wwwlogs/test.error.log;
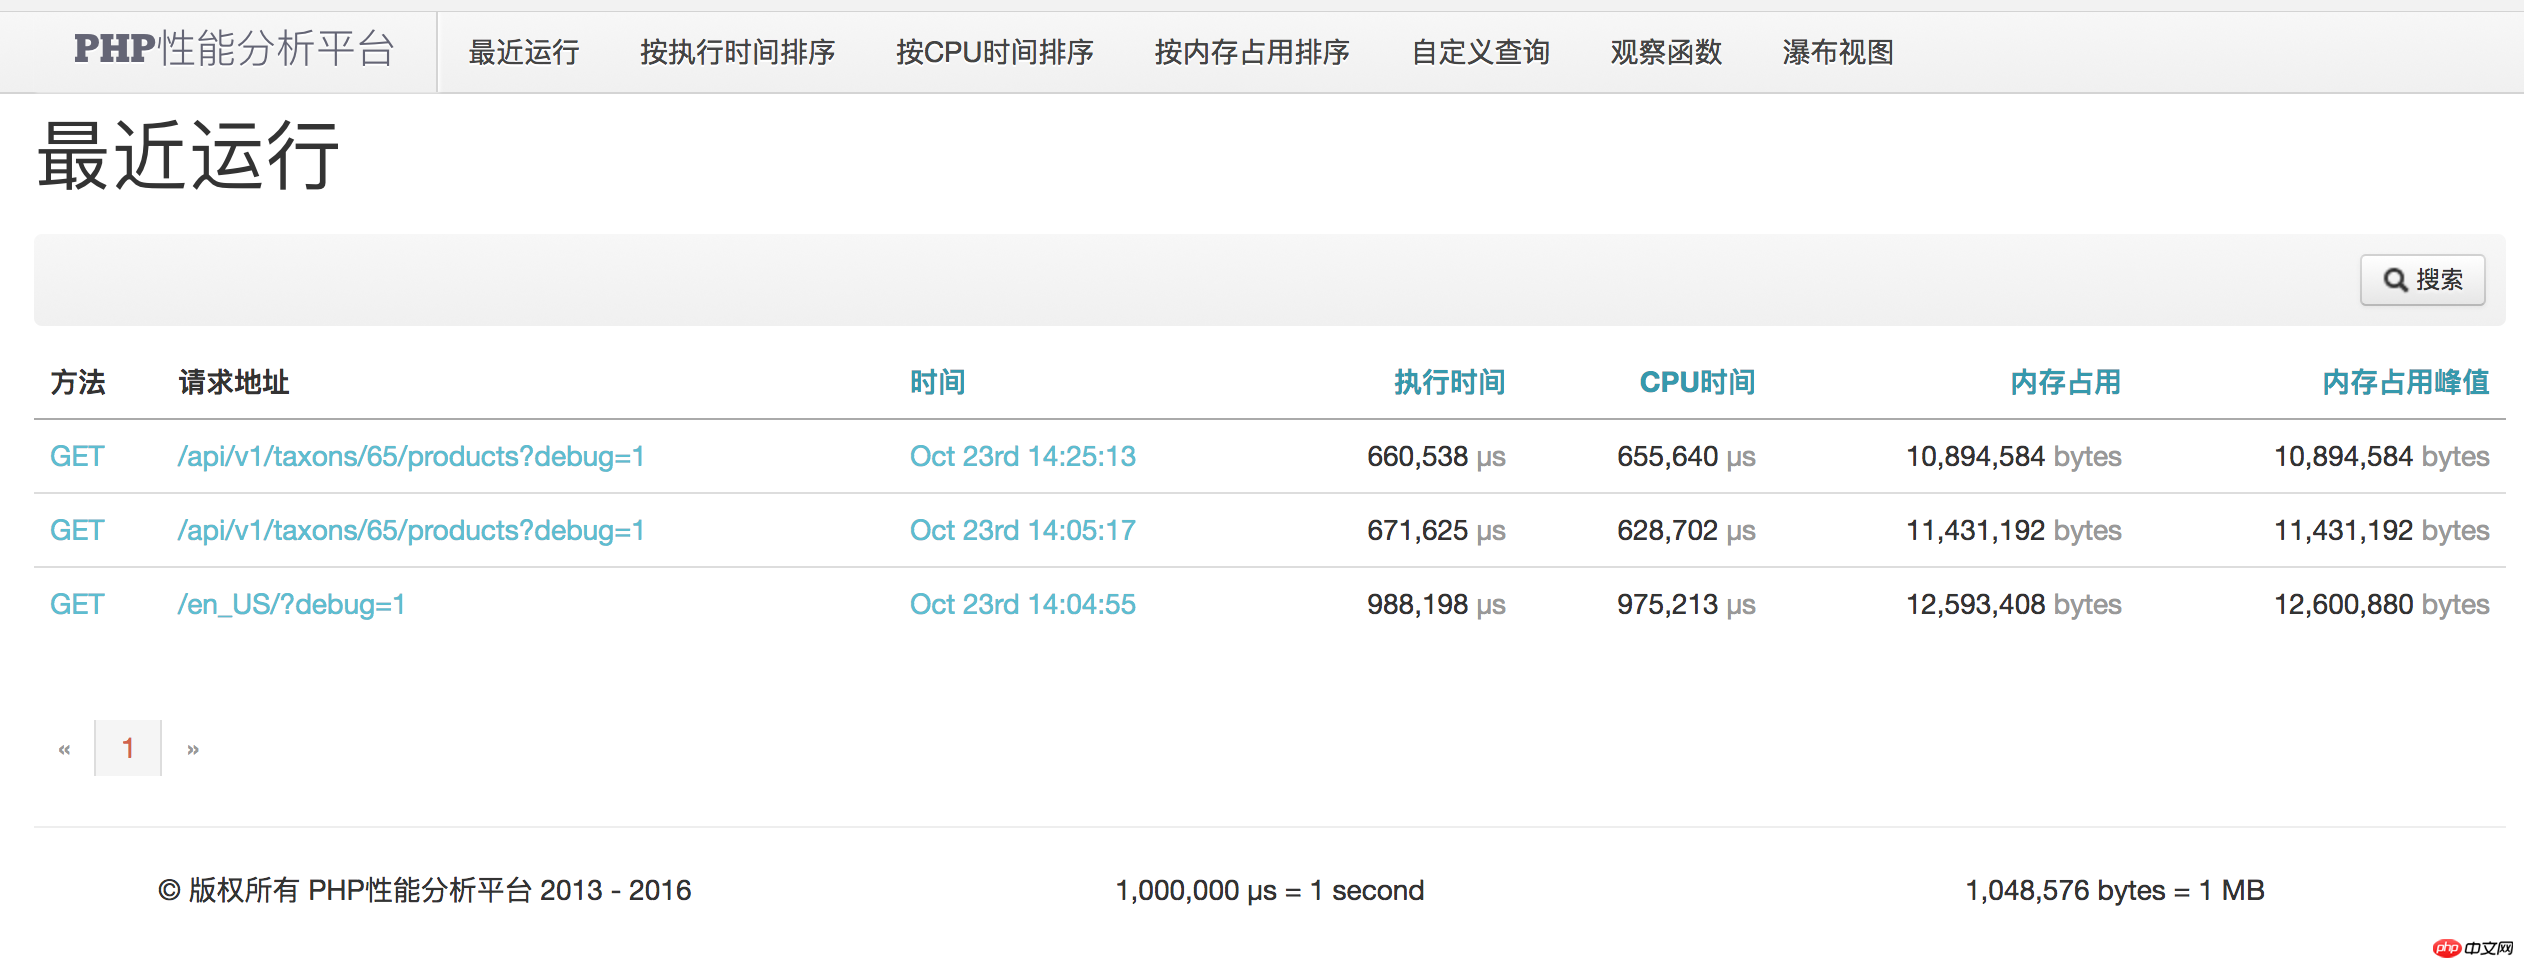
}最终成功配置并采集到数据的界面
Das obige ist der detaillierte Inhalt vonSo erstellen Sie eine Leistungstestumgebung für PHP7. Für weitere Informationen folgen Sie bitte anderen verwandten Artikeln auf der PHP chinesischen Website!
In Verbindung stehende Artikel
Mehr sehen- So verwenden Sie cURL zum Implementieren von Get- und Post-Anfragen in PHP
- So verwenden Sie cURL zum Implementieren von Get- und Post-Anfragen in PHP
- So verwenden Sie cURL zum Implementieren von Get- und Post-Anfragen in PHP
- So verwenden Sie cURL zum Implementieren von Get- und Post-Anfragen in PHP
- Alle Ausdruckssymbole in regulären Ausdrücken (Zusammenfassung)