Heim >Betrieb und Instandhaltung >Betrieb und Wartung von Linux >Tutorial zur Verwendung von Proxy-IP mit Curl und Wget in der Linux-Shell
Tutorial zur Verwendung von Proxy-IP mit Curl und Wget in der Linux-Shell
- 巴扎黑Original
- 2017-08-15 13:41:262510Durchsuche
Dieser Artikel führt Sie hauptsächlich in die relevanten Informationen zur Verwendung von Proxy-IP mit Curl und Wget in der Linux-Shell ein. Der Artikel stellt es im Detail anhand von Beispielcode vor. Es ist für jeden ein Muss Bitte folgen Sie dem Herausgeber, um gemeinsam zu lernen.
Vorwort
Wie wir alle wissen, gibt es in der Linux-Shell zwei sehr praktische Befehle zum Crawlen von Webseiten: Curl und Wget In diesem Artikel erhalten Sie eine detaillierte Einführung in die Verwendung von Proxy-IP durch Curl und Wget in der Linux-Shell. Ich werde im Folgenden nicht viel sagen.
Curl und Wget verwenden Proxy
Curl unterstützt http, https, Socks4, Socks5
wget unterstützt http, https
Proxy-Beispiel:
#!/bin/bash
#
# curl 支持 http、https、socks4、socks5
# wget 支持 http、https
#
# 米扑代理示例:
# http://proxy.mimvp.com/demo2.php
#
# 米扑代理购买:
# http://proxy.mimvp.com
#
# mimvp.com
# 2015-11-09


# http代理格式   http_proxy=http://IP:Port
# https代理格式   https_proxy=http://IP:Port

{'http': 'http://120.77.176.179:8888'}
curl -m 30 --retry 3 -x http://120.77.176.179:8888 http://proxy.mimvp.com/exist.php     # http_proxy
wget -T 30 --tries 3 -e "http_proxy=http://120.77.176.179:8888" http://proxy.mimvp.com/exist.php   # http_proxy

{'https': 'http://46.105.214.133:3128'}
curl -m 30 --retry 3 --proxy-insecure -x http://46.105.214.133:3128 -k https://proxy.mimvp.com/exist.php     # https_proxy
wget -T 30 --tries 3 --no-check-certificate -e "https_proxy=http://46.105.214.133:3128" https://proxy.mimvp.com/exist.php # https_proxy


# curl 支持socks
{'socks4': '101.255.17.145:1080'}
curl -m 30 --retry 3 --socks4 101.255.17.145:1080 http://proxy.mimvp.com/exist.php

{'socks5': '82.164.233.227:45454'}
curl -m 30 --retry 3 --socks5 82.164.233.227:45454 http://proxy.mimvp.com/exist.php


# wget 不支持socks
wget-Profileinstellungen-Proxy
vim ~/.wgetrc

http_proxy=http://120.77.176.179:8888:8080
https_proxy=http://12.7.17.17:8888:8080
use_proxy = on
wait = 30

wget -T 30 --tries 3 http://proxy.mimvp.com
Shell-Einstellungen temporär Lokal Proxy
# proxy no auth
export http_proxy=http://120.77.176.179:8888:8080
export https_proxy=http://12.7.17.17:8888:8080

# proxy auth
export http_proxy=http://username:password@120.77.176.179:8888:8080
export https_proxy=http://username:password@12.7.17.17:8888:8080


# 取消设置
unset http_proxy
unset https_proxy
Globaler Shell-Set-System-Proxy
# 修改 /etc/profile,保存并重启服务器
sudo vim /etc/profile  # 所有人有效
或
sudo vim ~/.bashrc  # 所有人有效
或
vim ~/.bash_profile  # 个人有效


# proxy no auth
export http_proxy=http://120.77.176.179:8888:8080
export https_proxy=http://12.7.17.17:8888:8080

# proxy auth
export http_proxy=http://username:password@120.77.176.179:8888:8080
export https_proxy=http://username:password@12.7.17.17:8888:8080

source /etc/profile
或
source ~/.bashrc
或
source ~/.bash_profile


sudo reboot
Mipu-Proxy-Beispiel
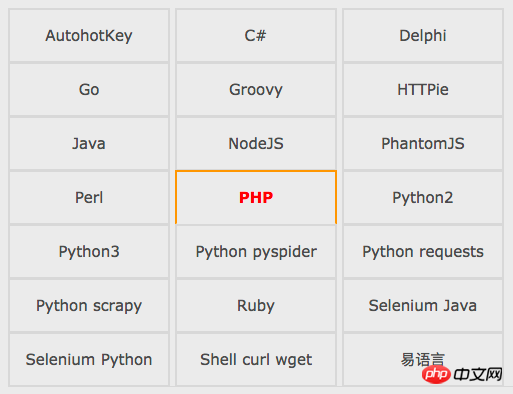
Mipu-Proxy-Beispiel, einschließlich Python, Java, PHP, C#, Go, Perl, Ruby, Shell, NodeJS, PhantomJS, Groovy, Delphi, Yi Language und mehr als zehn Programmiersprachen oder Skripte. Anhand einer großen Anzahl ausführbarer Beispiele wird die korrekte Methode zur Verwendung von Proxy-IP ausführlich erläutert, um das Web-Crawling zu erleichtern. Datenerfassung und Automatisierung, Tests und andere Bereiche.

Das obige ist der detaillierte Inhalt vonTutorial zur Verwendung von Proxy-IP mit Curl und Wget in der Linux-Shell. Für weitere Informationen folgen Sie bitte anderen verwandten Artikeln auf der PHP chinesischen Website!
In Verbindung stehende Artikel
Mehr sehen- Erfahren Sie, wie Sie den Nginx-Server unter Linux installieren
- Detaillierte Einführung in den wget-Befehl von Linux
- Ausführliche Erläuterung von Beispielen für die Verwendung von yum zur Installation von Nginx unter Linux
- Detaillierte Erläuterung der Worker-Verbindungsprobleme in Nginx
- Detaillierte Erläuterung des Installationsprozesses von Python3 unter Linux

