
Heim >Web-Frontend >js-Tutorial >Bringen Sie Ihnen bei, wie man Axios lernt
Bringen Sie Ihnen bei, wie man Axios lernt

- PHP中文网Original
- 2017-06-22 13:22:172712Durchsuche
Axios ist ein auf Promise basierender HTTP-Client für Browser und NodeJS. Der folgende Artikel führt Sie hauptsächlich in die relevanten Informationen des Axios-Lern-Tutorials ein Freunde, lasst uns gemeinsam einen Blick darauf werfen.
Vorwort
Als Vuejs-Autor You Yuxi die Nachricht veröffentlichte, wird er die Vue-Ressource nicht mehr weiter pflegen und empfiehlt jedem, sie zu verwenden axios zu starten ist immer mehr Menschen bekannt. Ich wollte ursprünglich eine detaillierte Anleitung im Internet finden, aber plötzlich stellte ich fest, dass die offizielle Dokumentation von Axios selbst sehr detailliert ist! ! Was für ein Fahrrad willst du, wenn du das hast! ! Daher wird jedem empfohlen, sich mit dieser Art von Bibliothek vertraut zu machen und die offizielle Dokumentation im Detail zu lesen. Ich habe die offizielle Dokumentation von Axios grob übersetzt. Ich glaube, dass Axios ein Kinderspiel sein wird, solange Sie diesen Artikel gründlich verstehen und üben. !
Wenn Sie glauben, dass dieser Artikel für Sie hilfreich ist, geben Sie ihm bitte ein „Gefällt mir“ oder folgen Sie ihm und speichern Sie ihn. Ihre Ermutigung ist mir sehr wichtig.
Axios-Einführung
Axios ist ein Promise-basierter HTTP-Client für Browser und Nodejs. Er weist die folgenden Eigenschaften auf:
XMLHttpRequest über den Browser erstellen
HTTP-Anfrage von node.js erstellen
Support Promise API
Abfangen von Anfragen und Antworten
Anfrage- und Antwortdaten konvertieren
-
Anfrage abbrechen
JSON-Daten automatisch konvertieren
Client unterstützt die Verhinderung von CSRF/XSRF
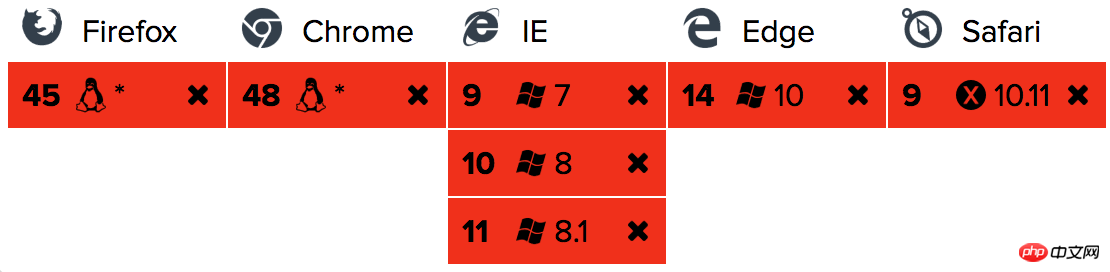
Browserkompatibilität
Einführungsmethode:
$ npm install axios
$ cnpm install axios //taobao源
$ bower install axios
oder verwenden Sie cdn:
<script src="https://unpkg.com/axios/dist/axios.min.js"></script>
Zum Beispiel:
GET-Anfrage ausführen
// 向具有指定ID的用户发出请求
axios.get('/user?ID=12345')
 .then(function (response) {
 console.log(response);
 })
 .catch(function (error) {
 console.log(error);
 });
// 也可以通过 params 对象传递参数
axios.get('/user', {
 params: {
 ID: 12345
 }
 })
 .then(function (response) {
 console.log(response);
 })
 .catch(function (error) {
 console.log(error);
 });
POST-Anfrage ausführen
axios.post('/user', {
 firstName: 'Fred',
 lastName: 'Flintstone'
 })
 .then(function (response) {
 console.log(response);
 })
 .catch(function (error) {
 console.log(error);
 });
Mehrere gleichzeitige Anfragen ausführen
function getUserAccount() {
 return axios.get('/user/12345');
}
function getUserPermissions() {
 return axios.get('/user/12345/permissions');
}
axios.all([getUserAccount(), getUserPermissions()])
 .then(axios.spread(function (acct, perms) {
 //两个请求现已完成
 }));
axios API
kann angefordert werden, indem die entsprechende Konfiguration an axios übergeben wird.
axios(config)
// 发送一个 POST 请求
axios({
 method: 'post',
 url: '/user/12345',
 data: {
 firstName: 'Fred',
 lastName: 'Flintstone'
 }
});
axios(url[, config])
// 发送一个 GET 请求 (GET请求是默认请求模式)
axios('/user/12345');
Aliase für Anforderungsmethoden
Der Einfachheit halber wurden Aliase für alle unterstützten Anforderungsmethoden bereitgestellt.
axios.request(config)
axios.get(url[,config])
axios.delete(url[,config])
axios.head(url[,config])
axios.post( url[,data[,config]])
axios.put(url[,data[,config]])
axios. patch(url [, data [, config]])
Hinweis
bei Verwendung des Alias method ist es nicht erforderlich, die URL-, Methoden- und Datenattribute in der Konfiguration anzugeben.
Parallelität
Hilfsfunktion zur Bearbeitung gleichzeitiger Anfragen.
axios.all (iterierbar)
axios.spread (Rückruf)
Instanz erstellen
Sie können eine neue Instanz von axios mit einer benutzerdefinierten Konfiguration erstellen.
axios.create([config])
var instance = axios.create({
 baseURL: 'https://some-domain.com/api/',
 timeout: 1000,
 headers: {'X-Custom-Header': 'foobar'}
});
Instanzmethoden
Die verfügbaren Instanzmethoden sind wie folgt. Die angegebene Konfiguration wird mit der Instanzkonfiguration zusammengeführt.
axios#request(config)
axios#get(url[,config])
axios#delete(url[,config])
axios#head(url[,config])
axios#post( url[,data[,config]])
axios#put(url[,data[,config]])
axios# patch(url[,data[,config]])
Konfiguration anfordern
Diese werden verwendet, um Anfragen zu stellen verfügbaren Konfigurationsmöglichkeiten. Es ist nur die URL erforderlich. Wenn keine Methode angegeben ist, lautet die Anforderung standardmäßig GET.
{
// `url`是将用于请求的服务器URL
url: '/user',
// `method`是发出请求时使用的请求方法
method: 'get', // 默认
// `baseURL`将被添加到`url`前面,除非`url`是绝对的。
// 可以方便地为 axios 的实例设置`baseURL`,以便将相对 URL 传递给该实例的方法。
baseURL: 'https://some-domain.com/api/',
// `transformRequest`允许在请求数据发送到服务器之前对其进行更改
// 这只适用于请求方法'PUT','POST'和'PATCH'
// 数组中的最后一个函数必须返回一个字符串,一个 ArrayBuffer或一个 Stream
transformRequest: [function (data) {
// 做任何你想要的数据转换
return data;
}],
// `transformResponse`允许在 then / catch之前对响应数据进行更改
transformResponse: [function (data) {
// Do whatever you want to transform the data
return data;
}],
// `headers`是要发送的自定义 headers
headers: {'X-Requested-With': 'XMLHttpRequest'},
// `params`是要与请求一起发送的URL参数
// 必须是纯对象或URLSearchParams对象
params: {
ID: 12345
},
// `paramsSerializer`是一个可选的函数,负责序列化`params`
// (e.g. https://www.npmjs.com/package/qs, http://api.jquery.com/jquery.param/)
paramsSerializer: function(params) {
return Qs.stringify(params, {arrayFormat: 'brackets'})
},
// `data`是要作为请求主体发送的数据
// 仅适用于请求方法“PUT”,“POST”和“PATCH”
// 当没有设置`transformRequest`时,必须是以下类型之一:
// - string, plain object, ArrayBuffer, ArrayBufferView, URLSearchParams
// - Browser only: FormData, File, Blob
// - Node only: Stream
data: {
firstName: 'Fred'
},
// `timeout`指定请求超时之前的毫秒数。
// 如果请求的时间超过'timeout',请求将被中止。
timeout: 1000,
// `withCredentials`指示是否跨站点访问控制请求
// should be made using credentials
withCredentials: false, // default
// `adapter'允许自定义处理请求,这使得测试更容易。
// 返回一个promise并提供一个有效的响应(参见[response docs](#response-api))
adapter: function (config) {
/* ... */
},
// `auth'表示应该使用 HTTP 基本认证,并提供凭据。
// 这将设置一个`Authorization'头,覆盖任何现有的`Authorization'自定义头,使用`headers`设置。
auth: {
username: 'janedoe',
password: 's00pers3cret'
},
// “responseType”表示服务器将响应的数据类型
// 包括 'arraybuffer', 'blob', 'document', 'json', 'text', 'stream'
responseType: 'json', // default
//`xsrfCookieName`是要用作 xsrf 令牌的值的cookie的名称
xsrfCookieName: 'XSRF-TOKEN', // default
// `xsrfHeaderName`是携带xsrf令牌值的http头的名称
xsrfHeaderName: 'X-XSRF-TOKEN', // default
// `onUploadProgress`允许处理上传的进度事件
onUploadProgress: function (progressEvent) {
// 使用本地 progress 事件做任何你想要做的
},
// `onDownloadProgress`允许处理下载的进度事件
onDownloadProgress: function (progressEvent) {
// Do whatever you want with the native progress event
},
// `maxContentLength`定义允许的http响应内容的最大大小
maxContentLength: 2000,
// `validateStatus`定义是否解析或拒绝给定的promise
// HTTP响应状态码。如果`validateStatus`返回`true`(或被设置为`null` promise将被解析;否则,promise将被
// 拒绝。
validateStatus: function (status) {
return status >= 200 && status < 300; // default
},
// `maxRedirects`定义在node.js中要遵循的重定向的最大数量。
// 如果设置为0,则不会遵循重定向。
maxRedirects: 5, // 默认
// `httpAgent`和`httpsAgent`用于定义在node.js中分别执行http和https请求时使用的自定义代理。
// 允许配置类似`keepAlive`的选项,
// 默认情况下不启用。
httpAgent: new http.Agent({ keepAlive: true }),
httpsAgent: new https.Agent({ keepAlive: true }),
// 'proxy'定义代理服务器的主机名和端口
// `auth`表示HTTP Basic auth应该用于连接到代理,并提供credentials。
// 这将设置一个`Proxy-Authorization` header,覆盖任何使用`headers`设置的现有的`Proxy-Authorization` 自定义 headers。
proxy: {
host: '127.0.0.1',
port: 9000,
auth: : {
username: 'mikeymike',
password: 'rapunz3l'
}
},
// “cancelToken”指定可用于取消请求的取消令牌
// (see Cancellation section below for details)
cancelToken: new CancelToken(function (cancel) {
})
}
Bei Verwendung von then erhalten Sie folgende Antwort:
axios.get('/user/12345')
 .then(function(response) {
 console.log(response.data);
 console.log(response.status);
 console.log(response.statusText);
 console.log(response.headers);
 console.log(response.config);
 });
Konfigurationsstandardwerte
Sie können Konfigurationsstandardwerte angeben, die auf jede Anfrage angewendet werden.
Globaler Axios-Standardwert
axios.defaults.baseURL = 'https://api.example.com';
axios.defaults.headers.common['Authorization'] = AUTH_TOKEN;
axios.defaults.headers.post['Content-Type'] = 'application/x-www-form-urlencoded';
Benutzerdefinierter Instanzstandardwert
//在创建实例时设置配置默认值
var instance = axios.create({
 baseURL:'https://api.example.com'
});

//在实例创建后改变默认值
instance.defaults.headers.common ['Authorization'] = AUTH_TOKEN;
Konfigurationsprioritätsreihenfolge
Die Konfiguration wird mit der Prioritätsreihenfolge zusammengeführt. Die Reihenfolge besteht aus den Bibliotheksstandardwerten in lib/defaults.js, dann dem Standardattribut der Instanz und schließlich den Konfigurationsparametern der Anforderung. Letzteres wird Vorrang vor Ersterem haben. Hier ist ein Beispiel.
//使用库提供的配置默认值创建实例
//此时,超时配置值为`0`,这是库的默认值
var instance = axios.create();

//覆盖库的超时默认值
//现在所有请求将在超时前等待2.5秒
instance.defaults.timeout = 2500;

//覆盖此请求的超时,因为它知道需要很长时间
instance.get('/ longRequest',{
 timeout:5000
});
拦截器
你可以截取请求或响应在被 then 或者 catch 处理之前
//添加请求拦截器
axios.interceptors.request.use(function(config){
  //在发送请求之前做某事
  return config;
 },function(error){
  //请求错误时做些事
  return Promise.reject(error);
 });

//添加响应拦截器
axios.interceptors.response.use(function(response){
  //对响应数据做些事
  return response;
 },function(error){
  //请求错误时做些事
  return Promise.reject(error);
 });
如果你以后可能需要删除拦截器。
var myInterceptor = axios.interceptors.request.use(function () {/*...*/});
axios.interceptors.request.eject(myInterceptor);
你可以将拦截器添加到axios的自定义实例。

var instance = axios.create();
instance.interceptors.request.use(function () {/*...*/});
处理错误
axios.get('/ user / 12345')
 .catch(function(error){
  if(error.response){
  //请求已发出,但服务器使用状态代码进行响应
  //落在2xx的范围之外
  console.log(error.response.data);
  console.log(error.response.status);
  console.log(error.response.headers);
  } else {
  //在设置触发错误的请求时发生了错误
  console.log('Error',error.message);
  }}
  console.log(error.config);
 });
您可以使用validateStatus配置选项定义自定义HTTP状态码错误范围。
axios.get('/ user / 12345',{
 validateStatus:function(status){
  return status < 500; //仅当状态代码大于或等于500时拒绝
 }}
})
消除
您可以使用取消令牌取消请求。
axios cancel token API基于可取消的promise提议,目前处于阶段1。
您可以使用CancelToken.source工厂创建一个取消令牌,如下所示:
var CancelToken = axios.CancelToken;
var source = CancelToken.source();
axios.get('/user/12345', {
 cancelToken: source.token
}).catch(function(thrown) {
 if (axios.isCancel(thrown)) {
 console.log('Request canceled', thrown.message);
 } else {
 // 处理错误
 }
});
//取消请求(消息参数是可选的)
source.cancel('操作被用户取消。');
您还可以通过将执行器函数传递给CancelToken构造函数来创建取消令牌:
var CancelToken = axios.CancelToken;
var cancel;

axios.get('/ user / 12345',{
 cancelToken:new CancelToken(function executor(c){
  //一个执行器函数接收一个取消函数作为参数
  cancel = c;
 })
});

// 取消请求
clear();
注意:您可以使用相同的取消令牌取消几个请求。
使用application / x-www-form-urlencoded格式
默认情况下,axios将JavaScript对象序列化为JSON。 要以应用程序/ x-www-form-urlencoded格式发送数据,您可以使用以下选项之一。
浏览器
在浏览器中,您可以使用URLSearchParams API,如下所示:
var params = new URLSearchParams();
params.append('param1', 'value1');
params.append('param2', 'value2');
axios.post('/foo', params);
请注意,所有浏览器都不支持URLSearchParams,但是有一个polyfill可用(确保polyfill全局环境)。
或者,您可以使用qs库对数据进行编码:
var qs = require('qs');
axios.post('/foo', qs.stringify({ 'bar': 123 });
Node.js
在node.js中,可以使用querystring模块,如下所示:
var querystring = require('querystring');
axios.post('http://something.com/', querystring.stringify({ foo: 'bar' });
你也可以使用qs库。
Promise
axios 依赖本机要支持ES6 Promise实现。 如果您的环境不支持ES6 Promises,您可以使用polyfill。
TypeScript
axios包括TypeScript定义。
import axios from 'axios';
axios.get('/user?ID=12345');
axios在很大程度上受到Angular提供的$http服务的启发。 最终,axios努力提供一个在Angular外使用的独立的$http-like服务。
Das obige ist der detaillierte Inhalt vonBringen Sie Ihnen bei, wie man Axios lernt. Für weitere Informationen folgen Sie bitte anderen verwandten Artikeln auf der PHP chinesischen Website!
In Verbindung stehende Artikel
Mehr sehen- Eine eingehende Analyse der Bootstrap-Listengruppenkomponente
- Detaillierte Erläuterung des JavaScript-Funktions-Curryings
- Vollständiges Beispiel für die Generierung von JS-Passwörtern und die Erkennung der Stärke (mit Download des Demo-Quellcodes)
- Angularjs integriert WeChat UI (weui)
- Wie man mit JavaScript schnell zwischen traditionellem Chinesisch und vereinfachtem Chinesisch wechselt und wie Websites den Wechsel zwischen vereinfachtem und traditionellem Chinesisch unterstützen – Javascript-Kenntnisse