
Heim >Backend-Entwicklung >Python-Tutorial >Teilen Sie ein Beispiel für die Verwendung von Python zum Schreiben einer automatischen SSH-Anmeldung bei einem Remote-Server
Teilen Sie ein Beispiel für die Verwendung von Python zum Schreiben einer automatischen SSH-Anmeldung bei einem Remote-Server

- 零下一度Original
- 2017-06-25 10:22:351388Durchsuche
Oft möchten wir vom Terminal unseres eigenen Computers aus direkt eine SSH-Verbindung zum Linux-Server herstellen, anstatt den Toolbereich mit der UI-Schnittstelle zu verwenden, um eine Verbindung zu unserem Server herzustellen. Wenn wir jedoch SSH im Terminal verwenden, müssen wir jedes Mal das Konto und das Kennwort eingeben, was ebenfalls problematisch ist. Daher können wir einfach ein kleines Tool erstellen, das sich automatisch per SSH beim Remote-Server unter Linux/Mac OS anmeldet .
Hier ist ein GIF-Animationsbeispiel:
Übersicht
Lassen Sie uns zunächst herausfinden, welche Funktionen wir benötigen:
1. 添加/删除连接服务器需要的IP,端口,密码2. 自动输入密码登录远程服务器
Ja, lass es uns machen So eine einfache Funktion
Beginnen Sie mit dem Schreiben von Code
Der Code ist relativ lang, daher habe ich ihn auch auf Github und Code Cloud gestellt. Die Adresse befindet sich am Ende des Artikels:
1. Erstellen wir ein Modulverzeichnis osnssh (Open Source Noob SSH) und erstellen Sie dann unten zwei weitere Verzeichnisse, eines für das Hauptprogramm und nennen es „bin“ und eines zum Speichern von Anmeldedaten (IP, Port, Passwort) namens „data“. .
-osnssh
    -bin
    -data
1. Setup-Programm: IP, Port, Passwort hinzufügen/löschen: py-Datei bin/setting.py:
#!/usr/bin/env python#-*-coding:utf-8-*-import re, base64, os, sys
path = os.path.dirname(os.path.abspath(sys.argv[0]))'''
选项配置管理
__author__ = 'allen woo'
'''def add_host_main():while 1:if add_host():break
print("\n\nAgain:")def add_host():'''
添加主机信息
:return:
'''
print("================Add=====================")
print("[Help]Input '#q' exit")# 输入IP
host_ip = str_format("Host IP:", "^(25[0-5]|2[0-4][0-9]|1[0-9][0-9]|[1-9]?[0-9])\.(25[0-5]|2[0-4][0-9]|1[0-9][0-9]|[1-9]?[0-9])\.(25[0-5]|2[0-4][0-9]|1[0-9][0-9]|[1-9]?[0-9])\.(25[0-5]|2[0-4][0-9]|1[0-9][0-9]|[1-9]?[0-9])$")if host_ip == "#q":return 1# 输入端口
host_port = str_format("Host port(Default 22):", "[0-9]+")if host_port == "#q":return 1# 输入密码
password = str_format("Password:", ".*")if password == "#q":return 1# 密码加密
password = base64.encodestring(password)# 输入用户名
name = str_format("User Name:", "^[^ ]+$")if name == "#q":return 1elif not name:
os.system("clear")
print("[Warning]:User name cannot be emptyg")return 0# The alias# 输入别名
alias = str_format("Local Alias:", "^[^ ]+$")if alias == "#q":return 1elif not alias:
os.system("clear")
print("[Warning]:Alias cannot be emptyg")return 0# 打开数据保存文件
of = open("{}/data/information.d".format(path))
hosts = of.readlines()# 遍历文件数据,查找是否有存在的Ip,端口,还有别名for l in hosts:
l = l.strip("\n")if not l:continue
l_list = l.split(" ")if host_ip == l_list[1] and host_port == l_list[2]:
os.system("clear")
print("[Warning]{}:{} existing".format(host_ip, host_port))return 0if alias == l_list[4]:
os.system("clear")
print("[Warning]Alias '{}' existing".format(alias))return 0
of.close()# save# 保存数据到数据文件
of = open("{}/data/information.d".format(path), "a")
of.write("\n{} {} {} {} {}".format(name.strip("\n"), host_ip.strip("\n"), host_port, password.strip("\n"), alias.strip("\n")))
of.close()
print("Add the success:{} {}@{}:{}".format(alias.strip("\n"), name.strip("\n"), host_ip.strip("\n"), host_port, password.strip("\n")))return 1def remove_host():'''
删除主机信息
:return:
'''while 1:# 打开数据文件
of = open("{}/data/information.d".format(path))
hosts = of.readlines()
of.close
l = len(hosts)if l <= 0:
os.system("clear")
print("[Warning]There is no host")return
print("================Remove================")
print("+{}+".format("-"*40))
print("| Alias UserName@IP:PORT")
hosts_temp = []
n = 0# 遍历输出所以信息(除了密码)供选择for i in range(0, l):if not hosts[i].strip():continue
v_list = hosts[i].strip().split(" ")
print("+{}+".format("-"*40))
print("| {} | {} {}@{}:{}".format(n+1, v_list[4], v_list[0], v_list[1], v_list[2]))
n += 1
hosts_temp.append(hosts[i])
hosts = hosts_temp[:]
print("+{}+".format("-"*40))
c = raw_input("[Remove]Choose the Number or Alias('#q' to exit):")
is_alias = False
is_y = Falsetry:
c = int(c)if c > l or c < 1:
os.system("clear")
print("[Warning]:There is no")continuedel hosts[c-1]
is_y = Trueexcept:
is_alias = Trueif is_alias:if c.strip() == "#q":
os.system("clear")break
n = 0for l in hosts:if c.strip() == l.split(" ")[4].strip():del hosts[n]
is_y = True
n += 1if not is_y:
os.system("clear")
print("[Warning]:There is no")continueelse: # save# 再次确认是否删除
c = raw_input("Remove?[y/n]:")if c.strip().upper() == "Y":
of = open("{}/data/information.d".format(path), "w")for l in hosts:
of.write(l)
print("Remove the success!")
of.close()def str_format(lable, rule):'''
用于验证输入的数据格式
:param lable:
:param rule:
:return:
'''while 1:
print("{} ('#q' exit)".format(lable))
temp = raw_input().strip()
m = re.match(r"{}".format(rule), temp)if m:breakelif "port" in lable:
temp = 22breakelif temp.strip() == "#q":
os.system("clear")break
os.system("clear")
print("[Warning]:Invalid format")return temp2. py dient der Ausgabe unserer Informationen, also über mich.
def about():'''
    输出关于这个程序的信息
    :return:
    '''
    of = open("{}/bin/about.dat".format(path))
    rf = of.read()try:
        info = eval(rf)
        os.system("clear")
        print("================About osnssh================")for k,v in info.items():
            print("{}: {}".format(k, v))except:
        print("For failure.")return
Dann erstellen Sie eine Datei about.dat im bin-Verzeichnis und schreiben Sie einige unserer Informationen, wie zum Beispiel:
{"auther":"Allen Woo","Introduction":"In Linux or MAC using SSH, do not need to enter the IP and password for many times","Home page":"","Download address":"https://github.com/osnoob/osnssh","version":"1.1.0","email":"xiaopingwoo@163.com"
}
Nach dem Einrichten des Programms ist es das:
2. Melden Sie sich automatisch beim Remote-Server-Programm an: Erstellen Sie eine Py-Datei im Bin mit dem Namen auto_ssh.py:
Hinweis: Hier müssen wir zuerst ein Paket namens: pexpect installieren, um mit dem Benutzer zu interagieren Terminal und erfassen Sie die Interaktionsinformationen, um das Passwort automatisch einzugeben.
Installieren Sie pexpect:
pip install pexpect
Dann beginnen Sie mit dem Schreiben des Codes:
#!/usr/bin/env python#-*-coding:utf-8-*-import os, sys, base64import pexpect
path = os.path.dirname(os.path.abspath(sys.argv[0]))def choose():# 打开我们的数据文件
of = open("{}/data/information.d".format(path))
hosts = of.readlines()
hosts_temp = []for h in hosts:if h.strip():
hosts_temp.append(h)
hosts = hosts_temp[:]
l = len(hosts)if l <= 0:
os.system("clear")
print("[Warning]Please add the host server")returnwhile 1:
print("=================SSH===================")
print("+{}+".format("-"*40))
print("| Alias UserName@IP:PORT")for i in range(0, l):
v_list = hosts[i].strip().split(" ")
print("+{}+".format("-"*40))
print("| {} | {} {}@{}:{}".format(i+1, v_list[4], v_list[0], v_list[1], v_list[2]))
print("+{}+".format("-"*40))
c = raw_input("[SSH]Choose the number or alias('#q' exit):")
is_alias = False
is_y = Falsetry:
c = int(c)if c > l or c < 1:
os.system("clear")
print("[Warning]:There is no")continue
l_list = hosts[c-1].split(" ")
name = l_list[0]
host = l_list[1]
port = l_list[2]
password = l_list[3]
is_y = Trueexcept:
is_alias = Trueif is_alias:if c.strip() == "#q":
os.system("clear")returnfor h in hosts:if c.strip() == h.split(" ")[4].strip():
l_list = h.split(" ")
name = l_list[0]
host = l_list[1]
port = l_list[2]
password = l_list[3]
is_y = Trueif not is_y:continue# ssh# 将加密保存的密码解密
password = base64.decodestring(password)
print("In the connection...")# 准备远程连接,拼接ip:port
print("{}@{}".format(name, host))if port == "22":
connection("ssh {}@{}".format(name, host), password)else:
connection("ssh {}@{}:{}".format(name, host, port), password)def connection(cmd, pwd):'''
连接远程服务器
:param cmd:
:param pwd:
:return:
'''
child = pexpect.spawn(cmd)
i = child.expect([".*password.*", ".*continue.*?", pexpect.EOF, pexpect.TIMEOUT])if( i == 0 ):# 如果交互中出现.*password.*,就是叫我们输入密码# 我们就把密码自动填入下去
child.sendline("{}\n".format(pwd))
child.interact()elif( i == 1):# 如果交互提示是否继续,一般第一次连接时会出现# 这个时候我们发送"yes",然后再自动输入密码
child.sendline("yes\n")
child.sendline("{}\n".format(pwd))#child.interact() else:# 连接失败
print("[Error]The connection fails")Okay, jetzt müssen wir nur noch die Datei starten, die das erste Menü nach dem Öffnen des Programms ist
3. Erstellen Sie eine osnssh.py-Datei im osnssh-Verzeichnis:
#!/usr/bin/env python#-*-coding:utf-8-*-import os, sys
sys.path.append("../")from bin import setting, auto_ssh
path = os.path.dirname(os.path.abspath(sys.argv[0]))'''
方便在LINUX终端使用ssh,保存使用的IP:PORT , PASSWORD
自动登录
__author__ = 'allen woo'
'''def main():while 1:
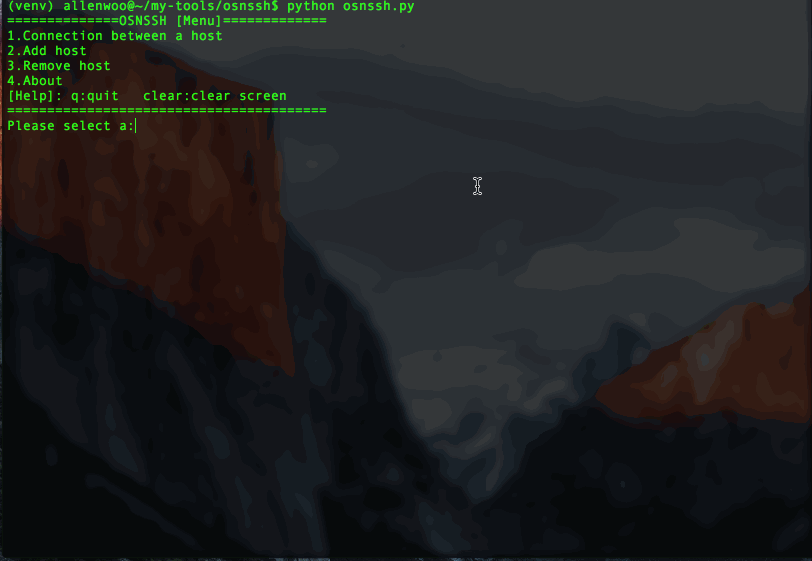
print("==============OSNSSH [Menu]=============")
print("1.Connection between a host\n2.Add host\n3.Remove host\n4.About\n[Help]: q:quit clear:clear screen")
print("="*40)
c = raw_input("Please select a:")if c == 1 or c == "1":
auto_ssh.choose()if c == 2 or c == "2":
setting.add_host_main()if c == 3 or c == "3":
setting.remove_host()if c == 4 or c == "4":
setting.about()elif c == "clear":
os.system("clear")elif c == "q" or c == "Q" or c == "quit":
print("Bye")
sys.exit()else:
print("\n")if __name__ == '__main__':try:
of = open("{}/data/information.d".format(path))except:
of = open("{}/data/information.d".format(path), "w")
of.close()
main()Endlich sind wir mit dem Schreiben fertig, wir können es versuchen:
$python osnssh.py
Die spezifische Demonstration habe ich angegeben Ein GIF-Animationsbild-Quellcode am Anfang des Artikels, um der Gruppe beizutreten
Wenn Sie während des Lernprozesses auf Probleme stoßen oder Lernressourcen erhalten möchten, sind Sie herzlich willkommen, der Lernaustauschgruppe beizutreten
626062078, Lasst uns gemeinsam Python lernen!
Das obige ist der detaillierte Inhalt vonTeilen Sie ein Beispiel für die Verwendung von Python zum Schreiben einer automatischen SSH-Anmeldung bei einem Remote-Server. Für weitere Informationen folgen Sie bitte anderen verwandten Artikeln auf der PHP chinesischen Website!