Heim >Backend-Entwicklung >C#.Net-Tutorial >Erfahren Sie mehr über die Ausführung von WordPress auf .NET Core
Erfahren Sie mehr über die Ausführung von WordPress auf .NET Core
- 迷茫Original
- 2017-03-26 14:29:242334Durchsuche
在.NET Core 上运行的 WordPress,无需安装PHP既可跨平台运行WordPress。
在Peachpie中实现PHP所需的功能数月后,现在终于可以运行一个真实的应用程序:WordPress。
本文是基于Peachpie https://github.com/iolevel/peachpie
Peachpie是一个基于Microsoft的Roslyn的现代PHP编译器。
在.NET上运行WordPress
流行的Phalanger项目已经证明,可以在Microsoft .NET上运行几乎未经修改的WordPress应用。
但是这个解决方案存在着问题,与新的WordPress版本不兼容。现在,Peachpie 也能够将WordPress作为一个完全托管的应用程序运行在.NET和.NET Core上。
这只是一个证明,Peachpie仍然是一个正在进行中的项目。不建议在生产环境中使用它。
本篇文章主要目的是证明Peachpie真的与WordPress中使用的标准PHP兼容,并展示其优点。
先决条件:
.NET Core 1.0
MySQL Server
对WordPress修改
由于Peachpie 0.5.0版本,编译器不支持扩展有条件声明的类,如
if (condition) { class X {} }
class Y extends X {}
// extending conditionally declared class
wp-includes/class-json.php:
注释条件 if (!class_exists(...))
注释第一个Services_JSON_Error类,保留第二个
这里准备了一个修改好的WordPress版本,已经包括上面修改,使你编译项目更容易。
.NET Core WordPress
预先修改 wp-config.php 配置了包含MySQL数据库的凭据的文件。使用默认端口3306,密码为'' ,服务器是'localhost'。这里大家根据实际情况进行修改。
编译WordPress
编译由dotnet及其website/project.json 项目文件驱动。
{
  "version": "1.0.0",

  "buildOptions": {
    "compilerName": "php",
    "compile": "**\\*.php",
    "debugType": "portable",
    "xmlDoc": true
  },
  "dependencies": {
    "Peachpie.App": "0.5.0-*"
  },
  "tools": {
    "Peachpie.Compiler.Tools": "0.5.0-*"
  },
  "frameworks": {
    "netcoreapp1.0": {
      "dependencies": {
        "Microsoft.NETCore.App": {
          "type": "platform",
          "version": "1.0.0"
        }
      }
    }
  }
}
使用 Peachpie.Compiler.Tools 进行编译WordPress项目。
然后有一个app 项目也就是ASP.NET Core。
static void Main() {
    var root = Path.GetDirectoryName(System.IO.Directory.GetCurrentDirectory()) + "/website";

    var host = new WebHostBuilder()
        .UseKestrel()
        .UseWebRoot(root).UseContentRoot(root) // content root with wp static files
        .UseUrls("http://*:5004/")
        .UseStartup<Startup>() // initialization routine, see below
        .Build();

    host.Run();
}

class Startup {
    public void Configure(IApplicationBuilder app) {
        Pchp.Core.Context.DefaultErrorHandler = new Pchp.Core.CustomErrorHandler(); // disables debug asserts

        app.UsePhp(); // installs handler for *.php files and forwards them to our website.dll
        app.UseDefaultFiles();
        app.UseStaticFiles();
    }
}
接着还原项目,在根目录下dotnet restore.
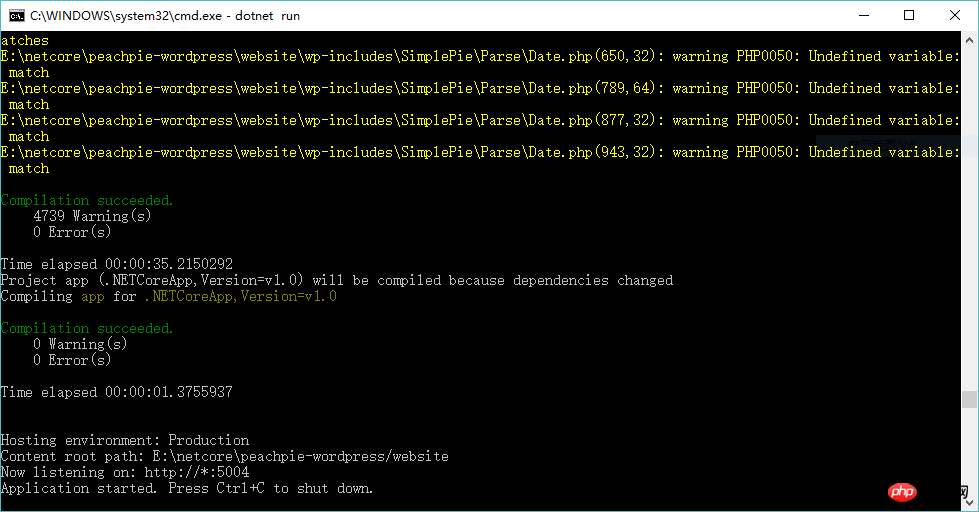
还原好以后cd app dotnet run

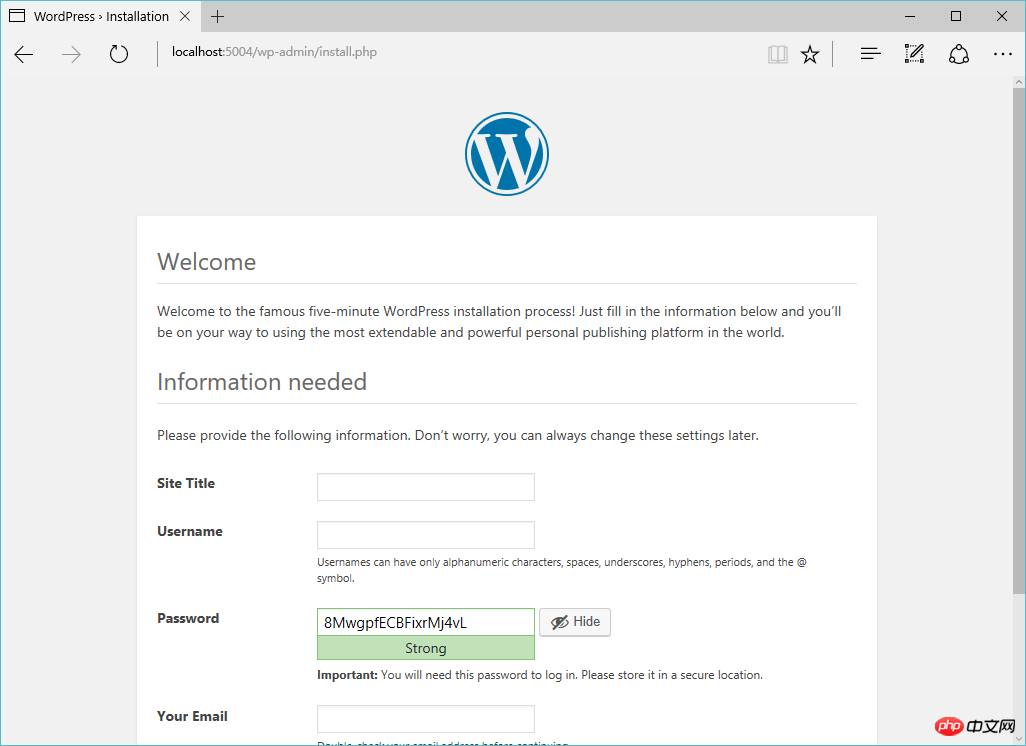
然后访问http://localhost:5004/ ,只要MySQL 配置正确,就会跳转至安装界面。注意要先在数据库中创建wordpress 数据库。

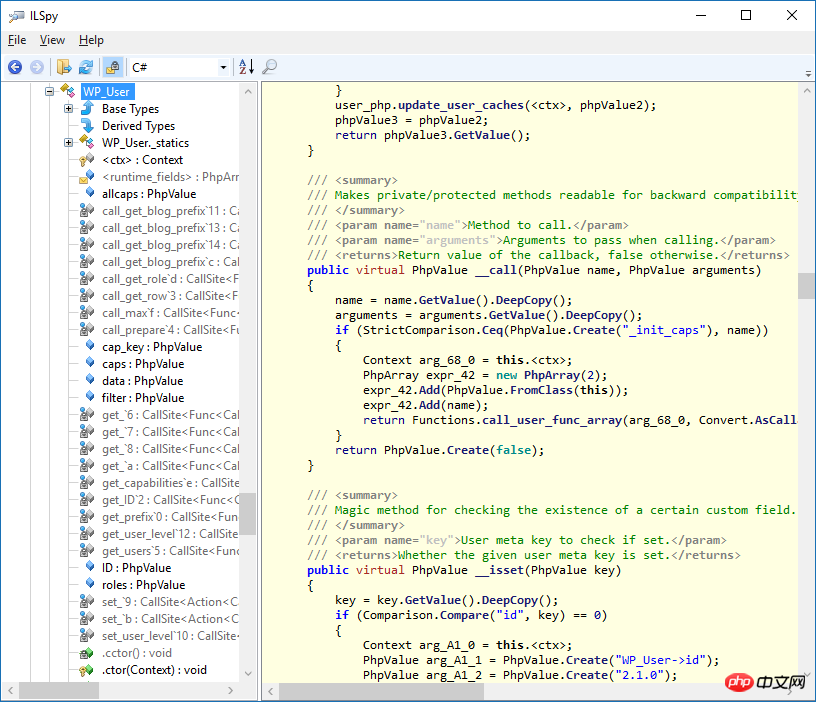
为了证明该网站真的在.NET Core上运行,我们可以反编译website.dll 看看。

Das obige ist der detaillierte Inhalt vonErfahren Sie mehr über die Ausführung von WordPress auf .NET Core. Für weitere Informationen folgen Sie bitte anderen verwandten Artikeln auf der PHP chinesischen Website!
In Verbindung stehende Artikel
Mehr sehen- .Net Core-Grafikverifizierungscode
- Laden der .NET Core-Konfigurationsdatei und DI-Injektion von Konfigurationsdaten
- Dokumentation zum .NET Core CLI-Tool dotnet-publish
- asp.net verwendet .net-Steuerelemente, um Dropdown-Navigationsmenüs zu erstellen
- So erhalten Sie den Namen des Controllers in Asp.net MVC

