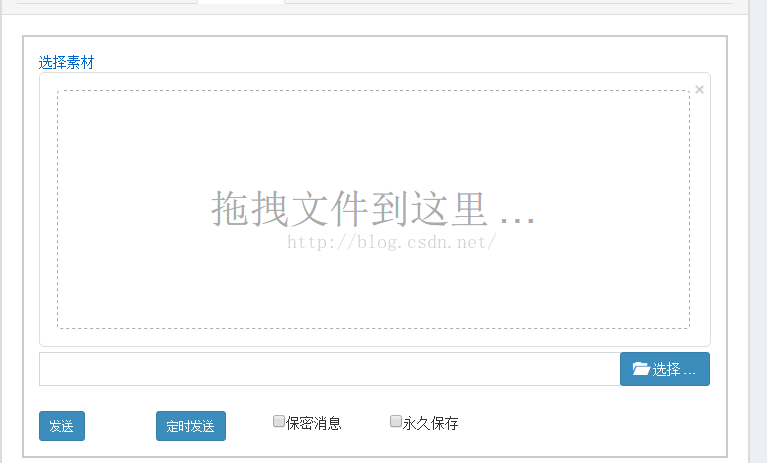
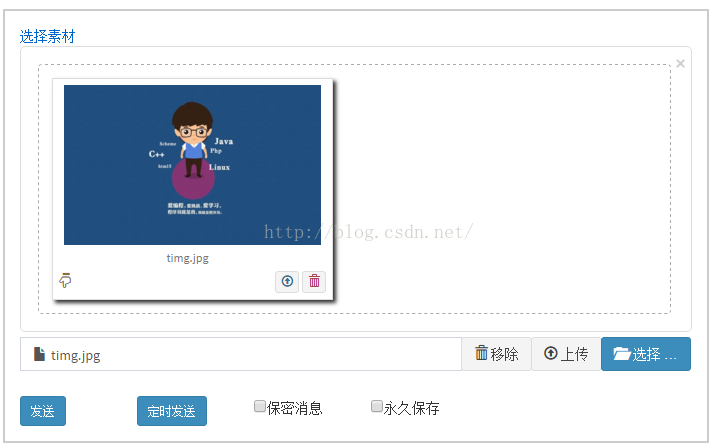
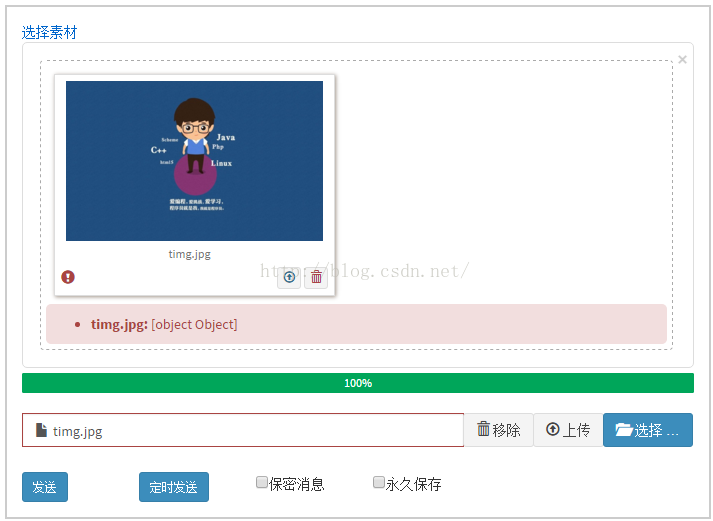
Heim >Web-Frontend >js-Tutorial >BootStrap fileinput.js-Datei-Upload-Komponenten-Beispielcode
BootStrap fileinput.js-Datei-Upload-Komponenten-Beispielcode
- 高洛峰Original
- 2017-02-21 14:40:502058Durchsuche
这篇文章主要介绍了BootStrap fileinput.js文件上传组件实例代码,非常不错,具有参考借鉴价值,需要的朋友可以参考下
1.首先我们下载好fileinput插件引入插件
<span style="font-size:14px;"><link type="text/css" rel="stylesheet" href="fileinput/css/fileinput.css" rel="external nofollow" />
<script type="text/javascript" src="fileinput/js/fileinput.js"></script>
<script type="text/javascript" src="fileinput/js/fileinput_locale_zh.js"></script></span>
2.html设置:
<span style="font-size:14px;"><form enctype="multipart/form-data">
  <input id="file-file" class="file" type="file" multiple>
</form></span>
3.初始化设置:
function initFileInput(ctrlName, uploadUrl) {
var control = $('#' + ctrlName);
control.fileinput({
resizeImage : true,
maxImageWidth : 200,
maxImageHeight : 200,
resizePreference : 'width',
language : 'zh', //设置语言
uploadUrl : uploadUrl,
uploadAsync : true,
allowedFileExtensions : [ 'jpg', 'png', 'gif' ],//接收的文件后缀
showUpload : true, //是否显示上传按钮
showCaption : true,//是否显示标题
browseClass : "btn btn-primary", //按钮样式
previewFileIcon : "<i class='glyphicon glyphicon-king'></i>",
maxFileCount : 3,
msgFilesTooMany : "选择图片超过了最大数量",
maxFileSize : 2000,
});
};
//初始化控件initFileInput(id,uploadurl)控件id,与上传路径
initFileInput("file-file", "/tqyh/pushMessAction");
注:要想使用控件自带的upload按钮,以及上传进度,必须用form包裹
(当然也可以在初始化的时加入 enctype: 'multipart/form-data',是一样的)但不用定义action
<strong><form enctype="multipart/form-data">
  <input id="file-file" class="file" type="file" multiple>
</form></strong>
最后通过后台进行正常的上传就好了。


有些朋友说我没写明白,好吧我把后台代码贴出:
servlet:
@Override
ublic void doPost(HttpServletRequest request,
       HttpServletResponse response)
       throws ServletException, java.io.IOException {
    String path = request.getSession().getServletContext().getRealPath("/headUpload");
  UploadMediaService upload=new UploadMediaService();
  String headimage=upload.getMeiaName(path, request);
  request.getSession().setAttribute("headname",headimage );
  System.out.println("文件上传成功");
 }
 @Override
ublic void doGet(HttpServletRequest request,
           HttpServletResponse response)
    throws ServletException, java.io.IOException {
  doPost( request, response);
 }
其实后台不用可以接收,我们通过解析request就能获取一个或者多个上传的文件。上面代码主要核心代码:
<span style="font-size:14px;">String path = request.getSession().getServletContext().getRealPath("/headUpload");
      UploadMediaService upload=new UploadMediaService();
      String headimage=upload.getMeiaName(path, request);</span>
<span style="font-size:14px;">UploadMediaService :
/**
   * 上传媒体文件,存储在服务端
   *
   * @param path 获取文件需要上传到的路径
   * @param request 客户端请求
   * @return
   */
  public static String uploadLocalMedia(String path,HttpServletRequest request){
    String filename ="";
     //获得磁盘文件条目工厂
    DiskFileItemFactory factory = new DiskFileItemFactory();
    //如果没以下两行设置的话,上传大的 文件 会占用 很多内存,
    //设置暂时存放的 存储室 , 这个存储室,可以和 最终存储文件 的目录不同
    /**
     * 原理 它是先存到 暂时存储室,然后在真正写到 对应目录的硬盘上,
     * 按理来说 当上传一个文件时,其实是上传了两份,第一个是以 .tem 格式的
     * 然后再将其真正写到 对应目录的硬盘上
     */
    factory.setRepository(new File(path));
    //设置 缓存的大小,当上传文件的容量超过该缓存时,直接放到 暂时存储室
    factory.setSizeThreshold(1024*1024) ;
    //高水平的API文件上传处理
    ServletFileUpload upload = new ServletFileUpload(factory);
    try {
      //可以上传多个文件
      List<FileItem> list = upload.parseRequest(request);
      for(FileItem item : list) {
        //如果获取的 表单信息是普通的 文本 信息
        if(item.isFormField()) {
          //获取用户具体输入的字符串 ,名字起得挺好,因为表单提交过来的是 字符串类型的
          String value = item.getString() ;
        } else{
          //对传入的非 简单的字符串进行处理 ,比如说二进制的 图片,视频这些
          /**
           * 以下三步,主要获取 上传文件的名字
           */
          //获取路径名
          String value = item.getName() ;
          //索引到最后一个反斜杠
          int start = value.lastIndexOf("\\");
          //截取 上传文件的 字符串名字,加1是 去掉反斜杠,
          filename = value.substring(start+1);
          System.out.println("filename="+ filename);
          //真正写到磁盘上
          //它抛出的异常 用exception 捕捉
          //item.write( new File(path,filename) );//第三方提供的
          //手动写的
          OutputStream out = new FileOutputStream(new File(path,filename));
          InputStream in = item.getInputStream() ;
          int length = 0 ;
          byte [] buf = new byte[1024] ;
          // in.read(buf) 每次读到的数据存放在  buf 数组中
          while( (length = in.read(buf) ) != -1) {
            //在  buf 数组中 取出数据 写到 (输出流)磁盘上
            out.write(buf, 0, length);
          }
          in.close();
          out.close();
        }
      }
    } catch (FileUploadException e) {
      log.error("文件上传异常:",e);
    } catch (Exception e) {
      log.error("文件处理IO异常:",e);
    }
    return filename ;
  }
</span>
以上所述是小编给大家介绍的BootStrap fileinput.js文件上传组件实例代码,希望对大家有所帮助,如果大家有任何疑问请给我留言,小编会及时回复大家的。在此也非常感谢大家PHP中文网的支持!
更多BootStrap fileinput.js文件上传组件实例代码相关文章请关注PHP中文网!
Stellungnahme:
Der Inhalt dieses Artikels wird freiwillig von Internetnutzern beigesteuert und das Urheberrecht liegt beim ursprünglichen Autor. Diese Website übernimmt keine entsprechende rechtliche Verantwortung. Wenn Sie Inhalte finden, bei denen der Verdacht eines Plagiats oder einer Rechtsverletzung besteht, wenden Sie sich bitte an admin@php.cn
Vorheriger Artikel:Tutorial zum Erstellen eines einfachen Webservers mit node.jsNächster Artikel:Tutorial zum Erstellen eines einfachen Webservers mit node.js
In Verbindung stehende Artikel
Mehr sehen- Eine eingehende Analyse der Bootstrap-Listengruppenkomponente
- Detaillierte Erläuterung des JavaScript-Funktions-Curryings
- Vollständiges Beispiel für die Generierung von JS-Passwörtern und die Erkennung der Stärke (mit Download des Demo-Quellcodes)
- Angularjs integriert WeChat UI (weui)
- Wie man mit JavaScript schnell zwischen traditionellem Chinesisch und vereinfachtem Chinesisch wechselt und wie Websites den Wechsel zwischen vereinfachtem und traditionellem Chinesisch unterstützen – Javascript-Kenntnisse

