Heim >Java >javaLernprogramm >Android implementiert verschiedene QR-Code-Scaneffekte basierend auf Google Zxing
Android implementiert verschiedene QR-Code-Scaneffekte basierend auf Google Zxing
- 高洛峰Original
- 2017-01-07 10:49:081769Durchsuche
Mit der Einführung von WeChat werden QR-Codes immer beliebter, beispielsweise in Einkaufszentren, KFC, Restaurants usw. Zum Scannen von QR-Codes verwenden wir das Open-Source-Framework Zxing Gehen Sie zu http://code.google.com/p/zxing/, um den Quellcode und das Jar-Paket herunterzuladen. Vorher implementierte die QR-Code-Scanfunktion in meinem Projekt nur die Scanfunktion und die Benutzeroberfläche war wirklich hässlich Gut Die Benutzeroberfläche einer Anwendungssoftware muss von der Öffentlichkeit akzeptiert werden, sonst werden die Funktionen der Anwendungssoftware genauso wichtig wie die Benutzeroberfläche von WeChat Viele Anwendungssoftware haben auch den Effekt des Scannens des QR-Codes auf WeChat nachgeahmt, obwohl der Effekt immer noch gut ist, daher werde ich Ihnen den Code zum Ändern der Benutzeroberfläche und den Code zum Scannen mitteilen Erstens werde ich in zukünftigen Projekten auf Probleme stoßen, die gleiche Funktion zu verwenden stand auch auf den Schultern von Riesen, bevor ich diese Funktion hinzufügte. Als nächstes habe ich diese Funktion Schritt für Schritt implementiert und viele unnötige Dateien entfernt
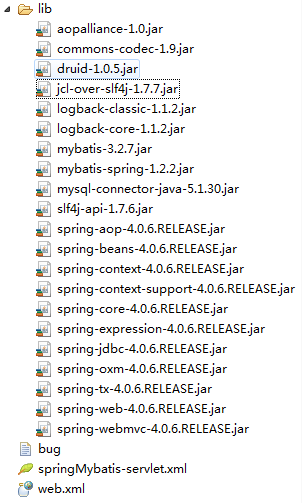
Werfen wir zunächst einen Blick auf die Struktur des Projekts

Wenn Sie dasselbe für Ihr Projekt tun möchten. Um diese Funktion hinzuzufügen, kopieren Sie direkt die drei Pakete com.mining.app.zxing.camera, com.mining.app.zxing.decoding , und com.mining.app.zxing.view zu Ihrem Projekt, und stellen Sie dann die entsprechenden Ressourcen ein. Ich habe sie auch direkt aus meinem Projekt zitiert. Natürlich muss ich auch nicht geändert werden Zitat Zxing.jar
com.example.qr_codescan Paket, das ein MipcaActivityCapture enthält, führt es auch direkt den Code meines vorherigen Projekts ein. Diese Aktivität behandelt beispielsweise hauptsächlich die Scan-Schnittstellenklassen Wenn der Scan erfolgreich ist, sind Geräusche und Vibrationen usw. zu hören. Der Schwerpunkt liegt hauptsächlich auf der Methode handleDecode (Ergebnisergebnis, Bitmap-Barcode). Nach Abschluss des Scans werden die Anfangsparameter des Ergebnisses und die Bitmap des QR angezeigt Code wird an handleDecode (Ergebnisergebnis, Bitmap-Barcode) übergeben. Es besteht keine Notwendigkeit, die Scanergebnisse und Fotos hier zu ändern
/**
 * 处理扫描结果
 * @param result
 * @param barcode
 */
public void handleDecode(Result result, Bitmap barcode) {
  inactivityTimer.onActivity();
  playBeepSoundAndVibrate();
  String resultString = result.getText();
  if (resultString.equals("")) {
    Toast.makeText(MipcaActivityCapture.this, "Scan failed!", Toast.LENGTH_SHORT).show();
  }else {
    Intent resultIntent = new Intent();
    Bundle bundle = new Bundle();
    bundle.putString("result", resultString);
    bundle.putParcelable("bitmap", barcode);
    resultIntent.putExtras(bundle);
    this.setResult(RESULT_OK, resultIntent);
  }
  MipcaActivityCapture.this.finish();
}
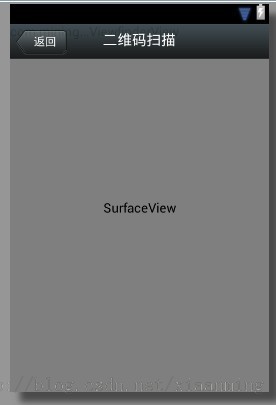
Ich habe meine eigenen Änderungen am Layout der MipcaActivityCapture-Schnittstelle vorgenommen. Ich verwende hauptsächlich FrameLayout mit darin verschachteltem RelativeLayout.

<?xml version="1.0" encoding="utf-8"?>
<FrameLayout xmlns:android="http://schemas.android.com/apk/res/android"
  android:layout_width="fill_parent"
    android:layout_height="fill_parent" >

  <RelativeLayout
    android:layout_width="fill_parent"
    android:layout_height="fill_parent" >

    <SurfaceView
      android:id="@+id/preview_view"
      android:layout_width="fill_parent"
      android:layout_height="fill_parent"
      android:layout_gravity="center" />

    <com.mining.app.zxing.view.ViewfinderView
      android:id="@+id/viewfinder_view"
      android:layout_width="wrap_content"
      android:layout_height="wrap_content" />

    <include
      android:id="@+id/include1"
      android:layout_width="fill_parent"
      android:layout_height="wrap_content"
      android:layout_alignParentTop="true"
      layout="@layout/activity_title" />
  </RelativeLayout>

</FrameLayout>
Darin schreibe ich den oberen Teil von die Schnittstelle in einem anderen Im Layout dann einbinden, da dieser Aktivitätstitel auch von anderen Aktivitäten in meinem Projekt verwendet wird, habe ich ihn auch direkt kopiert <?xml version="1.0" encoding="utf-8"?>
<RelativeLayout xmlns:android="http://schemas.android.com/apk/res/android"
android:layout_width="fill_parent"
android:layout_height="wrap_content"
android:background="@drawable/mmtitle_bg_alpha" >
<Button
android:id="@+id/button_back"
android:layout_width="75.0dip"
android:text="返回"
android:background="@drawable/mm_title_back_btn"
android:textColor="@android:color/white"
android:layout_height="wrap_content"
android:layout_centerVertical="true"
android:layout_marginLeft="2dip" />
<TextView
android:id="@+id/textview_title"
android:layout_width="wrap_content"
android:layout_height="wrap_content"
android:layout_alignBaseline="@+id/button_back"
android:layout_alignBottom="@+id/button_back"
android:layout_centerHorizontal="true"
android:gravity="center_vertical"
android:text="二维码扫描"
android:textColor="@android:color/white"
android:textSize="18sp" />
</RelativeLayout>
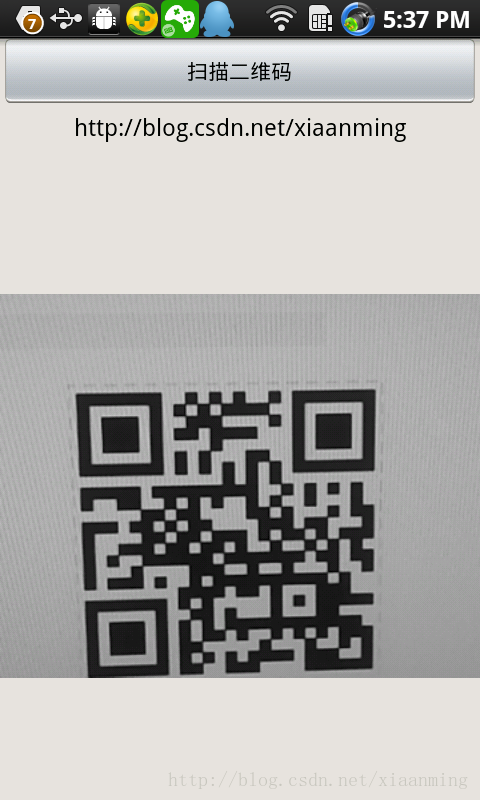
In dieser Demo gibt es eine Hauptschnittstelle „MainActivity“ mit einer Schaltfläche, einer ImageView und einer TextView. Klicken Sie auf die Schaltfläche, um die QR-Code-Scanoberfläche aufzurufen. Wenn der Scan in Ordnung ist, kehren Sie zur Hauptoberfläche zurück und zeigen Sie die Scanergebnisse an zur Textansicht. Das Bild wird in ImageView angezeigt, und Sie müssen das Bild hier nicht verarbeiten. Das Layout der Hauptoberfläche ist wie folgt sehr einfach <RelativeLayout xmlns:android="http://schemas.android.com/apk/res/android"
xmlns:tools="http://schemas.android.com/tools"
android:layout_width="match_parent"
android:layout_height="match_parent"
android:background="#ffe1e0de" >
<Button
android:id="@+id/button1"
android:layout_width="fill_parent"
android:layout_height="wrap_content"
android:layout_alignParentTop="true"
android:text="扫描二维码" />
<TextView
android:id="@+id/result"
android:layout_width="fill_parent"
android:layout_height="wrap_content"
android:layout_below="@+id/button1"
android:lines="2"
android:gravity="center_horizontal"
android:textColor="@android:color/black"
android:textSize="16sp" />
<ImageView
android:id="@+id/qrcode_bitmap"
android:layout_width="fill_parent"
android:layout_height="fill_parent"
android:layout_alignParentLeft="true"
android:layout_below="@+id/result"/>
</RelativeLayout>MainActivity Der darin enthaltene Code lautet wie folgt, und die darin enthaltenen Funktionen wurden oben erwähnt
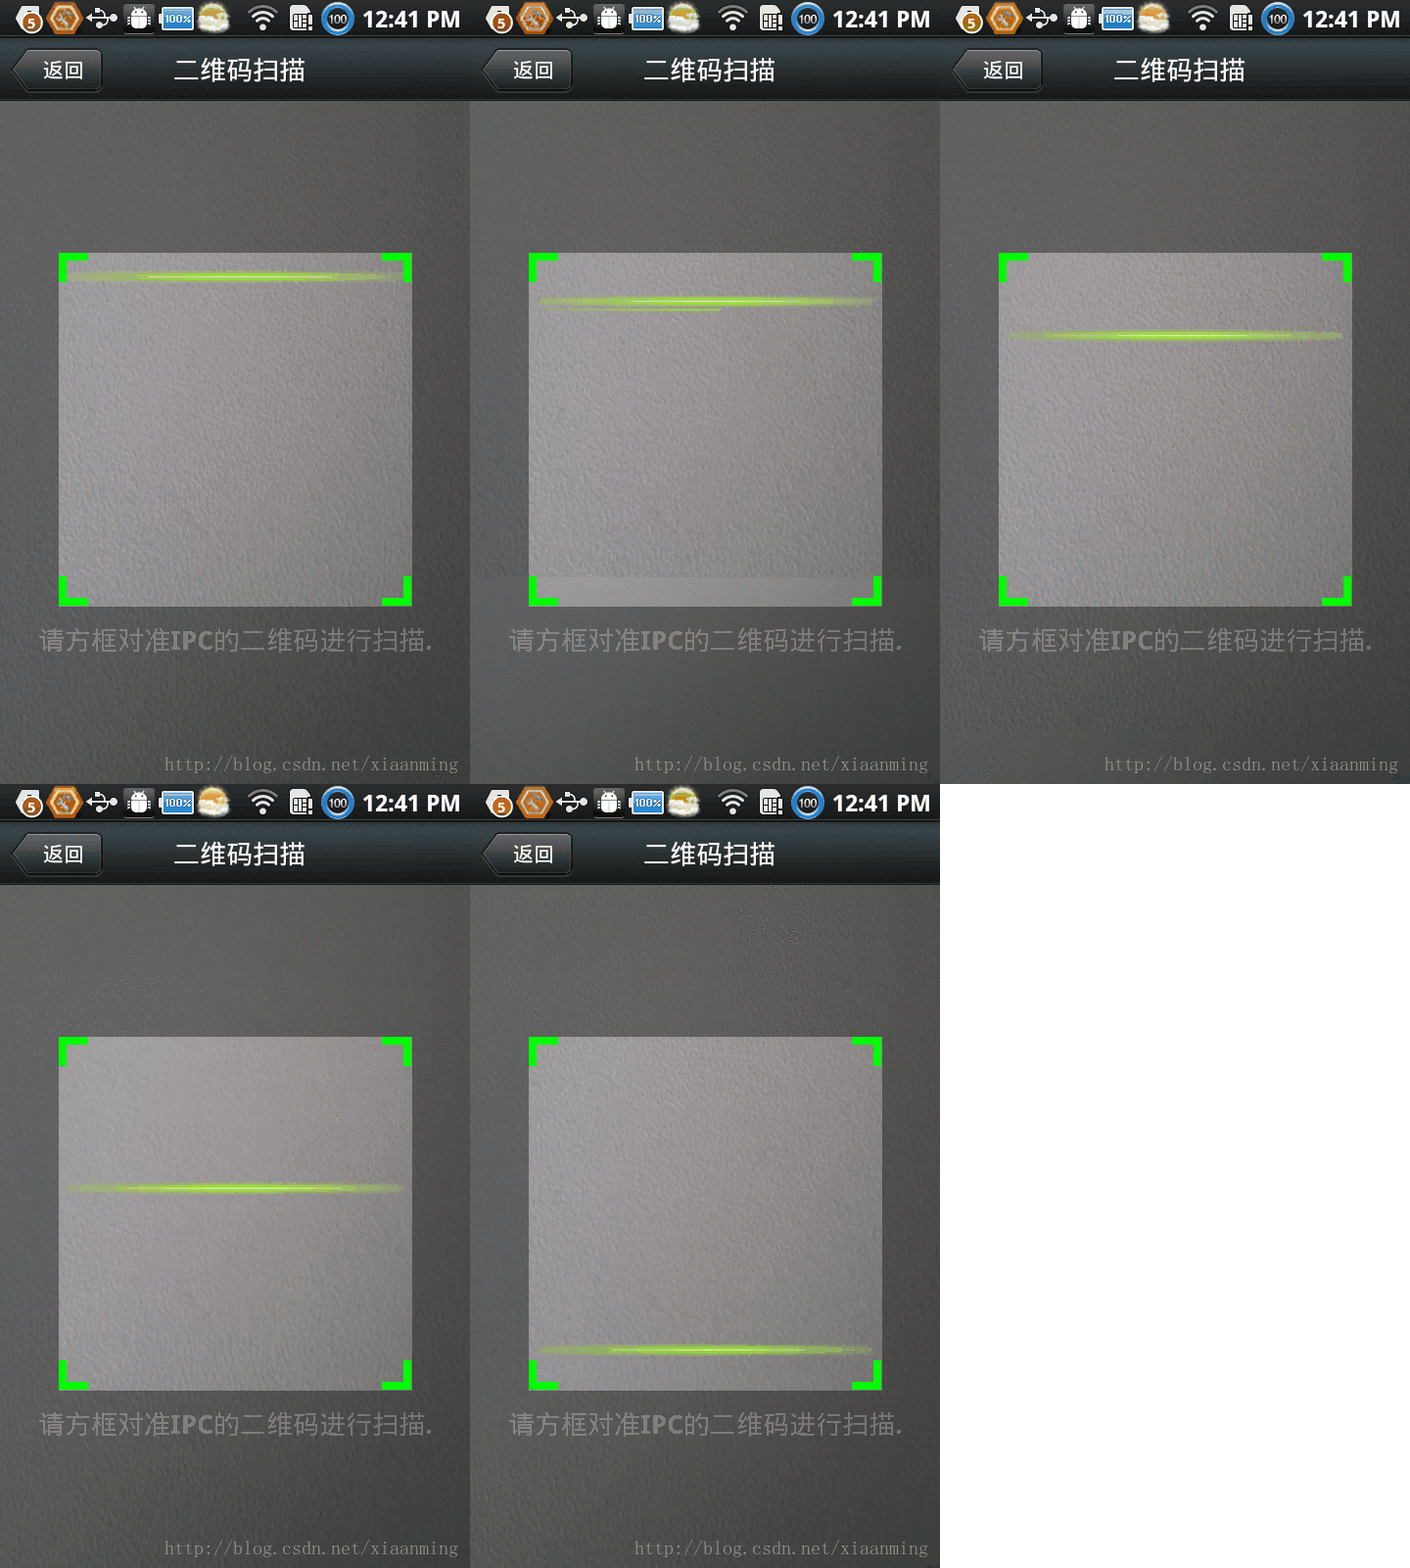
Scanbox, der obige Code hat diesen Effekt nicht Ich muss die ViewfinderView-Klasse unter dem Paket com.mining.app.zxing.view neu schreiben. Die Codekommentare sind relativ klar. Wenn Sie die Größe des Scanfelds ändern möchten, gehen Sie zur CameraManager-Klasse und ändern Sie siepackage com.example.qr_codescan;
import android.app.Activity;
import android.content.Intent;
import android.graphics.Bitmap;
import android.os.Bundle;
import android.view.View;
import android.view.View.OnClickListener;
import android.widget.Button;
import android.widget.ImageView;
import android.widget.TextView;
public class MainActivity extends Activity {
private final static int SCANNIN_GREQUEST_CODE = 1;
/**
* 显示扫描结果
*/
private TextView mTextView ;
/**
* 显示扫描拍的图片
*/
private ImageView mImageView;
@Override
protected void onCreate(Bundle savedInstanceState) {
super.onCreate(savedInstanceState);
setContentView(R.layout.activity_main);
mTextView = (TextView) findViewById(R.id.result);
mImageView = (ImageView) findViewById(R.id.qrcode_bitmap);
//点击按钮跳转到二维码扫描界面,这里用的是startActivityForResult跳转
//扫描完了之后调到该界面
Button mButton = (Button) findViewById(R.id.button1);
mButton.setOnClickListener(new OnClickListener() {
@Override
public void onClick(View v) {
Intent intent = new Intent();
intent.setClass(MainActivity.this, MipcaActivityCapture.class);
intent.setFlags(Intent.FLAG_ACTIVITY_CLEAR_TOP);
startActivityForResult(intent, SCANNIN_GREQUEST_CODE);
}
});
}
@Override
protected void onActivityResult(int requestCode, int resultCode, Intent data) {
super.onActivityResult(requestCode, resultCode, data);
switch (requestCode) {
case SCANNIN_GREQUEST_CODE:
if(resultCode == RESULT_OK){
Bundle bundle = data.getExtras();
//显示扫描到的内容
mTextView.setText(bundle.getString("result"));
//显示
mImageView.setImageBitmap((Bitmap) data.getParcelableExtra("bitmap"));
}
break;
}
}
}
Im obigen Code ist die mittlere Zeile Das von WeChat verwendete Bild habe ich hier gezeichnet. Wenn Sie mehr Simulation wünschen, ändern Sie einfach den folgenden Code /*
* Copyright (C) 2008 ZXing authors
*
* Licensed under the Apache License, Version 2.0 (the "License");
* you may not use this file except in compliance with the License.
* You may obtain a copy of the License at
*
* *
* Unless required by applicable law or agreed to in writing, software
* distributed under the License is distributed on an "AS IS" BASIS,
* WITHOUT WARRANTIES OR CONDITIONS OF ANY KIND, either express or implied.
* See the License for the specific language governing permissions and
* limitations under the License.
*/
package com.mining.app.zxing.view;
import java.util.Collection;
import java.util.HashSet;
import android.content.Context;
import android.content.res.Resources;
import android.graphics.Bitmap;
import android.graphics.Canvas;
import android.graphics.Color;
import android.graphics.Paint;
import android.graphics.Rect;
import android.graphics.Typeface;
import android.util.AttributeSet;
import android.view.View;
import com.example.qr_codescan.R;
import com.google.zxing.ResultPoint;
import com.mining.app.zxing.camera.CameraManager;
/**
* This view is overlaid on top of the camera preview. It adds the viewfinder
* rectangle and partial transparency outside it, as well as the laser scanner
* animation and result points.
*
*/
public final class ViewfinderView extends View {
private static final String TAG = "log";
/**
* 刷新界面的时间
*/
private static final long ANIMATION_DELAY = 10L;
private static final int OPAQUE = 0xFF;
/**
* 四个绿色边角对应的长度
*/
private int ScreenRate;
/**
* 四个绿色边角对应的宽度
*/
private static final int CORNER_WIDTH = 10;
/**
* 扫描框中的中间线的宽度
*/
private static final int MIDDLE_LINE_WIDTH = 6;
/**
* 扫描框中的中间线的与扫描框左右的间隙
*/
private static final int MIDDLE_LINE_PADDING = 5;
/**
* 中间那条线每次刷新移动的距离
*/
private static final int SPEEN_DISTANCE = 5;
/**
* 手机的屏幕密度
*/
private static float density;
/**
* 字体大小
*/
private static final int TEXT_SIZE = 16;
/**
* 字体距离扫描框下面的距离
*/
private static final int TEXT_PADDING_TOP = 30;
/**
* 画笔对象的引用
*/
private Paint paint;
/**
* 中间滑动线的最顶端位置
*/
private int slideTop;
/**
* 中间滑动线的最底端位置
*/
private int slideBottom;
private Bitmap resultBitmap;
private final int maskColor;
private final int resultColor;
private final int resultPointColor;
private Collection<ResultPoint> possibleResultPoints;
private Collection<ResultPoint> lastPossibleResultPoints;
boolean isFirst;
public ViewfinderView(Context context, AttributeSet attrs) {
super(context, attrs);
density = context.getResources().getDisplayMetrics().density;
//将像素转换成dp
ScreenRate = (int)(20 * density);
paint = new Paint();
Resources resources = getResources();
maskColor = resources.getColor(R.color.viewfinder_mask);
resultColor = resources.getColor(R.color.result_view);
resultPointColor = resources.getColor(R.color.possible_result_points);
possibleResultPoints = new HashSet<ResultPoint>(5);
}
@Override
public void onDraw(Canvas canvas) {
//中间的扫描框,你要修改扫描框的大小,去CameraManager里面修改
Rect frame = CameraManager.get().getFramingRect();
if (frame == null) {
return;
}
//初始化中间线滑动的最上边和最下边
if(!isFirst){
isFirst = true;
slideTop = frame.top;
slideBottom = frame.bottom;
}
//获取屏幕的宽和高
int width = canvas.getWidth();
int height = canvas.getHeight();
paint.setColor(resultBitmap != null ? resultColor : maskColor);
//画出扫描框外面的阴影部分,共四个部分,扫描框的上面到屏幕上面,扫描框的下面到屏幕下面
//扫描框的左边面到屏幕左边,扫描框的右边到屏幕右边
canvas.drawRect(0, 0, width, frame.top, paint);
canvas.drawRect(0, frame.top, frame.left, frame.bottom + 1, paint);
canvas.drawRect(frame.right + 1, frame.top, width, frame.bottom + 1,
paint);
canvas.drawRect(0, frame.bottom + 1, width, height, paint);
if (resultBitmap != null) {
// Draw the opaque result bitmap over the scanning rectangle
paint.setAlpha(OPAQUE);
canvas.drawBitmap(resultBitmap, frame.left, frame.top, paint);
} else {
//画扫描框边上的角,总共8个部分
paint.setColor(Color.GREEN);
canvas.drawRect(frame.left, frame.top, frame.left + ScreenRate,
frame.top + CORNER_WIDTH, paint);
canvas.drawRect(frame.left, frame.top, frame.left + CORNER_WIDTH, frame.top
+ ScreenRate, paint);
canvas.drawRect(frame.right - ScreenRate, frame.top, frame.right,
frame.top + CORNER_WIDTH, paint);
canvas.drawRect(frame.right - CORNER_WIDTH, frame.top, frame.right, frame.top
+ ScreenRate, paint);
canvas.drawRect(frame.left, frame.bottom - CORNER_WIDTH, frame.left
+ ScreenRate, frame.bottom, paint);
canvas.drawRect(frame.left, frame.bottom - ScreenRate,
frame.left + CORNER_WIDTH, frame.bottom, paint);
canvas.drawRect(frame.right - ScreenRate, frame.bottom - CORNER_WIDTH,
frame.right, frame.bottom, paint);
canvas.drawRect(frame.right - CORNER_WIDTH, frame.bottom - ScreenRate,
frame.right, frame.bottom, paint);
//绘制中间的线,每次刷新界面,中间的线往下移动SPEEN_DISTANCE
slideTop += SPEEN_DISTANCE;
if(slideTop >= frame.bottom){
slideTop = frame.top;
}
canvas.drawRect(frame.left + MIDDLE_LINE_PADDING, slideTop - MIDDLE_LINE_WIDTH/2, frame.right - MIDDLE_LINE_PADDING,slideTop + MIDDLE_LINE_WIDTH/2, paint);
//画扫描框下面的字
paint.setColor(Color.WHITE);
paint.setTextSize(TEXT_SIZE * density);
paint.setAlpha(0x40);
paint.setTypeface(Typeface.create("System", Typeface.BOLD));
canvas.drawText(getResources().getString(R.string.scan_text), frame.left, (float) (frame.bottom + (float)TEXT_PADDING_TOP *density), paint);
Collection<ResultPoint> currentPossible = possibleResultPoints;
Collection<ResultPoint> currentLast = lastPossibleResultPoints;
if (currentPossible.isEmpty()) {
lastPossibleResultPoints = null;
} else {
possibleResultPoints = new HashSet<ResultPoint>(5);
lastPossibleResultPoints = currentPossible;
paint.setAlpha(OPAQUE);
paint.setColor(resultPointColor);
for (ResultPoint point : currentPossible) {
canvas.drawCircle(frame.left + point.getX(), frame.top
+ point.getY(), 6.0f, paint);
}
}
if (currentLast != null) {
paint.setAlpha(OPAQUE / 2);
paint.setColor(resultPointColor);
for (ResultPoint point : currentLast) {
canvas.drawCircle(frame.left + point.getX(), frame.top
+ point.getY(), 3.0f, paint);
}
}
//只刷新扫描框的内容,其他地方不刷新
postInvalidateDelayed(ANIMATION_DELAY, frame.left, frame.top,
frame.right, frame.bottom);
}
}
public void drawViewfinder() {
resultBitmap = null;
invalidate();
}
/**
* Draw a bitmap with the result points highlighted instead of the live
* scanning display.
*
* @param barcode
* An image of the decoded barcode.
*/
public void drawResultBitmap(Bitmap barcode) {
resultBitmap = barcode;
invalidate();
}
public void addPossibleResultPoint(ResultPoint point) {
possibleResultPoints.add(point);
}
}
canvas.drawRect(frame.left + MIDDLE_LINE_PADDING, slideTop - MIDDLE_LINE_WIDTH/2, frame.right - MIDDLE_LINE_PADDING,slideTop + MIDDLE_LINE_WIDTH/2, paint);
Suchen Sie selbst nach der Scanzeile in WeChat. Laden Sie die WeChat-Apk herunter, ändern Sie den Suffixnamen in „zip“ und entpacken Sie sie
Der Code zum Zeichnen der Schriftart unter dem Scanfeld muss geändert werden, damit er automatisch entsprechend der Schriftart in der Mitte angeordnet werden kann. Wenn das Wort zu lang ist, habe ich es nicht verarbeitet und muss es sein automatisch umgebrochen. Sie können es selbst erledigenRect lineRect = new Rect();
lineRect.left = frame.left;
lineRect.right = frame.right;
lineRect.top = slideTop;
lineRect.bottom = slideTop + 18;
canvas.drawBitmap(((BitmapDrawable)(getResources().getDrawable(R.drawable.qrcode_scan_line))).getBitmap(), null, lineRect, paint);
Die grüne Linie in der Mitte bewegt sich nach oben und unten ähnelt der Wirkung von WeChat. Natürlich können Sie es ausführen. Es sind auch entsprechende Berechtigungsprobleme erforderlich. paint.setColor(Color.WHITE); paint.setTextSize(TEXT_SIZE * density); paint.setAlpha(0x40); paint.setTypeface(Typeface.DEFAULT_BOLD); String text = getResources().getString(R.string.R.string.scan_text); float textWidth = paint.measureText(text); canvas.drawText(text, (width - textWidth)/2, (float) (frame.bottom + (float)TEXT_PADDING_TOP *density), paint)


Das Obige ist der gesamte Inhalt dieses Artikels. Ich hoffe, er wird für alle hilfreich sein, die Android-Softwareprogrammierung zu erlernen.
Weitere Android-basierte Artikel zur Realisierung verschiedener QR-Code-Scaneffekte basierend auf Google Zxing finden Sie auf der chinesischen PHP-Website!

