Heim >Web-Frontend >js-Tutorial >javascript 放大镜 v1.0 基于Yui2 实现的放大镜效果_YUI.Ext相关
javascript 放大镜 v1.0 基于Yui2 实现的放大镜效果_YUI.Ext相关
- WBOYWBOYWBOYWBOYWBOYWBOYWBOYWBOYWBOYWBOYWBOYWBOYWBOriginal
- 2016-05-16 18:33:091081Durchsuche

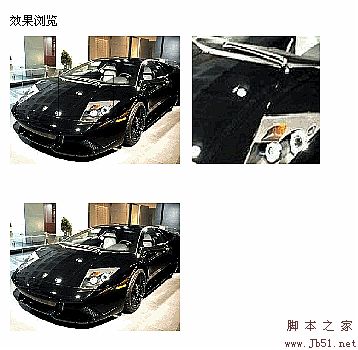
v1.0实现功能
1 放大倍数设置
2 透明度设置
3 反转特效
4 放大图片层的大小自定义
5 鼠标层的大小自定义
6 ie6下select遮盖问题
7 光标样式自定义
8 zIndex设置
简单初始化方法举例
复制代码 代码如下:
new flower.init("Demo","mag");
new flower.init("Demo1","mag1",{
max:3,zoomType:false,zoomWidth:200,zoomHeight:200,iframe:true,zIndex:666,cursor:"row-resize"
});
代码讲解
复制代码 代码如下:
defaultConfig={
/**
* 放大镜的倍数
* @type Number
*/
max:3,
/**
* *放大镜鼠标移动层的透明度
* @type Number
*/
opacity:0.5,
/**显示效果 false为默认,true为反色效果
* @type Boolean
*/
zoomType:false,
/**显示动画
* @type String
*/
showEffect:'fadein',
/**放大层的宽度
* @type Number
*/
zoomWidth:'auto',
/**放大层的高度
* @type Number
*/
zoomHeight:'auto',
/**鼠标层的宽度
* @type Number
*/
tipsWidth:'auto',
/**鼠标层的高度
* @type Number
*/
tipsHeight:'auto',
/**iframe遮盖select
* @type Boolean
*/
iframe:false,
/**iframe zIndex
* @type Number
*/
zIndex:999,
/**光标样式
* @type String
*/
cursor:"auto"
};
组件默认的参数配置,包括放大倍数,宽度,高度,透明度等的设置
2 定义属性
复制代码 代码如下:
namespace.init=function(content,mag,config){
/**
* 原始图片容器
* @type HTMLElement
*/
this.content=D.get(content);
/**
* 放大图片容器
* @type HTMLElement
*/
this.mag=D.get(mag);
/**
* 原始图片
* @type HTMLElement
*/
this.imgsource=this.content.getElementsByTagName("img")[0];
/**
* 放大图片
* @type HTMLElement
*/
this.img=this.mag.getElementsByTagName("img")[0];
/**
* 鼠标layer
* @type HTMLElement
*/
this.tips=this.content.getElementsByTagName("div")[0];
/**
* 配置参数
* @type this.tipsect
*/
this.config=L.merge(defaultConfig,config||{});
/*初始化*/
this._init();
};
init函数接受三个实参 原图的容器id,和放大后的图片容器id和配置参数 (装firebug的同学可以看下代码结构)
this.config=L.merge(defaultConfig,config||{});
这句话是后面的对象的属性覆盖前面的对象的属性,并返回
如 this.config=L.merge({"a":"aa"},{"a":"bb"});
此时的this.config.a == "bb"
config||{}
如果config不存在,则返回空的对象自变量
原型初始化方法
代码
复制代码 代码如下:
_init:function(){
var self=this;
/*赋值src给大图*/
this.img.src=this.imgsource.src;
/*get边框长度*/
this.borderwidth=this.imgsource.offsetWidth - this.imgsource.clientWidth;
/**
* 设置大图片的宽度和高度 (X倍数)
* 设置大图容器的宽高和位置
* 设置鼠标跟随层的宽高和透明度
*/
this.pi=(this.config.zoomWidth!='auto'?this.config.zoomWidth/this.imgsource.offsetWidth:1)
this.pi2=(this.config.zoomHeight!='auto'?this.config.zoomHeight/this.imgsource.offsetHeight:1)
this._css(this.img,{
'position':'absolute',
'width':(this.config.zoomWidth!='auto' ?this.imgsource.offsetWidth*this.config.max*this.pi:this.imgsource.offsetWidth*this.config.max)+"px",
'height':(this.config.zoomHeight!='auto' ?this.imgsource.offsetHeight*this.config.max*this.pi2:this.imgsource.offsetHeight*this.config.max)+"px"
})._css(this.mag,{
'width':(this.config.zoomWidth!='auto' ? this.config.zoomWidth:this.imgsource.offsetWidth)+"px",
'height':(this.config.zoomHeight!='auto'?this.config.zoomHeight:this.imgsource.offsetHeight)+"px",
'left':D.getX(this.content)+this.imgsource.offsetWidth+10+"px",
'top':this.content.offsetTop+"px",
'position' : 'absolute',
"zIndex":this.config.zIndex
})._css(this.tips,{
'display':'',
'width':(this.config.tipsWidth!='auto' ? this.config.tipsWidth: parseInt(this.imgsource.offsetWidth / this.config.max)- this.borderwidth)+"px",
'height' : (this.config.tipsHeight!='auto' ? this.config.tipsHeight: parseInt(this.imgsource.offsetHeight / this.config.max) - this.borderwidth )+ 'px',
'opacity' : this.config.opacity
})
E.on(this.content,'mousemove',function(e){
self._css(self.mag,{"display":"block"})._css(self.tips,{"display":"block"})._move(e,self.tips)
})
E.on(this.content,'mouseout',function(e){
self._css(self.tips,{"display":"none"})._css(self.mag,{"display":"none"});
})
!!this.config.zoomType && E.on(self.tips,'mouseout',function(e){
self._css(self.imgsource,{"opacity":1});
self.tips.getElementsByTagName("img")[0] && self.tips.removeChild(self.tips.getElementsByTagName("img")[0]);
})
if(ie6 && !!this.config.iframe){
this._createIframe(this.mag);
}
D.setStyle(this.content,"cursor",this.config.cursor);
},
组件的初始化原代码
默认鼠标跟随的层和大图是隐藏的
1.把图片的链接赋值给将要放大显示的图片。
2. 如有自定义zoomWidth或zoomHeight大小的时候,设置 this.pi 宽比 和this.pi2 高比 (为与实际图片大小间的比值)
3.设置大图的宽度和高度
4. 设置大图容器的宽高和位置
5.设置鼠标层的位置和宽高和透明度
6 给原图容器增加mousemove事件
7. 给原图容器增加mouseout事件
8 反色特效后,还原透明度,并删除用来实现效果的 Dom (在鼠标层结构内用appendChild一个img元素)
9 ie6 创建iframe 用来遮挡的select。(默认情况下在无iframe的时候,ie6会被select挡住,无法用zIndex来修正 )
10 设置光标样式
style设置的方法
复制代码 代码如下:
_css:function(el,json){
for(var s in json){
D.setStyle(el,s,json[s]);
}
return this;
},
Yui有提供自己的 设置Dom样式的方法 D.setStyle(dom,style属性名,属性的值);
用 for (var s in json) 来遍历 json对象的所有属性
return this; 常用的链式调用写法 // this._css(/**/)._css(/**/) ._css(/**/) ……
核心mousemove事件代码
复制代码 代码如下:
_move:function(e,tips){
var point=E.getXY(e);
/**
* 提示层位置
* 大图显示位置
*/
this._css(tips,{
'top' : Math.min(Math.max(point[1] - this.content.offsetTop-parseInt(tips.offsetHeight)/2 ,0),this.content.offsetHeight - tips.offsetHeight) + 'px',
'left' : Math.min(Math.max(point[0] - this.content.offsetLeft-parseInt(tips.offsetWidth)/2 ,0),this.content.offsetWidth - tips.offsetWidth) + 'px'
})._css(this.img,{
'top':-(parseInt(tips.style.top) * this.config.max *this.pi2) + 'px',
'left' : - (parseInt(tips.style.left) * this.config.max *this.pi) + 'px'
});
/**
* 反色效果
*/
if(!!this.config.zoomType){
if(!tips.getElementsByTagName("img").length){
var imgs=document.createElement("img");
imgs.id='temp';
imgs.src=this.imgsource.src;
this._css(imgs,{
'width':this.imgsource.offsetWidth+"px",
'height':this.imgsource.offsetHeight+"px",
'position':'absolute'
});
tips.appendChild(imgs);
this.imgs=imgs;
}
this._css(this.imgsource,{
"opacity":0.2
})._css(this.tips,{
"opacity":1,
"visibility":"visible"
})._css(D.get("temp"),{
'top':-(parseInt(tips.style.top))+"px",
'left':-(parseInt(tips.style.left))+"px"
})
}
},
提示层位置的移动 鼠标位置X轴 - this.offsetLeft - 鼠标框宽度/2
并用Math.max和Math.min,不让鼠标框超出tuxiang
大图位置的移动=小图的位置 X 放大倍数 X 宽比(默认为1)
反色效果是在jquery的一个插件上看到的 没有看他的代码 看了下他dom结构 应该和我这种实现方式是一样的
设置原图的透明度为0.2 这样就变灰色了 然后设置鼠标层透明为1,也就是不透明.层内是一个图片 和 imgsource的地址是一样的
这图片的父元素position也是absolute,所以我们要实时设置top和left值来定位鼠标层的图片
创建iframe
复制代码 代码如下:
_createIframe:function(el){
var layer = document.createElement('iframe');
layer.tabIndex = '-1';
layer.src = 'javascript:false;';
el.appendChild(layer);
this._css(layer,{
"width":(this.config.zoomWidth!='auto' ? this.config.zoomWidth:this.imgsource.offsetWidth)+"px",
"height":(this.config.zoomHeight!='auto'?this.config.zoomHeight:this.imgsource.offsetHeight)+"px",
"zIndex":this.config.zIndex
})
}
iframe元素的宽高和zIndex的设置,配置参数设置iframe:true并在ie6下 才会创建,在其他浏览器下设置true也不会创建,因为没有必要
代码改进中
1 增加特效的插件机制
2 优化设定宽高值表达式的代码 感觉太长太臃肿
3 增加图片预载
4 增加回调函数接口
5 增加className,让用户可自定义
6 等等(...)
地址打包下载 :放大镜
Stellungnahme:
Der Inhalt dieses Artikels wird freiwillig von Internetnutzern beigesteuert und das Urheberrecht liegt beim ursprünglichen Autor. Diese Website übernimmt keine entsprechende rechtliche Verantwortung. Wenn Sie Inhalte finden, bei denen der Verdacht eines Plagiats oder einer Rechtsverletzung besteht, wenden Sie sich bitte an admin@php.cn
Vorheriger Artikel:js实现的真正的iframe高度自适应(兼容IE,FF,Opera)_javascript技巧Nächster Artikel:全选并改变TR颜色的javascript实现代码_典型特效
In Verbindung stehende Artikel
Mehr sehen- Eine eingehende Analyse der Bootstrap-Listengruppenkomponente
- Detaillierte Erläuterung des JavaScript-Funktions-Curryings
- Vollständiges Beispiel für die Generierung von JS-Passwörtern und die Erkennung der Stärke (mit Download des Demo-Quellcodes)
- Angularjs integriert WeChat UI (weui)
- Wie man mit JavaScript schnell zwischen traditionellem Chinesisch und vereinfachtem Chinesisch wechselt und wie Websites den Wechsel zwischen vereinfachtem und traditionellem Chinesisch unterstützen – Javascript-Kenntnisse

