Heim >Web-Frontend >js-Tutorial >JavaScript 高级篇之DOM文档,简单封装及调用、动态添加、删除样式(六)_基础知识
JavaScript 高级篇之DOM文档,简单封装及调用、动态添加、删除样式(六)_基础知识
- WBOYOriginal
- 2016-05-16 17:54:311116Durchsuche
http://www.cnblogs.com/TomXu/archive/2012/02/16/2351331.html , 在回来看这里文章,你一定会有更深刻的认识。因为我在这里介绍概念上的东西比较少,看下面的例子,对初学的朋友可能会有些吃力!
1、DOM的架构
复制代码 代码如下:
CSS Demo
我喜欢美女,特别是高个的美女
这个文档的DOM表示如下图:
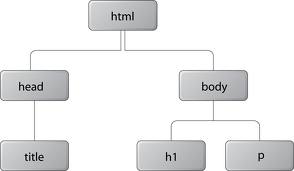
图片表示一个HTML文档的树.
所有DOM树结构表现为不同种类的Node对象的一个数,firstChild,lastChild,nextSibling,previousSibling和ParentNode属性提供遍历节点的树的一种办法,appendChild,removeChild,replaceChildh和insertBefore这样的方法可以像文档中添加节点或者从文档中删除节点。不明白没关系接下来我将用大量的例子让你明白。
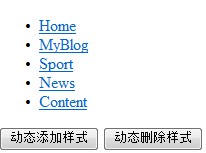
1、先创建一个使用CSS美化的列表
复制代码 代码如下:
2、加一个div 元素.
复制代码 代码如下:
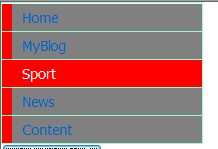
3、你现在应该看到如下图:
复制代码 代码如下:
var Tools = {};
Tools.getElementCount = function(e){
var count =0;
elementTotal(e);
document.table.txt.value = "element:"+ count;
function elementTotal(e)
{
if(e.nodeType == 1) count++;
var children = e.childNodes;
for(var i = 0;i
elementTotal(children[i]);
}
}
};
备注:大家使用可以再body加入
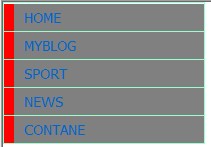
5、将文本全部大写
复制代码 代码如下:
Tools.ModifyElement = function modify(e){
if(e.nodeType == 3)
e.data = e.data.toUpperCase();
else
{
for(var i = e.firstChild;i!=null;i=i.nextSibling)
modify(i);
}
};
备注:大家使用可以再body加入
效果:
复制代码 代码如下:
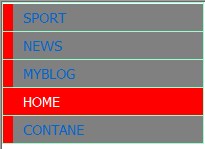
Tools.documentSort = function(e){
var textArray = [];
if(typeof e =="string") e = document.getElementById(e);
for(var x = e.firstChild; x!= null;x=x.nextSibling)
if(x.nodeType == 1) textArray.push(x);
textArray.sort(function(n,m){
var s = n.firstChild.firstChild.data;
var t = m.firstChild.firstChild.data;
if(s>t) return -1;
else if(s
});
备注:大家使用可以再body加入
效果:
复制代码 代码如下:
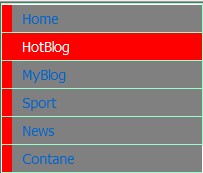
Tools.insertElement = function(n,e){
if(typeof n == "string") n = document.getElementById(n);
var li = document.createElement(e);
var a = document.createElement("a");
a.setAttribute("href","#");
var txt = document.createTextNode("HotBlog");
a.appendChild(txt);
li.appendChild(a);
var parent = n.parentNode;
parent.insertBefore(li,n);
};
备注:大家使用可以再body加入
效果:
1、样式表
复制代码 代码如下:
.tooltip{background:url('2.jpg'); border:solid 1px #99ffcc; width:200px;height:200px;}//这里的图片大家要该一下
.toolcontent{background-color:#ffffff; border:solid 1px #99ff00; padding:5px; font:tahoma 12px; color:#000000;}
2、javascript类
复制代码 代码如下:
function Tooltip()
{
this.tooltip = document.createElement("div");
this.tooltip.style.position = "absolute";
this.tooltip.className = "tooltip";
this.content = document.createElement("div");
this.content.style.position = "relative";
this.content.className = "toolcontent";
this.tooltip.appendChild(this.content);
}
Tooltip.prototype.show = function(text,x,y)
{
this.content.innerHTML = text;
this.tooltip.style.left = x+"px";
this.tooltip.style.top = y+"px";
this.tooltip.style.visibility = "visible";
if(this.tooltip.parentNode != document.body)
document.body.appendChild(this.tooltip);
};
Tooltip.prototype.hide = function(){ this.tooltip.style.visibility ="hidden";};
var t = new Tooltip();
function hide()
{
t.hide();
}
function show()
{
t.show("hello ",300,0);
}
function init()
{
document.operator.show.onclick = show;
document.operator.hide.onclick = hide;
}
备注:配合上面使用必须还完成以下步骤:1、将body中的onload=init();2 在body中添加 :
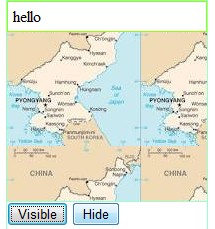
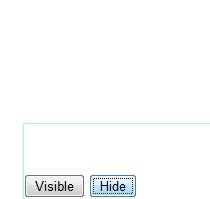
效果:(隐藏看到什么了)
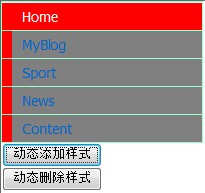
1、样式表
复制代码 代码如下:
.container{font-family:tahoma;font-size:14px;border:solid 1px #99ffcc; width:200px;height:140px;float:left;}
.container ul{list-style:none;padding:1px 0px 0px 0px; margin:0px;}
.container ul li{ border-bottom:solid 1px #99ffcc; margin:0px;height:27px;}
.container ul li a{background-color:gray;text-decoration:none;display:block; border-left:solid 10px red;margin:0px; padding:5px 0px 5px 10px;}
.container ul li a:hover{background-color:red; color:#ffffff; }
2、工具函数(动态添加、删除样式)
复制代码 代码如下:
var CSSclass = {};
CSSclass.is = function(e,c){
if(typeof e == "string") e = document.getElementById(e);
var classes = e.className;
if(!classes) return false;
if(classes == c) return true;
return e.className.search("\\b" +c +"\\b*") != -1;
};
CSSclass.add = function(e,c){
if(typeof e == "string") e = document.getElementById(e);
if(CSSclass.is(e,c))return;
//if(e.className) c=""+c;
e.className += c;
};
CSSclass.remove = function(e,c){
if(typeof e == "string") e = document.getElementById(e);
//e.id = e.id.replace(new RegExp("\\b" +e.id +"\\b\\s*","g"),"");
e.className = e.className.replace(new RegExp("\\b"+c+"\\b\\s*","g"),"");
};
3、在body中加入如下元素
复制代码 代码如下:
Stellungnahme:
Der Inhalt dieses Artikels wird freiwillig von Internetnutzern beigesteuert und das Urheberrecht liegt beim ursprünglichen Autor. Diese Website übernimmt keine entsprechende rechtliche Verantwortung. Wenn Sie Inhalte finden, bei denen der Verdacht eines Plagiats oder einer Rechtsverletzung besteht, wenden Sie sich bitte an admin@php.cn
Vorheriger Artikel:jQuery UI Dialog 创建友好的弹出对话框实现代码_jqueryNächster Artikel:jQuery之$(document).ready()使用介绍_jquery
In Verbindung stehende Artikel
Mehr sehen- Eine eingehende Analyse der Bootstrap-Listengruppenkomponente
- Detaillierte Erläuterung des JavaScript-Funktions-Curryings
- Vollständiges Beispiel für die Generierung von JS-Passwörtern und die Erkennung der Stärke (mit Download des Demo-Quellcodes)
- Angularjs integriert WeChat UI (weui)
- Wie man mit JavaScript schnell zwischen traditionellem Chinesisch und vereinfachtem Chinesisch wechselt und wie Websites den Wechsel zwischen vereinfachtem und traditionellem Chinesisch unterstützen – Javascript-Kenntnisse


