Heim >Web-Frontend >js-Tutorial >javascript时间自动刷新实现原理与步骤_javascript技巧
javascript时间自动刷新实现原理与步骤_javascript技巧
- WBOYOriginal
- 2016-05-16 17:44:181146Durchsuche
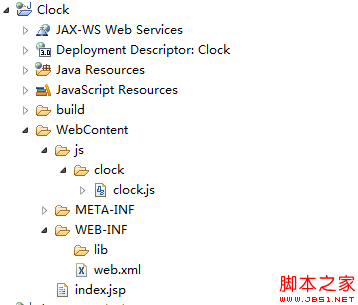
项目结构:

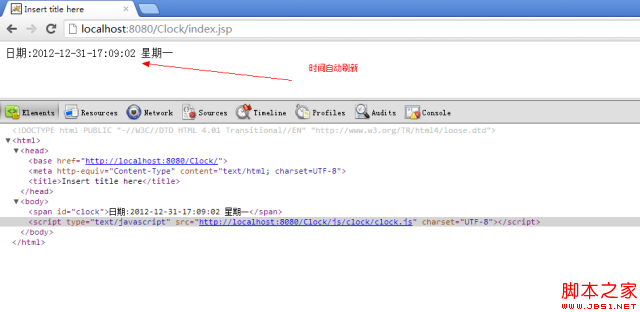
运行效果:

=========================================================
代码部分:
=========================================================
/Clock/WebContent/index.jsp
复制代码 代码如下:
String path = request.getContextPath();
String basePath = request.getScheme() + "://"
+ request.getServerName() + ":" + request.getServerPort()
+ path + "/";
%>
/Clock/WebContent/js/clock/clock.js
复制代码 代码如下:
/**
* 时间显示
* @date 2012-12-31
* @author hongten(hongtenzone@foxmail.com)
*
* @returns
*/
function Clock() {
var date = new Date();
this.year = date.getFullYear();
this.month = date.getMonth() + 1;
this.date = date.getDate();
this.day = new Array("星期日", "星期一", "星期二", "星期三", "星期四", "星期五", "星期六")[date.getDay()];
this.hour = date.getHours() this.minute = date.getMinutes() this.second = date.getSeconds()
// 日期:2012-12-31-17:03:18 星期一
this.toString = function() {
return "日期:" + this.year + "-" + this.month + "-" + this.date + "-" + this.hour + ":" + this.minute + ":" + this.second + " " + this.day;
};
// 2012-12-31
this.toSimpleDate = function() {
return this.year + "-" + this.month + "-" + this.date;
};
// 2012-12-31 17:04:03
this.toDetailDate = function() {
return this.year + "-" + this.month + "-" + this.date + " " + this.hour + ":" + this.minute + ":" + this.second;
};
this.display = function(ele) {
var clock = new Clock();
ele.innerHTML = clock.toString();
window.setTimeout(function() {
clock.display(ele);
}, 1000);
};
}
//
var clock = new Clock();
clock.display(document.getElementById("clock"));
我个人认为这个在web中很实用...所以推荐给大家啦...
Stellungnahme:
Der Inhalt dieses Artikels wird freiwillig von Internetnutzern beigesteuert und das Urheberrecht liegt beim ursprünglichen Autor. Diese Website übernimmt keine entsprechende rechtliche Verantwortung. Wenn Sie Inhalte finden, bei denen der Verdacht eines Plagiats oder einer Rechtsverletzung besteht, wenden Sie sich bitte an admin@php.cn
Vorheriger Artikel:YUI Compressor压缩JavaScript原理及微优化_javascript技巧Nächster Artikel:onclick与listeners的执行先后问题详细解剖_javascript技巧
In Verbindung stehende Artikel
Mehr sehen- Eine eingehende Analyse der Bootstrap-Listengruppenkomponente
- Detaillierte Erläuterung des JavaScript-Funktions-Curryings
- Vollständiges Beispiel für die Generierung von JS-Passwörtern und die Erkennung der Stärke (mit Download des Demo-Quellcodes)
- Angularjs integriert WeChat UI (weui)
- Wie man mit JavaScript schnell zwischen traditionellem Chinesisch und vereinfachtem Chinesisch wechselt und wie Websites den Wechsel zwischen vereinfachtem und traditionellem Chinesisch unterstützen – Javascript-Kenntnisse

